Modular SouthWest Design-it-Yourself OJudith F. Russell, 2013
Pattern:
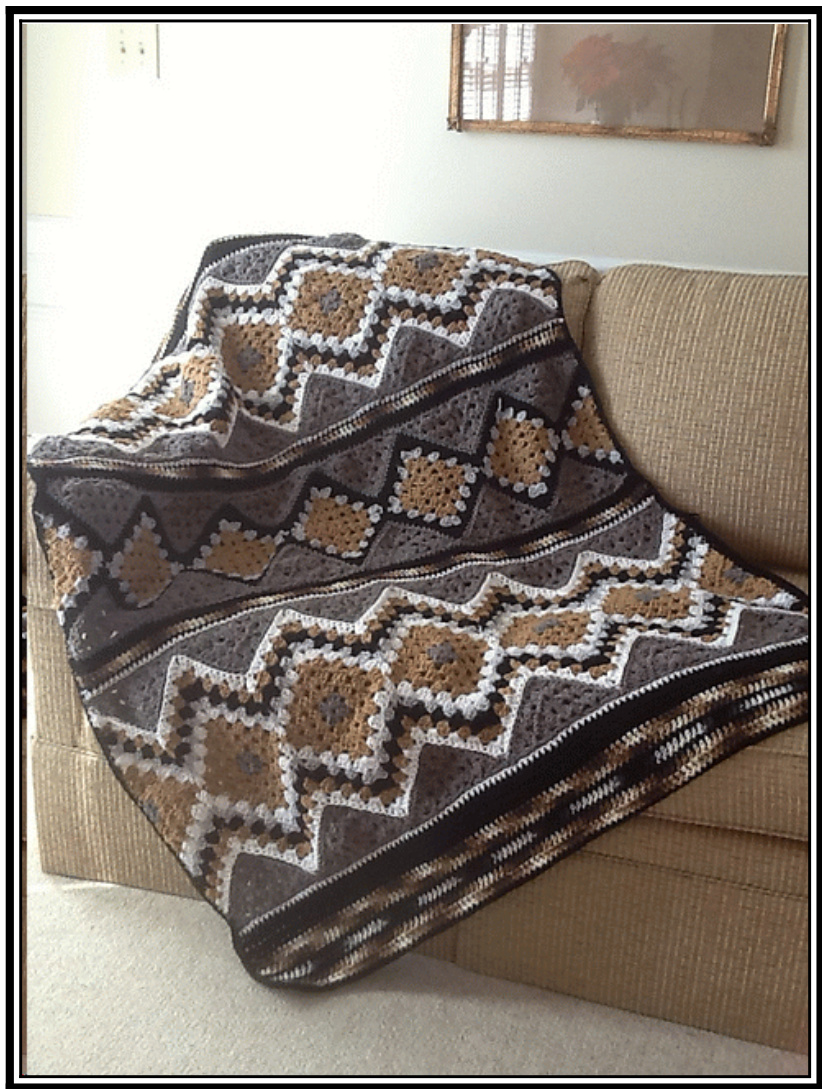
This is a Do-It-Yourself series of panels that can be stitched or crocheted together. I1 won't be giving stitch counts, just the approximate measurements of the panels. I hope that users will mix and match the panels to create their own versions. The basic pattern inspiration comes from: http://www.ravelry.com/patterns/library/grannies-and-ripples by Stephanie Blaisure. A similar pattern with granny and half-granny instructions and charts as well as ripple instructions is at http://www.caron.com/projects/ss/ss69_baby_granny_stripes Skills: Single crochet Double crochet slip stitch cluster join as you go whip stitch You'll need to make Grannies, half grannies, single and double crochet borders. Yarn amounts will vary. Using Red Heart Super Saver you would need at least two skeins of your main color and varying amounts of the accent colors. Total weight is approximately 30 - 40 OZ. Colors for example: Red Heart Super Saver Multis/Ombres. Colorway shaded brc Red Heart Super Saver Multis/Ombres. Colorway zebra Red Heart Super Saver Solids. Colorway: light gray Red Heart Super Saver Solids: Colorway warm brown Red Heart Super Saver Solids. Colorway: white Red Heart Super Saver Solids: Colorway: black Red Heart With Love Solids. Colorway: pewter Hook: G or hook for close fabric. Size: 42 by 60 inches Procedure: Create the number of small and large panels you chose as per the example you are following. Whipstitch the panels together. Add the border of your choice.
Small Panels
The small panels consist of five 4 round grannies and 2 half grannies, joined at the corners with as-you-go technique. Example's middle panel: grannies are three rows med. brown, one row It. Gray. After first granny, join-as-you-go to last granny by slip-stitch while working the third corner of next granny. Add row of black as per a granny ripple (with one cluster over three spaces at bottom of the valley and double cluster at top of mountain) Four row half grannies to fill in. With g hook, grannies have 2 ch at corner and 1 chain between clusters on rows. Square of four rounds measures 7 inches diagonally and 5 inches across. Mark front sides of squares; they are easy to get flipped when you are doing the first row around them. Use the 3 stitch cluster at the bottom of the valley in your ripples. The center panel measures 9 inches across. Edging of panel: work row of sc in edge of panels. Front side toward you on both ends. Work evenly, with 2 or 3 sc in the chains between clusters. Work THROUGH the chains, not under them in the large space.
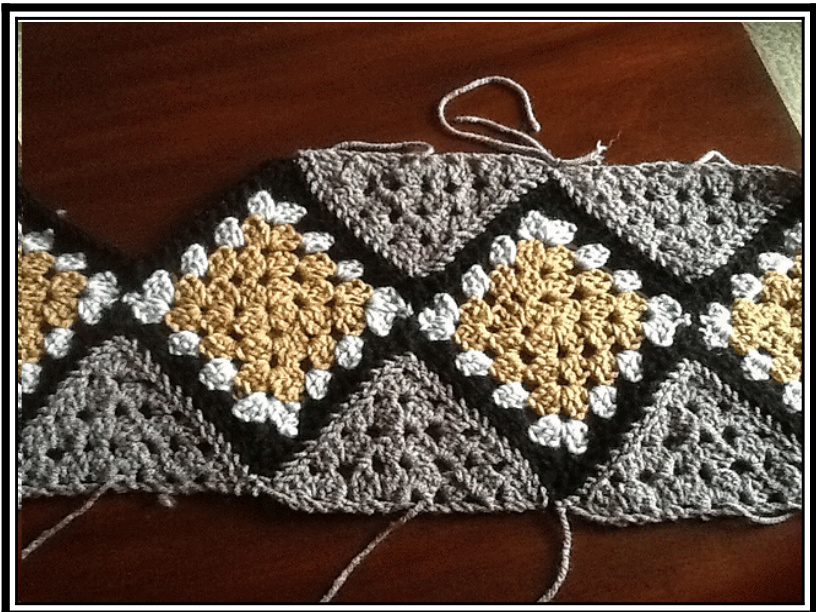
Figure 3 Small Panel To keep the edge even, you might need to work a hdc into the spaces where the triangles are joined. Add small border if you want. If you do this you might consider ending all small borders with black because whip stitching through the black is almost invisible.
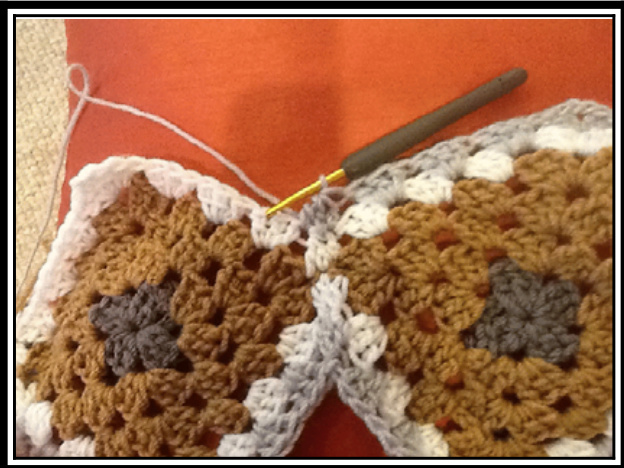
Figure 2 Cluster stitch at bottom of Granny's Valley
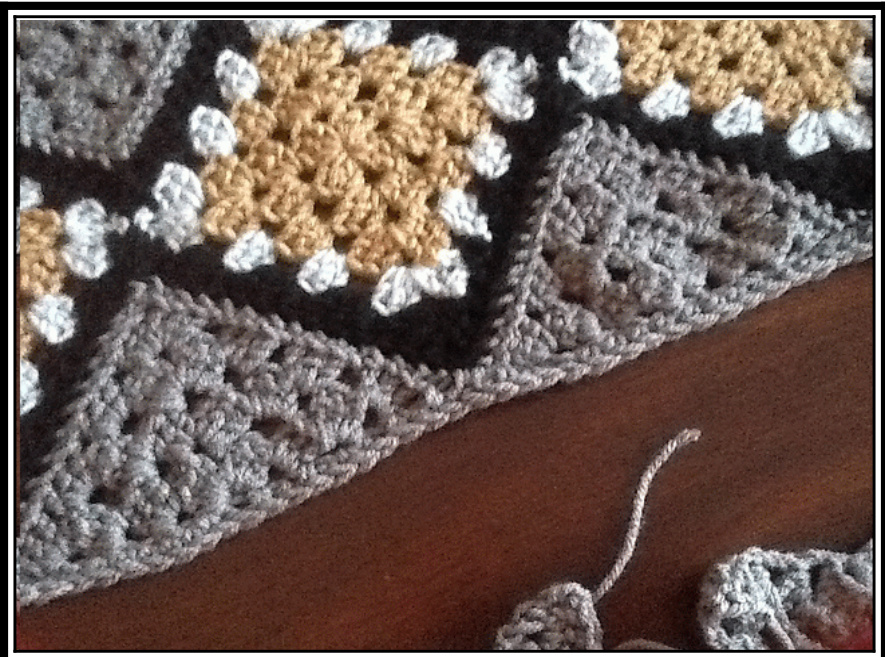
Figure 4 Small panel with single crochet edging, including half double crochet to fill in the gap over granny point
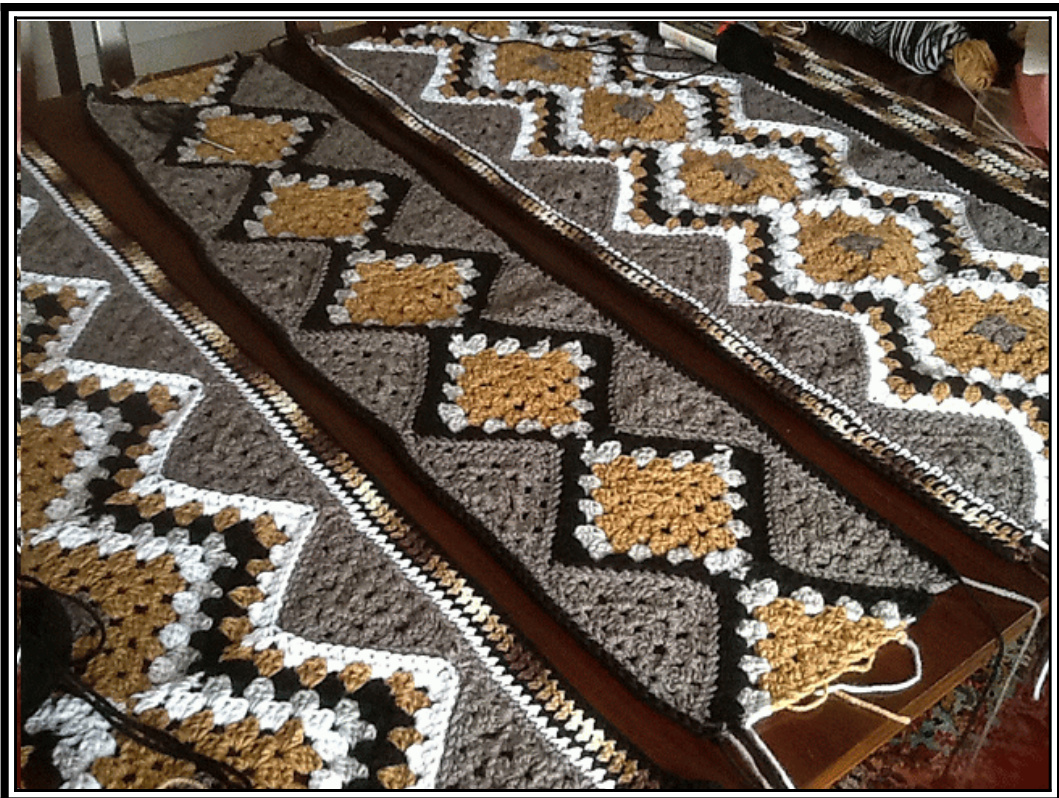
Figure 5 Large and small panels are edged have black as finishing row so that the whip stitiches are invisible
Large Panel:
example has 5 of the 4 round granny and 2 half grannies with first round pewter and next 3 rounds warm brown example has 4 rows of ripples: white, lt grey, warm brown, white measures 14 inches from top to bottom.

Figure 6 Large panel and Border Bottom border aprx 108 stitches across in example: Gray edge sc along panel edge 1 rw sc white 3 ros dc black 2 rows dc brown variegated 1row sc black 1row dc zebra variegated 1row sc black 2rows dc brown variegated Edging: two rows of single crochet in black in the example.
Notes:
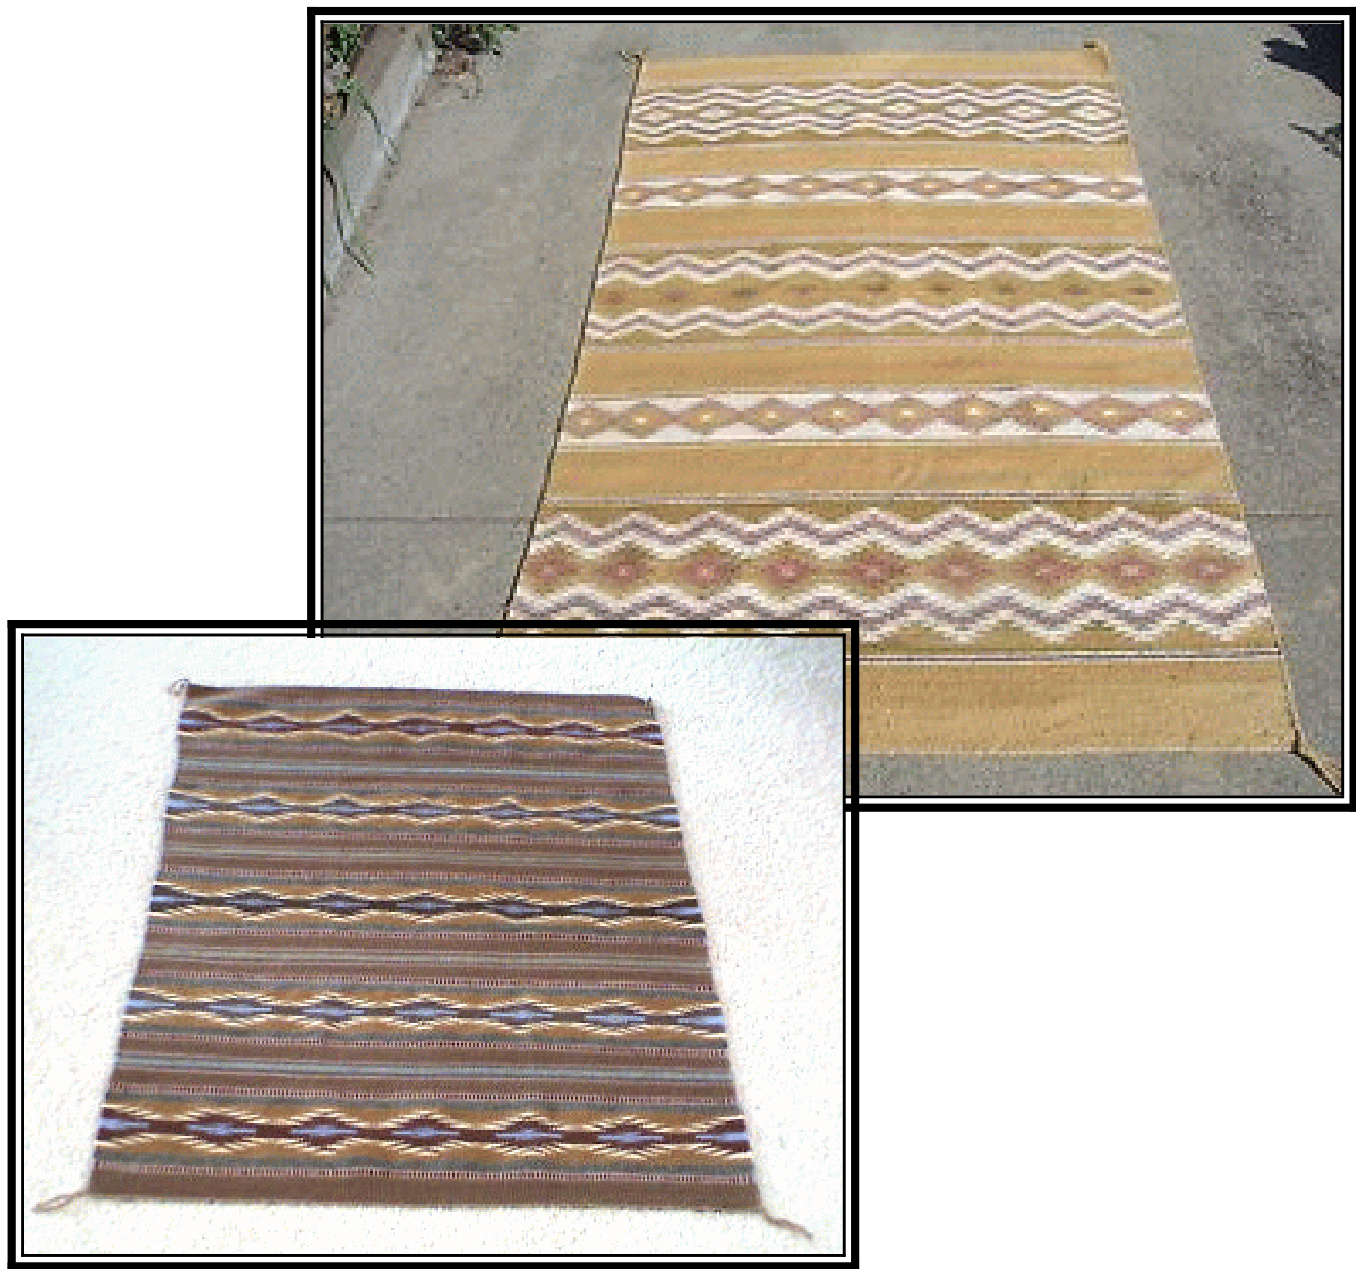
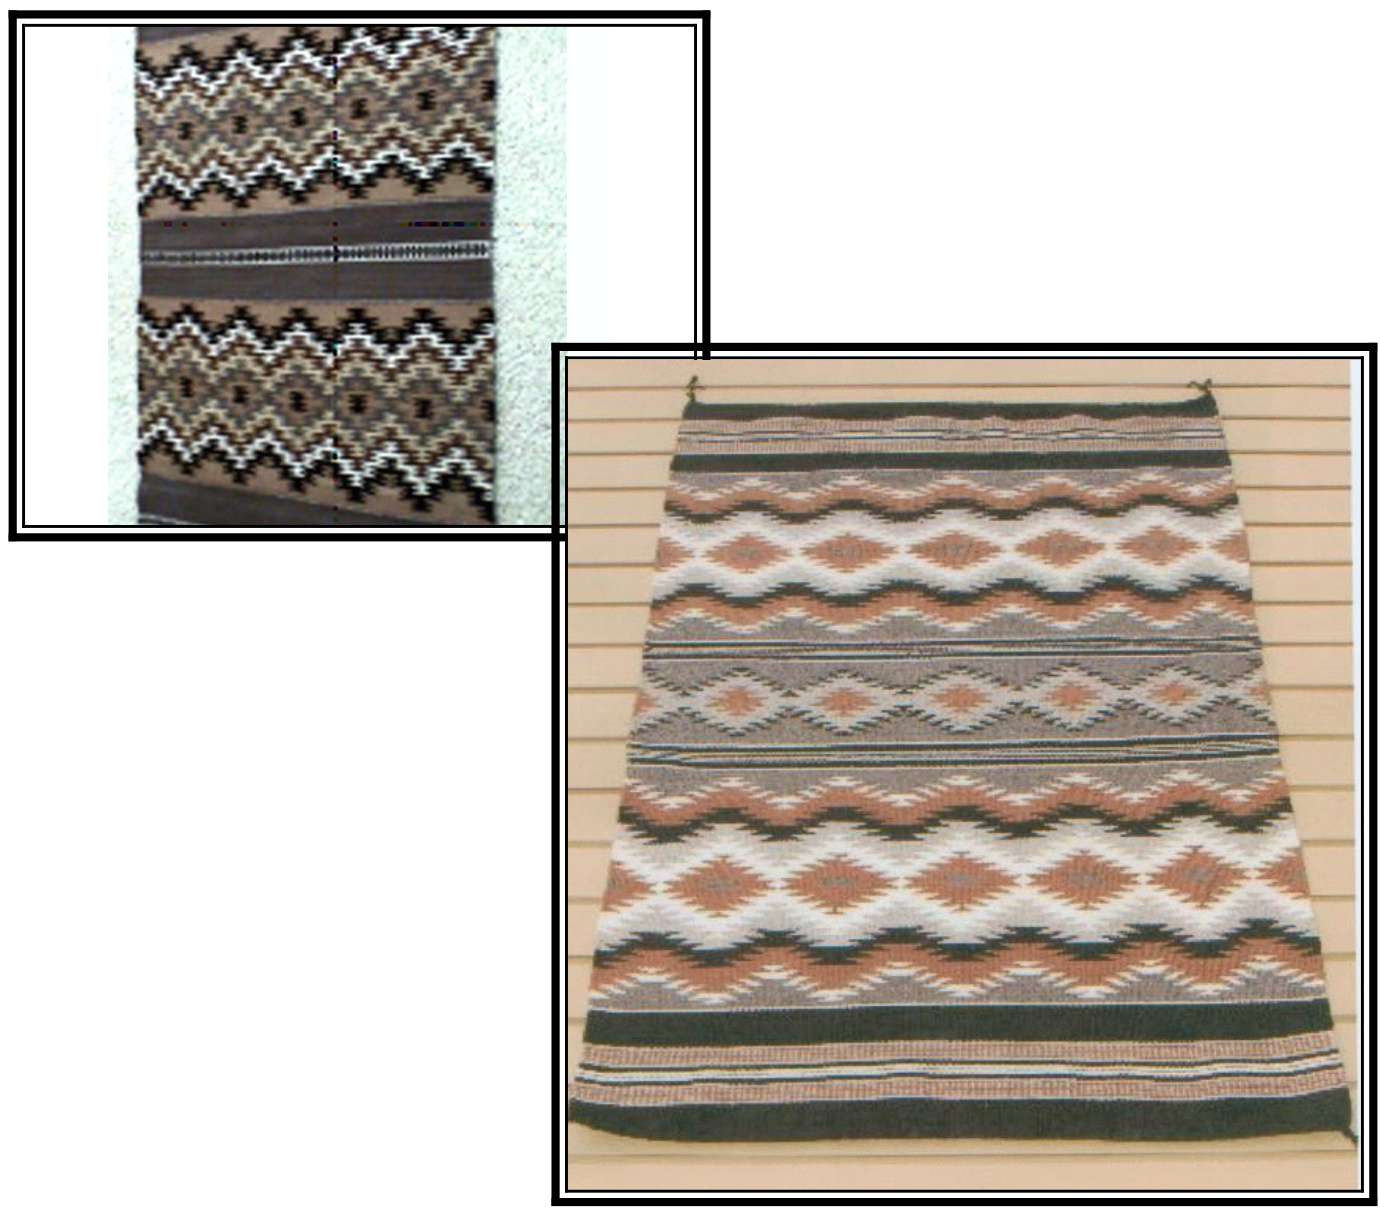
Keep your stitches loose, especially when adding the borders and edges. Be sure to crochet in the ch 3 of previous row when you come to the end of a border row. Lapghan size would be 4 full size grannies across and length as you wish. Examples: These beautiful photos were found by doing a google search for Navaho Rugs. One famous artist is Betty Yazzie and her work can be found in galleries and on ebay. Literally thousands of examples can be seen, in all colorways, but they do have some similarities that can be used as inspiration the patterns of for Design-it- Yourselfers. vajo rugs betty yazzie wide ruins" and you will find inspiration for a lifetime Others are at: http://www.ravefabricare.com/true-quality-cleaning/2010/11/18/cleaning-and-restoring-your-nava jo-rugs.aspx http://www.heardmuseumshop.com/browse.cfm/4.8494.html http://entertainmentguide.local.com/navajo-child-craft-9785.html