Mori Hikari Baby Bonnet
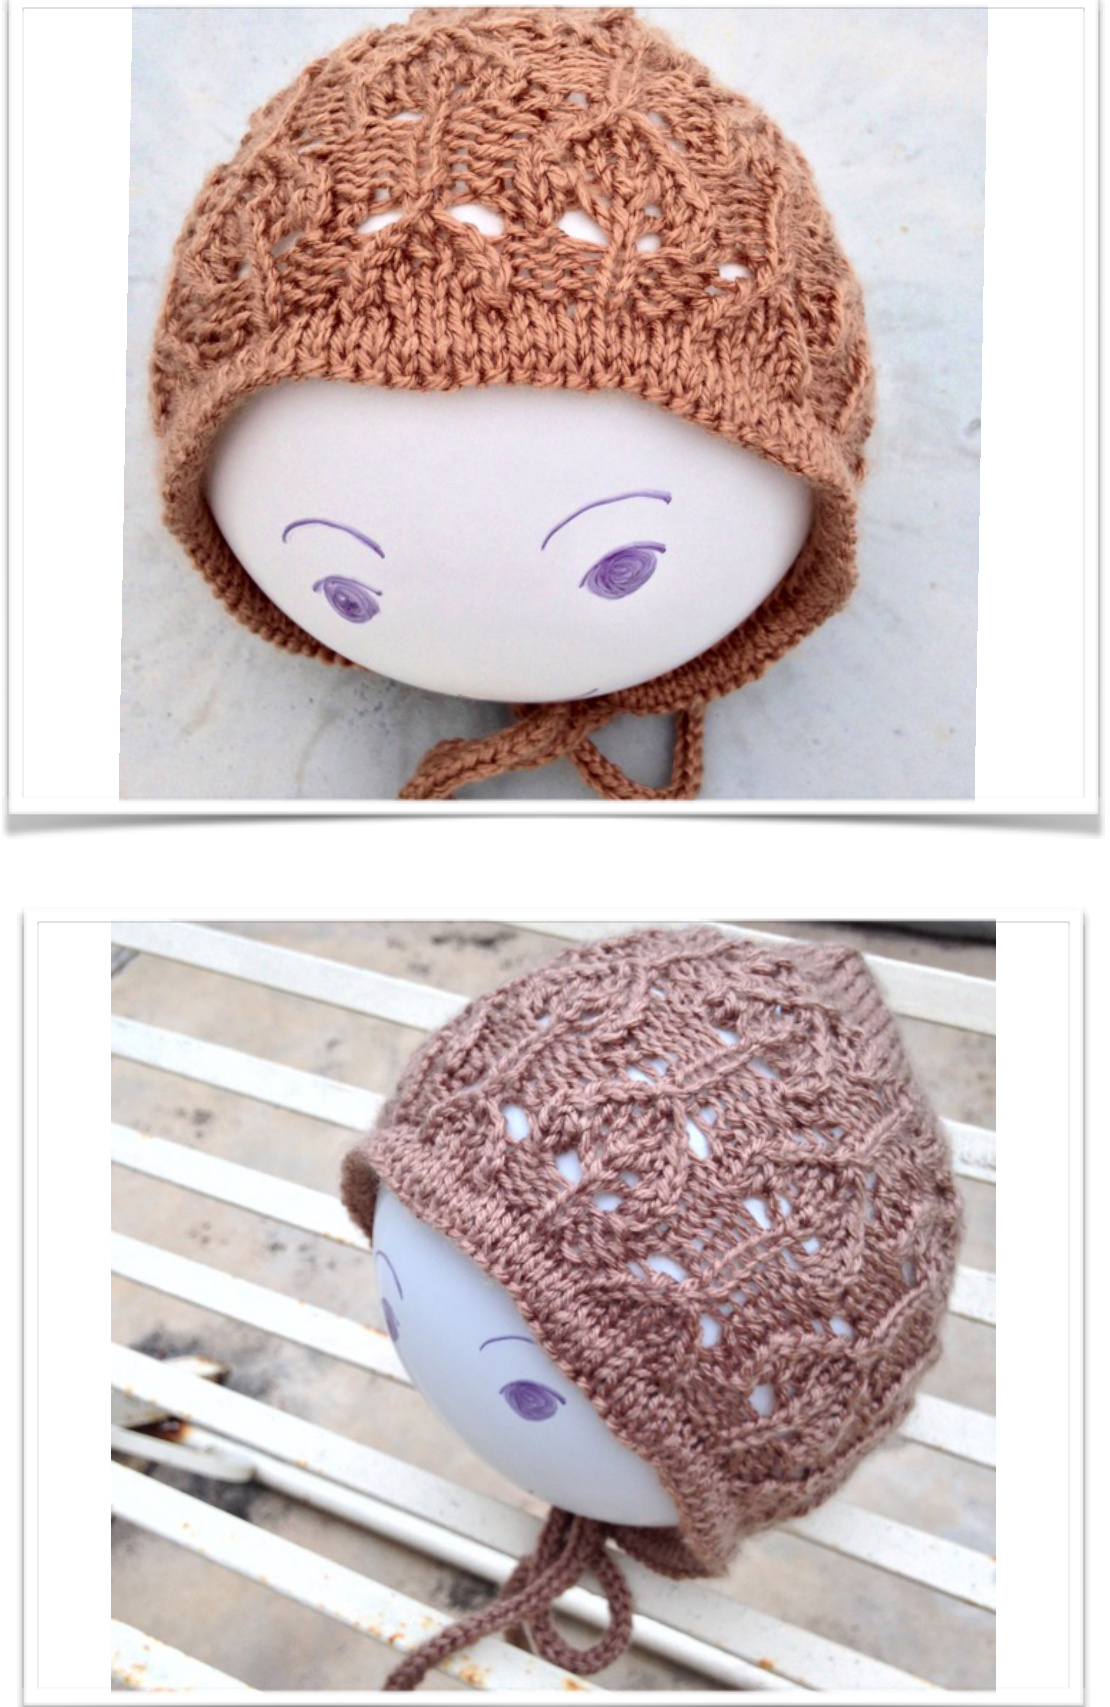
I'm so happy when I found out that I'm expecting a baby girl. That means ... many lace knitting awaiting me! Of all the lace stitches, my soft spot is the leaf stitches. While designing this bonnet for the baby, I found a lovely Bush stitch, which also resembles candlelight; thanks to freeknitstitches.com. Thus, I name the bonnet Mori Hikari, which means 'forest' and 'light' respectively in Japanese. You can download the pattern here
Size:
Newborn - 6 months, 6 months - 12 months, 12 months - 24 months.
Construction:
The bonnet is knitted flat and seamed one inch before the crown shaping. You can seam up to until the beginning of crown shaping if you prefer a looser fit. Then. i-cord is knitted for about 30cm long and attached i-cord is made starting from the right edge of the wrong side of the bonnet.
Material:
Japanese Size 5/ 3.66mm straight or circular needles (or any size to obtain gauge) Darning needle
| Size | Yarn (Grams) | Yarn (Metre) |
| Newborn-6months | 30 | 80 |
| 6 months - 12 months | 40 | 110 |
| 12 months - 24 months | 50 | 130 |
Gauge
Stokinette and lace pattern: 24 stitches x 28 rows = 4 x 4 inches
Abbreviations
ssk: slip slip knit. Slip first stitch knitwise, slip second stitch purlwise, insert the left needle into the fronts of these two stitches and knit them together. One stitch is decreased. This decrease slants to the left. k2tog: knit two together. One stitch is decreased. This decrease slants to the right. k3tog: knit three together yo: yarn over (Note: All yarn overs are purled at the Ws.) RS: right side WS:wrongside
Pattern:
CastOn: Note: I used long tail cast on, you can use any cast on method you like.
| Size | Cast on |
| Newborn - 6 months | 65stitches |
| 6 months - 12 months | 77 stitches |
| 12 months-24months | 89stitches |
Brim (All sizes)
Row 1 (WS): p Row 2 (and all RS): k Row 3 (turning row): k Row 4 - Row 6: stockinette stitch (k the RS and p the RS)
Lace pattern (All sizes)
(Note: You can place marker between each repeat to avoid confusion. The lace stitch is a multiple of 12' + 1, stitches should only be counted at row 7, 8, 15 and 16.) Row 1 (RS): p2, \*p1, ssk,k3, k2tog, p2, k1, p1\*, repeat \*, end with p3. Row 2 (WS): k3, \*k1, p1, k2, p5, k1\*, repeat \*, end with k2. Row 3: p2, \*p1, ssk, k1, k2tog, p2, k1, p1\*, repeat \*, end with p3. Row 4: k3, \*k1, p1, k2, p3, k1\*, repeat \*, end with k2. Row 5: p2, \*p1, yo, k3tog, yo, p1, k1, yo, k1, yo, k1\*, repeat \*, end with p3. Row 6: k3, \*p5, k1, p3, k1\*, repeat \*, end with k2. Row 7: p2, \*p2, k1, p2, k2, yo, k1, yo, k2\*, repeat \*, end with k2. Row 8: k3, \*p7, k2, p1, k2\*, repeat \*, end with k2. Row 9: p2, \*p2, k1, p2, ssk, k3, k2tog\*, repeat \*, end with p3. Row 10: k3, \*p5, k2, p1, k2\*, repeat \*, end with k2. Row 11: p2, \*p2, k1, p2, ssk, k1, k2tog\*, repeat \*, end with p3. Row 12: k3, \*\*p3, k2, p1, k2\*, repeat \*, end with k2. Row 13: p2, \*p1, k1, yo, k1, yo, k1, p1, yo, k3tog, yo\*, repeat \*, end with p3. Row 14: k3, \*p3, k1, p5, k1\*, repeat \*, end with k2. Row 15: p2, \*p1, k2, yo, k1, yo, k2, p2, k1, p1\*, repeat \*, end with p3. Row 16: k3, \*k1, p1, k2, p7, k1\*, repeat \*, end with k2.
| Size | Repeat lace pattern |
| Newborn- 6 months | until 4.5 inches from turning row |
| 6 months - 12 months | until 5 inches from turning row |
| 12 months-24months | until 5.5 inches from turning row. |
Crown Shaping (All sizes)
Row 1 (RS): k Row 2 (and all wS): p Row 3: k2, \*k2tog, k10\*, repeat \*, end with k3. Row 5: k2, \*k2tog, k9\*, repeat \*, end with k3. Row 7: k2, \*k2tog, k8\*, repeat \*, end with k3. Row 9: k2, \*k2tog, k7\*, repeat \*, end with k3. Row 11: k2, \*k2tog, k6\*, repeat \*, end with k3. Row 13: k2, \*k2tog, k5\*, repeat \*, end with k3. Row 15: k2, \*k2tog, k4\*, repeat \*, end with k3. Row 17: k2, \*k2tog, k3\*, repeat \*, end with k3.
Finishing
Break yarn, leave about the length of 1.5 times the last row of crown shaping edge and thread alternate stitches of the last row of crown shaping (that means you need to thread yarn two times for all the stitches). Seam the crown seam to about 1 inch below the beginning of crown shaping. Fold the brim at turning row to Ws of the bonnet and sew the cast on row to the inside of the brim.
i-cord
1. Knit a three-stitch i-cord of about 30cm long (you can adjust the length to your preference). 2. Flip the bonnet to the WS. 3. Attach the i-cord by picking up first stitch of the right edge of the brim, slide the needle to the other end, knit the first 2 stitches, k2tog (the third stitch and the picked up stitch). 4. Repeat step 3 (Note: Pick up every stitch of the edge.). 5. When the attached i-cord is done on the edge, continue making i-cord for about30cm. Weave in all ends. Block nicely. I wet blocked the bonnet and achieved the shape I desired. Yippee! Adorn it on your charming baby!


