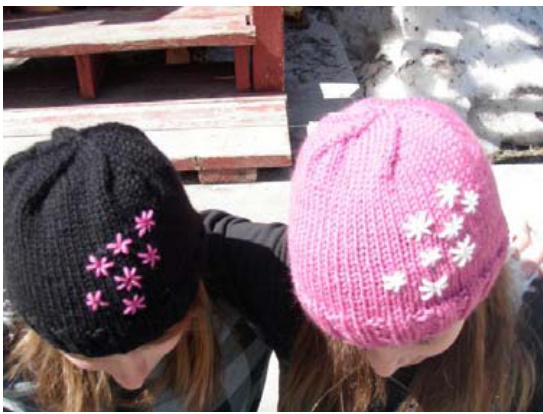
(Rock) Star Beenie
Embroidery for the Clueless by Rebecce Airmet, Stone Garden Designs
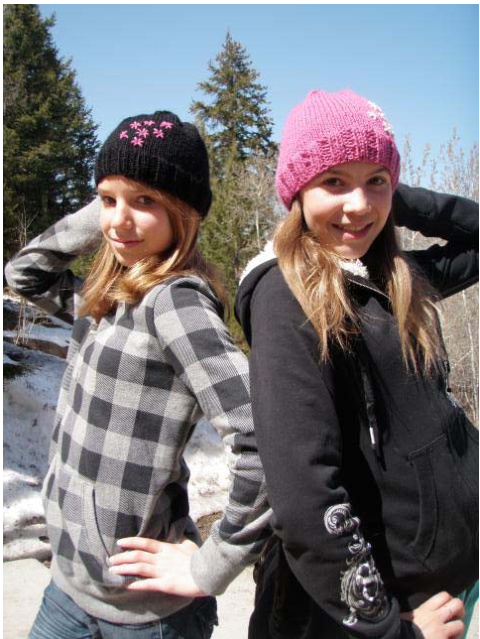
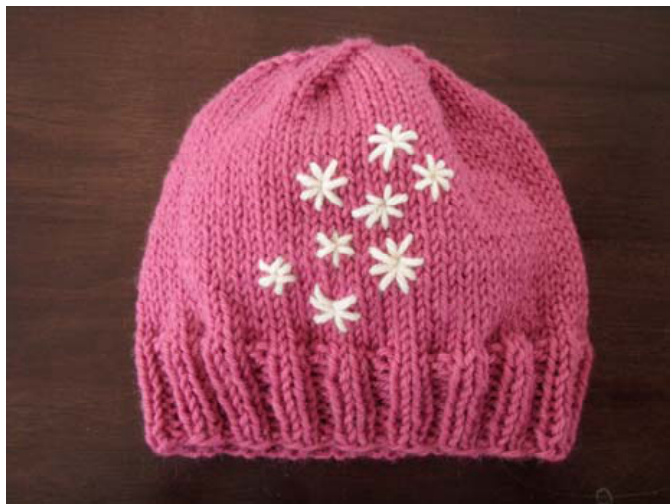
My daughter wanted a hip little beanie that she could wear in the warmer months of spring. It had to be cool, it had to be quick, and it had to be cheap, because goodness knows the kids don't wear their hand-knits very often, do they? I fooled around with a few ideas for colorwork, asked my daughter's opinion, and settled on a little embroidery. Thus was the (Rock) Star Beanie born. A super simple pattern consisting entirely of ribbing and stockinette knit in the round, a hat can be knocked out in just a few hours. You can embroider stars (flowers) on it, as I have, or you can add any other embellishments, from buttons to bows to embroidering on a smiley face! Included are simple instructions for embroidering on stars.
Size:
Approximately 16 in circumference, unstretched. Will fit an older child or a smaller adult.
Materials:
About 110 yards (50 grams) worsted weight yarn for beanie, plus a few yards of alternate color for embroidery. Size #74.5 mm needles: on 16-in circular and a set of DPNs One stitch marker, if desired Large-eye tapestry needle
Gauge:
18 stitches by 24 rows $=4$ in (4.5 st $\times\,6\;\mathsf{r o w s}=1$ inch)
Directions:
CO 72 stitches using long tail cast on, or other stretchy cast on of your choice. Join to work in the round, being careful not to twist stitches. I like to hold the working yarn and the tail together for the first two stitches, then drop the tail to the back of the work. This join helps to prevent the "jog" often found at the beginning of circular knitting. On the second round, be sure to knit through BOTH loops on the first two stitches! Place stitch marker at beginning of round and slip on each row. Brim: 2x2 ribbing Round 1: [k2, p2] to end (18 times) Rounds 2-12: Repeat Round 1 Body: Knit in plain stockinette until hat measures approximately 6 inches from cast on (approximately 24 rows)
Decrease section:
\*k 10, k2tog\* (6 times) \*k9, k2tog\* (6 times) \*k8, k2tog\* (6 times) Repeat, decreasing six stitches on every round, and changing to DPNs when necessary, until 12 stitches remain. Break yarn, thread through last 12 stitches, pull tight, and secure on inside of hat.
Alternate sizing info:
To change the size, add or subtract stitches to your cast on in a multiple of 4. If the number is not divisible by six, determine how many extra stitches you have, and decrease those stitches out by knitting two together evenly around the hat two rows before beginning the decreases. For instance, say you want to cast on 76 stitches, $76/6\ \ =\ \ 12$ remainder 4. Four stitches need to be removed before beginning the decreases. $76/4\ \ =\ \ 19$ , Therefore, you would knit 17 then knit two together, evenly around the hat. Knit two rows even and begin decreases.
Embroidery:
While embroidery can be a little daunting if you've never done it before, it's really quite simple. Begin by cutting a length of yarn in the desired color about a yard long. For stars, we are going to come up at the tip of each point and go down through the center.
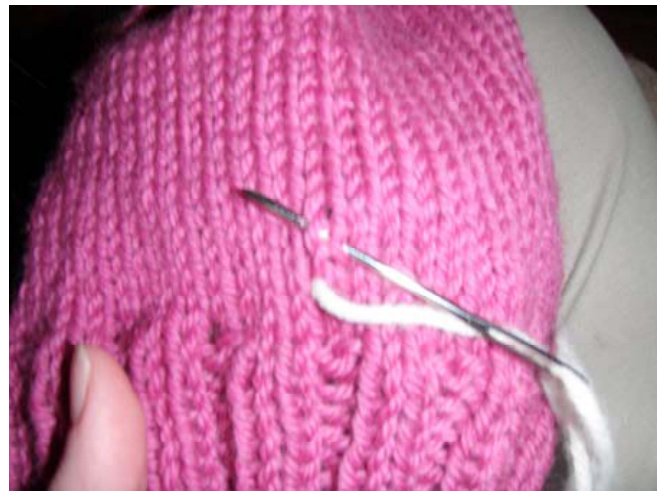
Start by drawing the yarn up through the hat from the backside, close to the brim. Leave about a 6 to 8 inch tail, which will be woven in at the end. Bring needle down through the center of a knit stitch about 1/4 to 3/8 of an inch from your starting point, and back up where you want the next star tip to be. Pull through loosely. Do NOT pull tight, as it will cause your fabric to pucker.
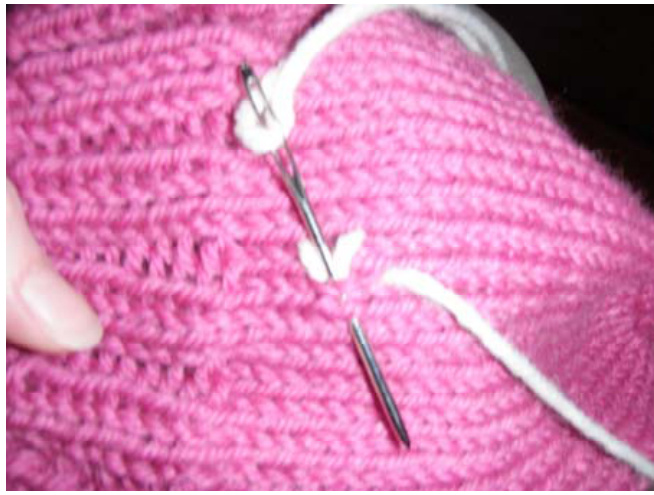
After making 5 to 7 points, bring needle down through center to complete the last point, and bring needle back up at the tip location of your next star. Continue making stars until you are happy with the pattern.

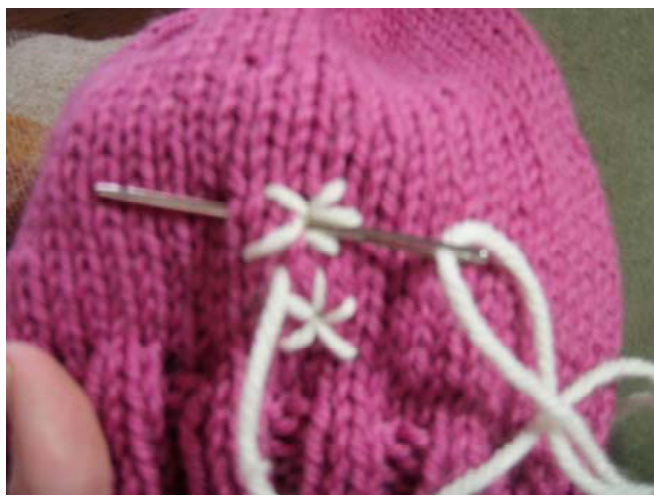
End by drawing needle down through center of last star, then turn hat inside out. Carefully run needle through the stitches on the back side of the hat, knotting a couple of times, weaving in end. Repeat for the tail at the beginning of the embroidery work.


