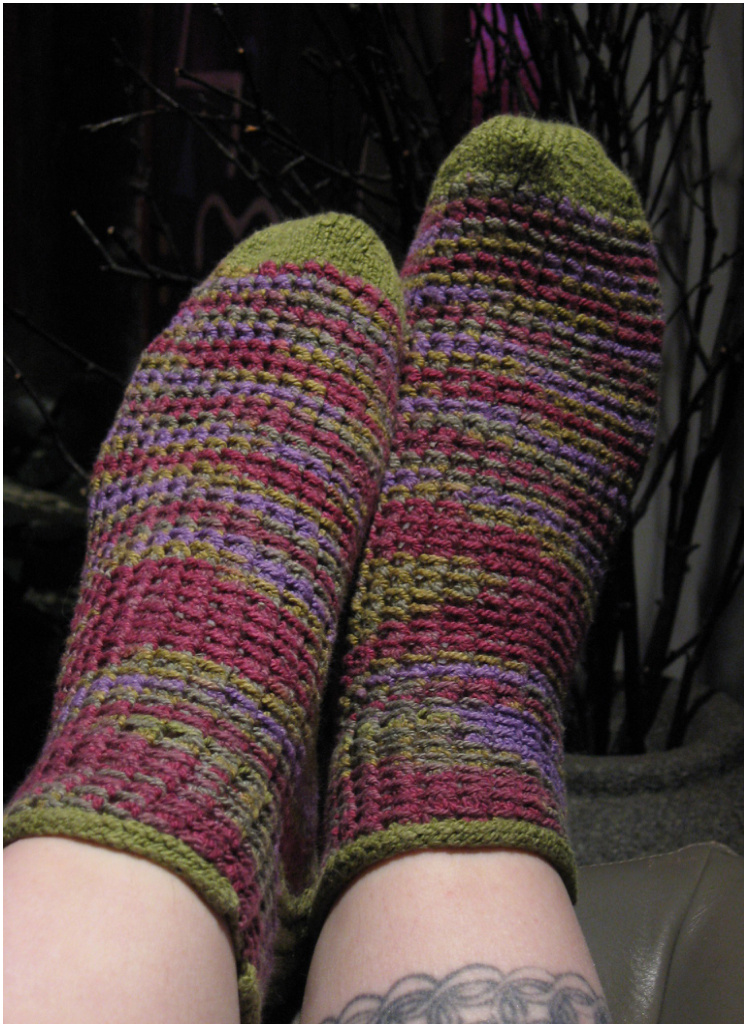
A simple textured stitch adds interest to a pair of comfy cotton socks. These socks are knit two at a time from the toe up with a modified heel flap and applied i-cord edging. This pattern assumes you have familiarity with knitting two socks at once with your weapon of choice (the instructions are written for two circular needles but are easily modified for other methods). Sizing: This pattern uses 48 stitches for a women's size 9 shoe size. This yarn is very stretchy though, so feel free to play with overall stitch count to get socks that are comfy for you. Use the toe of the socks as your gauge swatch, your gauge will probably vary with this yarn!
Materials:
Cotton/elastic yarn such as Cascade Fixation or Elann Esprit - one ball main color and a half ball contrast color. Note: Use a light tension when knitting this yarn. Holding the yarn too tightly makes the fabric feel stiff and means the sock won't have any stretch! ·Size 2.5mm needles, or size needed to get a gauge of about 6.5 stitches/inch. ·Stitch markers: two fixed ring and 12 clip, safety pin or split ring type. Stitch holder (if you don't have a handy clip marker).
Abbreviations:
· MLL: after knitting a stitch lift the left leg of the second stitch below the needle to the left needle, knit through the back loop. · MLR: before knitting a stitch lift the right leg of the first stitch below the needle onto the needle, knit. K2tog: knit two stitches together as one. · K2togtbl: knit two stitches together as one through the back loop. · p2tog: purl two stitches together as one. Sl1 - slip the stitch as if to purl. · w&t: wrap and turn. Bring the yarn between the current stitch and the next stitch. Slip the next stitch as if to purl, return the yarn to working position, turn the work and begin the next row without working any remaining stitches. yo: yarn over.
Technique Help:
Cat Bordhi has excellent video tutorials for MLR and MLL (she calls them La-Rink and La-Link), the magic cast on and lifting short row wraps at http://www.youtube.com/profile? user=catbordhi&view=videos. Text instructions for the magic cast on can be found at http://knitty.com/issuespring06/FEATmagiccaston.html.
Cast on:
Holding two circular points and one end of the contrast color yarn, use the magic toe cast on to make 12 stitches. Slide these down the needle to give enough room to cast on 12 more stitches with the other end of the contrast color yarn. Knit one round being careful to use the appropriate yarn for each sock, you don't want to connect your socks! Toe Increases: Note: If you leave a long enough tail from the cast on to knit the first few rounds with the yarn doubled you can reinforce the toe and knit into each loop of the increase stitches instead of using MLR and MLL to increase. Once the tail is used up follow the increases below. Round 1: Both needles - K1, MLR, knit to one stitch before end of needle, MLL, k1. Round 2: Knit. Repeat these two rounds until there are 48 total stitches (24 on each needle). At this point it's a good idea to check your gauge, most folks do not get their customary gauge when knitting with this yarn. Take your total number of stitches divided by the stitches per inch to find the circumference of the socks, which should be within ${\sf1}\!-\!2^{\prime\prime}$ of your actual foot measurement. If this is off then you can continue increasing until you have the proper number of stitches, just be warned that you will have to adjust the rest of the math in this pattern as well! If all is well, knit evenly until toe is $z^{\ast}$ long. Switch to main color and cut contrast color yarn, working in the end as knit one row evenly.
BeginTiny Bamboo stitch on the top eedle, leave the sole needle as stockinette.Knit evenly until approximately $3^{\ast}$ from the bend at the top of your foot. For my foot this is about 4.75" long, measure your own foot or try the socks on as you go.
Tiny Bamboo Stitch (multiple of 2 stitches): Round 1: \*YO, k2, pass the yo over the knit stitches; Repeat from \* to end. Round 2: Knit even.
Gusset Increases:
Round 1: Top Needle - Knit in pattern. Sole Needle - K1, MLR, knit until 1 stitch remains, MLL, K1. Round 2: Knit even. Note: I synchronize my increase rounds on the sole needle with the pattern rounds of the top needle so there's only one round where I have to pay attention. Repeat rounds until you have 48 stitches on the sole needle (72 stitches total). Then set up for heel turn. Sole Needle - Place markers as follows: Knit 12 stitches, place a fixed ring marker. Knit 24 stitches, place a second fixed ring marker. Knit remaining 12 stitches. Top Needle - Knit in pattern. Switch to contrast color yarn for heel, but do not cut main color. Just leave it where it is. Note: I make these fixed markers a different color/style from the ones used during heel turning to save my sanity. like to clip markers onto my working yarn during heel turning. When I do the wrap part of the w&t for a stitch I clip a marker around the wrap yarn on the right side of the fabric and then turn the work. Those markers make it easy to lift the wraps up later and helps me keep track of how many stitches I've wrapped already without having to count too much. When counting wrapped stitches by counting the markers don't include the original fixed markers in your count!
Turn the Heel (on sole needle only):
Note: Even when doing socks two at a time it's easiest to do the heel turn and flap one at a time. Do the first sock up to the Leg section, then do the second sock heel turning and flap up to the Leg section. Then both socks can be done two at a time again. Set up row 1: Using contrast color yarn knit until 2 stitches before second fixed marker (34 stitches), w&t placing clip marker on the wrap yarn. Set up row 2: Purl until 2 stitches before fixed marker, w&t placing clip marker on the wrap yarn. Row 1: Knit to the stitch before the clip marker, w&t placing clip marker on the wrap yarn. Row 2: Purl to the stitch before the clip marker, w&t placing clip marker on the wrap yarn. Repeat these two rows until you have placed 12 clip markers total, six on each side. Then: \*Knit to first clip marker. Use marker to lift wrap onto needle from knit side to purl side and remove marker. Knit the stitch with the wrap. Repeat from \* until you reach the original marker then k2tog with the nearest gusset stitch (you will need to remove the fixed ring marker to make that k2tog happen). Turn work. \*Purl to first clip marker. Use marker to lift wrap onto needle from knit side to purl side and remove marker. Purl the stitch with the wrap. Repeat from \* until you reach the original marker then p2tog with the nearest gusset stitch (you will need to remove the fixed ring marker to make that p2tog happen). Turn work. Note: At this point I usually remove the original markers as well, relying on the gap between stitches to tell me when to decrease. If you are not comfortable with this method just replace the fixed ring marker in between the decrease and the next stitch each time. But try it without the markers one time, it's just socks!
Heel Flap (on sole needle only, starting in the middle):
Row 1: SI1, $^{\star}\mathsf{K}_{1}$ , sl1. Repeat from \* until 1 stitch before the gap, k2tog the stitch before and the stitch after the gap together. Turn work. Row 2: Sl1, purl until 1 stitch remains before the gap, p2tog the stitch before and the stitch after the gap together. Turn work. Repeat rows 1 and 2 until you have returned to 24 stitches on the sole needle, 48 stitches total. Cut contrast color, working in the end as you knit the first leg round.
Pick up the main color yarn waiting at the end of the top needle and begin Tiny Bamboo pattern on the sole needle. Be sure to match the current row from the top needle. Continue the pattern as established until sock is desired height or you're close to running out of yarn. Cut MC if needed and work one round of plain knitting with CC, working in MC tail.
Applied I-cord bind off:
Top needle:
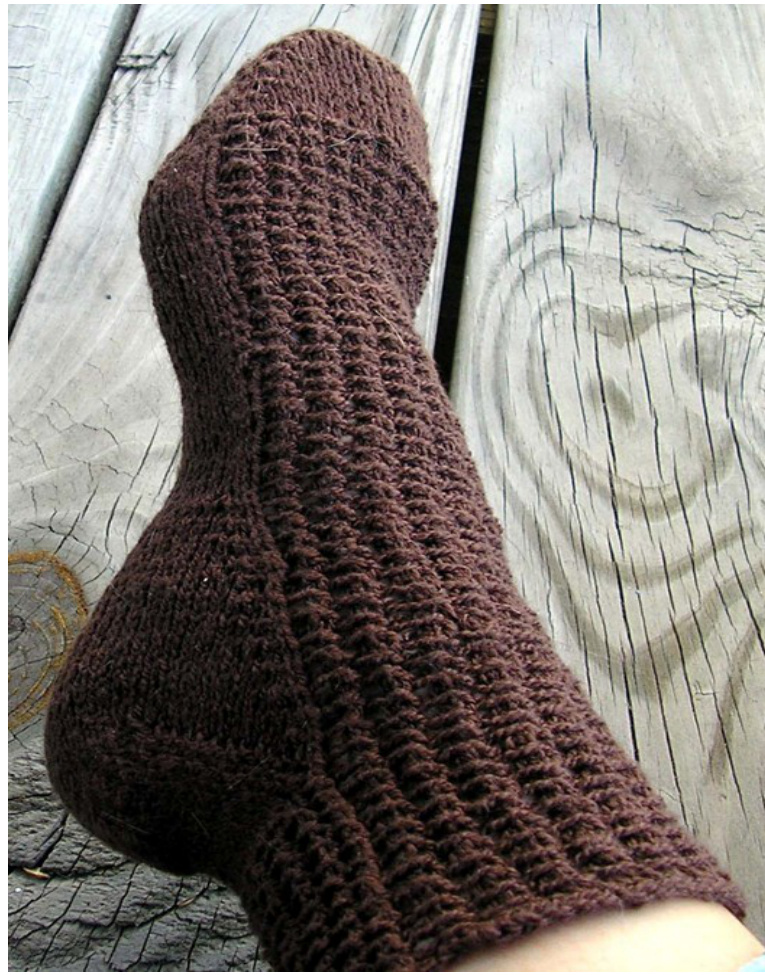
Sock 1 - cable cast on two stitches. $^{\star}\mathsf{K}2$ K2togtbl, slide the three stitches on the right needle back onto the left needle. Repeat from until you have three live stitches remaining, place these stitches on a clip marker or stitch holder for the moment. Sock 2 - knit all stitches. Sole needle: Sock 2 - cable cast on two stitches. $^{\star}\mathsf{K}2$ K2togtbl, slide the stitches back onto the left needle. Repeat from \* until you have three live Photo courtesy of Kramersmama.
stitches remaining, place these stitches on a clip marker or stitch holder for the moment. Sock 1 - put the held stitches on the left needle, $^{\star}\mathsf{K}2$ , K2togtbl, slide the stitches back onto the left needle. Repeat from \* until you have three live stitches remaining, bind off these three stitches. Sock 1 bound off, sole needle free.
Top needle:
Sock 2 - put the held stitches on the left needle, $^{\star}\mathsf{K}_{2}$ , K2togtbl, slide the stitches back onto the left needie. Repeat from \* until you have three live stitches remaining, bind off these three stitches. Sock 2 bound off, top needle free.


