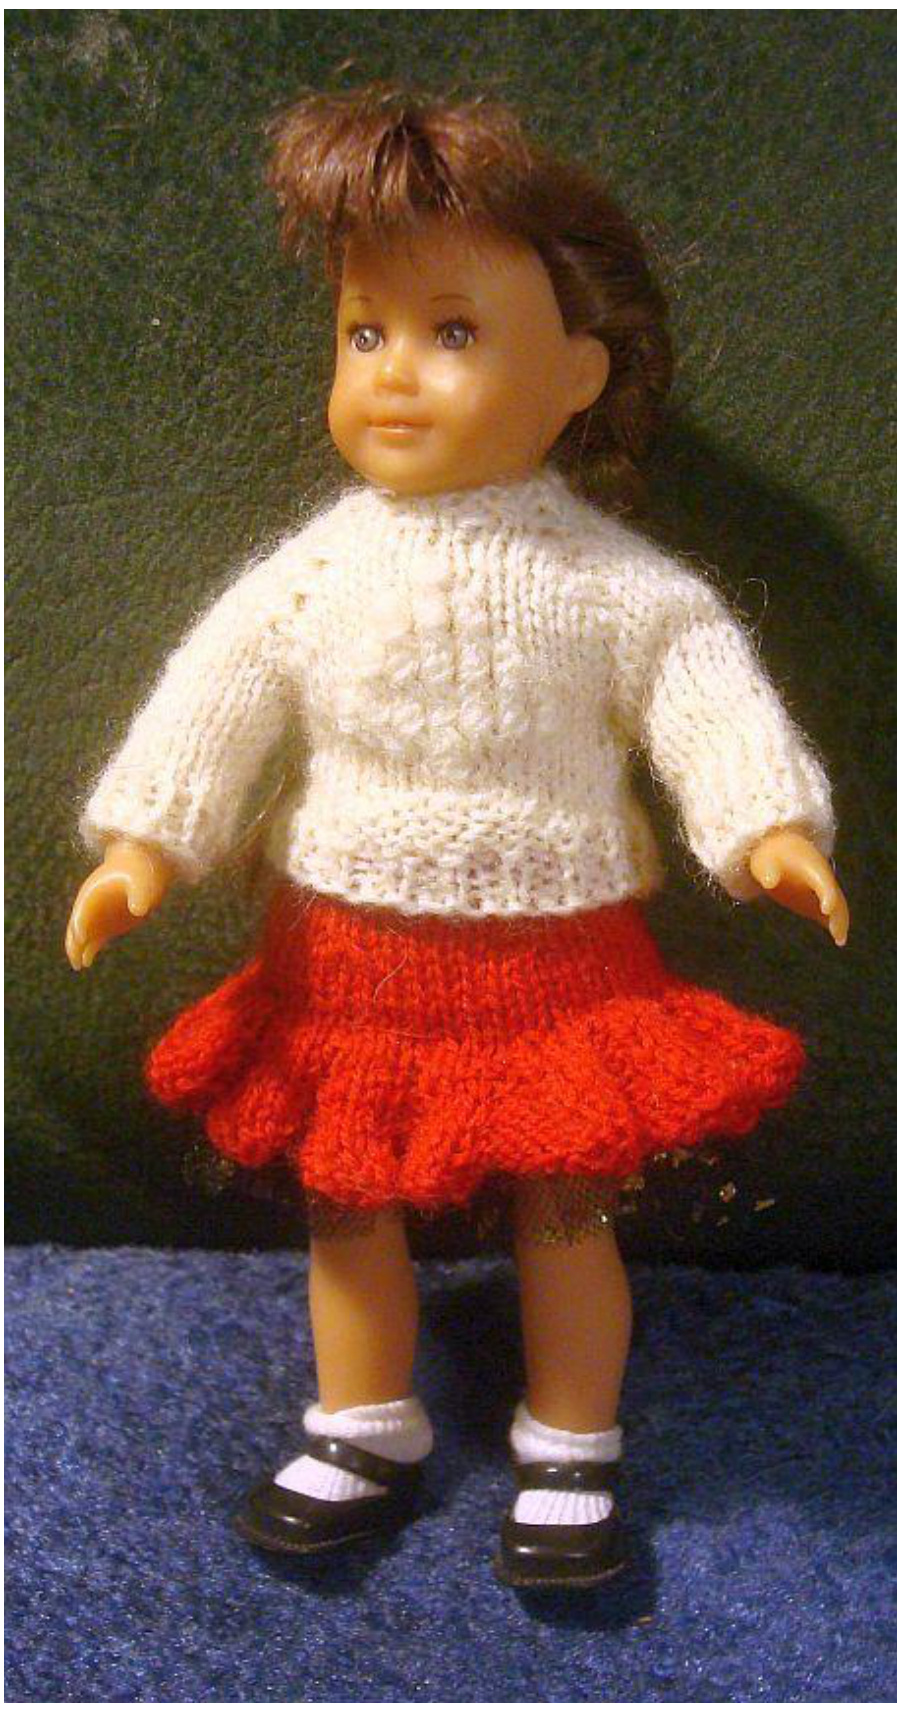
Christmas Tree Sweater For 6" AG
#0 needles. dps are handy for sleeves but you can do without. Lace weight yarn Before you start see the notes about different ways to work the increase. Cast on 23. Long tail CO looks nice. Start increases.
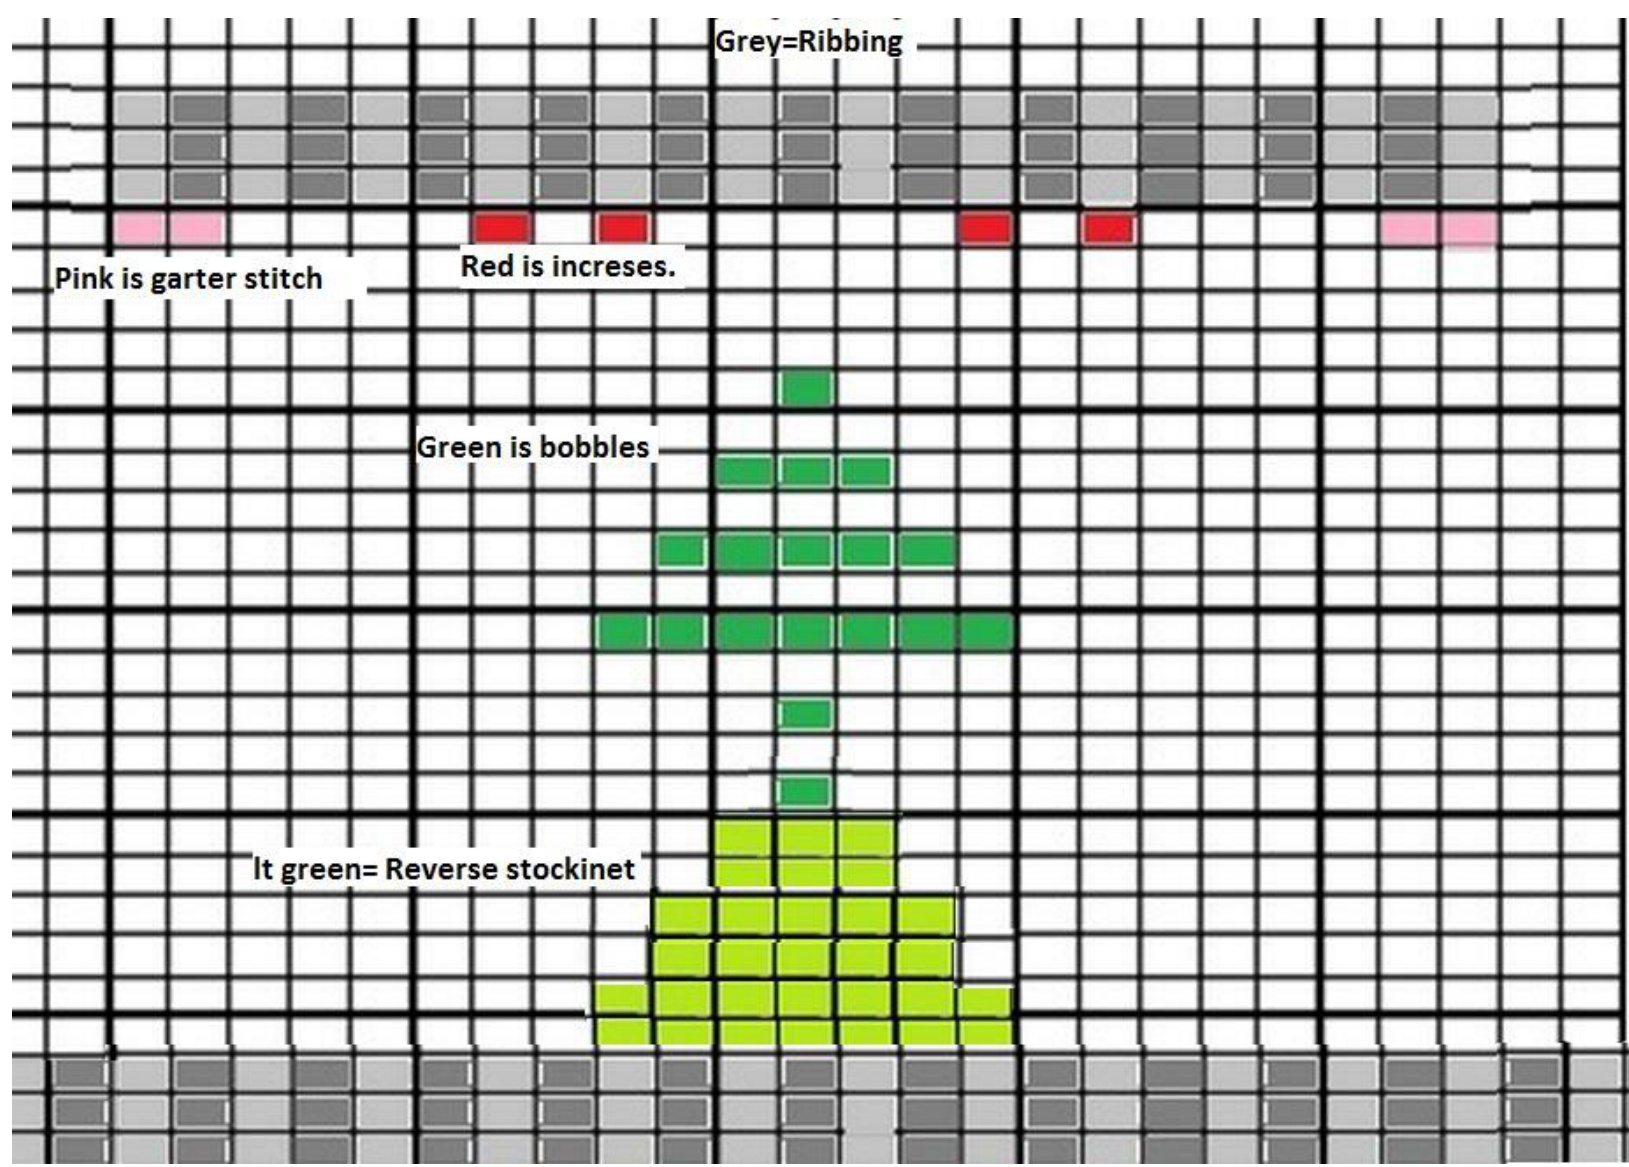
1. K6, kpk in next stitch, k1, kpk, k5, kpk, k1, kpk, k6 Work three rows of k1p1 ribbing. 2. (Always knit into the center stitch of the increase on the purl rows. This makes a purl bump on the right side, into which you will work the increases.) k2, p5, k1, p3, k1, p7, k1, p3, k1, p5, k2. These two rows form the pattern for the increases. The numbers will increase by two each time. work on more increase row and purl back. The next row will start the bobbles for the tree according to the chart. The dark green is the bobbles; the light green is reversestockinet. To work the bobble: Knit fbf in the next stitch, turn. Slip the first stitch and purl 2 together.. turn keeping yarn in back and pass the slip stitch over the purl 1 together. Slip the bobble, purl way, to the right needle. The return row is purled in pattern as usual. When you have 12 stitches on the back it is time to start knitting the sleeves. I changed to dps at this point. knit to the purl stitch and start your dp if you are suing them. work the 15 sleeve stitches in stockinet for 1 inch. Work 3 rows of k1p1 rib and cast off. Attach yarn at left front and work pattern across the front, you should be at the first trunk bobble at this point. Work second sleeve as the first. Attach yarn at left of next back and knit across. K2 and purl back to last back stitch, p2tog for underarm. Continur across and p1 tog at next underarm. Continue to finish chart and end with 4 rows of k1p1 ribbing, CO. Sew sleeve seams and attach snaps on back. I am thinking that maybe the bobbles could be replaced with small pearls or beads but have not tried this. This chart is not to scale. It is just to explain where things go. The top ribbing is correct and the first increases are marked as red. The tree is centered in the front of the sweater. You will knit 4 after the increase every time to the first bobble & knit 4 after the last bobble to the next increase. Nelly's pink sweater was knitted with the same pattern and same needle using Palette fingering yarn. I know not all of you have lace weight handy so wanted to try this. It's a tighter knit and comes out a little larger but still within her size range. So if that's the finest in your stash you can use that. If you do have lace weight use it as first choice.

Notes about different ways to work the increase.

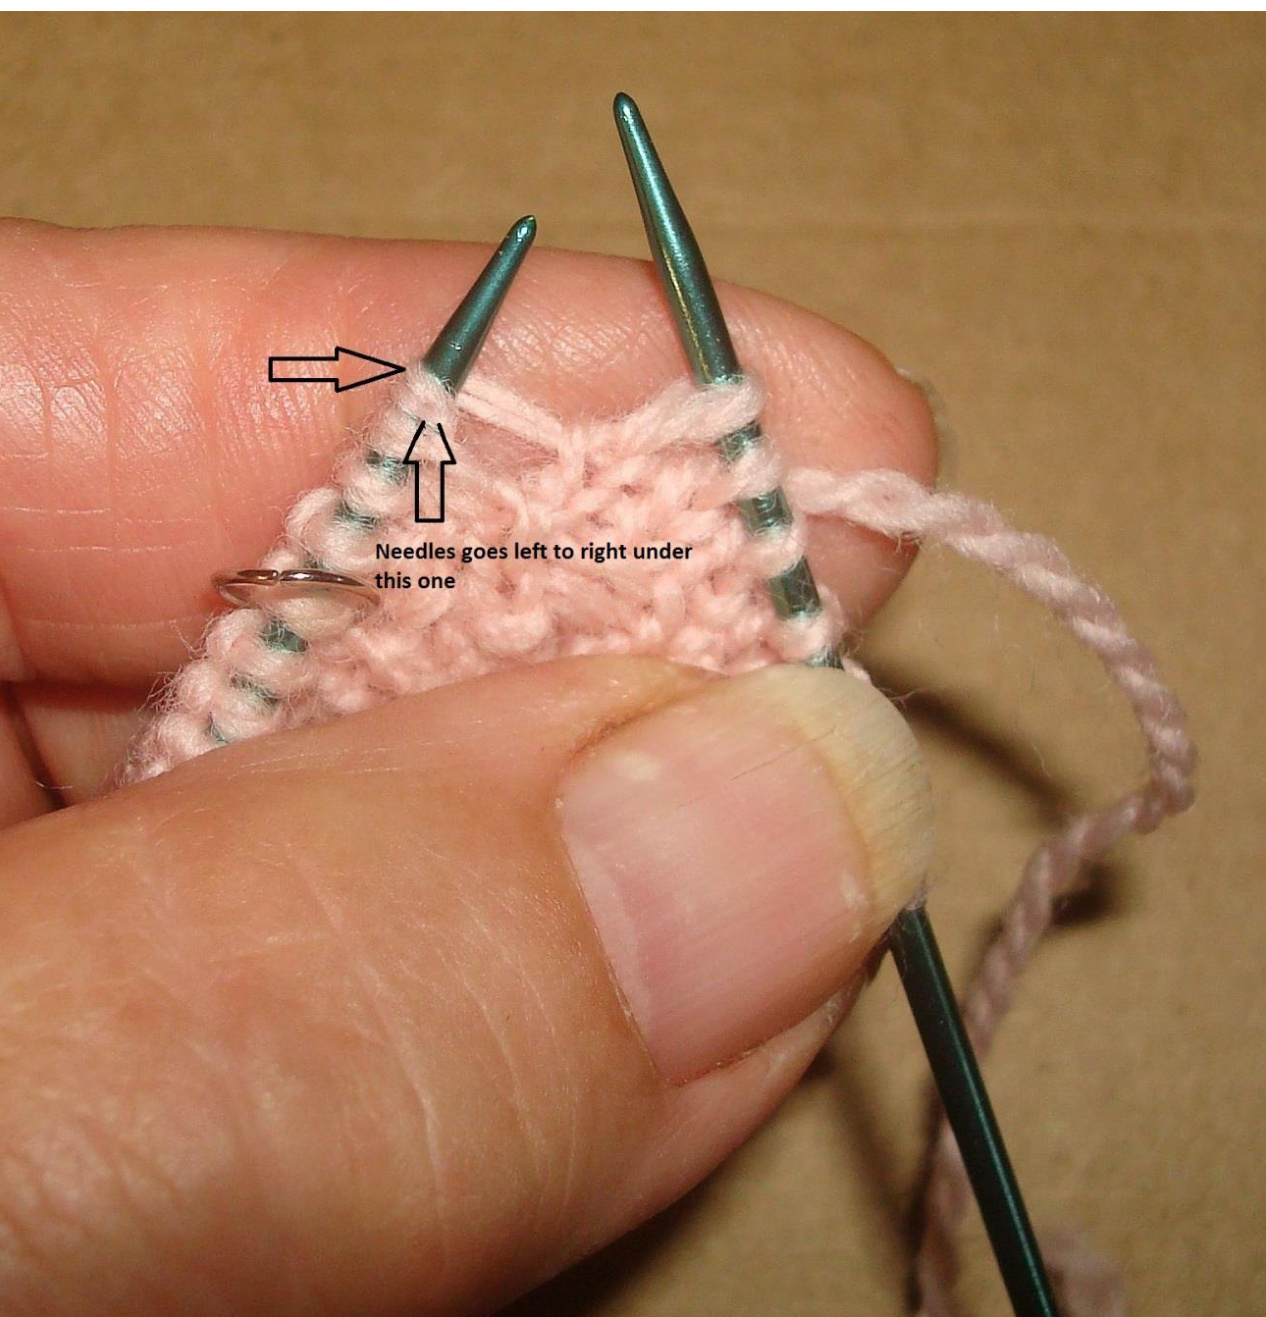
If you work your increases by adding them before and after the center stitch it will eliminate the little hole or eyelet. It is difficult to explain how to do that for beginners. The yarn between the stitches is where the increase is worked See arrow. Over the left needle. Right needle knits as shown by the bottom Arrow. I've pulled it tight here so you can see it, you'll need to keep it looser to work it.
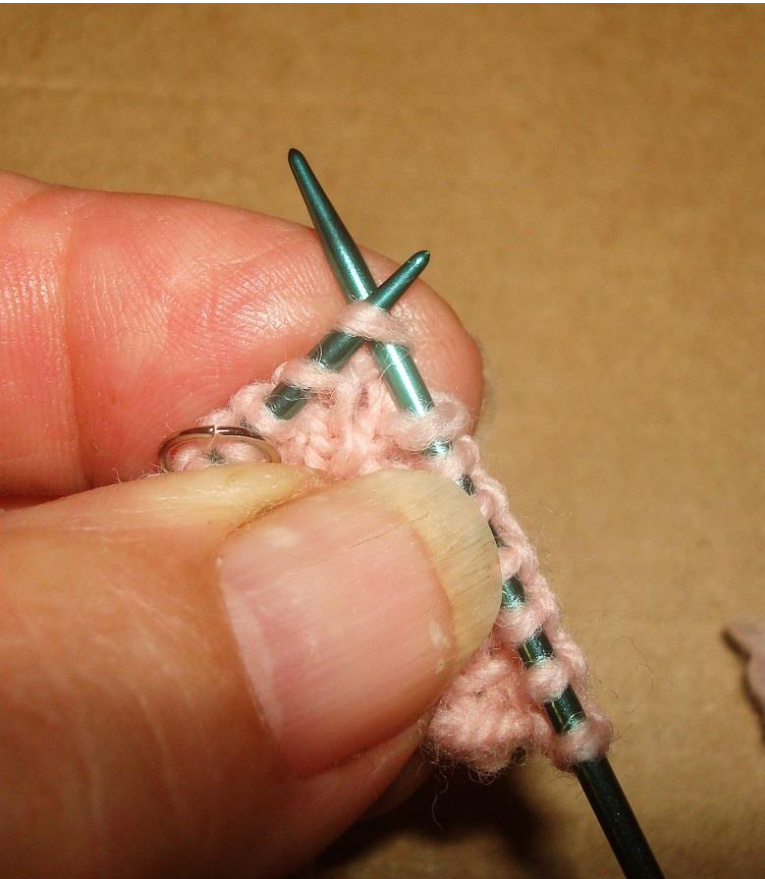
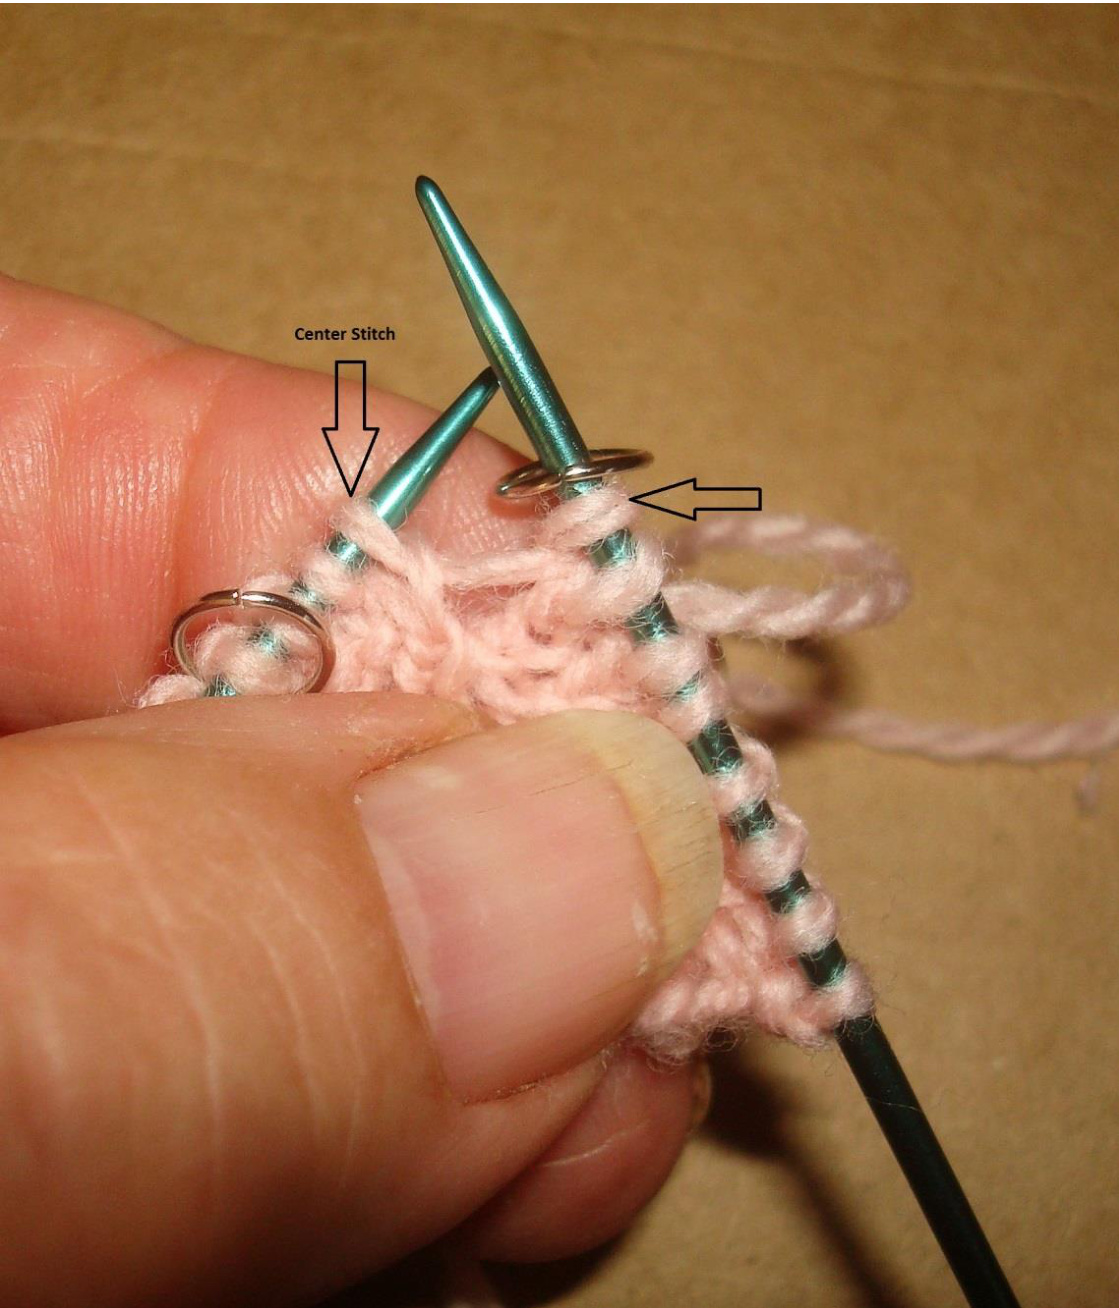
Here it is ready to knit Arrow on the right shows the completed increase stitch. place your marker here to keep track of this center stitch. Arrow in the left is the center of the group. The next increase comes just after you knit this center stitch and is done the same way as the previous increase.


