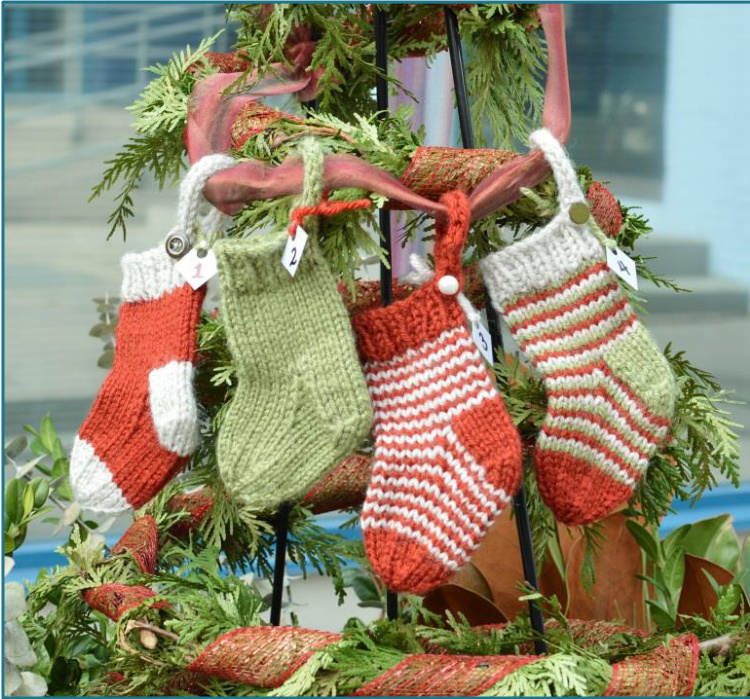
Holiday Countdown Stockings
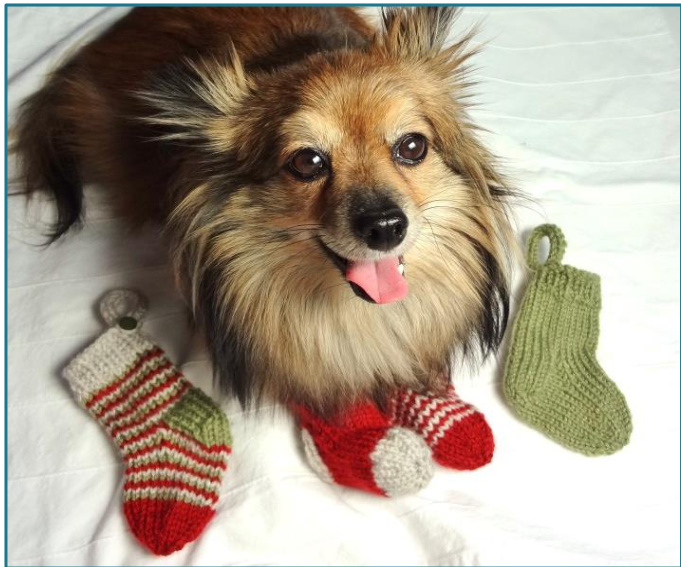
Miniature stockings made with one, two, or three colours in four styles, perfect for tiny gifts such as ornaments, candy, mini toys, jewelry, cosmetics, money, and craft notions. Each stocking is worked from the top down, with all the main components of a traditional top-down sock, but with details optimized for decorative and gift-holding purposes rather than for feet. (Which is not to say I didn't try them on my dog, of course...) Decorate your home, tree, wreath, and workplace! Attach them to larger wrapped gifts with a bow! Make an advent set to countdown to the holidays, or to extend your celebration through ye olde 12 days of Christmas -- start in January and make just 2 or 3 each month to be ready for next December! Mix and match to create your own unique set!
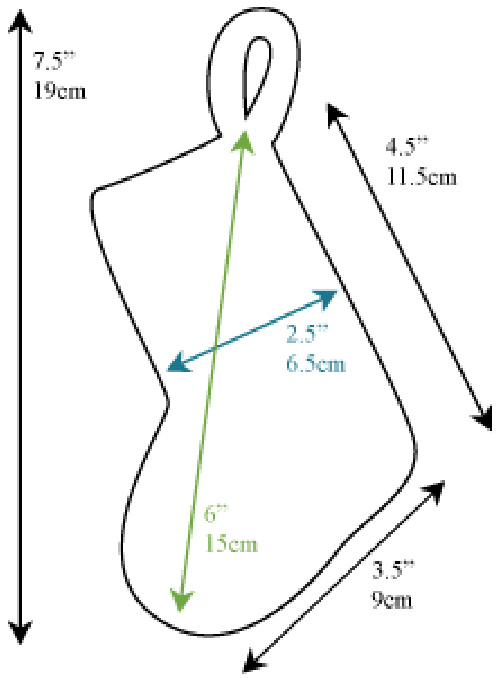
2.5" / 6.5cm wide at leg; 3.5" / 9cm from back of heel to tip of toe; 4.5"' / 11.5cm from edge of cuff to bottom of heel; 6" / 15cm from base of loop to tip of toe; and 7.5"' / 19cm from top of loop to tip of toe. Gauge: 21 sts x 28 rows over 4" / 10cm in stockinette st in the round.
Exact gauge is not crucial for this project, but it will affect the finished size and yardage required.
Note: suggested gauge for this pattern is slightly tighter than gauge recommended on yarn label, as densely knit fabric will better hide surprises inside!
You will need:
Yarn: Lion Brand Vanna's Choice (100% acrylic: 170yd / 156m per 100g) OR other worsted or aran yarn, in the following amounts for each stocking: 28yd / 26m of Contrast Colour 1 (CC1) shown in: 173 Dusty Green
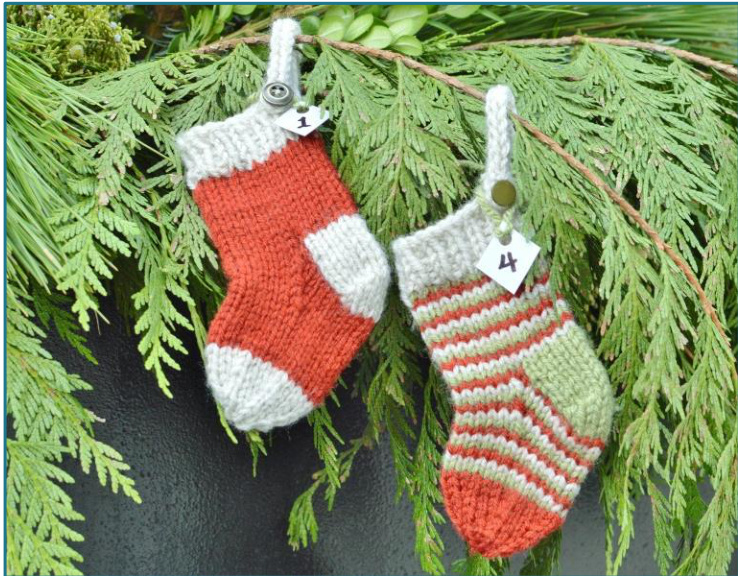
Colourblock Stocking:
Suggested needles: One 29" / 75 cm or longer circular needle to work Magic Loop (or one set of 4 or 5 DPNs in preferred length), in size US 6 / 4.0mm OR size needed to achieve gauge of 21 sts x 28 rows over 4" / 10 cm in stockinette stintheround
Tapestry needle
Two stitch markers and one removable marker Optional for stockings with buttoned hanging loop: one crochet hook in size US F / 3.75mm or 1 size smaller than the knitting needle size used to achieve gauge, AND sewing needle, AND thread, AND one button for each stocking Optional for a wall-hanging set of stockings: 1.3yd / 1.2m (2.6yd / 2.4m) of garland or ribbon on which to string 12 (or 24) stockings for a 12 days of Christmas (Advent/countdown) garland, or custom length Optional for a countdown set of stockings: hanging tags with which to label each one Models: Ember the Pomeranian and Rebeka Darylin Many thanks to my test knitters: AprilBroken, FroggyMama, Julia Stockert (JStockert), oribe, and shakeyourbooties
Holiday Countdown Stockings
Abbreviations and Symbols
| * | Marks the beginning of a section to be repeated. See also: rep from *. |
| Indicates where to switch to a new needle for suggested configuration of stitches on Magic Loop or DPNs. | |
| k | Knit. |
| k2tog | Knit two stitches together. |
| k2togtbl | Knit two stitches together through the back loop (in this pattern, used only once in the setup). |
| kbl | Knit through the back loop, twisting the stitch (in this pattern, used only once in the setup). |
| p | Purl. |
| p2tog | Purl two stitches together. |
| rep from * Marks the end of a section to be repeated. See also *. | |
| ssk | Slip next stitch purlwise, slip one more stitch purlwise, insert tip of left needle from left to right through both stitches while leaving them on the right needle, and use tip of right needle to k2togbl. Alternately, slip 1 st, k1, pass slipped stitch over. |
| sl | Slip (purlwise from left to right needle with yarn held to the back, or as specified). |
| sl1 wyb | Slip next stitch with yarn held to the back. |
| sl1 wyf | Slip next stitch with yarn held to the front. |
| st, sts | Stitch, stitches. |
Techniques and Resource Links
Cast on: Knitting-on cast on and cable cast on instructions can be found at Knitty.com (photo tutorials) and KnittingHelp.com (videos). I-cord instructions can be found at wikiHow (photo tutorial and video). Helix stripes are explained by Grumperina and TECHknitting (illustrated tutorials). Pick up and knit instructions can be found at Knitty.com (photo tutorial) and KnittingHelp.com (video). Finished Measurements (unstretched):
Contact Rebeka Darylin: Ravelry ID: rebekafish Email: waterviewknits @ gmail.com Blog: http://waterviewknits.com
Instructions for All Stockings
Setup:
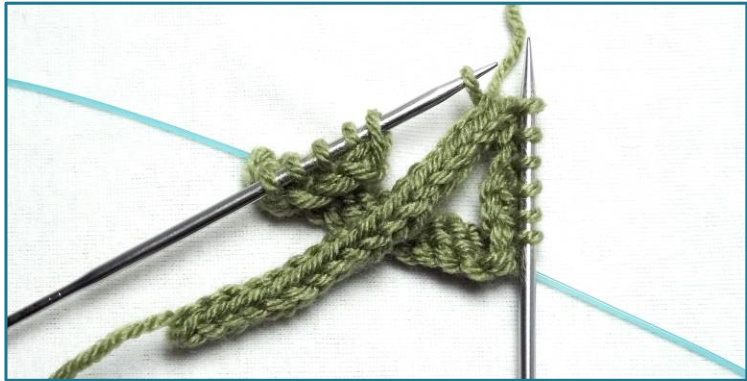
For closed hanging loop: using CC1, cast on 3 sts. For buttoned hanging loop: using CC1, crochet a chain of 8 sts (or work as i-cord with only one stitch). Slip the live stitch to a knitting needle in your right hand, and pick up 2 more sts in the 1st and 2nd chain sts, forming a small buttonhole with 3 sts on the needle. For both loops, begin i-cord: \* without turning work and with yarn in back, using Magic Loop sl 3 sts back to left needle, or on DPNs pass the needle holding sts to the left hand. Knit 3 sts, rep from \*. If starting with buttonhole, work i-cord around the yarn tail. Continue working i-cord for 18 rows, ending with 3 sts on left needle. Use knitting-on cast on to add 1 st, then cable cast on 20 more sts, do not turn. (24sts) Knit 21, distributing sts to prepare to join in the round. Suggested configuration for Magic Loop: 5 sts / 12 sts / slide remaining sts to 1st needle and k to last 3 sts; for 4 DPNs: 4 sts / 7 sts / 7 sts / sl remaining sts from right to left onto 1st needle and knit to last 3 sts; for 5 DPNs: 3 sts /6 sts / 6 sts / 6sts / sl remaining 3 sts from right to left onto 1st needle.
Join: kbl, k1, place start of round marker, sl last st. Pick up the cast-on loop at the base of the 1st st on left needle and put it on the left needle, then sl last st back from right needle to left needle and k2togtbl to join the caston loop with the slipped st. Leave this st on right needle, and begin Round 1 of the Cuff at the 2nd st of the round.
Cuff:
Round 1 (start at second st past marker): \*sl1 wyb, p1, rep from \* ending sl1 wyb (do not pull floats tight -- this slip stitch round gives a neater transitionfromstockinetteto1xlriband back) Rounds 2, 3, and 4: \*p1, k1, rep from \* Round 5: \*p1, sl1 wyb, rep from \*
Proceed to instructions for the style of stocking you want to knit, then return here for Toe and Finishing.
Toe:
Round 1: \*k2, k2tog, rep from \* 6 times (18 sts) Rounds 2 and 3: knit Round 4: \*k1, k2tog, rep from \* 6 times (12 sts) Round 5: knit Round 6: k2tog 6 times (6 sts). Break yarn leaving an 8" tail. Use a tapestry needle to pull yarn tail through final 6 sts and cinch closed.
Finishing:
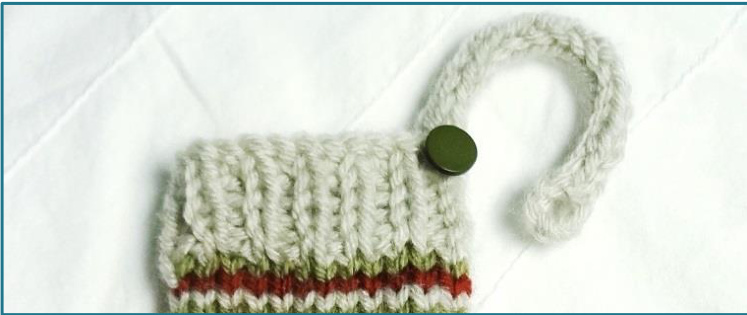
Turn stocking inside out and weave in all ends except the starting tail at the end of the i-cord. Turn stocking right-side out. For a closed hanging loop: use the i-cord tail to sew the tip of the i-cord to the base of the i-cord just inside the cuff, forming the hanging loop. For a buttoned hanging loop: if the i-cord was not worked around the tail, now carefully use a tapestry needle to thread the tail through the central tube of the i-cord like a drawstring. Stretch the i-cord so the tail is loose within it, then sew this tail to the inside of the cuff. Choose a button that fits snuggly through the buttonhole and use a sewing needle and thread to attach it securely to the left side of the base of the i-cord. Optionally, arrange a set of stockings on a garland, add numbered tags or name tags, and hide a treat in each!
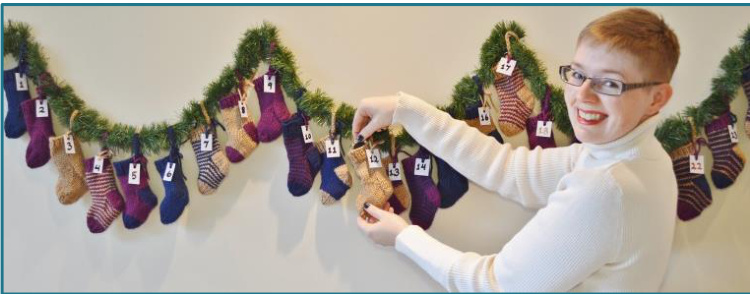
Set of 24 stockings made from Bernat Satin (100% acrylic: 163 yd / 149 m per 100g, discontinued) shown in Navy, Sultana, and Sable.
Instructions: One-colour Stocking
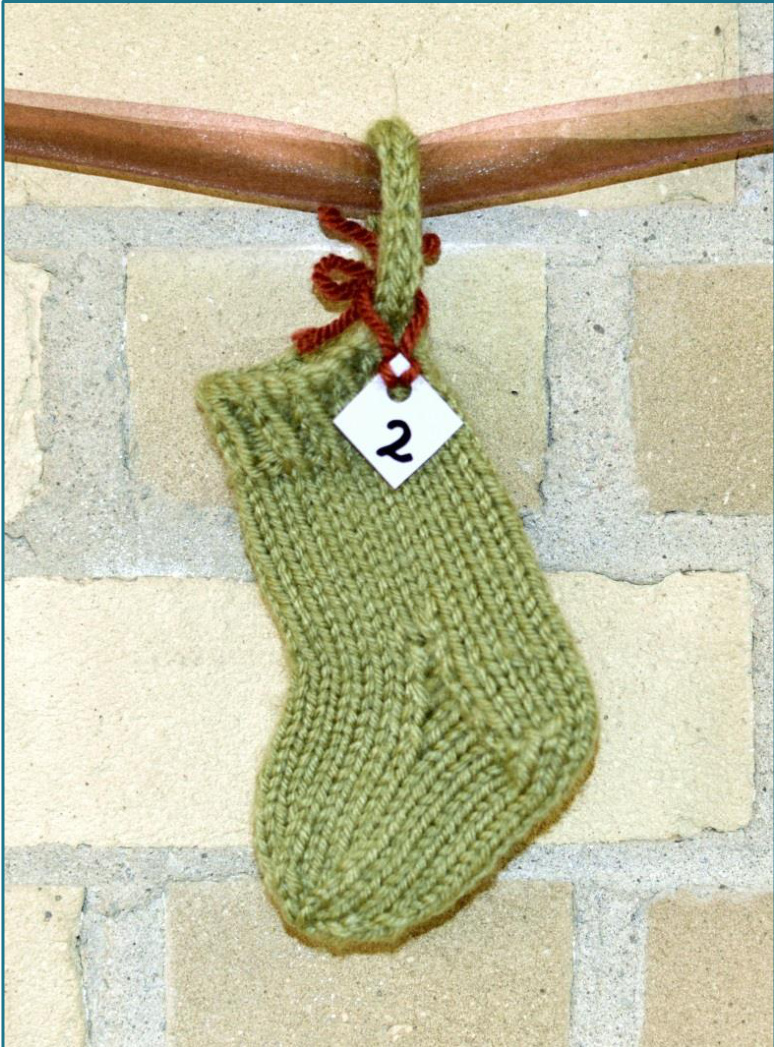
Work Setup and Cuff using Instructions for All Stockings (page 3).
Leg:
Knit 13 rounds, but on last round stop 6 sts before end of round.
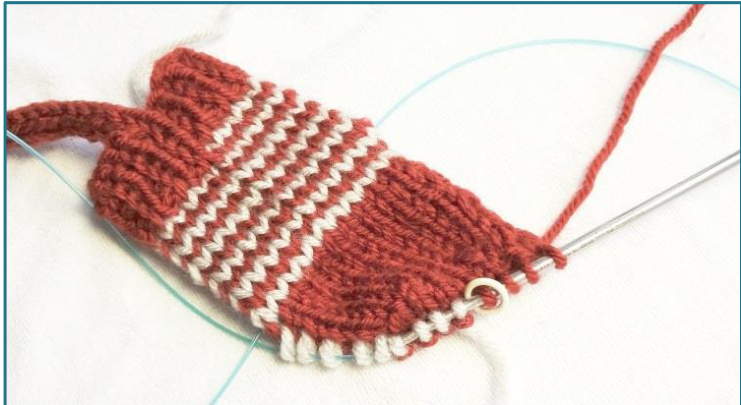
Heel Flap:
The heel flap is worked flat over the next 12 sts, so rearrange these sts onto your left needle if needed. Ignore the start marker while working the heel, but leave it in place, slipping it when you come to it. Row 1: k2, place removable marker on stitch just worked, k10, turn to work flat Row 2: sl1 wyf, p11, turn Row 3: sl1 wyb, k11, turn Repeat rows 2 and 3 three more times, until flap is 9 rows counting from and including marked row, ending after a knit row.
Heel Turn:
Row 1: p7, p2tog, p1, turn (last 2 sts left unworked) Row 2: sl1 wyb, k3, ssk, k1, turn (last 2 sts left unworked) Row 3: sl1 wyf, p4, p2tog (across gap), p1, turn Row 4: k6, ssk (across gap), k1, do not turn (8 sts)
Gusset and Foot:
Pick up sts for gusset and resume working in the round: With right side of flap facing, pick up and knit 5 sts along edge of heel flap, k12 instep sts, pick up and knit 5 sts along edge of heel flap, stopping 4 sts before start marker (30 sts) Redistribute sts, keeping 8 heel sts on left needle, with start marker between the 4th and 5th sts. For Magic Loop: slide 7 more sts from the cable onto left side of heel needle until there are 15 sts on this needle, plus 15 sts on the other side of the cable loops. For 4 DPNs redistribute as: 8 heel sts / 11 sts / 11 sts. For 5 DPNs: 8 sts / 7 sts / 8 sts / 7 sts. Knit 4 sts onto working needle to reach start marker. Round 1: k8, k2tog, k10, ssk, k8 (28 sts) Round 2: knit Round 3: k7, k2tog, k10, ssk, k7 (26 sts) Round 4: knit Round 5: k6, k2t0g, k10, ssk, k6 (24 sts) Round 6: k1, place removable marker on stitch just worked, knit to end of round. Knit 6 more rounds plain counting from removable marker. Return to Instructions for All Stockings on page 3 for Toe and Finishing.
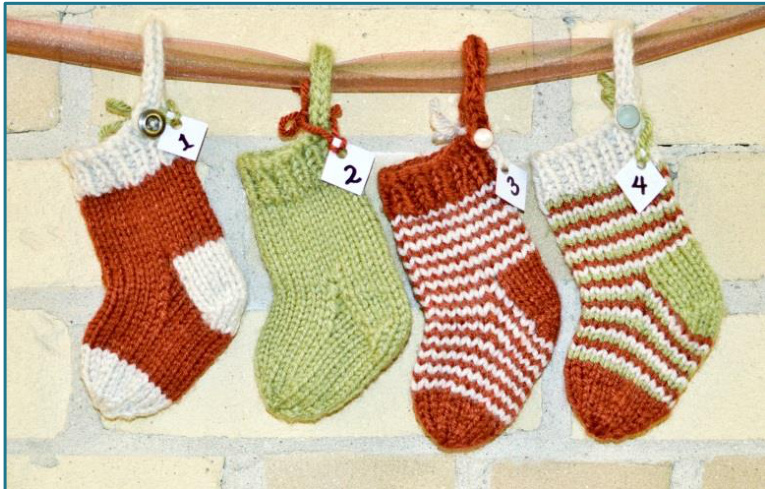
Instructions: Colourblock Stocking
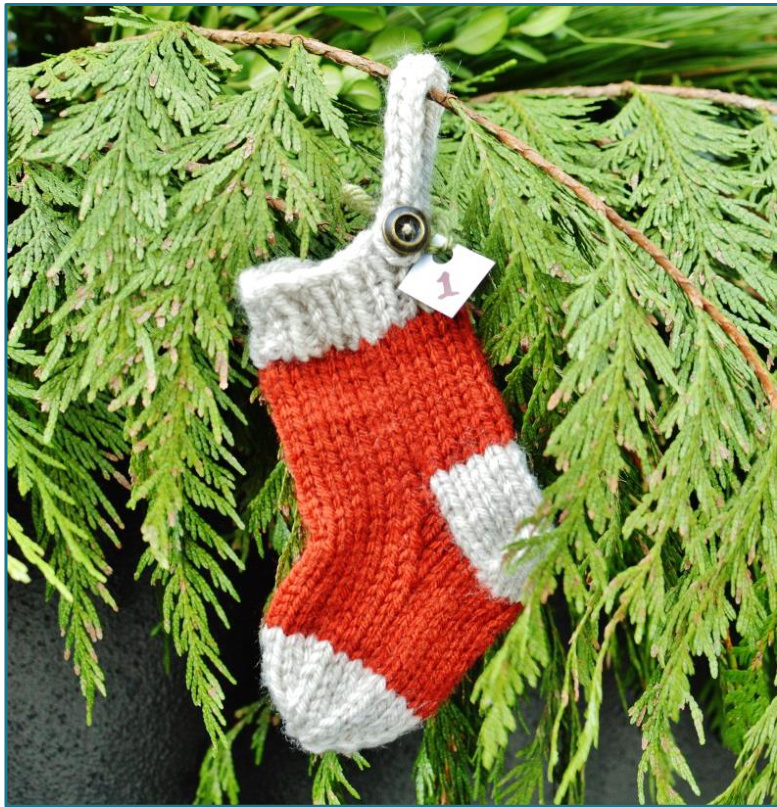
Work Setup and Cuff using Instructions for All Stockings (page 3), using CC1 for the cuff. Drop and cut CC1, leaving an 8" tail. Prepare to work with CC2.
Leg:
Using CC2, knit 13 rounds, but on last round stop 6 sts before end of round. Drop CC2, do not cut. Prepare to begin working with CC1.
Heel Flap:
The heel flap is worked flat over the next 12 sts, so rearrange these sts onto your left needle if needed. Ignore the start marker while working the heel, but leave it in place, slipping it when you come to it. Row 1: Using CC1: k12, turn Row 2: sl1 wyf, p11, turn Row 3: sl1 wyb, k11, turn Repeat rows 2 and 3 three more times, until flap is 9 rows of CC1, ending after a knit row.
Heel Turn:
Row 1: p7, p2tog, p1, turn (last 2 sts left unworked) Row 2: sl1 wyb, k3, ssk, k1, turn (last 2 sts left unworked) Row 3: sl1 wyf, p4, p2tog (across gap), pl, turn Row 4: k6, ssk (across gap), k1, do not turn (8 sts)
Gusset and Foot:
Pick up sts for gusset and resume working in the round: Drop and cut CC1, leaving an 8" tail. For Magic Loop, sl 8 heel sts from the right needle to the left needle, or on DPNs pass the needle with heel sts to the left hand. Rotate work a quarter-turn counter-clockwise to reach CC2. Using CC2, pick up and knit 5 sts along edge of heel flap. Switch to a new DPN or form a Magic Loop, then k8 heel sts, pick up and knit 5 sts along other edge of heel flap, k17, stopping 4 sts before start marker. (30 sts) Redistribute sts, keeping 8 heel sts on left needle, with start marker between the 4th and 5th sts. For Magic Loop: slide 7 more sts from the cable onto left side of heel needle until there are 15 sts on this needle, plus 15 sts on the other side of the cable loops. For 4 DPNs redistribute as: 8 heel sts / 11 sts / 11 sts. For 5 DPNs: 8 sts / 7 sts / 8 sts / 7 sts. Knit 4 sts onto working needle to reach start marker Round 1: k8, k2tog, k10, ssk, k8 (28 sts) Round 2: knit Round 3: k7, k2tog, k10, ssk, k7 (26 sts) Round 4: knit Round 5: k6, k2tog, k10, ssk, k6 (24 sts) Knit 7 more rounds until 12 rounds (including the pickup round) have been worked counting from side of heel flap on the left side of the heel (with sock upside down). Drop and cut CC2, leaving an 8" tail. Use only CC1 for the rest of the stocking. Knit 2 rounds. Return to Instructions for All Stockings on page 3 for Toe and Finishing.
Holiday Countdown Stockings
Instructions: Double Helix Stripe Stocking
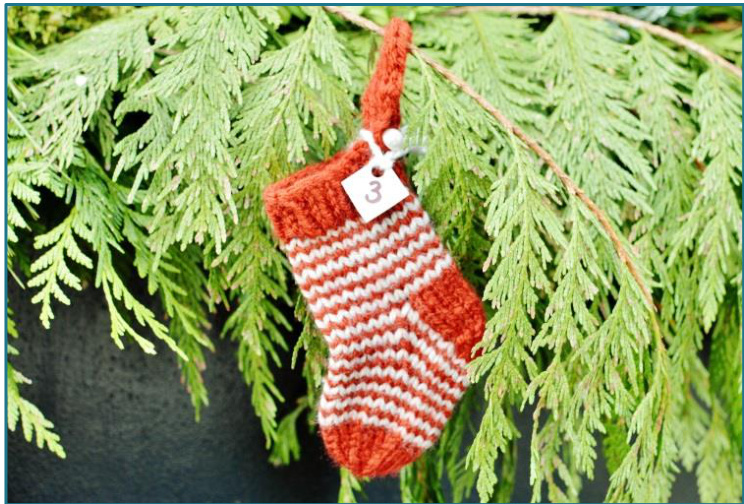
Work Setup and Cuff using Instructions for All Stockings (page 3), using CC1 for the cuff. Drop but do not cut CC1. Prepare to work with CC2.
Leg:
Each time you reach the start marker, drop the working yarn to the right and pick up the next yarn from below without twisting the strands. Round 1: using CC2: k24 Round 2: using CC1, k24 Repeat rounds 1 and 2 five more times, until there are 12 rounds/stripes from cuff. Work round 1 with CC2 one more time, but stop 6 sts before end of round. Drop CC2, do not cut.
Heel Flap:
The heel flap is worked flat over the next 12 sts, so rearrange these sts onto your left needle if needed. Ignore the start marker while working the heel, but leave it in place, slipping it when you come to it. Row 1: sl 6 sts purlwise from left needle to right needle to reach CC1 working yarn at end of round. Using CC1: k6, turn Row 2: sl1, p11, turn Row 3: sl1, k11, turn Repeat rows 2 and 3 three more times, until flap is 9 rows of CC1, ending after a knit row.
Heel Turn:
Row 1: p7, p2tog, p1, turn (last 2 sts left unworked) Row 2: sl1 wyb, k3, ssk, k1, turn (last 2 sts left unworked) Row 3: sl1 wyf, p4, p2tog (across gap), p1, turn Row 4: k6, ssk (across gap), k1, do not turn (8 sts)
Gusset and Foot:
Pick up sts for gusset and resume working in the round: Drop CC1. For Magic Loop, sl 8 heel sts from right needle to left needle, or on DPNs pass needle with heel sts to the left hand. Rotate work a quarter-turn counter-clockwise to reach CC2. Using CC2, pick up and knit 5 sts along edge of heel flap toward heel sts, k4 to start marker.
Drop CC2, sl 4 remaining heel sts from left to right needle. Using CC1 pick up and knit 5 sts along other edge of heel flap, k17, stopping 4 sts before start marker. (30 sts) Redistribute sts, keeping 8 heel sts on left needle, with start marker between the 4th and 5th sts. For Magic Loop: slide 7 more sts from the cable onto left side of heel needle until there are 15 sts on this needle, plus 15 sts on the other side of the cable loops. For 4 DPNs redistribute as: 8 heel sts / 11 sts / 11 sts. For 5 DPNs: 8 sts / 7 sts / 8 sts / 7 sts. Using CC1, k4 sts to reach start marker, sl marker, drop CC1 to the right and pick up CC2 from below. Continue to switch yarns at each marker to maintain helix striping for the rest of the foot, as follows: Round 1: Using CC2, k8, k2tog, k10, ssk, k8 (28 sts) Round 2: Using CC1, knit Round 3: Using CC2, k7, k2tog, k10, ssk, k7 (26 sts) Round 4: Using CC1, knit Round 5: Using CC2, k6, k2tog, k10, ssk, k6 (24 sts) Round 6: Using CC1, knit Round 7: Using CC2, knit Repeat rounds 6 and 7 twice more until 12 rounds (including pick-up round) have been worked counting from side of heel flap on left side of heel (with sock upside down), ending round 7. Drop and cut CC2, leaving an 8" tail. Use only CC1 for the rest of the stocking. Knit 2 rounds. Return to Instructions for All Stockings on page 3 for Toe and Finishing.
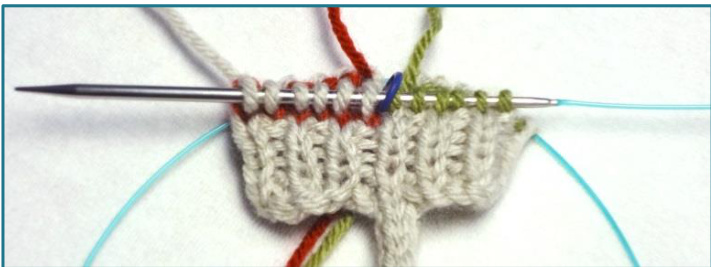
Instructions: Triple Helix Stripe Stocking
Work Setup and Cuff using Instructions for All Stockings (page 3), using CC1 for the cuff. Drop but do not cut CC1. Prepare to work with CC2 and CC3. Note: The stripe sequence will begin CC2 (shown in Rust), CC1 (shown in Linen), CC3 (shown in Dusty Green) and continue in a sequence that appears opposite to the order in which the yarns are first used. The heel will be worked in CC3 and the toe in CC2.
Leg:
Round 1: using CC2: k12; drop CC2, place second marker; using CC3: k12
Continue to switch yarns every 12 sts at each marker as follows. Drop the working yarn to the right and pick up the next yarn from below without twisting the strands. Round 2: using CC1: k12; using CC2: k12 Round 3: using CC3: k12; using CC1: k12 Round 4: using CC2: k12; using CC3: k12 Repeat rounds 2-4 three more times, until there are 13 rounds from cuff as counted on right side of start marker. Work round 2 once more, but stop 6 sts before end of round, ending with CC2. Drop CC2, do not cut.
Heel Flap:
The heel flap and turn are worked flat over the next 12 sts, so rearrange these sts onto your left needle if needed. Ignore the start marker while working the heel, but leave it in place, slipping it when you come to it. Row 1: sl 6 sts purlwise from left needle to right needle to reach CC3 working yarn at end of round. Using CC3, k6, turn Row 2: sl1 wyf, p11, turn Row 3: sl1 wyb, k11, turn Repeat rows 2 and 3 three more times, until flap is 9 rows of CC3, ending after a knit row.
Heel Turn:
Row 1: p7, p2tog, p1, turn (last 2 sts left unworked) Row 2: sl1 wyb, k3, ssk, k1, turn (last 2 sts left
unworked)
Row 3: sl1 wyf, p4, p2tog (across gap), p1, turn Row 4: k6, ssk (across gap), k1, do not turn (8 sts)
Gusset and Foot:
Pick up sts for gusset and resume working in the round: Drop CC3. For Magic Loop, sl 8 heel sts from right needle to left needle, or on DPNs pass needle with heel sts to the left hand. Rotate work a quarter-turn counter-clockwise to reach CC2. Using CC2, pick up and knit 5 sts along edge of heel flap toward heel sts, k4 to start marker. Drop CC2, sl 4 remaining heel sts from left to right needle. Using CC3 pick up and knit 5 sts along other edge of heel flap, k6 to second marker, sl marker, drop CC2, pick up CC1, k11 stopping 4 sts before start marker. (30 sts) Redistribute sts, keeping 8 heel sts on left needle, with start marker between the 4th and 5th sts. For Magic Loop: slide 7 more sts from the cable onto left side of heel needle until there are 15 sts on this needle, plus 15 sts on the other side of the cable loops. For 4 DPNs redistribute as: 8 heel sts / 11 sts / 11 sts. For 5 DPNs: 8 sts / 7 sts / 8 sts / 7 sts. Using CC1, k4 sts to reach start marker, sl marker, drop CC1 to the right and pick up CC2 from below. Continue to switch yarns at each marker to maintain helix striping for the rest of the foot as follows: Round 1: using CC2: k8, k2tog, k5; using CC3: k5, ssk, k8 (28 sts) Round 2: using CC1: k14; using CC2: k14 Round 3: using CC3: k7, k2tog, k5; using CC1: k5, ssk, k7 (26 sts) Round 4: using CC2: k13; using CC3: k13 Round 5: using CC1, k6, k2tog, k5; using CC2: k5, ssk, k6 (24 sts) Round 6: using CC3, k12; using CC1, k12 Round 7: using CC2, k12; using CC3, k12 Round 8: using CC1, k12; using CC2, k12 Repeat rounds 6-8 once more until 12 rounds (including pick-up round) have been worked counting from side of heel flap on the left side of heel (with sock upside down). Cut CC3 and CC1, leaving 8" tails. Use only CC2 for the rest of the stocking. Knit 2 rounds. Return to Instructions for All Stockings on page 3 for Toe and Finishing.


