Softie Hat

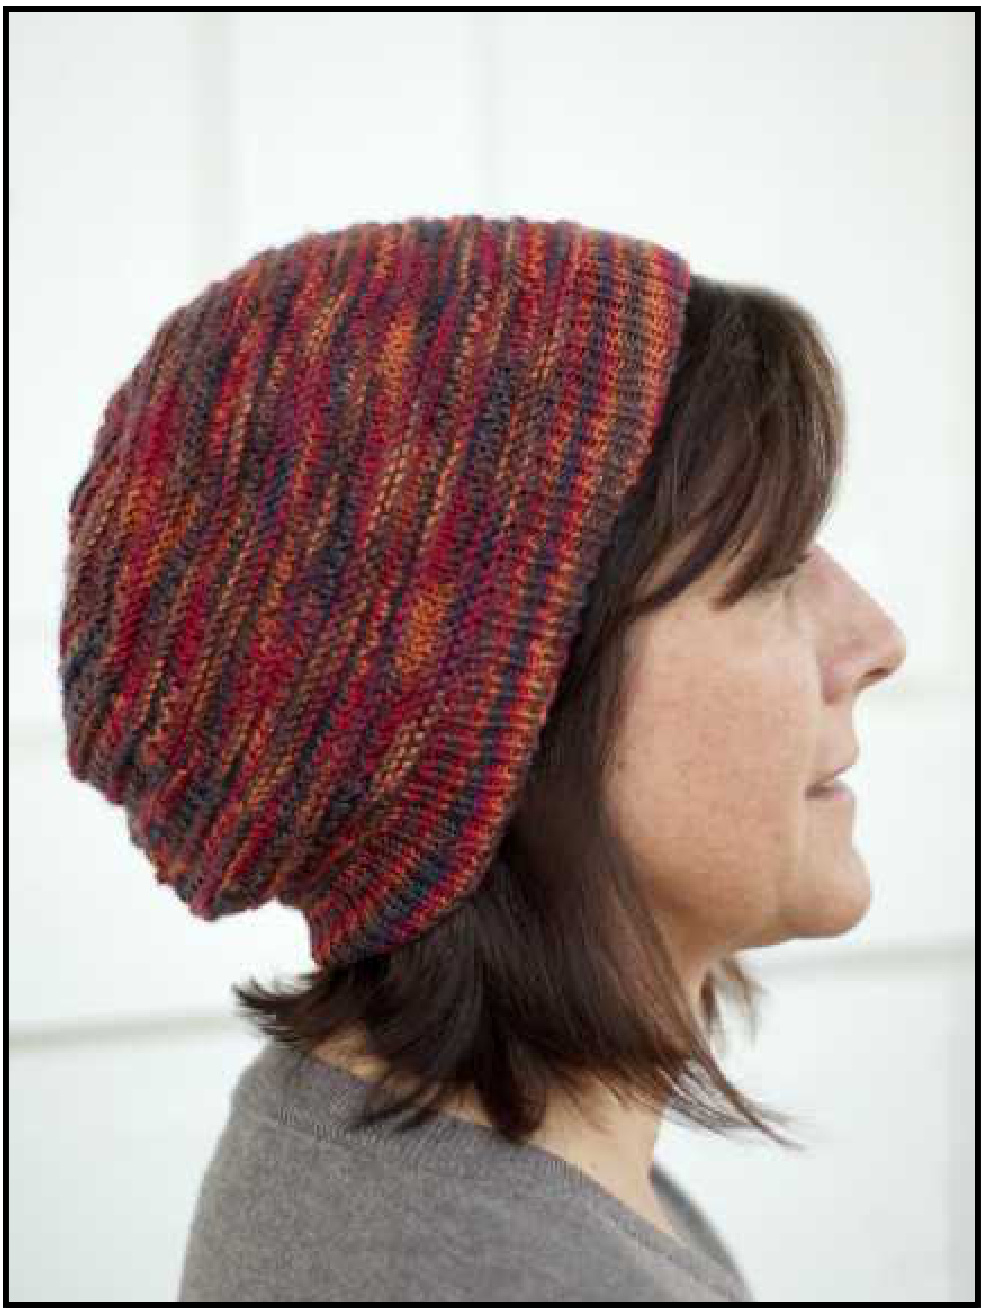
A Handknit Lightweight Fine Gauge Hat for Women Designed by Wanda HayesEichler I wanted a lightweight knit hat, soft and slouchy, kind of a beret, but not quite. It would hug my ears and not be the kind of knitwear that would destroy a hairstyle. Softie Hat is the result. It is stretchy, but the ribbing hugs the ears. It drapes and is loose, yet warm. Softie Hat pulls down over the forehead for those really windy and cold times. Or, it can be worn casually tucked back for a stylish knitted look. Tuck this hat into your rollabout for your next weekend jaunt. Knit one for spring and fall cool days. Find a yarn that matches a favorite jacket or coat, or knit one in team colors. Softie Hat is fun to knit, practical and stylish, and sure to bring the comment that we knitters love to hear, “"Can you knit me a hat just like yours?"
Directions
Cast on 140 stitches on 2.75 mm 16 inch circular needle, using cable cast on. Being careful not to twist the stitches, join and rib in k1, p1 for 1 % inches. With this many stitches on a smaller gauge needle, beware of the “cursed twist." If you don't know what that twist is, you are a good knitter (or your day iscoming!) Increase round \*K11, m1,\* 12 times, ending k8. There will be 152 stitches. Mark first stitch of round using split ring marker.
Using a US #4 needle, begin double ridge stitch pattern.
Round 1: Purl every stitch - first garter ridge. Round 2: Knit. Round 3: Purl - second ridge. Round 4: Knit. Round 5: Knit. Round 6: \*K1, p1.\* Round 7: Knit. Round 8: Knit. Round 9: Purl - single center ridge. Round 10: Knit. Round 11: Knit. Round 12: \*K1, p1.\* Round 13: Knit. Round 14: Knit. Repeat these 14 rounds 2 more times. Then follow the pattern as established until you have completed round 10.
Begin decrease rounds for crown of hat.
You will keep to the double ridge stitch pattern as you decrease. There are 18 decrease rounds and you will decrease on knit rounds only. Notice that you will not decrease on a kl, pl round or a purl round. Use the decrease chart on page 3 as a guide to decreasing. Change to double pointed needles whenstitchesstretchout onthecircularneedle. First decrease round (round 11): \*K17, k2tog,\* - 144 stitches. Second decrease round (round 13): \*K16, k2tog,\* - 136 stitches. Third decrease round (round 2): \*K15, k2tog,\* - 128 stitches. Fourth decrease round (round 4): \*K14, k2tog,\* - 120 stitches. Continue decreasing on knit rounds only until there are 48 stitches. Then purl every other round and decrease on knit rounds. There will be 8 stitches left.
Finish the hat.
Break yarn, leaving 8-10 inch length. Using a Chibi jumbo needle, thread through the remaining 8 stitches twice. Pull up and weave the end of the yarn in on the wrong side of the knitting. Weave in cast on end along ribbing.
Softie Hat
Yarn 1 - 100 gram (3.5 to 4 oz) skein, approx. 400-420 yards of fingering or sock weight yarn Gauge 7 stitches per inch on US#4 needle Size adult woman, medium
Needles
1 - 16" circular, 2.75 mm for ribbing 1 - 16" circular, US #4 for hat body 1 - set of US#4 double pointed needles for crown decreasing
Notions
split ring stitch marker Chibi jumbo darning needle Eucalan woolwash
Make One Increase
The make one (m1) increase is a lifted increase. With the right needle, lift the bar between the stitches from front to back. Place this bar on the left needle. Knit into the back of the loop - one stitch increased.
Split Ring Marker
Place a split ring marker through both legs of the first stitch of the round. Move the marker up every 3-5 rows so that it follows the knitting. The marker helps determine which stitch is the first stitch ofa round.
Decrease Chart for Crown
Choosing Yarn
| Decrease round 1st dec - K17, k2tog | Pattern round 11 | Stitches left 144 | |
| 2nd dec - K16, k2tog | 13 | 136 | |
| 3rd dec - K15, k2tog | 2 | 128 | |
| 4th dec - K14, k2tog | 4 | 120 | |
| 5th dec - K13, k2tog | 7 | 112 | |
| 6th dec - K12, k2tog | 10 | 104 | |
| 13 | |||
| 7th dec - K11, k2tog | 2 | 96 | |
| 8th dec - K10, k2tog | 88 | ||
| 9th dec - K9, k2tog | 4 | 80 | |
| 10th dec - K8, k2tog | 7 | 72 | |
| 11th dec - K7, k2tog | 10 | 64 | |
| 12th dec - K6, k2tog | 13 | 56 | |
| 13th dec - K5, k2tog | 2 | 48 | |
After 13th decrease, discontinue double ridge pattern stitch. Begin purl every other row. Sock yarns knit up into a compact, lightweight hat that is easy to slip into a pocket or backpack. Having lots of stitches on a fairly small needle means that there will be pleasurable knitting time. This is a project to tuck into a day bag and carry along so you can savor some quiet moments of knitting in a busy day. You will use almost all of an entire ball of yarn in this design. Splurge on beautiful fiber and exquisite color. Think soft and classy. You will probably want to knit more than one Softie Hat, so be on the lookout for that next great skein of yarn, even as you embark on your first time through the pattern.
| 14th dec - K4, k2tog |
| 15th dec -K3, k2tog |
| 16th dec - K2, k2tog |
| 17th dec -K1, k2tog |
| 18th dec - K2tog |
| 40 |
| 32 |
| 24 |
| 16 |
| 8 |
Finishing Hint
I wash my just finished knits in Eucalan wool wash. The first washing evens the stitches and it scents and softens the yarn. No Eucalan? Use baby shampoo to soften and scent.
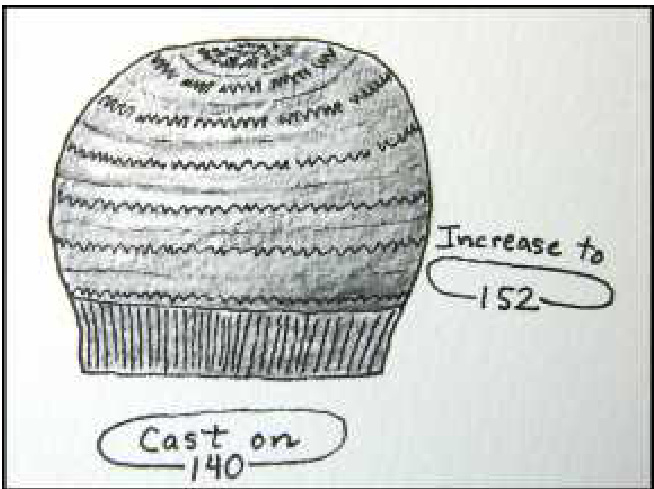
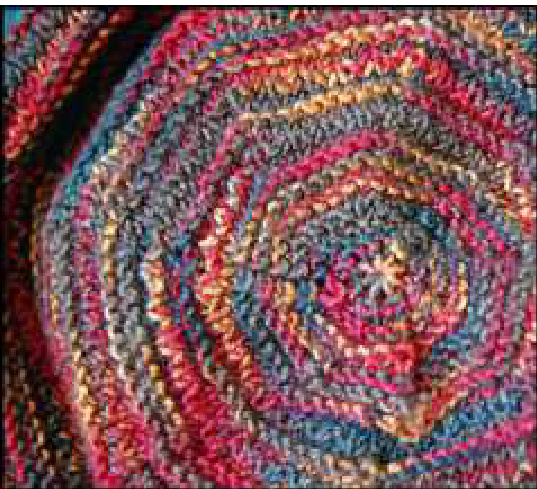
Copyright 2013 by Graywood Designs. All rights reserved.Pattern for personal use only. www.graywooddesigns.com. GWK10 Softie Hat PDF August 2013 Page 3 of 4 Left drawing: The body of the hat is larger than the ribbed band, duetoanincreased numberofstitches and using a larger size needle for the body. Right photo: Shaping lines form as the hat is decreasedtoward the final eight stitches in the center top.
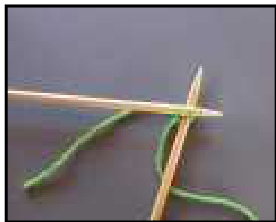
Cable Cast On Directions
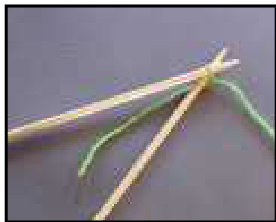
1. Make a slip knot and tie it on to the left needle.
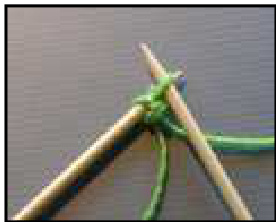
Cable cast on is easy to learn since it is based on the motion of the knit stitch. The cable cast on forms a cabled or braided edge along the base of the knitting. As you learn to work this cast on evenly and loosely you will find that you will use this method often.
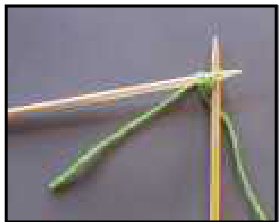
CREDITS Design, model knitting, layout, writing by 2. Insert right needle as if to knit a stitch, pass yarn around right needle and pull the loop through. Wanda Hayes Eichler Editing, proofreading, test knitting by Kathy Kent, Lori Limberger, Barb Main, Gloria Swartzendruber
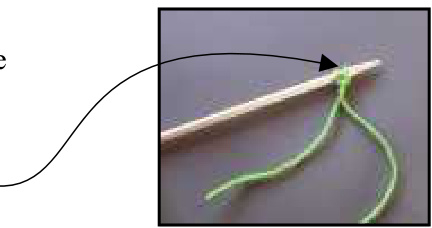
Photography by Kathy Kent, Wanda Eichler Modeling by Barb Main Other knitting designs by Wanda Eichler This pattern is available as a PDF download from ravelry.com. 3. Transfer the loop from the right needle to the left needle. Now there are two stitches on the left needle.
++ Knitcushion ++ Tessa's Hats ++ Sensibility Shawl ++ Zelda Hat ++ Not Rocket Science Socks ++ Element Wrap ++ Magic Ball Christmas Stocking ++ Topknot Hat
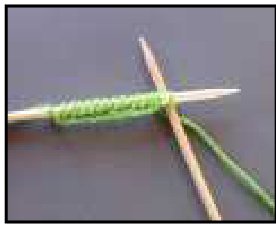
4. Now insert right needle BETWEEN the two stitches, pass yarn around right needle and pull the loop through.
Hint
Work this cast on loosely for best results. 5. Transfer the loop from the right needle to the left, as before. Now there are three stitches on the left needle.
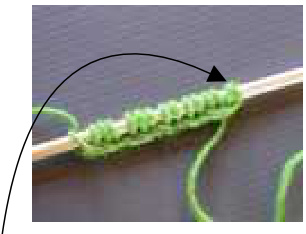
6. Continue casting on by working BETWEEN stitches. A cable or braided edge will form along the base of the cast on row. Keep first stitch loose, even though it will tighten and cross in front of second stitch.

Copyright 2013 by Graywood Designs. All rights reserved. Pattern for personal use only. www.graywooddesigns.com.GWK10 SoftieHatPDF August 2013Page4 of 4