BLUE BOX BEANIE
Design by Cuddlelump Crafts www.cuddlelumpcrafts.tumblr.com www.facebook.com/cuddlelumpcrafts cuddlelump@gmail.com E-mail me with any questions about this pattern, I'll do my best to respond ASAP!
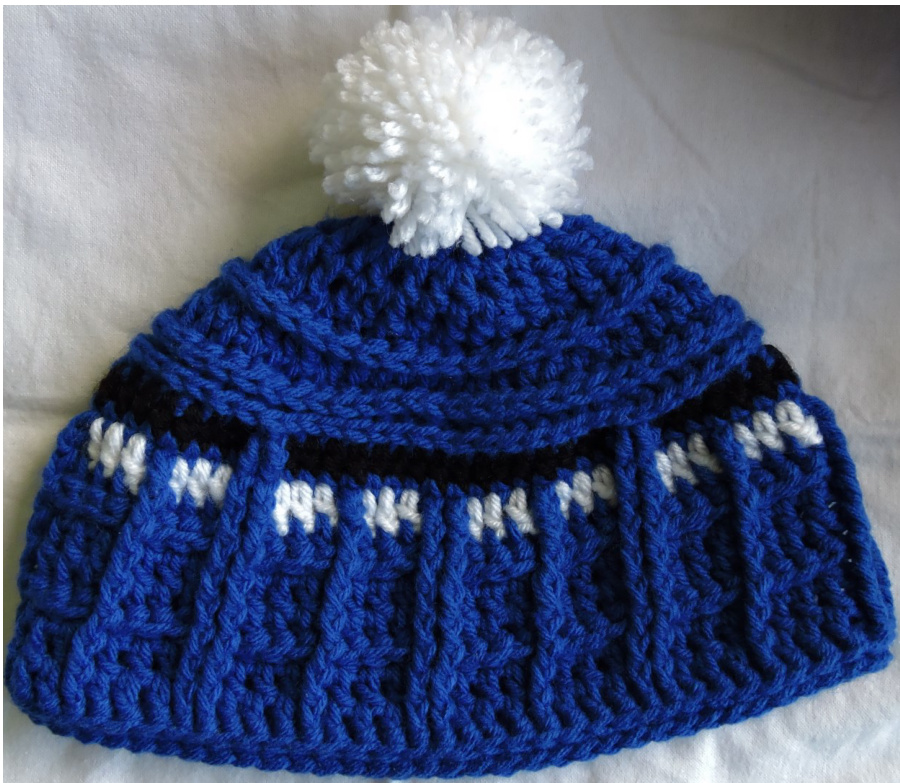
This is an adult-sized, TARDIS-inspired beanie and should fit most people, although it may be a snug fit for people who have a head circumference larger than 24 inches. Special thanks to LemonBomb, AllyRaisin, and Harlequinbunny from /r/crochet for testing this out and giving feedback at the eleventh hour! Doctor Who is a cool show, but it is not my property. This pattern is however, and these are the rules: . You can sell the hats you make from this pattern, just make sure to give credit and/or link to Cuddlelump Crafts! · Do not sell this pattern. · Do not reproduce this pattern for commercial use.
MATERIALS
Bernat Super Saver in Royal Blue Vanna's Choice in Black and White J hook (6.00 mm) or to meet gauge indicated. Feel free to use other brands of worsted weight yarn, but be aware that it may change gauge.
GAUGE
18 stitches = 10.5 cm (= 4.25 in) Round 5 = 10.5 cm (= 4.25 in)
nOTES
Start each round with a ch 2 unless indicated. K5, [M1R, K1] \* 3 Join to your first dc (not the starting chain) at Row 57 (MC) - [K1, M1L] \* 3, K5, SL2WYIB, [K4, SL2WYIB] \* until 8 stitches remain,
STITCHES USED (US TERMS)
Single crochet (sc) Double crochet (dc) Front/Back Post Single crochet (fpsc/bpsc) Front/Back post Double crochet (fpdc/bpdc)
PATTERI
Starting with the blue yarn, make a magic circle and ch 2. Rl:8 dc in circle. Pull yarn tail to close hole. Join. (8 dc) R2: 2 dc in every st. (16 dc) R3:\*2 dc in next st, I dc in next st. Repeat from \* to end of round. (24 dc) R4:\*I dc in each of next 2 sts,2 dc in next st. Repeat from \* to end of round. (32 dc) R5:\*2 dc in next st, I dc in each of next 3 sts. Repeat from \* to end of round. (40 dc) R6: \*I bpdc in each of next 4 sts, 2 bpdc in next st. Repeat from \* to end of round. (48 bpdc) R7:\*2 dc in next st, I dc in each of next 5 sts. Repeat from \* to end of round. (56 dc) R8:\*I bpdc in each of next 6 sts,2 bpdc in next st. Repeat from \* to end of round. (64 bpdc) R9: Ch I, \*2 bpsc in next st, I bpsc in next 7 sts. Repeat from \* to end of round. (72 bpsc R10: Chl, 72 sc in the round. (72 sc)
THE BANNER AND WINDOWS
This part is kind of tricky, as the way I did color changes and carried contrasting yarn in this section is rather unconventional. The blue yarn is carried tapestry style, but the black and white yarns are carried Fair Isle. white: when working with blue the black and white varns willL be carried bebind the vork, Check out the tutorial at the
· (CC) - K3, P5, SL2WYIF, [P4, SL2WYIF] \* until 8 stitches remain, P5, K3
| R11 | fp hdc | hdc | ||||||||||||||||
| hdc hdc | hdc fp | hdc | hdc | hdc | hdc fp | hdc fp | hdc | hdc | hdc | hdc fp | hdc | hdc | hdc | fp hdc fp | ||||
| R12 | fp SC | SC | SC | SC | SC fp | SC | SC | SC | SC fp | SC fp | SC | SC | SC | SC fp | SC | SC | SC | SC fp |
| R13 | fp dc | dc | dc | dc | dc | dc | dc | dc | dc | dc | dc | dc | dc | dc | dc | dc | dc | dc |
RlI: I fphdc, \*switch to black. 16 hdc, switch to blue, fphdc. Repeat from \*. (72 sts) RI2: [(lfpsc, 3sc) x 2, fpdc] 8 times. (72 sts) RI3: [(I fpdc, switch to white.3 dc, switch to blue.) × 2,fpdc] 8 times. (72 sts) The remainder of the hat will be worked in blue, so the white and black yarns can be cut off here. RI4: [(fpdc, 3dc) x 2, fpdc] 8 times. (72 sts) RI5: [(fpdc, 3bpdc) x 2,fpdc] 8 times. (72 sts) RI6: [(fpdc, 3dc) x 2,fpdc] 8 times. (72 sts) RI7: Repeat row 15. RI8: Repeat row I6. R19: Ch I, 72 bpsc in the round. (72 bpsc) R20: Ch I,72 fpdc in the round. (72 fpdc) Fasten of weave in ends. Finish by adding a white pom-pom on top.
COLOR CHANGINGTUTORIAL
I have a rather unique way of changing colors for this hat. You aren't required to use this technique, but in my opinion it creates a very clean color change. For this tutorial I'll be using brighter colors for visibility. Pastel Mint = Royal Blue Cream = White Pink = Black
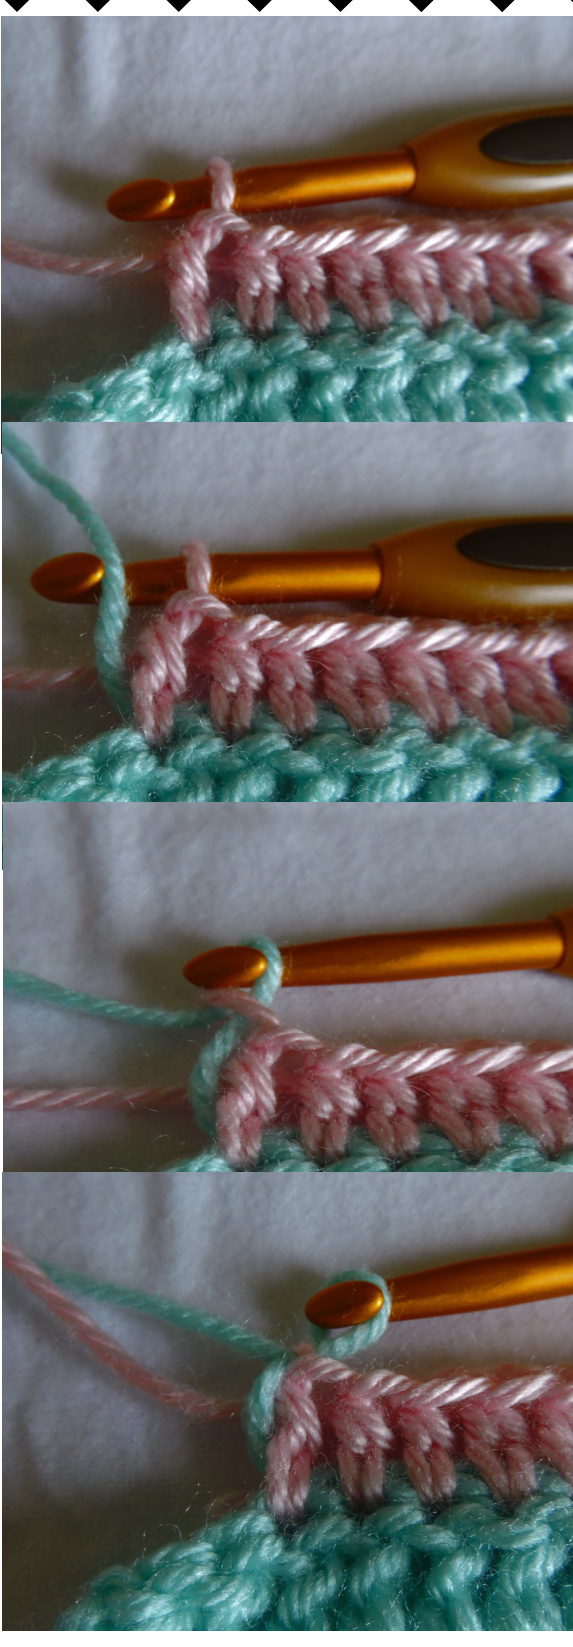
This set of four photos shows how I did color changes for RlI, or the “banner' section. For sake of simplicity, this tutorial is showing one section of the pattern worked flat. In the first picture, I have finished 16 hdc and am ready to switch into my main color (mint). With the main color, yarn over and pull through the loop. Now we're in a peculiar situation. By switching to the main color this way, we've appeared to add an extra chain. This problem can be solved by tightening the working yarn of the banner color (pink). Now with the change less visible, you can continue with finishing the remainder of the round.

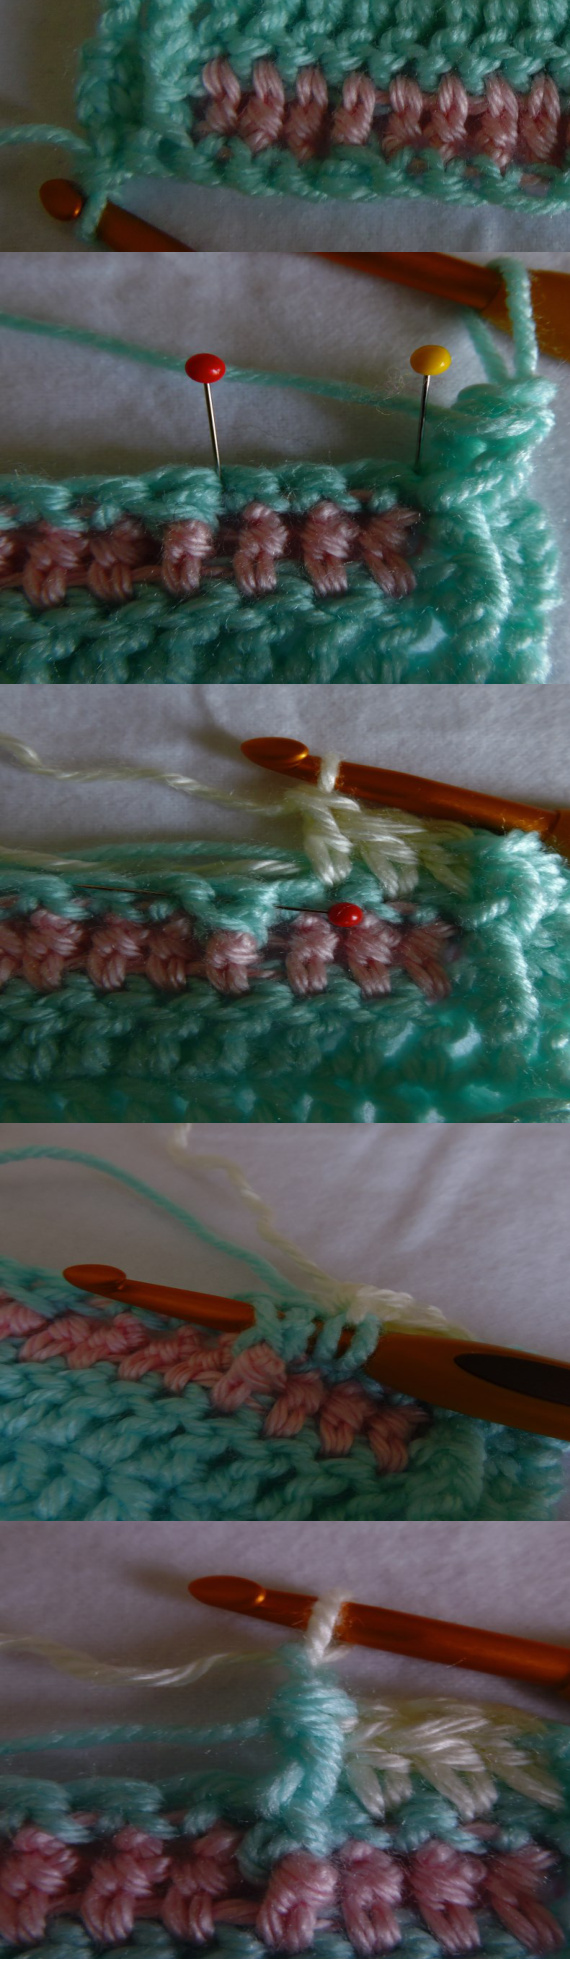
Here I've already completed R12 and am about to start RI3, the“window" section of the pattern.This is where carrying two colors different ways is required. After switching to the window color (cream), you will make a dc into the stitch directly next to the post stitch (indicated by the yellow pin). It may look like a tight squeeze, but it'll make sense with the next step. After the 3 dc, switch back into the main color and make a fpdc through the stitch indicated with the red pin. As you are working a fpdc into a fpsc, it does look a bit bulky and awkward. It does manage to work out, and then you switch back into your window color and complete the remainder of the round.
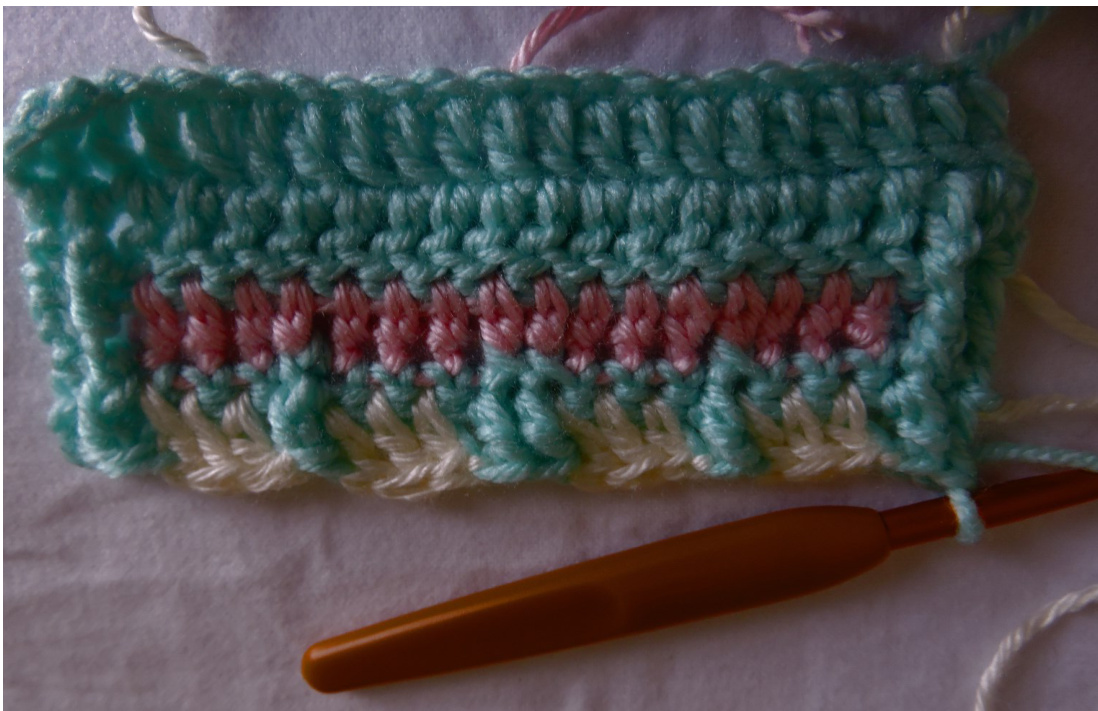
Here's what the completed rounds look like (work is upside down for easier viewing). The color changes are well hidden, but all the stitches seem to shift a bit to the side? Don't worry, working the next couple of rows will straighten that out!
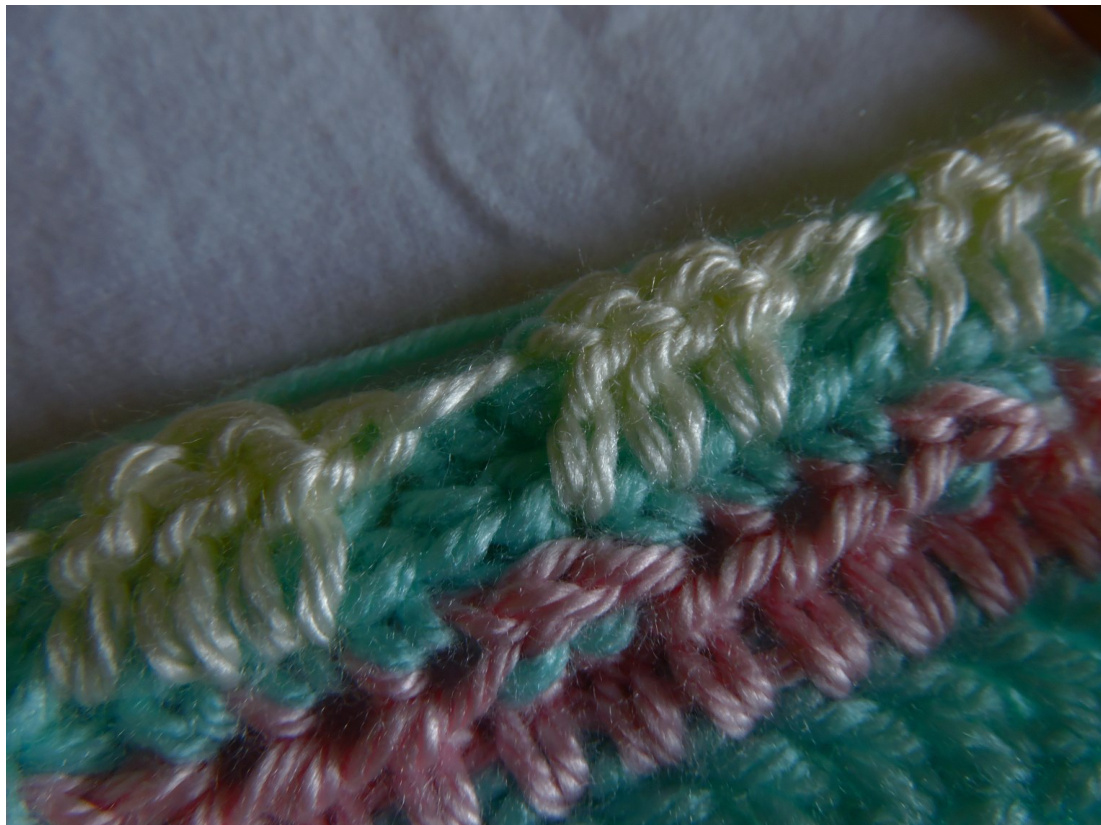
Here's a close up of the back to see how the colors are carried. See how the cream yarn is crocheted over mint and carried behind when mint is used. Just to clarify again, this way of changing colors is just a suggestion. You can use any technique you feel comfortable doing! I just added this if anyone was interested in how I changed colors for this project.


