Painted Stripes Shawlette
designed by Ann Wicker
Have you ever had the experience of picking up a ball of variegated yarn at your LYS or at a show and just fallen in love with the colors——- how they blend and merge into each other? Then be unable to think of what you would make with the yarn. But buy the ball anyway because you fell in love? Those kinds of ballslitter my stash! Since I loved them I wanted to do something with them. This little shawlette is the result of that desire. My design is more a method than a pattern. The actual shawlette is a beginner level pattern composed entirely in garter stitch (knit every stitch) with one increase at the beginning and the end of each row. That's it. The thing that makes the shawlette special is the color. I am going to describe to you the process I use to decide what colors to choose and how I combine them together. The rest is really up to what you would like to do. The shawlette can be made any size you like (although I will give you some general guidelines). You can use smaller needles for a more dense fabric or larger ones for a shawlette that is more open and lacy.It can have an edging or not. This shawlette is a great deal of fun to make. I always feel as though I am painting with the yarn. I hope you enjoy making this shawlette as much as I have.

Step One - Choose the Yarns
Start with a ball of variegated yarn. Pull out a length of yarn so you can see the total color repeat. Go to your stash and start matching yarn to the colors in the variegated ball. Different weights and textures are fine, solids and other variegateds are also. It is up to you. If you use yarns of similar weight and texture as your variegated ball, your shawlette will be different (marvelous but different) than one made with a wide variety of weights and textures. I generally like to use 5-7 different yarns.
Step Two - Choose the Needles
For an open lacy look choose a larger needle. For a more dense fabric choose a smaller needle. Ihave used anywhere from an 8 (5 mm) to an 11 (8mm). I knit using a fairly long circular needle used as straight needles (in other words I am NOT knitting in the round). By the last row of the shawlette you will have many stitches on the needles.
Step Three - Cast On
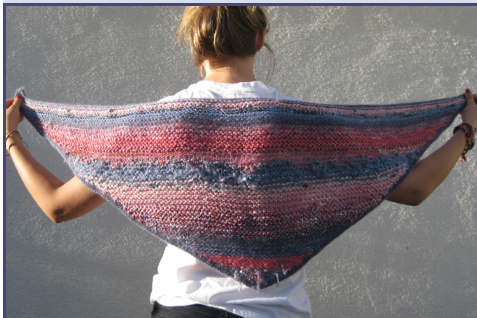
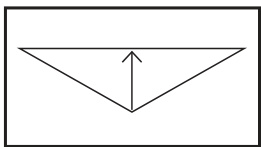
Choose one of your yarns Cast on 3 stitches. Row 1: Kinto the front and back of first st (inc), k 1, kinto the front and back of the last st (inc) - 5 sts. Row 2: Kinto the front and back offirst st (inc),kuntil the last st, kinto the front and back ofthe last st (inc) - 7 sts. Row 2 is your basic pattern row. Repeat that row until you have a shawlette of your desired size, then bind off. The basic shape of the shawlette is an elongated triangle. I usually stop when the shawlette measures 18"from the bottom tip to the neck edge.
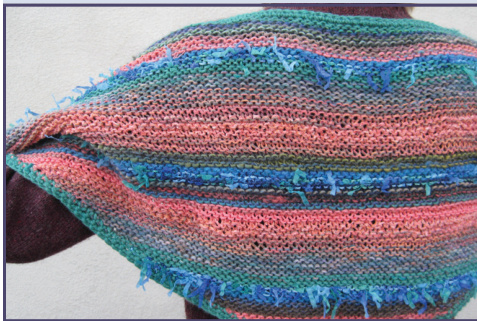
Change yarn every 3-5 rows. Knit more rows if you want thicker stripes of color or knit fewer rows for thinner stripes. I sometimes knit with 2 strands of yarn together (especially if the yarns are fairly thin) to create different variations of color. This is where you get to paint with your yarns.
Step Four - Finishing
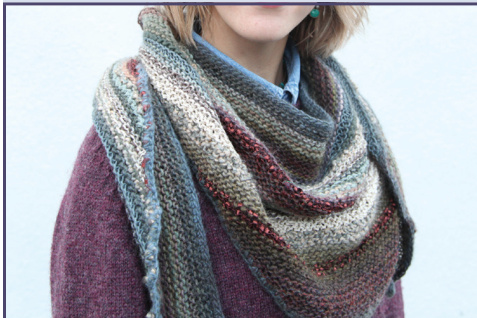
@2012 Freeform Fibers I usually pick one of the yarns and use it to make an edging of a couple of rows single crochet. Don't crochet? I'm sure a knitting edge would look great too. Why not be your own designer and do a more elaborate edge... maybe add beads. Go for it! Ialso block the shawlette when done to help even up the stitches and tame any wavyedges. Please make this pattern your own, let those creative juices flow. And remember there is no such thing as Knitting Police. If you like it. ..it's not wrong! Abbreviations inc= increase k=knit st(s) = stitch(es)


