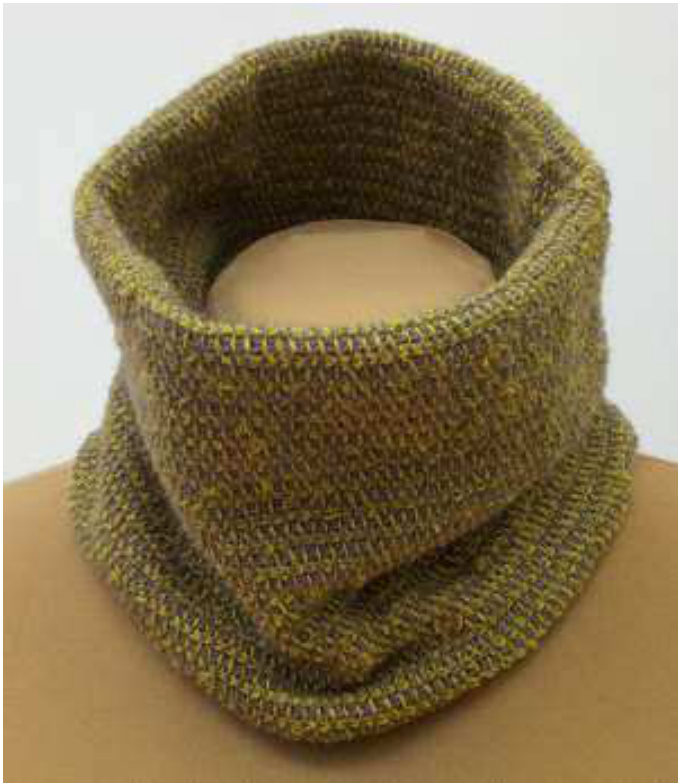
Bipolar
find me on Ravelry as stebo79 http://hobbyatelier.blogspot.com This pattern is called bipolar because of two reasons: first, it combines two yarns with different character. Shibui's "Linen" is a chainette yarn made from linen that gives some body to the fabric. "Cima" is a plied wool yarn that adds warmth. Second, the resulting item can be worn as a cowl or as a headband. Depending on how you arrange the fabric, it can look plain or like a turban. This item is worked in Tunisian simple stitch only, but in two alternating colors. The fabric is double-layered so there is no right or wrong side. The piece is worked flat and then seamed. I am introducing "Tunisian grafting" which is a way to seam two rows of Tunisian crochet together in a nearly invisible fashion.
size
circumference 52 cm (20.5 inch), height 17 cm (6.75 inch)
materials
Shibui Linen (100% linen, 50g = 225 meter), 1 skein in ,apple 103" Shibui Cima (70% alpaca, 30% merino, 50g = 300 meter), 1 skein in ,mineral 2022" - Tunisian hook with an attached cord, size 4mm (Us G) or as needed to obtain gauge - tapestry needle. - 1 locking stitch marker (optional)
gauge
27 stitches and 28 rows = 10 cm (4 inch) in two-color Tunisian simple stitch Stefanie Bold, 2013 please respect my copyright and use this pattern only non-commercially - thanks!
Abbreviations and explanations
TSS Tunisian simple stitch: insert hook from right to left (if you are left-handed: from left to right) into the next vertical bar on the front, yarn over and pull through. ES edge stitch - this stitch is worked at the left edge to make a neater edge. Work as follows: insert hook into the two strands at the edge, yarn over and pull through. Note: on this pattern you will be working with two yarns, changing colors after the forward pass. You need to do a little trick to get two strands on the edge to pick up later. Please see the tutorial attached for more details. A Tunisian row consists of a forward pass where the stitches are picked up, and a return pass where the stitches are "bound off". On the forward pass, do not work the first vertical bar because the loop left on the hook after a reverse pass resembles the loop picked up from that bar. The return pass on this two-colored item is worked a bit differently. Because you have an extra loop on your hook (see tutorial), you skip the "chain 1" you usually do. So the return pass is worked as follows: \*yarn over and pull through next two loops. Repeat from \* until 1 loop remains.
A note about chainette yarns
Chainette yarns are not plied but instead consist of connected loops, similar to a crochet chain. So if you cut this yarn, it will unravel. To prevent this, find the next loop that would unravel and enlarge it until the end slips free.
InstruCtions
Note: This item is worked in two-color Tunisian crochet. You will be changing colors after each forward pass. Do NoT cut any yarn! color A = "Linen", color B = "Cima" With color A, chain 141. Row 1: With color A and leaving out the first chain stitch, pick up 140 TSS from the back pump of the chain. Put the yarn over the hook from front to back (see also tutorial). If you like, you can put a lockable marker into the last two loops that are on the hook. This way you will know where to insert the hook on the next forward pass. Drop color A and pick up color B. Work return pass for two-color Tunisian crochet (see abbreviations). Row 2: With color B, 139 TsS, ES. If you used a marker, remove it now. Put the yarn over the hook from front to back. Drop color B and pick up color A. Work return pass for two-color Tunisian crochet. Row 3: With color A, 139 TsS, ES. If you used a marker, remove it now. Put the yarn over the hook from front to back. Drop color B and pick up color A. Work return pass for two-color Tunisian crochet. Repeat rows 2-3 until you are almost out of color A, ending with having worked row 2. Cut yarn leaving a 1,5 meter (5 feet) tail and pull on the loop until the end slips free. Thread the end into a tapestry needle and sew the cast-on to the last row using "Tunisian grafting" (see attached tutorial). Wave in this end. Cut color B leaving a 1,5 m (5 feet) tail. Thread this end into a tapestry needle and sew the sides together. Weave in all ends and hide them in the inside between the two layers.
Stefanie Bold, 2013
please respect my copyright and use this pattern only non-commercially - thanks!
Tunisian crochet: changing colors between forward pass and return pass
To get a nice left edge that looks like the edge on a one-color Tunisian crochet fabric, you need to do a little trick. At the end of the forward pass, bring your yarn over the needle to the back, similar to a yarn over (well, in this case like a "reverse" yarn over from front to back):
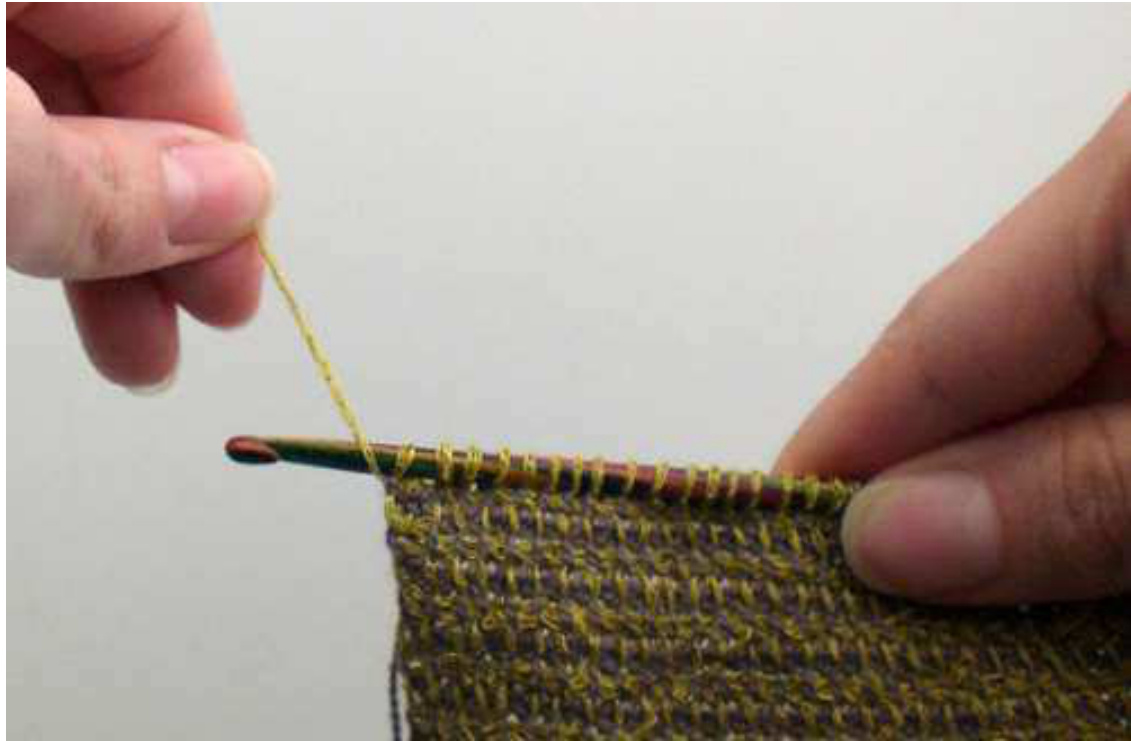
Now treat this yarn over and the first loop as one loop. This means, when starting the return pass, you skip the "chain 1" and immediately work "yarn over, pull through two loops" until 1 loop is left. And here is another little trick: if you find it difficult to work the edge stitch, you can put a lockable stitch marker into the yarn over and the first loop like this:

Now the stitch marker shows you where to insert the hook at the next forward pass.
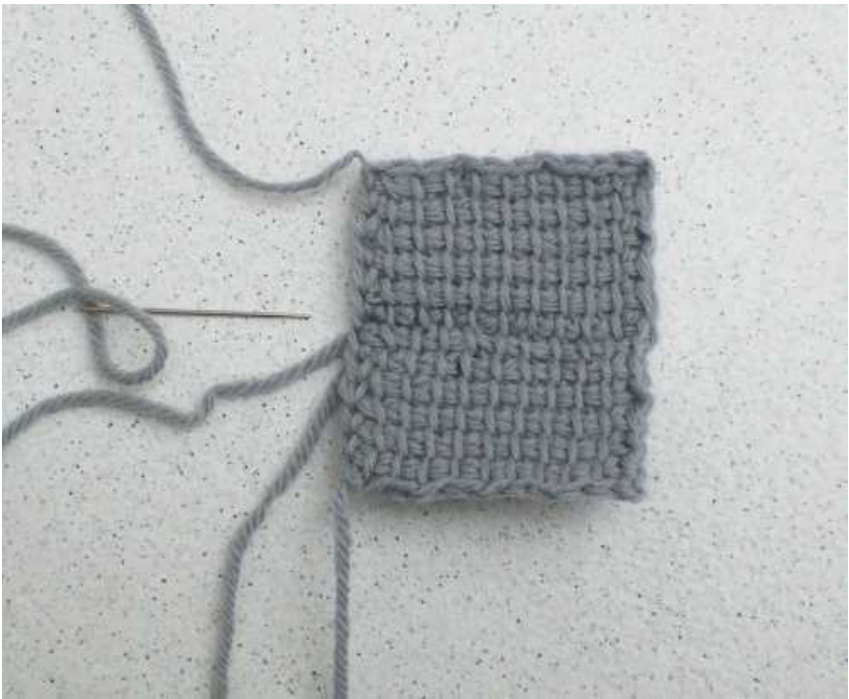
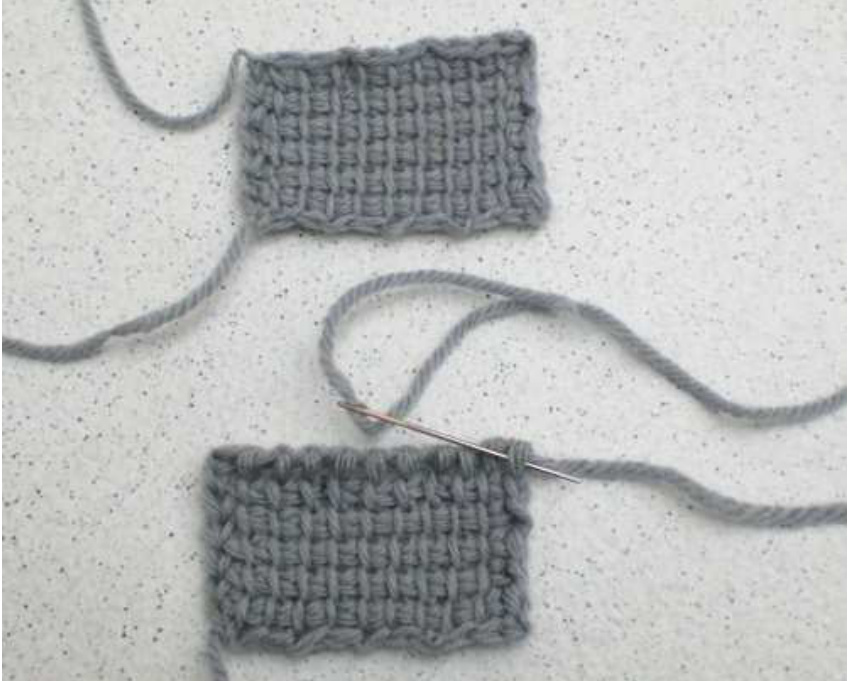
Tunisian Crochet: Grafting two rows
",Grafting" is a word coming from knitting, where you sew two rows together in such a fashion that there is no visible seam. In fact, you imitate how the stitches are built, so you effectively add one row. Here in Tunisian crochet, no extra row is added, but the seam is almost invisible and the yarn is moved through the vertical bars just like it would in a forward pass. Therefore, I call this "Tunisian Grafting". Here I show you how to graft two pieces made by using the simple stitch. Note how the two pieces are facing: both pieces are positioned just like you have worked them, so you are joining the last row of the lower piece to the first row of the upper piece. Also note, that on the lower piece no bind-off row has been worked. So you stop after having worked a return pass. Then you cut the yarn leaving a longer tail and pull on the loop that remained on the hook until the end slips free. Thread this end into a tapestry needle. Now you are ready to graft! he lower piece, insert the needle from left to right into the next free vertical bar and pull through.
n the upper piece, insert the needle from right to left into the next free vertical bar and pullthouf Step 3: On the lower piece, insert the needle from right to left into the vertical bar into which you inserted the needle in step 1. Tighten the yarn (but not too tight).
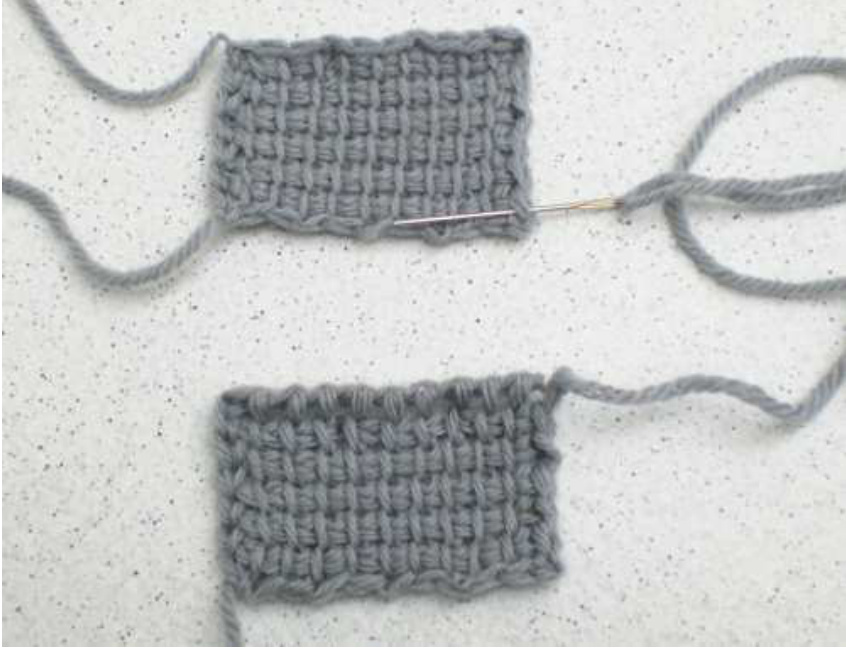
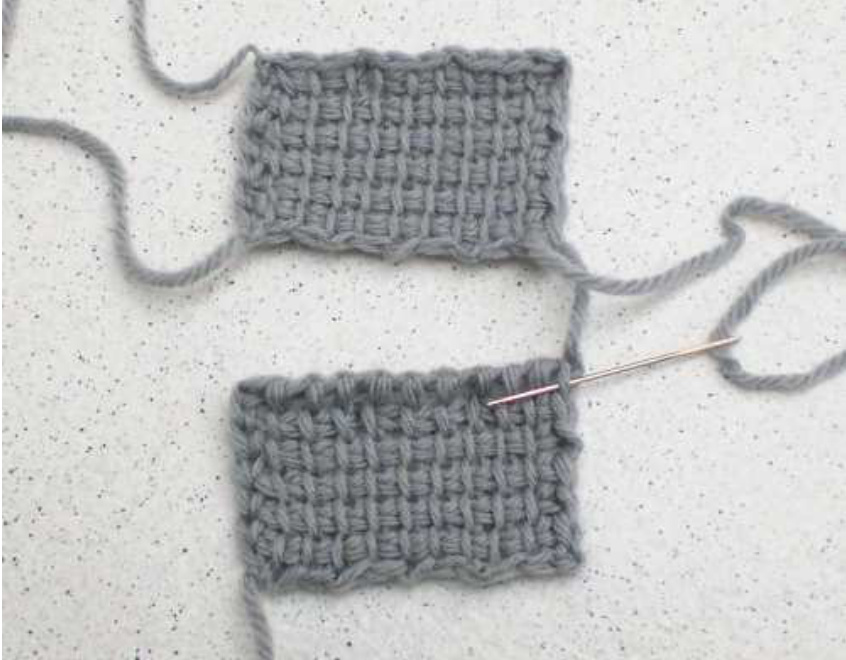
Repeat steps 1-3 until you reach the left edge and all vertical bars have been worked.