Adorabubble Baby Britches

After much trial and error, revisions and reworking, Adorabubble Baby Britches are here! Features include short rows are right at the bottom making for an incredibly perfect fit, Gansey gusset makes for freer movement for your acrobatic baby. I've included detailed directions on how I short row as well as links to videos on how to do it.
Before you begin knitting, select the hem style, leg style and waist style you would like.
A word about needles: Please use whatever method you feel most comfortable with be it double pointed needles, magic loop, or 2 circular needle method. The legs can be knit with whichever method you prefer while the body can be knit on one $\mathbf{16}^{\prime\prime}$ circular nee dle. A word about the gusset: The gusset is worked so that the back increases faster than the front. This makes a little more room in the bottom where it's needed most. Because of this, the right and left gusset mirror eachother, they are not worked the same. So make sure you place the increases when and where the pattern states!
Table of Contents
Page 3 .Special Stitches Page 4 ..Leg Hem Options Page 5-6 .Instructions for longies and capris, straight-legged Page 7 .Short Rows Instructions Page 9 .Waistband Options Page 10 ..Tapered leg Page 11 .Shorties. Page 12 ..Fringie Hem Page 13 .Adding Cables Page 14-15 ..Slouchy Hem Page 16-19. .Double Knit Britches Page 20 .Photo Gallery
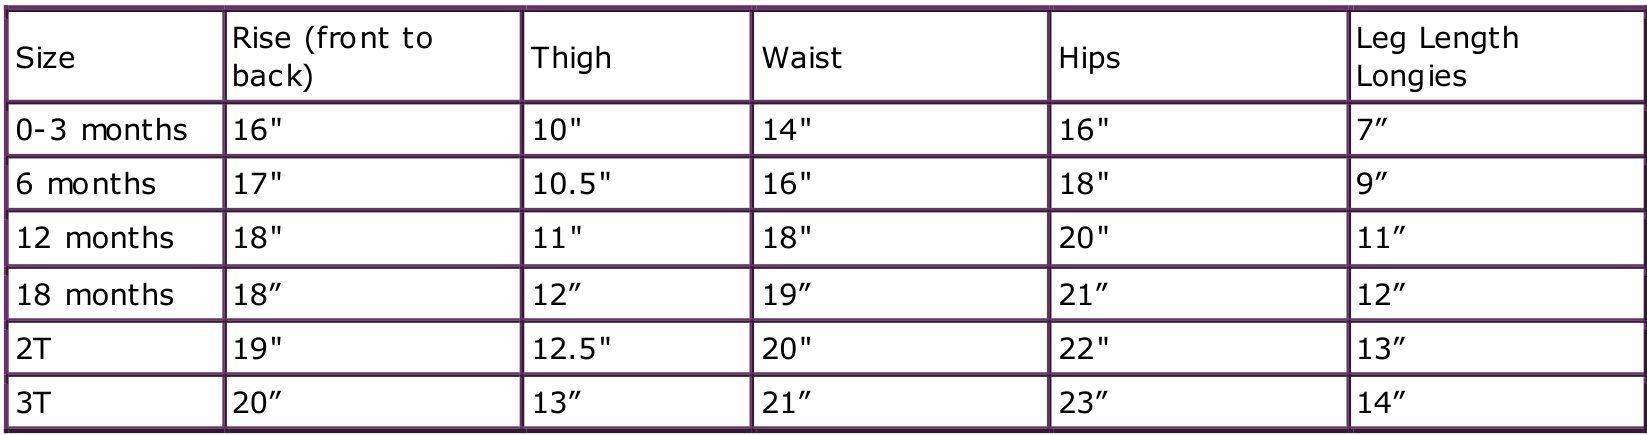
Finished Dime nsions:
Sizes: 0-3 months (6 months, 12 months, 18 months, 2T, 3T, custom)
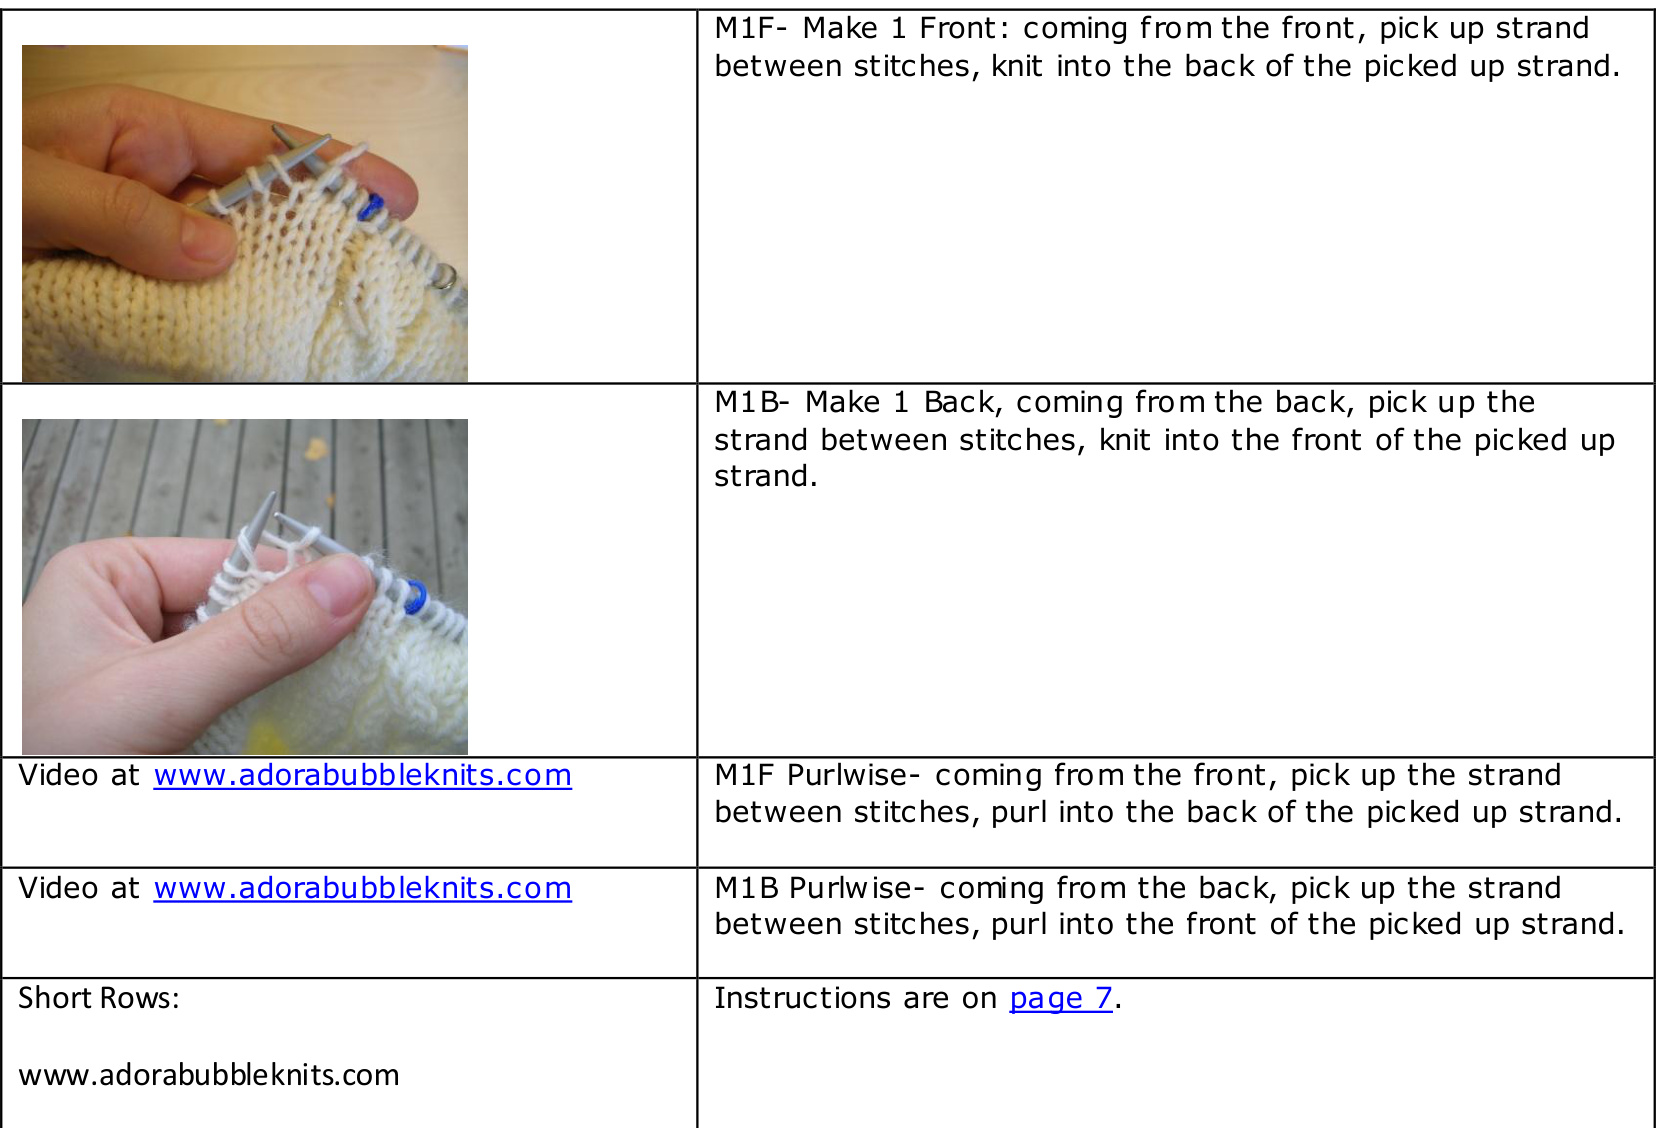
SpeciaI Stitc hes:
These can be seen on video at www.adorabubbleknits.com/tutorials.php
Leg hem options:
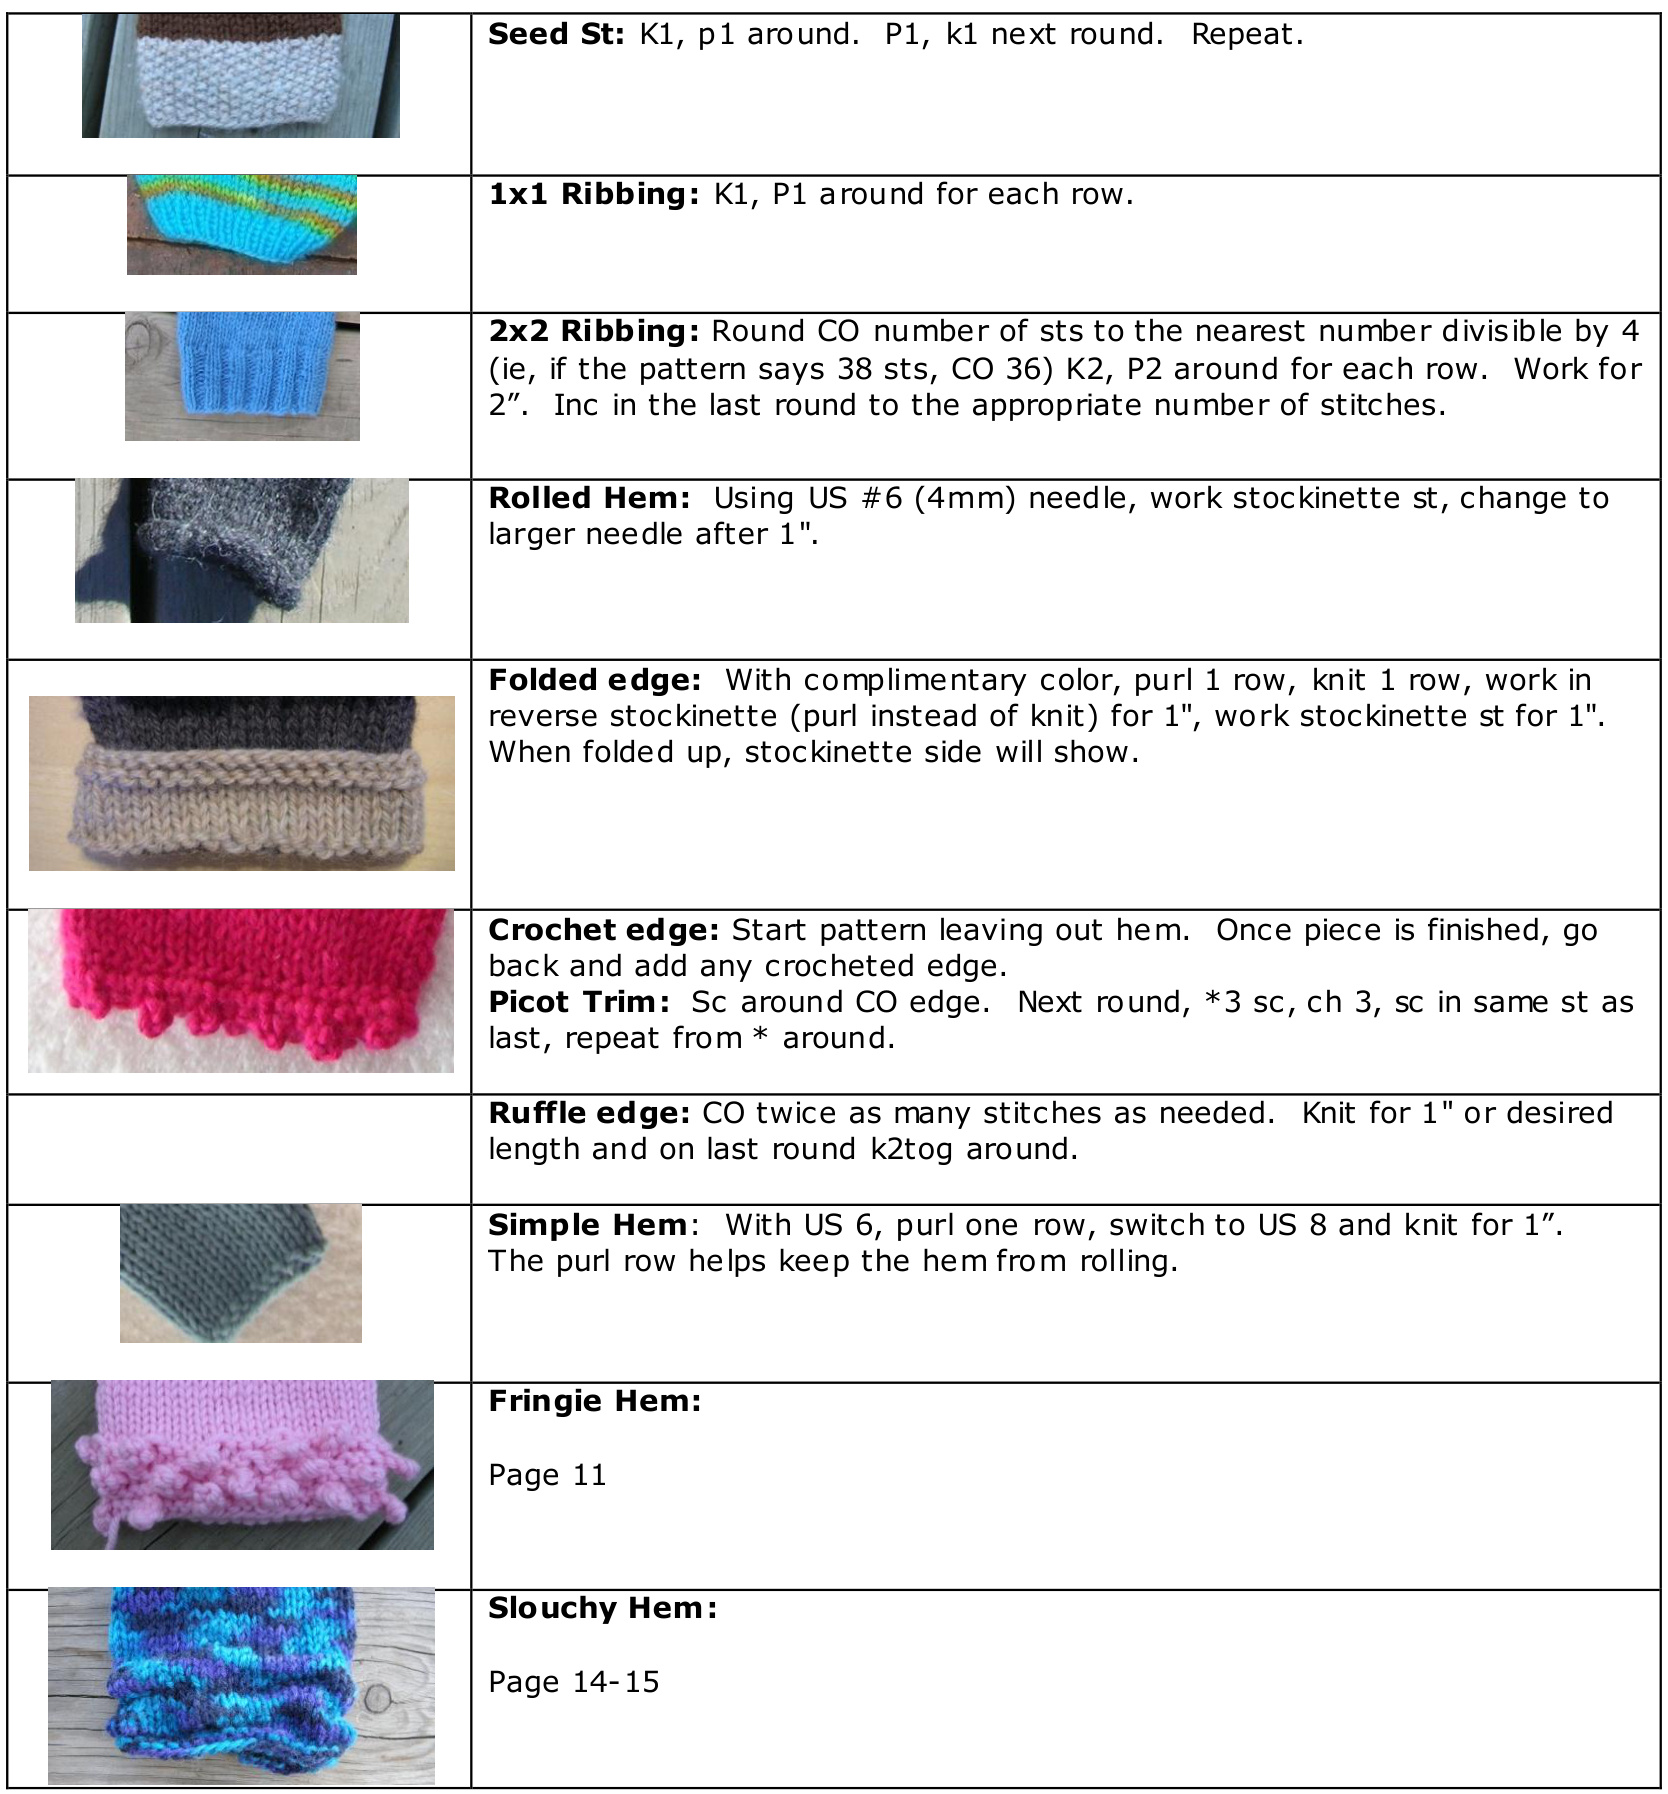
Longies and Capris:
The length of the longies is for the average sized baby. You can customize the length by kniting to 2 (2, 3, 3)" shorter than the length desired and then start the instructions from step 2.
Materials Needed:
US #8 (6mm) circular needles. US #6 $:4\ \mathsf{m m})$ circular needles. Aran weight/heavy worsted weight wool; 0-6 months, 6 months, 100 gms wool; 12 months, 24 months and 3T use about 200 gms or less of wool. Purchase extra yarn just in case and make a matching hat withthe excess. Gauge: 17 sts and 24 rows in 4x4" square.
Right Leg Straight:
1. With smaller needle, C0 42 (44, 46, 52, 54, 56, d_ ) sts. Place marker to mark beginning of the round, Join in a round being careful not to twist the stitches. 2. Work hem of your choice for 1-2". 3. Change to larger needle and knit even until piece measures 7 (9, 11, 12, 13, 14, e_—) inches for longies and 3 (5, 6, 7, 8, 9) for capris -- or as desired-from the cast on edge.
Right Gusset (instructions for a smaller gusset are below:
Place markers after first 4 (3, 2, 4, 4, 4, P—-) sts and before last 4 (3, 2, 4, 4, 4, P-—) stitches. These 8 (6, 4, 8, 8, 8, px2) stitches will be the gusset.
1) Knit to the first marker, M1B, slip marker, knit to next marker, slip marker, M1F, knit to end. 2 increases made. 2) Knit to first marker, do not increase, slip marker, knit to second marker, slip marker, M1F, knit to end. Only 1 increase made. Repeat these two rounds until there are 16 (17, 18, 19, 19, 19, r-) stitches between the markers. End by knitting to the second gusset marker (without increasing). Place gusset stitches on a holder or draw a piece of waste yarn though the m. Hold remaining stitches by placing them on another circular needle, same size or smaller or draw a piece of waste yarn through the stitches to hold them. Cut yarn, leaving an ${18"}$ tail to graft gusset stitches.
Smaller Gusset:
Place markers afterfirst 4 (3, 2,4, 4,4, p)tsts and before last 4 (3, 2, 4, 4, 4, P) stitches. These 8 (6, 4, 8, 8, 8, px2) stitches will be the gusset. 1. Knit to the first marker, M1B, slip marker, knit to next marker, slip marker, M1F, knit to end. 2 increases made. 2.Knit even. Repeat these two rounds 3 (4, 5, 4, 4, 4) times until there are 14 (14, 14, 16, 16, 16, r-) stitches between the markers. End by knitting to the second gusset marker (without increasing). Place gusset stitches on a holder or draw a piece of waste yarn though them. Hold remaining stitches by placing them on another circular needle, same size or smaller or draw a piece of waste yarn through the stitches to hold them. Cut yarn, leaving an ${18"}$ tail to graft gusset stitches.
Same for both right and left leg.
Left Leg Straight:
Work steps 1-3 as for the right leg. Left Gusset: Place markers after the first 4 (3, 2, 4, 4, 4, P-) sts and before last 4 (3, 2, 4, 4, 4, P-) stitches. These 8 (6, 4, 8, 8, 8, px2) stitches willbe the gusset. 1. Knit to the first marker, M1B, slip marker, knit to next marker, slip marker, M1F, knit to end. 2 increases made. 2. Knit to first marker, M1B, slip marker, knit to next marker, slip marker, do not increase, knit to end. Only 1 increase ma de. Repeat these two rounds until there are 16 (17, 18, 19, 19, 19, r_-) stitches between the markers stopping right before the second gusset marker.
Body:
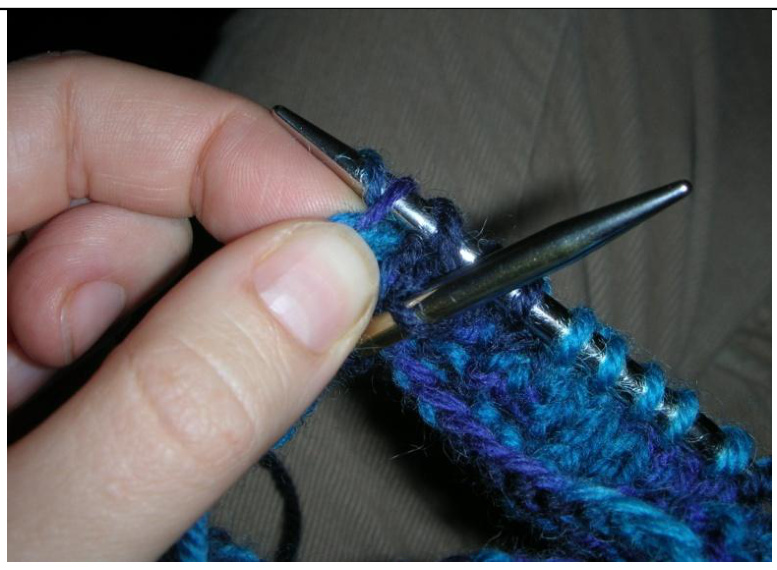
Graft the sts of both legs together with the wrong sides facing each other using a kitcheners stitch or a 3- needle bind off. This step can be left off until the end, just place the stitches on a holder.
Join the left leg to the right leg:
With the needle from the left leg begin knitting the stitches from the right leg. Knit around the right leg and place a stitch marker, this will be the beginning of the round. You wil now have 68, (76, 84, 88, 92, 96, b_) stitches on your needle. There wil be holes where the legs are joined that you can stitch together when the pants are finished. Place stitch markers 17(19, 21, 22, 23, 24,s_) stitches after beginning round stitch marker and 17(19, 21, 22, 23, 24, s-) before beginning stitch marker. Short rows will be worked between these 2 markers on the back.
Short rows:
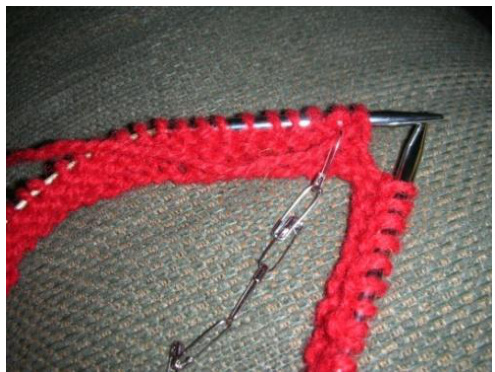
Here is my version of Japanese short rows in the round. You will need safety pins to work this,though it may be possible with out. The pins make in much easier. I chain my pins together to help keep track of how many short rows Ineed to make. For larger pictures and more details, got to http://www.adorabubbleknits.com/pages/tutorials.php
[Knit side short row:
Knit to first short row stitch marker, turn. Place safety pin on working yarn.
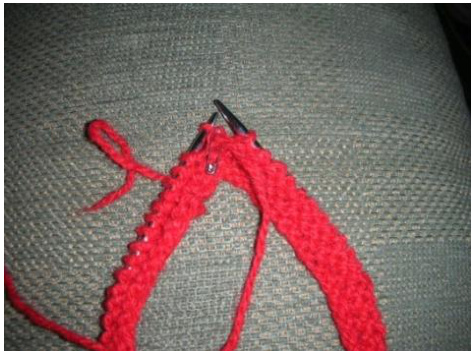
Purl side short row:
Slip first stitch. Purl across, slipping beginning round st marker, to second short row st ma rker.
Turn and place safety pin on working yarn. Knit across to next short row place ment, 4 stitches before last knit side short row and work ne xt kn it side short row. Purl across to 4 stitches before last purl side short row and work next purl Iside short row.
[Continue in this manner, turning 4 stitches before last short row worked until you have worked 8 short rows total, 4 on each side. You will have 4 safety pins on each side. [Closing the holes: Knit to the first gap. Pick up safety pin.
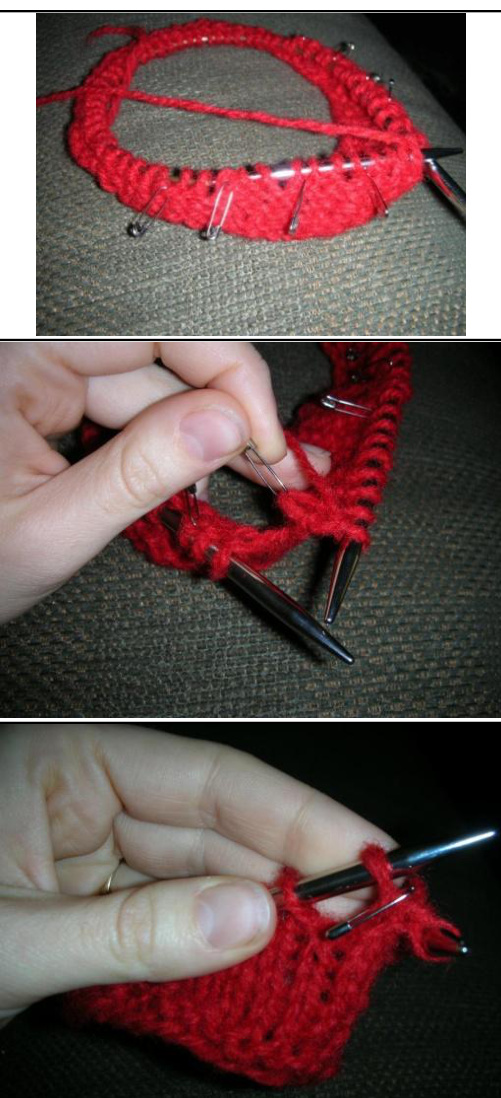
Place loop with safety pin on left needle and knit loop together with next stitch. This is where this version differs from others. Do not turn, knit around to 1 stitch before the right side short row holes. [Slip ne xt st. Pick up loop with safety pin and place on the left needle. It will be pretty tight. Place slipped stitch back on to left needle and knit it together with the picked up loop like you would knit an ssk.

Tada! Remove short row stitch markers and safety pins. Knit body even until piece measures 3.25 (3.75, 4.25, 4.25, 4.75, 5.25, v) inches from the join (top of the gusset) at the front.
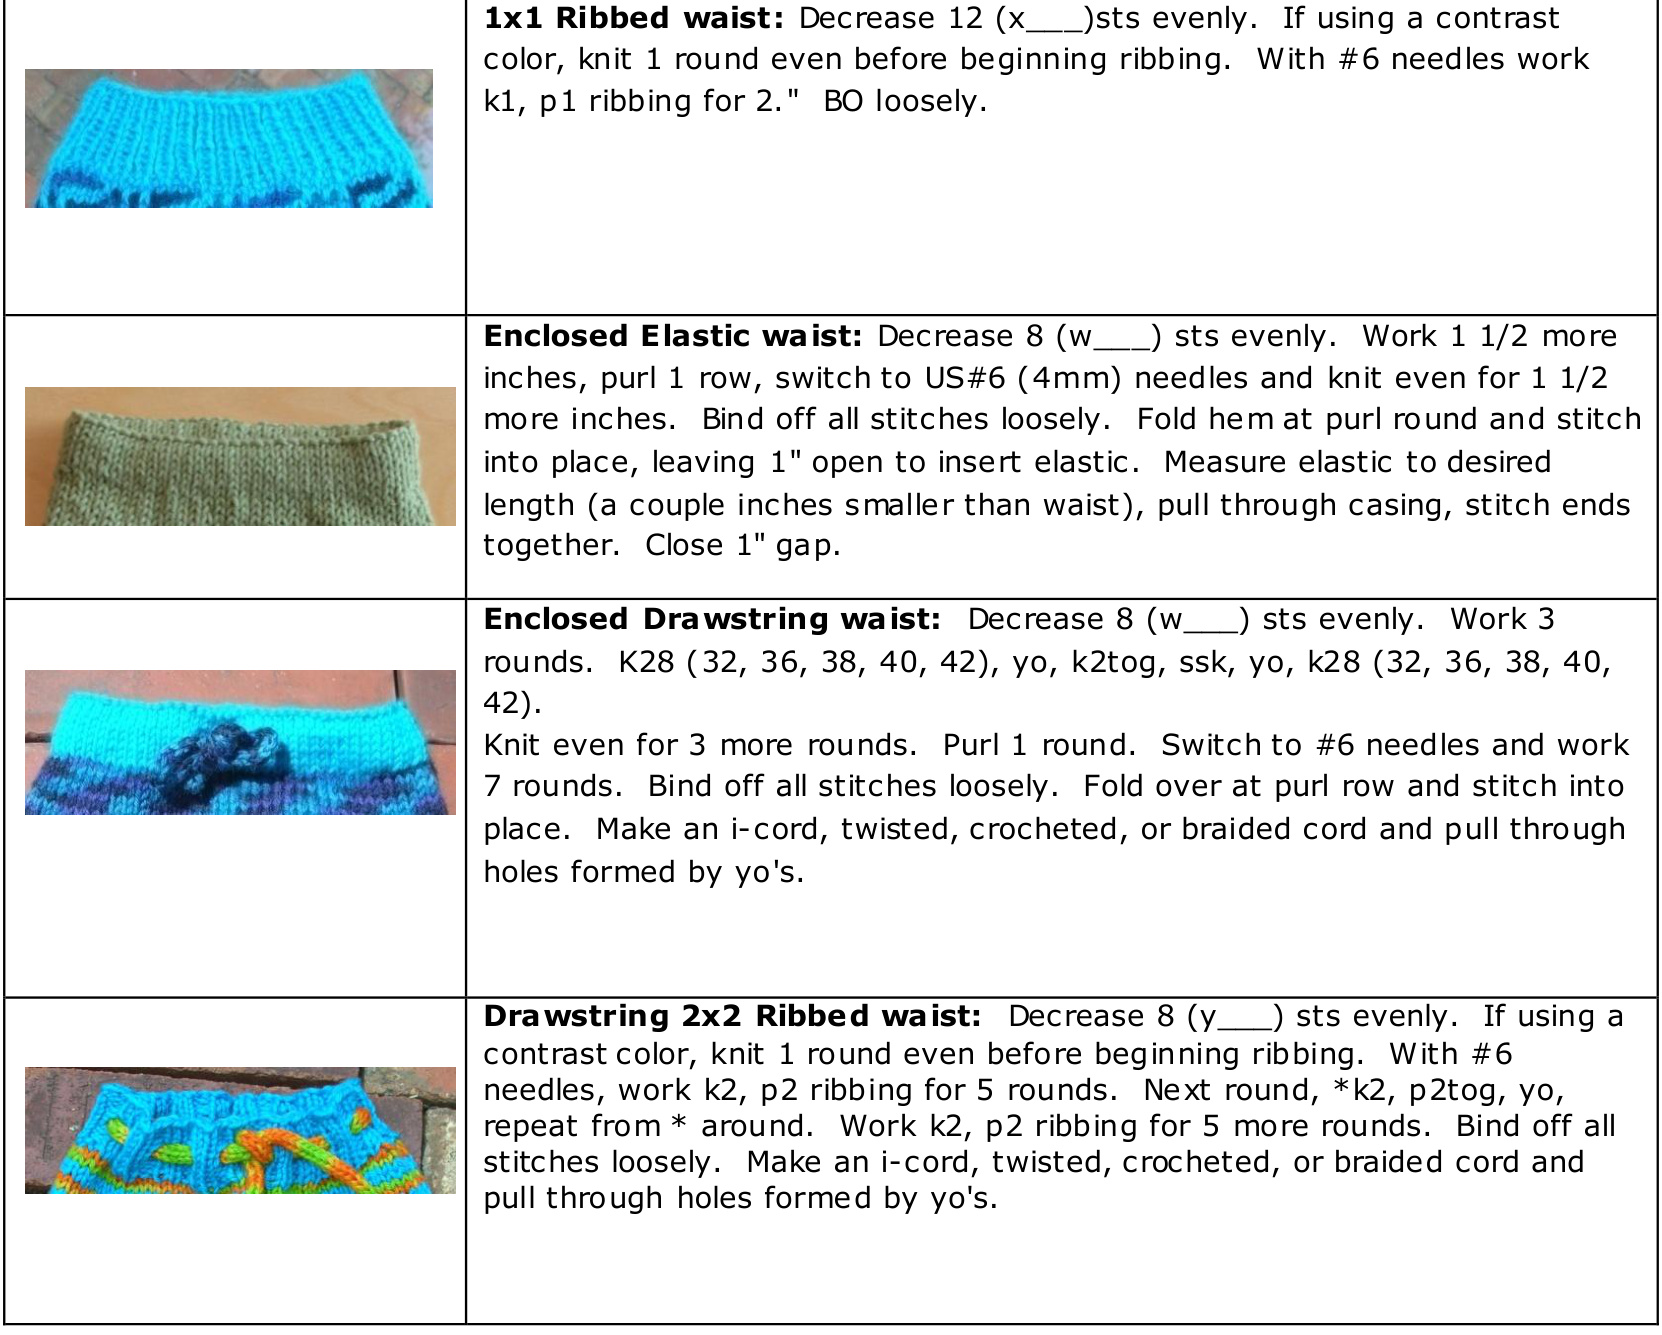
Waist: 4 options to choose from
Tapered Leg
You can customize the length by adding or removing rows before step 3 of the leg.
Right Leg Tapered:
1. With smaller needle, C0 32 (32, 34, 36, 36, 38, f_ ) sts. Place marker to mark beginning of the round. Join in a round being careful not to twist the stitches. Work hem of your choice for 1-2". 2. Switch to larger needle. Knit until piece measures $z^{\prime\prime}$ from cast on edge. 3. K1, M1B, knit to 1 stitch before the end, M1F, k1. 4. Knit 6(7, 8, 6, 6, 7, 0) rounds even. 5. Repeat step 3-4 until you have 42 (44, 46, 52, 54, 56, d_-) sts. Piece should measure 7 (9, 11, 12, 13, 14, e_—) inches for longies. If not long enough, continue working without increasing until desired length.
Right Gusset:
Place markers afterfirst 4 (3, 2, 4, 4,4, P--) sts and before last 4 (3, 2, 4, 4, 4, P-) stitches. These 8 (6, 4, 8, 8, 8, px2) stitches will be the gusset. 1. Knit to the first marker, M1B, slip marker, knit to next marker, slip marker, M1F, knit to end. 2 increasesmade. 2. Knit to first marker, do not increase, slip marker, knit to second marker, slip marker, M1B, knit to end. Only 1 increase made. Repeat these two rounds until there are 16 (17, 18, 19, 19, 19, r-—) stitches between the markers. End by knitting to the second gusset marker (without increasing). Place stitches ona holder or draw a piece of waste yarn through the stitches to hold them. Cut yarn, leaving an $\mathbf{18^{\prime\prime}}$ tail to graft gusset stitches.
Left Leg Tapered:
Work steps 1-5 as for the right leg. Left Gusset: Place markers after the first $\vdash(3,\,2,\,4,\,4,\,4,\,{\mathfrak{p}}\_{\longrightarrow})$ sts and before last 4 (3, 2, 4, 4, 4, P--) stitches. These 8 (6, 4, 8, 8, 8, px2) stitches will be the gusset. 1. Knit to the first marker, M1B, slip marker, knit to next marker, slip marker, M1F, knit to end. 2 increases made. 2. Knit to first marker, M1B, slip marker, knit to next marker, slip marker, do not increase, knit to end. Only 1 increase ma de. Repeat these two rounds until there are 16 (17, 18, 19, 19, 19, r_-) stitches between the markers stopping right before the second gusset marker.
Body:
Same as for longies, straight leg, page 2.
Shorties:
Right Leq:
1. Cast on 42 (44, 46, 52, 54, 56, d_-) sts. Join in a round being careful not to twist the stitches. Work desired hem for 1". Work stockinette st until piece measures 2" (or as desired). 2. Repeat steps for right gusset as for longies.
Left Leq:
1. Repeat step 1 above. 2, Repeat steps for the left gusset as for longies.
Body:
Same as for longies.
Fringie Hem
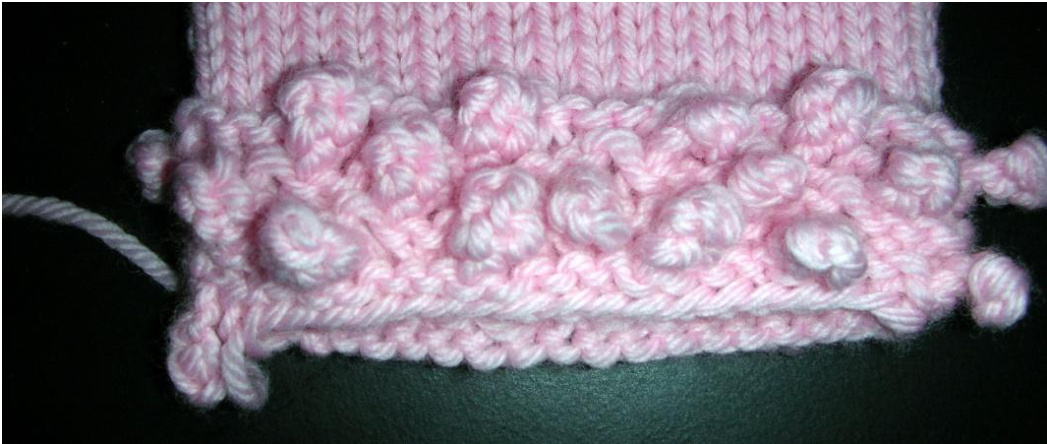
1. CO 40 (44, 44, 52, 52, 56, see below_-) sts. Join in a round being careful not to twist the stiches. 2. Purl around. 3. $\ast\mathsf{K}3$ , cable cast on 4 sts, bind off those 4 sts, repeat from \* around. 4. Purl around. 5. K1, \*cable cast on 4 sts, bind off those 4 sts, k3, repeat from \* around, end k2. 6. Repeat steps 2-4 once more. 7. Inc 2 (0, 2, 0, 2, 0) to 42 (44, 46, 52, 54, 56) sts. Continue from step 3 of Right Straight Leq. For customs: Cast on O__ to the nearest multiple of 4. Follow steps 2-6. For step 7, increase until you have O__ sts.
Adding Cables:
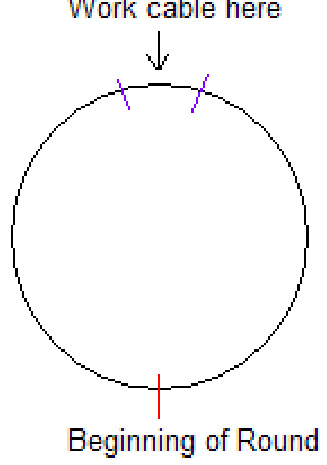
The cables run down the outside edge of the leg and the short rows are worked right next to the cables. You will need a cable needle. First, Co the appropriate amount of stitches for the size and style you desire. Work desired hem (ribbing works nice as well as the simple hem or rolled hem.) Divide the number of stitches you have on your needles by 2 and subtract 3 sts for a 4 stitch cable or 5 sts for a 6 stitch cable (in parenthesis). Place a stitch marker after this amount of stitches and another after 6 (8) more stitches. Example: If the C0 is 38 sts, the cable will be worked between the 16th (15th) sts and 18th (17th) sts. Place stitch markers before and after the 6 (8) cable stitches.
Right Leg 4 st cable:
1. Knit to marker, p1, k4, p1, knit to end. 2. Repeat step 2, 4 more times. 3. Knit to marker, p1, hold 2 sts to the front, k2, k2 from cable needle, p1, knit to end. 4. Repeat steps i-3, you will be crossing the cable every $6^{\mathrm{th}}$ round.
Left leg 4 st cable:
1. Knit to marker, p1, k4, p1, knit to end. 2. Repeat step 2, 4 more times. 3. Knit to marker, p1, hold 2 sts to the back, k2, k2 from cable needle, p1, knit to end. 4. Repeat steps i-3, you will be crossing the cable every $6^{\mathrm{th}}$ round.
Right Leg 6 st cable:
1. Knit to marker, p1, k6, p1, knit to end. 2. Repeat step 2, 6 more times. 3. Knit to marker, p1, hold 3 sts to the front, k3, k3 from cable needle, p1, knit to end. 4. Repeat steps i-3, you will be crossing the cable every $8^{\mathrm{th}}$ round.
Left Leg 6 st cable:
1. Knit to marker, p1, k6, p1, knit to end. 2. Repeat step 2, 6 more times. 3. Knit to marker, p1, hold 3 sts to the back, k3, k3 from cable needle, p1, knit to end. 4. Repeat steps i-3, you will be crossing the cable every $8^{\mathrm{th}}$ round. Work the pant style desired up to the short rows.
Short Rows
Short Rows are worked on the back between the cable panels. Your short row markers are the ones right before the first cable and after the second cable. 1. Knit to marker, turn, purl to ma rker, turm. 2. Knit to 2 sts before marker, turn, purl to 2 sts before marker, turn. 3. Knit to 4 sts before marker, turn, purl to 4 sts before marker, turn. 4. Knit to 6 sts before marker, turn, purl to 6 sts before marker, turn. 5. Knit to 8 sts before marker, turn, purl to 8 sts before marker, turn. Continue on in the pattern to the waistband. Remove st markers and work desired hem.
Slouchy Hem:
Special St: D_ Insert right needle into the next st as if to knit, count down as many rows as indicated on the purl side and knit that purl bump together with the stitch on the needle. What you are doing is knitting together 2 rows to form a fold. If the pattern says D5, dip down 5 rows and knit that together with the next st.
Insert right needle into the next st as if to knit, count down as many rows as indicated on the purl side. Knit that purl bump together with the stitch on the needle
Slouchy Directions:
Hem takes up about $z^{\prime\prime}$ 1. C0 38 (40, 46, 46, 48, 50) sts. Join in a round being careful not to twist the sts. 2. Purl 1 round. 3.Knit 6 rounds. 4. K4 (5, 8,8,9, 10), D5, k1, D5, k1, K6, k1, D5, k14 (15, 18, 18, 19, 20), D5, k1, D5, k1, D6, k1, D5, k6. 5.Knit 2 rounds. 6. D5, k1, D5, k12 (13, 16, 16, 17, 18), d5, k1, D6, k1, D6, k1, D5, k 12(13, 16, 16, 17, 18), D6, k1, D5, k1. 7. Knit 4 rounds. 8. K3 (4, 7, 7, 8, 9), D3, k1, D4, k1, D5, k1, D6, k11 (12, 15, 15, 16, 17), D4, k1, D5, k1, D6, k1, D5, k10. 9.Knit 2 rounds. 10. K12 (13, 16, 16, 17, 18), D5, k1, D5, k1, D4, k1, D4, k10 (11, 14, 14, 15, 16), D5, k1, D5, k1, D6, k1, D6, k2. Continue on in pattern for straight leg.
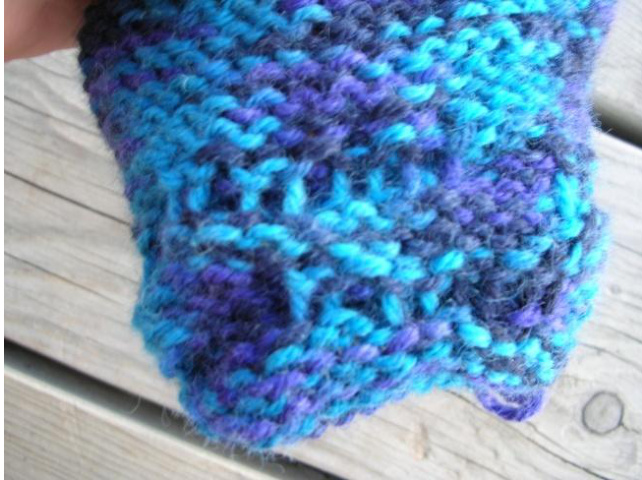

Wrong side
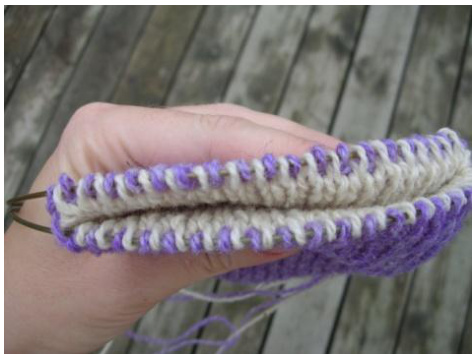
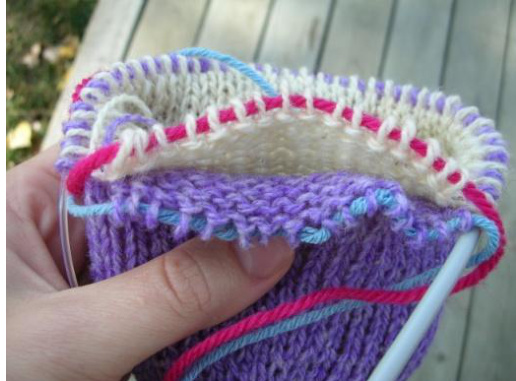
Double-Knit Reversible Britches
The double layer on these are virtually leak proof! They can easily be wom all day without switching Perfect for overnight. Dont let double-knitting scare you either. It is surprisingly simple to do and if you need any help, just email me! You are basically knitting 2 pieces of fabric at the same time, the inside layer and the outside layer. Use contrasting colors for a cool effect.
Materials:
US #6 $(4\mathsf{m m})$ and #4 ( $.3.5\ \mathsf{m m}$ ) circular needles. 200 gms sport weight wool (Marr Haven is my favorite).
Gauge in Patte rn:
20 sts and 30 rows in a. $4^{\prime\prime}$ square. May seem off, but in double-knitting the stitches end up fatter and shorter than regular knitting.
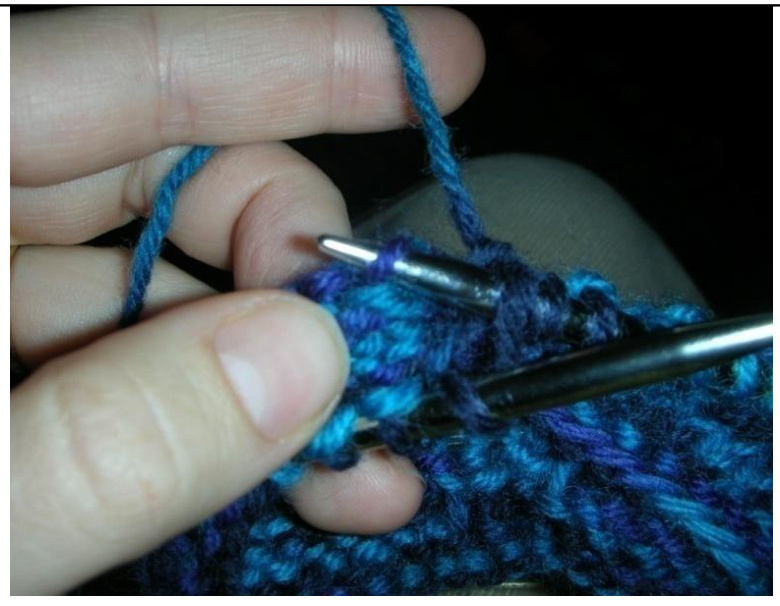
SpeciaI Stitches:
spuk-
1.Slip next st knitwise 2. Pick up strand between stitches coming from the front. 3. Place slipped stitch back onto left needle. 4. Insert right needle into slipped stitch and picked up loop on left needle and knit those 2 sts together (like a ssk). puk2tog- Coming from the back, pick up strand between the sts, knit together with next stitch. 1) With MC C0 88 (96, 104, 104, 112) sts. Place marker to mark beginning of the round. Join in a round being careful not to twist the stitches. 2) With MC\* k1, wyif sl 1, repeat from \* around. This knits the outer layer. 3) With CC \*wyib sl 1, p1, repeat from \* around. This knits the inner layer. 4) Repeat steps 2 and 3 until piece measures 7 (9, 10, 11, 12, 13) inches from cast on edge. This includes extra for a cuff. For no cuff measure 5 (7, 8, 9, 10, 11) inches. 5) With MC, k1, wyif sl1, M1R, k1, \*wyif sl 1, k1, repeat from \* around to last 2 sts, M1l, k1, wyif sl1. 6) With CC, wyib sl 1, p1, wyib sli 1, M1R purlwise (see note special stitches above), wyib sl 1, \*p1, wyib sl 1, repeat from \* around to last 2 sts, M1L purlwise, wyib sl 1, p1 7) Repeat steps 2 and 3, 6 times. 8) Repeat step 5-7 until you have 96 (104, 116, 120, 124, 128) sts. Repeat steps 2 and 3 until piece measures 9 (11, 12, 13, 14, 15) with cuff or 7 (9, 10, 11, 12, 13) without cuff.

Right Gusset:
Place markers after first 8 sts, 4 of each color, and before last 8 stsm 4 or each color. These 16 stitches will be the gusset. The back of the gusset has twice as many increases as the front, pulling the fabric back and making more room in the bottom. You will knit one round with the MC and increase 2 sts and then a round with the CC, increasing 2 sts. The next 2 rounds you will only one time on each round. 1) Work in pattern to the first marker, M1B, slip marker, work to next marker, slip marker, M1F, work to end. 2 increases made. 2) Work in pattern to the first marker, M1B purlwise, slip marker, work to next marker, slip marker, wyib sl 1, M1F purlwise, work to end. 2 increases made. 3) Work to first marker, do not increase, slip marker, work to second marker, slip marker, M1F, work to end. Only 1 increase made. 4) Workto first marker, do not increase, slip marker, work to next marker, slip marker, wyib sl1, M1F purlwise, work to end. Only 1 increase made. Repeat these two rounds until there are 38 (38, 42, 42, 42, 42) total stitches between the markers, 19 (19, 21, 21, 21, 21) of each color. End by knitting to the second gusset marker (without increasing). Place gusset stitches on a holder or draw a piece of waste yarn though them. Hold remaining stitches by placing them on another circular needle, same size or smaller or draw a piece of waste yarn through the stitches to hold them.
Left Leg Straight:
Work steps 1-8 as for the right leg.
Left Gusset:
Place markers after first 8 sts and before last 8 stitches. These 16 stitches will be the gusset. 1) Work in pattern to the first marker, M1B, slip marker, work to next marker, slip marker, M1F, work to end. 2 increases made. 2) Work in pattern to the first marker, M1B purlwise, slip marker, work to next marker, slip marker, wyib sl 1, M1F purlwise, work to end. 2 increases made. 3) Work to first marker, M1B, slip marker, work to second marker, slip marker, do not increase, work to end. Only 1 increase made. Work to first marker, M1B purlwise, slip marker, work to next marker, slip marker, do not Repeat these two rounds untilthere are 38 (38, 42, 42, 42, 42) stitches between the markers stopping right before the second gusset marker.
Body:
Draw a piece of waste yarn through the MC sts only and another piece through the CC sts only. Graft MC sts of both legs together with the wrong sides facing each other using a kitchener's stitch or a 3-needle bind off. Graft CC sts of both legs together with the wrong sides facing. Grafting can be left off until the end, just place the stitches on a holder.
Join the left leg to the right leg:
With the needle from the left leg begin knitting the stitches from the right leg. Knit around the right leg and place a stitch marker, this will be the beginning of the round. You will now have 160 (176, 200, 208, 216, 224) stitches on your needle. There will be holes where the legs are joined that you can stitch together when the pants are finished.
Short rows:
Place a marker48 (51, 58, 60, 62, 64) after beginning marker and 48 (51, 58, 60, 62, 64) before beginning marker. 1. Work in double knit pattern with MC to 1 st before marker, turn. Work in pattern to beginning marker, turn. Pick up CC and work to marker, turn. Work in pattern to beginning marker, do not turn. 2. With wrong side facing, work in double knit pattern with MC to 1 st before marker, turm. Work in pattern to beginning marker, turn. Pick up CC and work to marker, turn. Work in pattern to beginning marker, do not turn. 3. Work in double knit pattem with MC to 7 sts before marker, turn. Work in pattern to beginning marker, turn. Pick up CC and work to 6 sts before marker, turn. Work in pattern to beginning marker, do not turn. 4. With wrong side facing, work in double knit pattern with MC to 6 sts before marker, turn. Work in pattern to beginning marker, turn. Pick up CC and work to 7 sts before marker, tum. Work in pattern to beginning marker, do not turn. 5. Work in double knit pattern with MC to 13 sts before marker, turn. Work in pattern to. beginning marker, turn. Pick up CC and work to 12 sts before marker, turn. Work in pattern to beginning marker, do not turn. 6. With wrong side facing, work in double knit pattern with MC to 12 sts before marker, turn. Work in pattern to beginning marker, turn. Pick up CC and work to 13 sts before marker, turn. Work in pattern to beginning marker, do not turn. 7. Repeat in like manner, working 6 sts less on each side of the beginning marker until 6 short rows have been worked.
Close Holes from Short Rows:
With MC, knit to 1 st before the hole formed from the short row, spuk (see special stitches on pg 2). Repeat for each of the holes on the left leg. Knit around to the short rows on the right leg. Puk2tog (see special stitches on pg 2). Repeat of each of the holes on the right leg. For the inside layer, purl to 1 st before the hole, spup. Repeat for each of the holes on the left leg. Purl around to the short rows on the right leg, pup2tog. Step by step pictures and videos for short rows can be found at http:/www.adorabubbleknits.com/tutorials.php Knit body even until piece measures 3.25 (3.75, 4.25, 4.25, 4.75, 5.25) inches from the join (top of the gusset) at the front.
Begin waist:
Double-Knit $\mathbf{z}\mathbf{\times}\mathbf{z}$ Ribbed waist: Decrease 12 (12, 12, 8, 8, 12) sts each ofthe MC and CC, evenly across next round. You will need to rearrange the stitches that will be knit together so that you knit 2 MC sts together and 2 CC sts together. With smaller needles, work k2, p2 ribbing for 5 rounds. Next round, $\ast\mathsf{k}2$ , p2tog, yo, repeat from \* around. Work k2, p2 ribing for 10 more rounds. Bind off loosely. Make an i-cord, twisted, crocheted, or braided cord and pull through holes formed by yo's. Single layer $\mathbf{z}\mathbf{\times}\mathbf{z}$ Ribbed waist (easier to work than double-knit waist band): With the color you want for the waistband, k2tog all the way around. You will now have $\%$ the number of stitches. Dec 12 $(12,\,12,\,8,\,8,\,12)$ sts while working k2, p2. Work k2, p2 for4 more rounds.Next round, $\ast\mathsf{k}2$ p2tog,yo, repeat from \* around to beginning. Work k2, p2 ribing for 5 more rounds. Bind offloosely. Make an icord, twisted, crocheted, or braided cord and pull through holes formed by yo's.
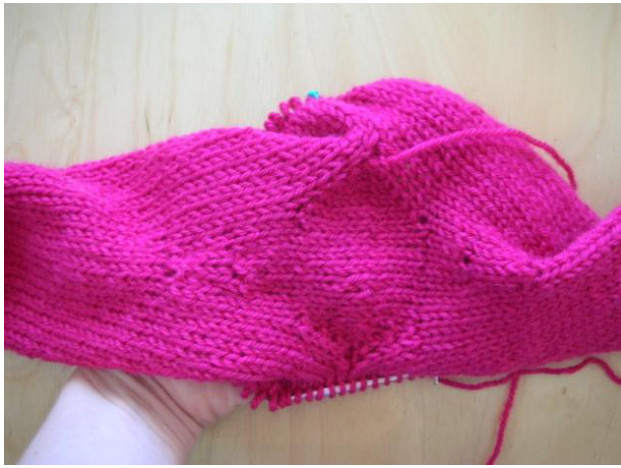
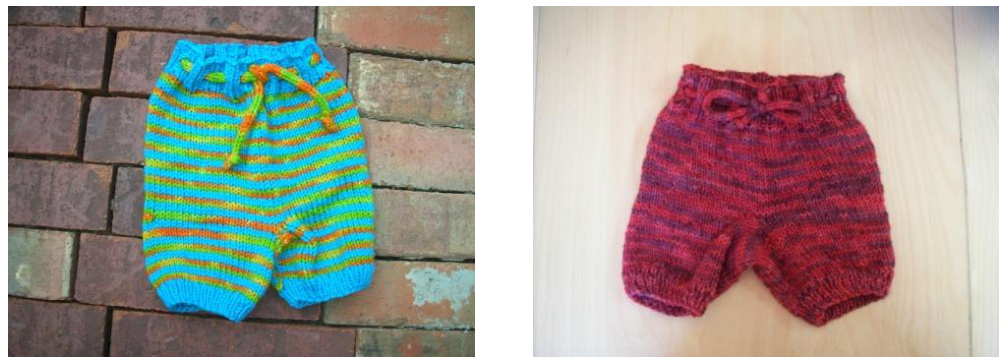
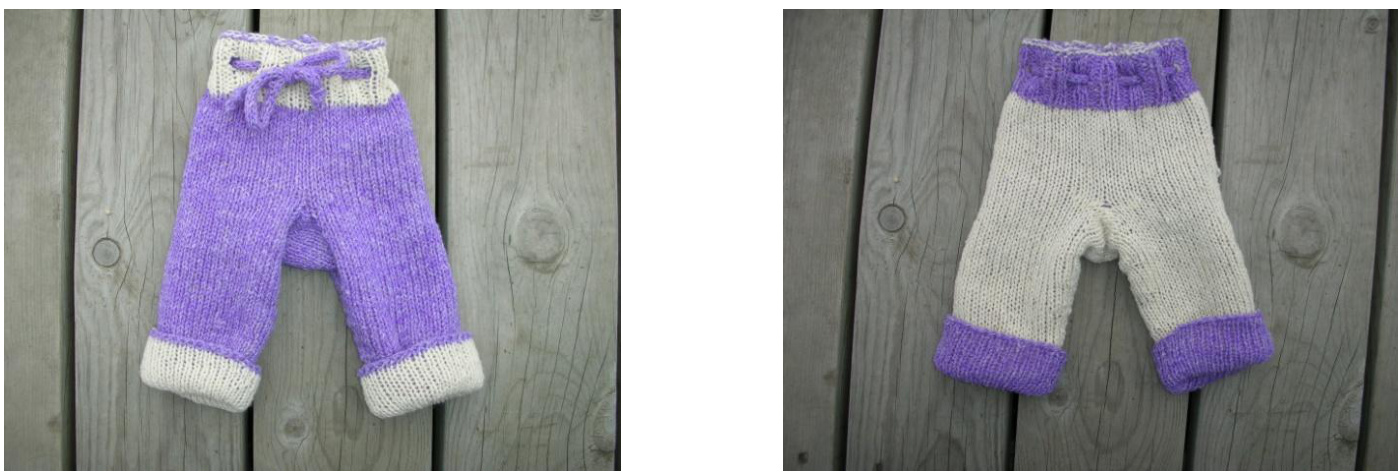
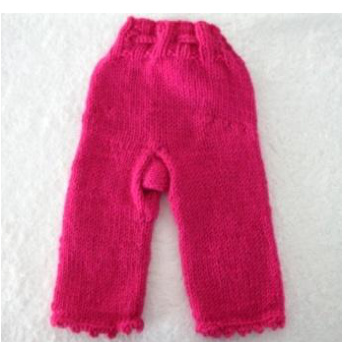
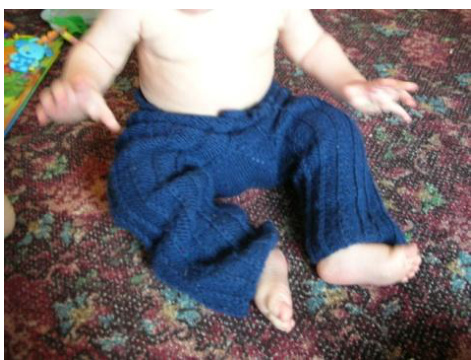
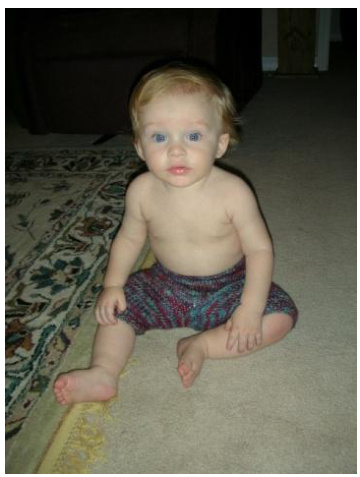
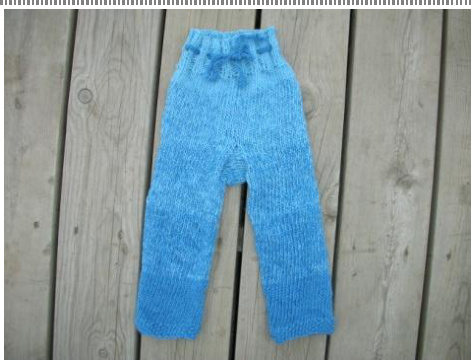
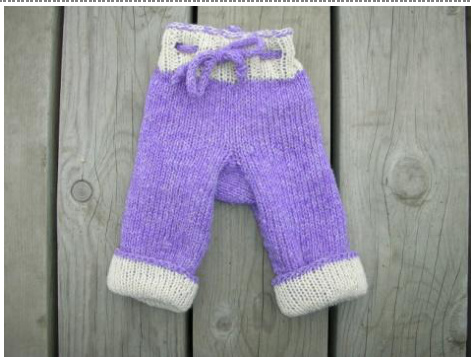
Photo Gallery
24 month size, 2x2 rib waist and hem.
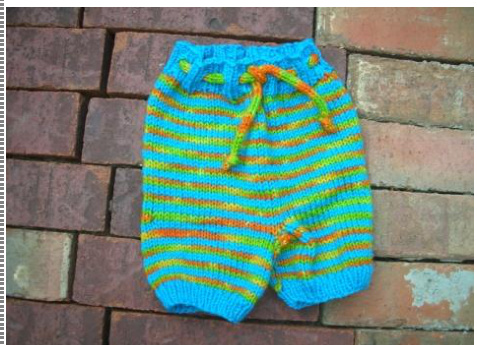
12 month size shorties, 1x1 rib hem.
12 month size shorties, 1x1 rib hem.
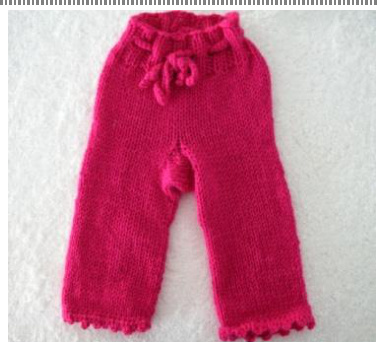
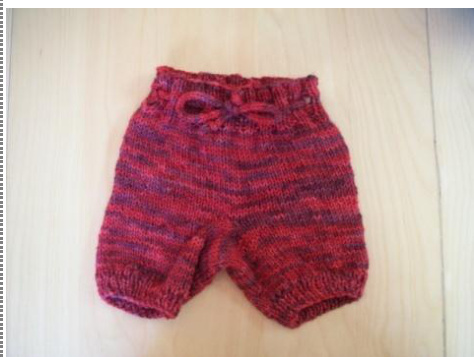
0-3 month size, picot crotchet hem and straight leg.
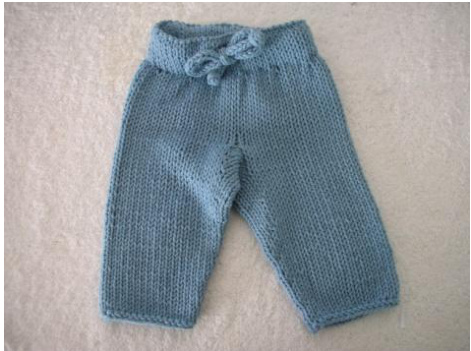
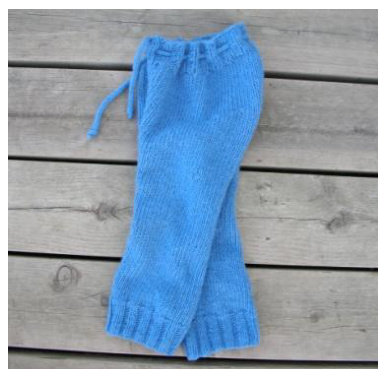
In cotton with enclosed drawsting waist, simple hem and tapered leg.
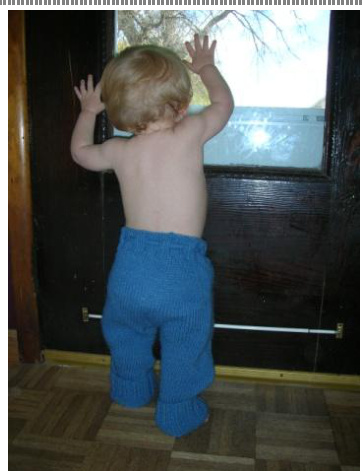
In action, a little big but rolled up they work.

Double-Knit Reversible Britches Reverse side of Double-Knit


