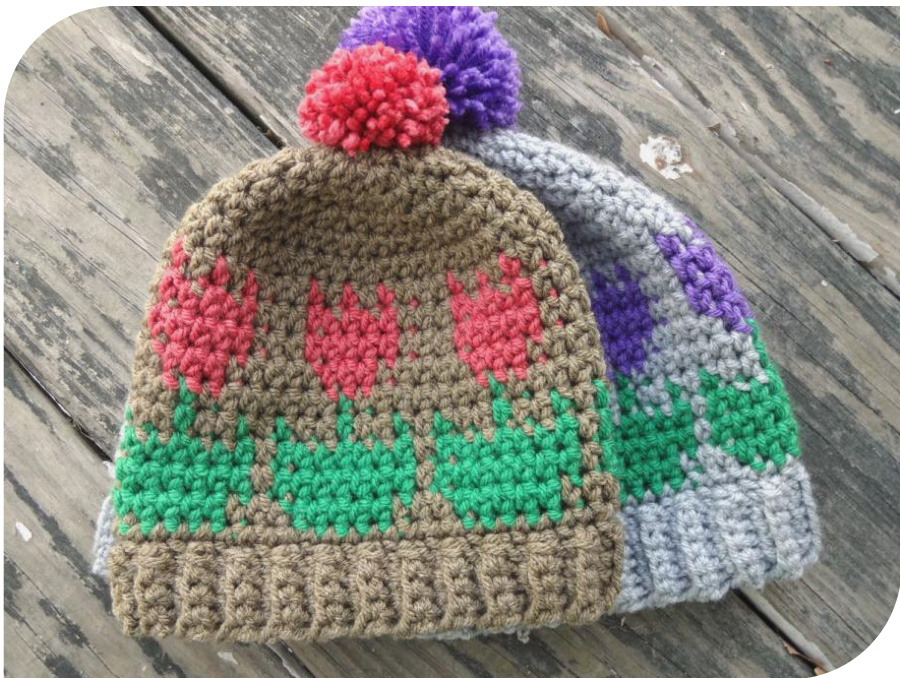
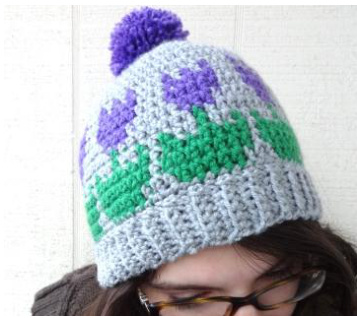
Towering Tulips
By MycoCrochet
Level Intermediate Beginner
Abbreviations
This pattern uses US crochet terms Chain ch Slip stitch sl st Single crochet SC Half-double crochet hdc Space sp Stitch st Back Loop bk lp Round rnd
Yarn
● Main Color (MC) - Dove Heather (1 skein) ●Flower Color (FC)- Freesia (.5 skein) ●Leaf Color (LC) - Grass (.5 skein)
Pink Tulip Hat
●Main Color (MC) - Camel Heather (1 skein) ●Flower Color (FC) - Coral (.5 skein) ·Leaf Color (LC) - Grass (.5 skein) Hook H - 5.0mm Gauge 1st four rounds = approx 3.5" diameter (8.75 cm)
| Sizes | |||
| Size | Age | Pattern Repeats | Circumference |
| Adult M/L | 9 | 22-27 in 56-68 cm | |
| Adult S | 8 | 20-24 in 51-51 cm | |
| Child | 3-10 yrs | 7 | 17.5-21 in 44.5-53 cm |
| Baby/Toddler | 3 mos- | 6 | 15-18 in |
| Newborn | 2 yrs 0-3mos | 5 | 38-46cm 12.5-15 in |
| 31.5-38cm | |||
Repeats for colorwork rows are written as Newborn [Baby, Child, Adult S, Adult M/L]
Special notes
· The first and second tulip have an extra stitch in between them. The hat is worked in spirals until the brim is added on. A stitch marker is needed to mark the first stitch of each round. · The hat is worked top down, then the ribbed brim is crocheted on. · This hat begins with the magic ring. It can be substituted with "ch 2, 8 hdc in 2nd ch from hook
Tapestry Crochet Basics
Changing Colors
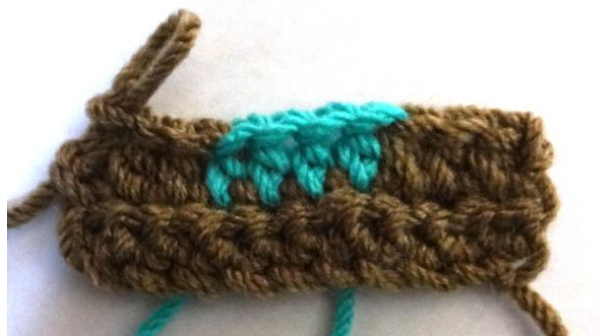
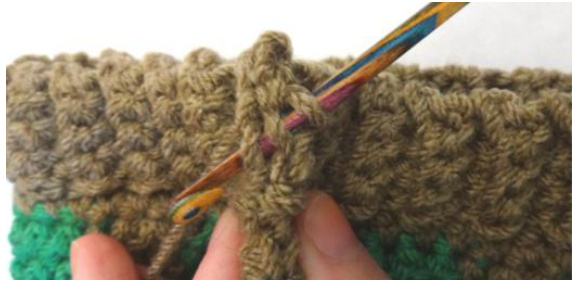
To change colors, complete the last yarn over of the previous stitch with the color you need for the next stitch. If you are not familiar with changing colors in crochet, I encourage you to make a small swatch following the instructions below. 1. Ch. 12, hdc in 2nd ch from hook and each ch across. Ch.1, turn. (10 hdc) 2. Hdc 3 with brown (MC), but complete last yarn over with blue (CC - contrasting color)
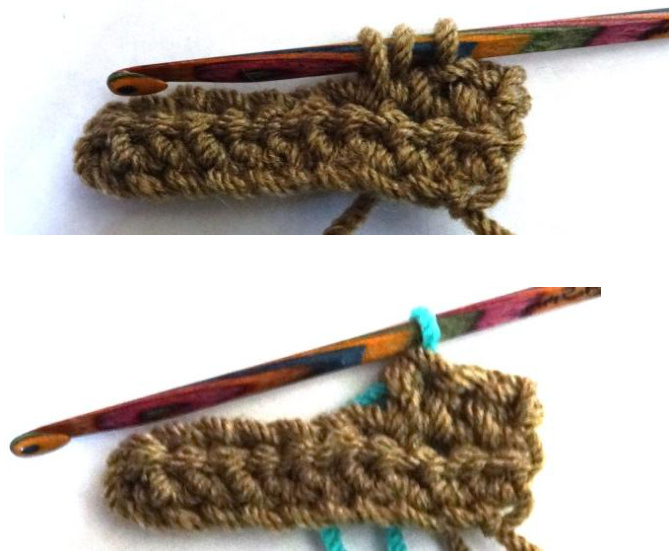
3. Hdc 4 with CC (complete last yarn over of 4th stitch with MC), hdc 3 with MC
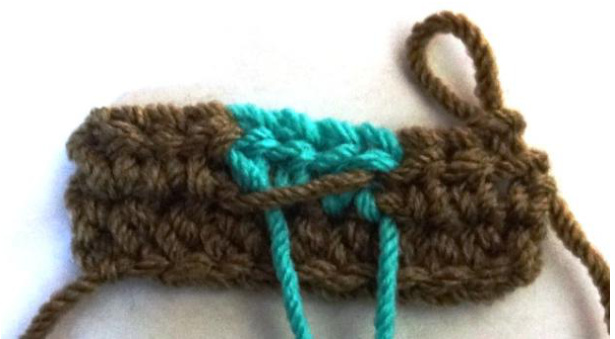
Carrying Yarn
Yarn that is carried along is set on top of the row currently being worked and is crocheted over. This encases the other color inside the crochet stitch.The cons to this method is that the contrasting color might be easily seen through the stitches if the stitches are not tight, and the extra piece of yarn in the bottom of the stitch slightly increases the height of the stitch.
Floating Yarn
The strands of yarn left when a color is picked up after not being used for a few stitches is called a "float". This method can be used instead of carrying the yarn along the stitches and crocheting over them. When a color has not been used for 5 or more stitches, some crocheters like to "catch" the yarn at the 3rd or 4th stitch by crocheting over it. The con to this method is that care must be taken to have floats that are loose enough to allow the stitches between them to stretch, yet tight enough to not distort the stitches at the beginning and end of each float. I recommend this method throughout the hat, as the stitches are loose on purpose to create a stretchy, comfortable hat. They are not worked tightly enough to hide the contrasting color. Page 2 0f 5 MycoCrochet
The Pattern
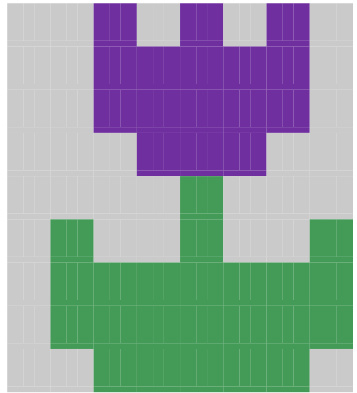
Round 1 With MC, hdc 8 in magic ring Round 2 2hdc in each hdc around (16 hdc) Round 3 (2 hdc in 1"t st, hdc in next hdc) around (24 hdc) Round 4 (2 hdc in 1t st, hdc in next 2 hdc) around (32 hdc) Round 5 (2 hdc in 1st st, hdc in next 3 hdc) around (40 hdc) For newborn size, skip to round 10 Round 6 (2 hdc in 1"t st, hdc in next 4 hdc) around (48 hdc) For baby/toddler size, skip to round 10 Round 7 (2 hdc in 1st st, hdc in next 5 hdc) around (56 hdc) For child size, skip to round 10 Round 8 (2 hdc in 1st st, hdc in next 6 hdc) around (64 hdc) For Adult S size, skip to round10 (For Adult M/L size, complete all rounds) Round 9 (2 hdc in 1"t st, hdc in next 7 hdc) around (72 hdc) Rounds 10-19 are colorwork rows Round 10 (hdc 3 with MC, 1 with FC, 1 with MC, 1 with FC, 1 with MC, 1 with FC) 5 [6, 7, 8, 9] times around Round 11 hdc 1 with MC, (hdc 3 with MC, 5 with FC) 4 [5, 6, 7, 8] times, hdc 3 with MC, 4 with FC Round 12 hdc 1 with FC, 1 with MC, (hdc 3 with MC, 5 with FC) 4 [5, 6, 7, 8] times, hdc 3 with MC, 3 with FC Round 13 hdc 2 with FC, (hdc 5 with MC, 3 with FC) 4 [5, 6, 7, 8] times, hdc 5 with MC, 1 with FC Note: Round 14 uses both FC (Flower Color) and LC (Leaf Color) Round 14 hdc 2 with FC (7 with MC, 1 with LC) 4 [5, 6, 7,8] times, hdc 6 with MC Fasten off FC, leave 6-8 in. tail for weaving in Round 15 hdc 1 with MC, 1 with LC, 2 with MC, 1 with LC, 2 with MC (hdc 1 with LC, 2 with MC, 1 with LC, 2 with MC, 1 with LC, 1 with MC) 4 [ 5, 6, 7, 8] times, hdc 1 with LC Round 16 hdc 2 with MC, 4 with LC, 2 with MC (7 with LC, 1 with MC) 4 [5, 6, 7, 8] times Round 17 hdc 7 with LC, 2 with MC, (7 with LC, 1 with MC) 3 [4, 5, 6, 7] times, hdc 7 with LC Round 18 hdc 1 with MC, 6 with LC, 4 with MC, (hdc 5 with LC, 3 with MC) 3 [4, 5, 6, 7] times, hdc 5 with LC Round 19 hdc 3 with MC, 2 with LC, sl st with LC in next hdc, fasten off LC (5 hdc) Page 3 0f 5 MycoCrochet Do NOT continue round 19 all the way around the hat - it is only finishing the bottom of the veryfirst tulip. Round 20 pull loop of MC through st, ch 1, sc in same st and each st around, join with sl st to 1st sc This is a graph of what the tulip should look like
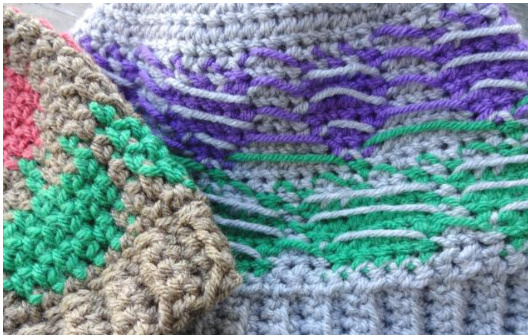
This is what the inside of the hat looks like
Ribbing
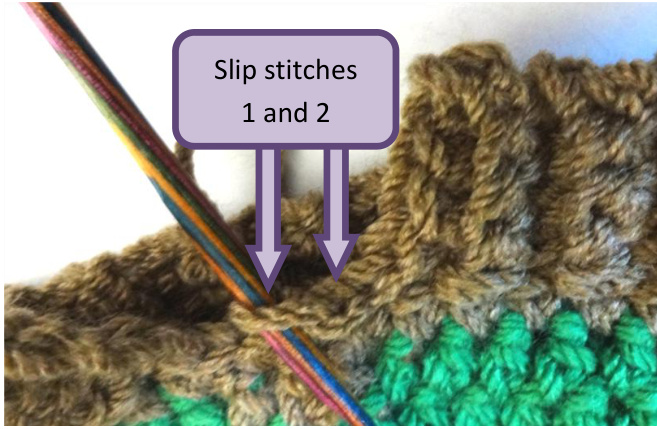
Instructionswritten asAdultS/M/L/ Child [Baby/Toddler/Newborn] Ribbing is 1.5" long for Adult/Child sizes, 1" long forBaby/Toddler/Newbornsizes Row 1 with MC, ch 7 [5], turn, sc in bk Ip of 2nd ch and each ch across, sl st into next 2 sc of rnd 20, turn Row 2 sc in bk Ip of each sc from previous row, ch 1, turn Row 3 sc in bk Ip of next 6 [4] sc, sl st into next 2 sc from rnd 20, turn Repeat rows 2-3 until ribbing completed all the way aroundhat
Join 2 edges of ribbing by slip stitching through bk Ip of last row and 1st row simultaneously
Pom-pom Making & P Finishing
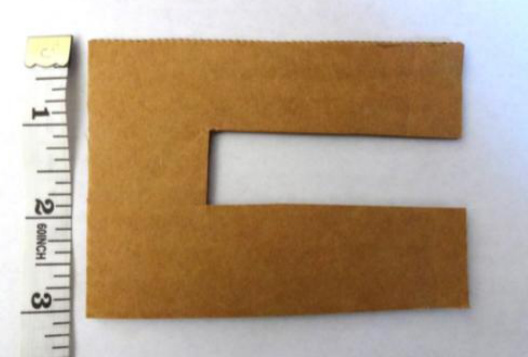
Step 1 If you do not have a pom pom maker, cut out a piece of cardboard like the one on the right. This one is 3" wide for a pom pom for the Adult and Child sized hats. Make a 2" wide one for baby and newborn sizes.
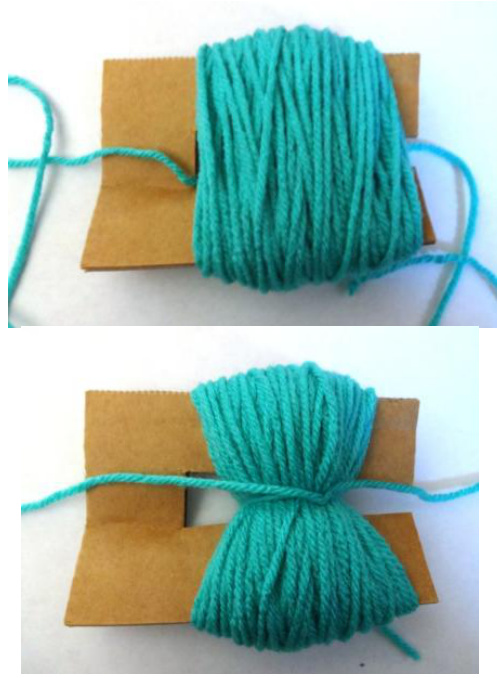
Page 4 0f 5 MycoCrochet Step 2 Wrap yarn around the arms of the cardboard cutout. For this pom pom I wrapped the yarn about 125 times. Wrapping it more times will produce a fuller pom pom. Cut the yarn.

Step 3 Cut a strand of yarn 12in (30cm) long. Wrap this strand around the middle, and tie it as tightly as possible. A tight knot is important to hold the pom pom together.
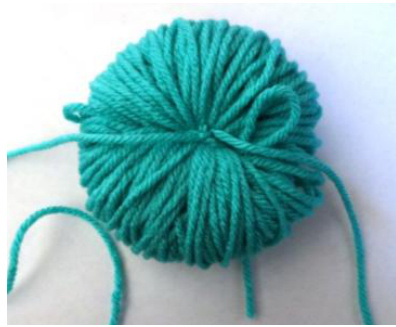
Step 4 Slide the newly-tied loops off of the cardboard. Turn it around and tie it on the other side as tightly as possible. It is easier to get a tighter knot when it is off the cardboard. It should look like the picture below.
Step 5 Cut open all of the loops. Do not cut off the two long ends.
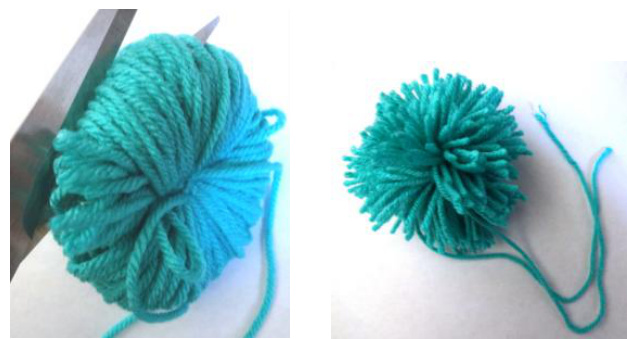
Step 6 Trim the yarn ends all around to a neat and even length. I recommend doing this over a garbage can - it can get messy very quickly. Again, leave the two long strands alone because you will use these to attach the pom pom to the top of your hat.
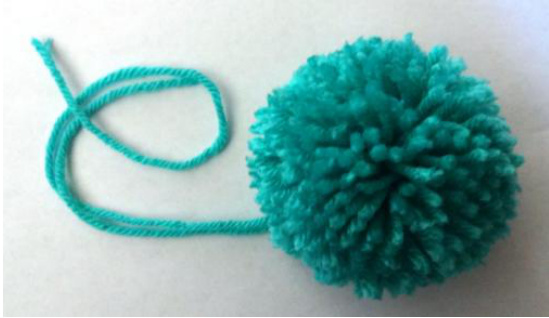
Step 7 Tie pom pom tightly to top of hat and weave in the ends of attaching pieces of yarn. Weave in any remaining ends and enjoy! Feel free to contact me with any questions. Find me on... Etsy: mycocrochet.etsy.com Ravelry: ravelry.com/stores/mycocrochet Craftsy: craftsy.com/user/2457798/pattern-store Page 5 of 5 MycoCrochet


