Adorabubble Baby Britches
From the Top!
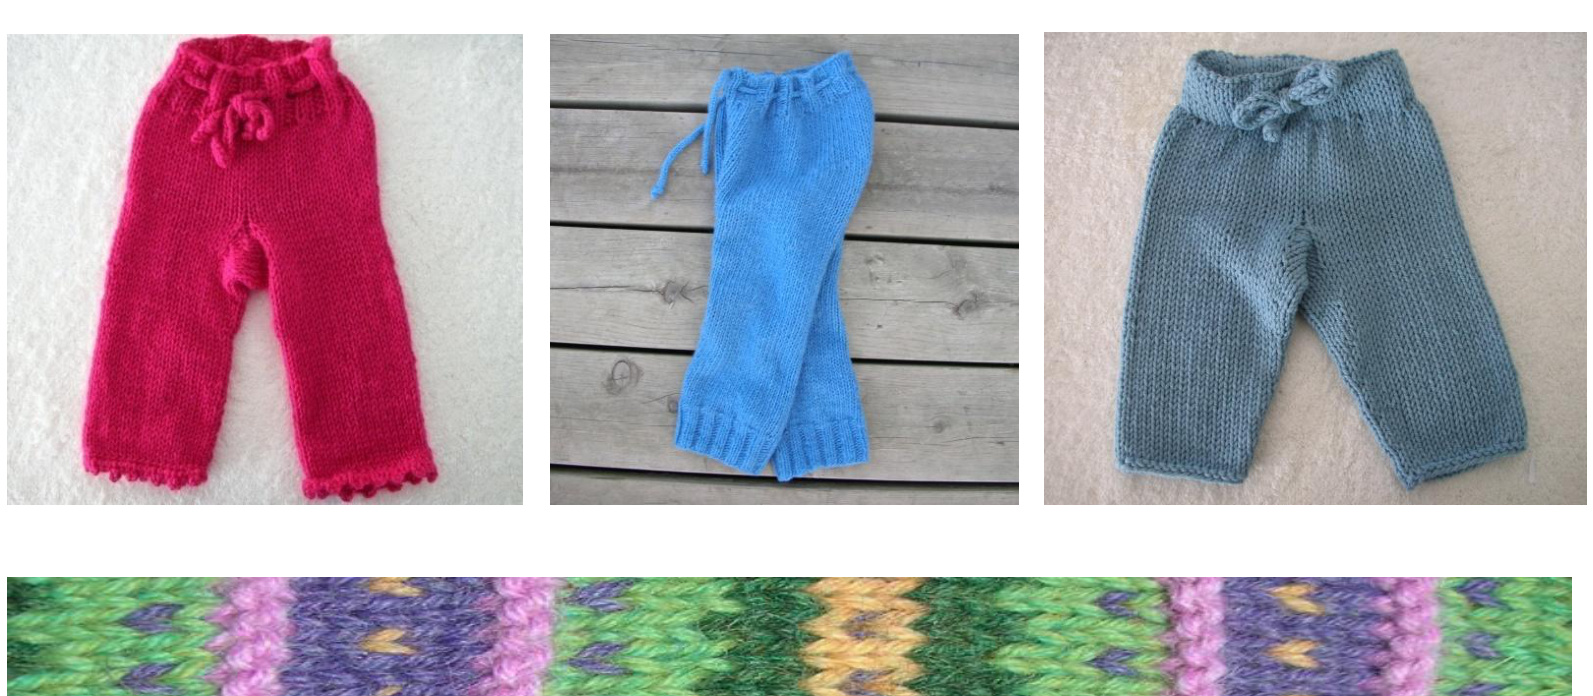
Features include short rows are right at the bottom making for an incredibly perfect fit, Gansey gusset makes for freer movement for your acrobatic baby. I've included detailed directions on how I short row as well as links to videos on how to do it. Before you begin knitting, select the hem style, leg style and waist style you would like. A word about needles: Please use whatever method you feel most comfortable with be it double pointed needles, magic loop, or 2 circular needle method. The legs can be knit with whichever method you prefer while the body can be knit on one $\mathsf{16^{\prime\prime}}$ circular needle. A word about the gusset: The gusset is worked so that the back increases faster than the front. This makes a little more room in the bottom where it's needed most. Because of this, the right and left gusset mirror eachother, they are not worked the same. So make sure you place the increases when and where the pattern states!
Materials Needed:
US#6 $:4\;\mathsf{m m})$ circular needles. US #4 $(3.5\;\mathsf{m m})$ circular needles. Worsted weight wool; 0-6 months, 6 months, 100 gms wool; 12 months, 24 months and 3T use about 200 gms or less of wool. Purchase extra yarn just in case and make a matching hat with the excess. Gauge: 5 sts per 1"
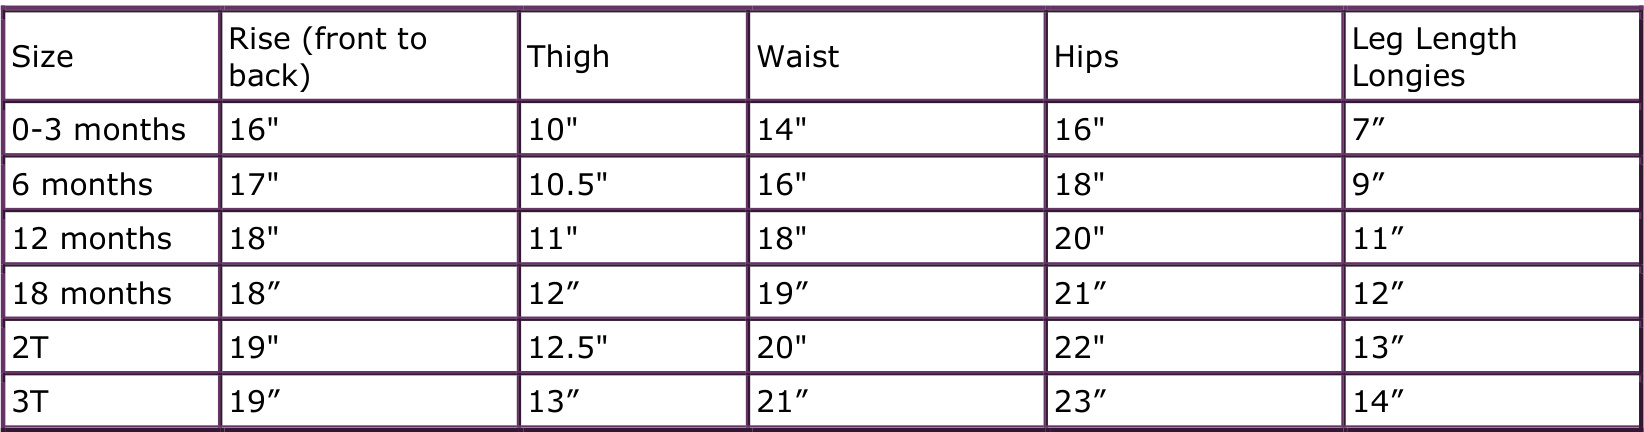
Finished Dimensions:
Sizes: 0-3 months (6 months, 12 months, 18 months, 2T, 3T, custom)
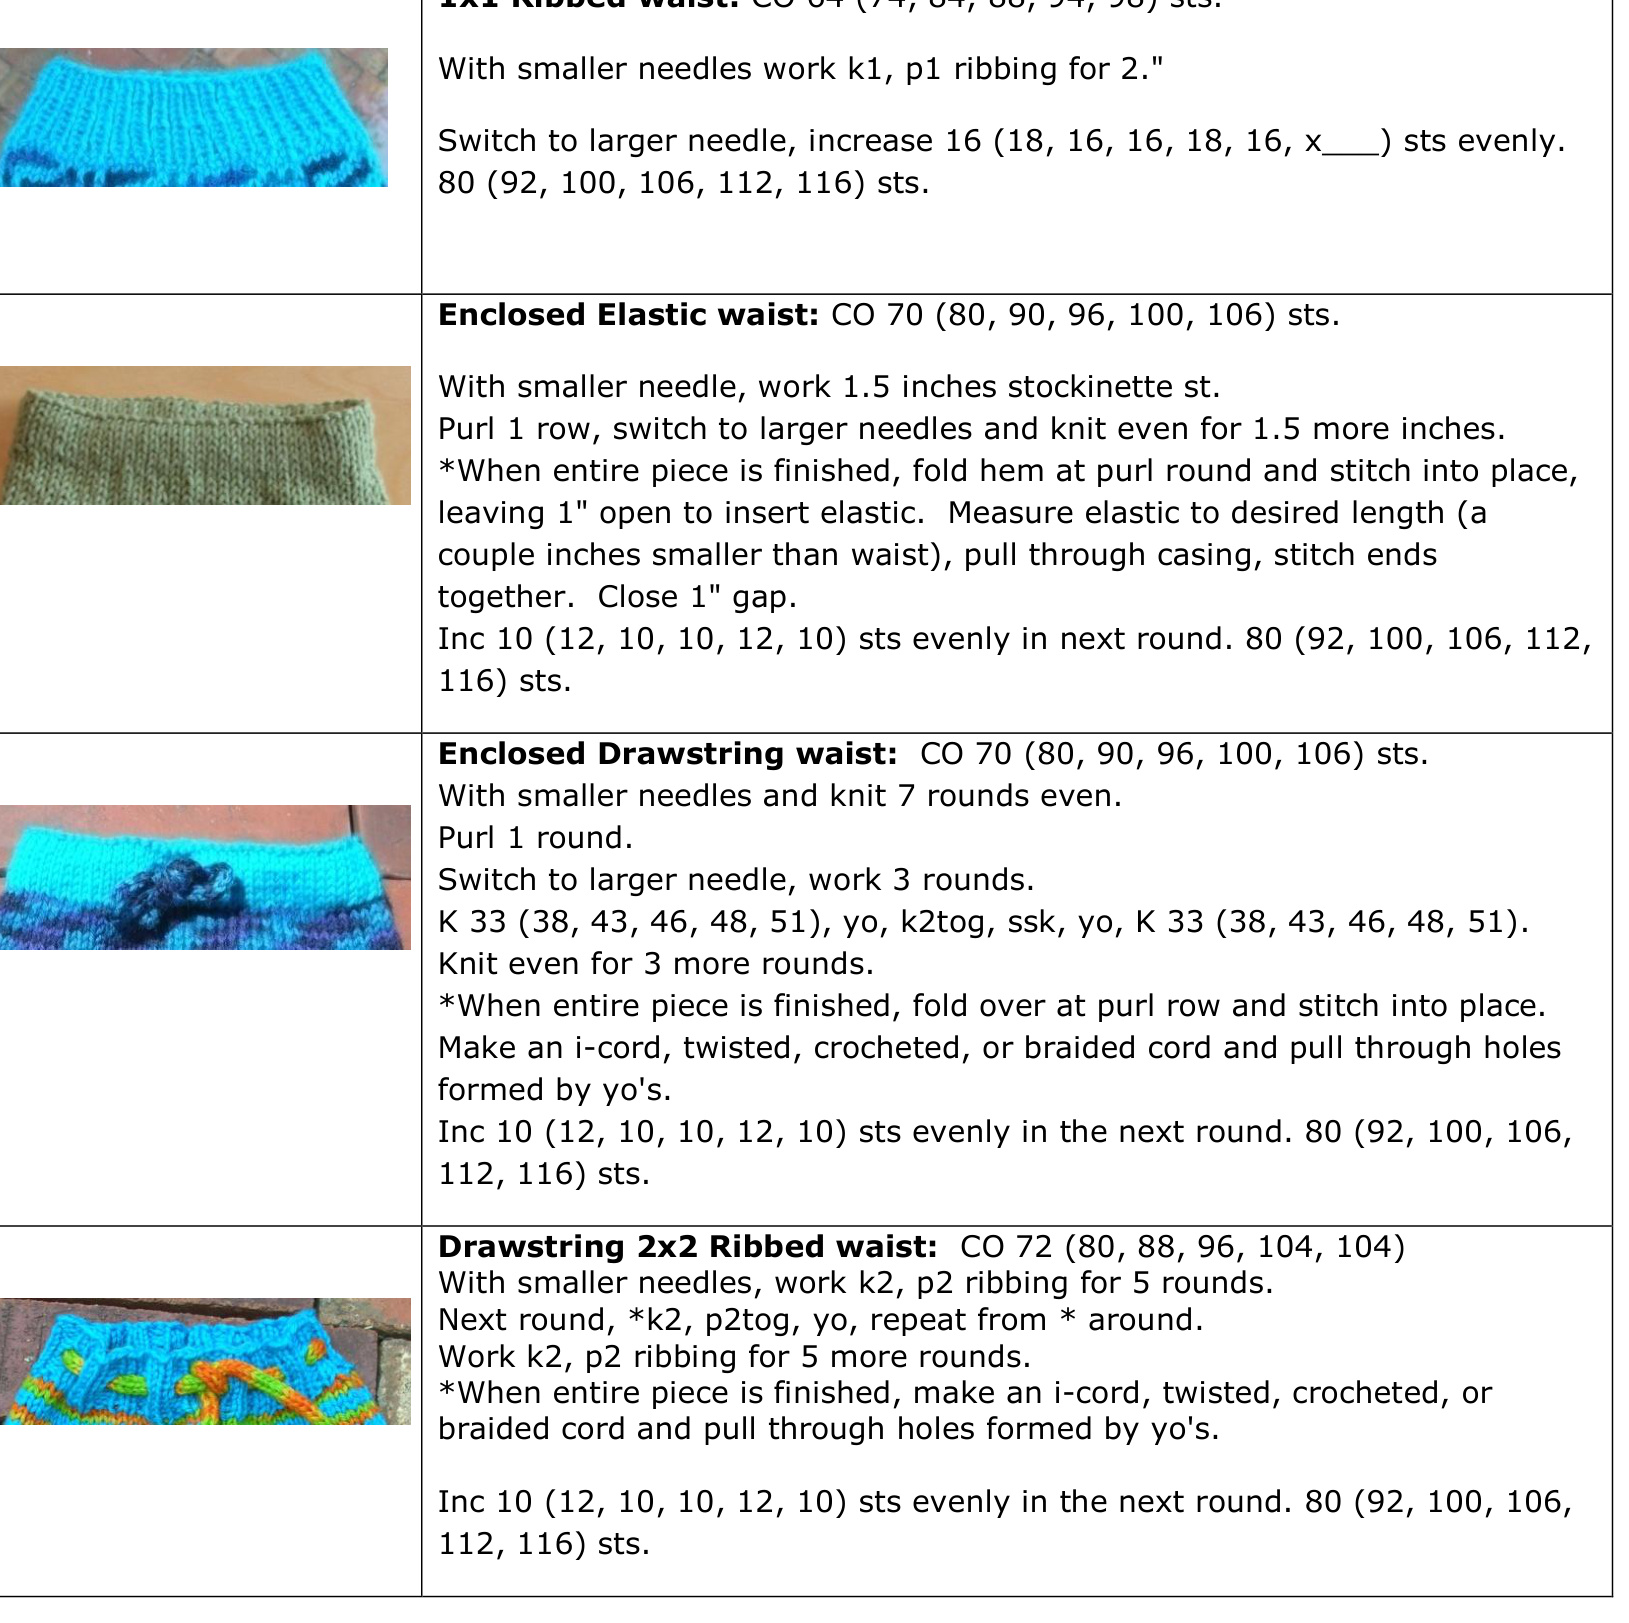
Waist: 4 options to choose from
1x1 Ribbed waist: C0 64 (74, 84, 88, 94, 98) sts.
Instructions:
Body:
Work waistband of your choice with smaller needles. Switch to larger needles and then knit body even until piece measures 5.5 (6, 6.25, 6.25, 6.75, 6.25, v) inches from the cast on edge.
Short Rows:
Short rows are worked at the bottom and all in one shot. Here is my version of Japanese short rows in the round. You will need safety pins to work this, though it may be possible without. The pins make in much easier. I chain my pins together to help keep track of how many short rows I need to make. For larger pictures and more details, got to http://www.adorabubbleknits.com/pages/tutorials.php Short row stitch marker placement: Place stitch marker 20 (23, 25, 26, 28, 29) sts before and after beginning round stitch marker.
Knit to first short row stitch marker, turn. Place safety pin on working yarn.
[Purl side short row:
Slip first stitch. Purl across, slipping beginning round st marker, to second short row st marker. Turn and place safety pin on working yarn. Knit across to next short row placement, 4 stitches before last knit side short row and work next knit side short row. Purl acrosto 4 stitches before last purl side short row and work next purl side short row. Continue in this manner, turning 4 stitches before last short row worked until you have worked 8 short rows total, 4 on each side. You will have 4 safety pins on each side.
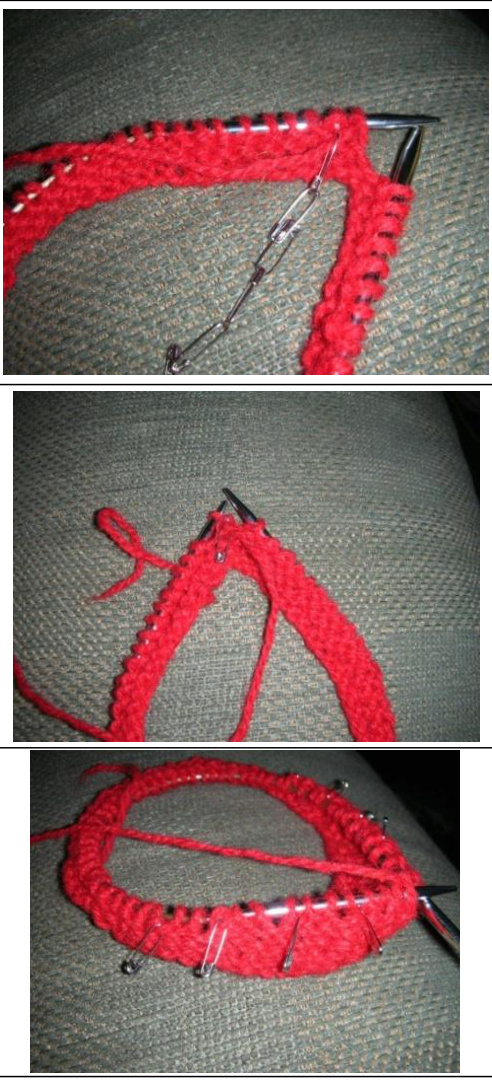
$^{**}$ Thispatfellytmaedselthrha me at melanie@adorabubbleknits.com for information. [Closing the holes: Knit to the first gap. Pick up safety pin. Place loop with safety pin on left needle and knit loop together with next Stitch. This is where this version differs from others. Do not turn, knit around to 1 stitch before the right side short row holes. [Slip next st.
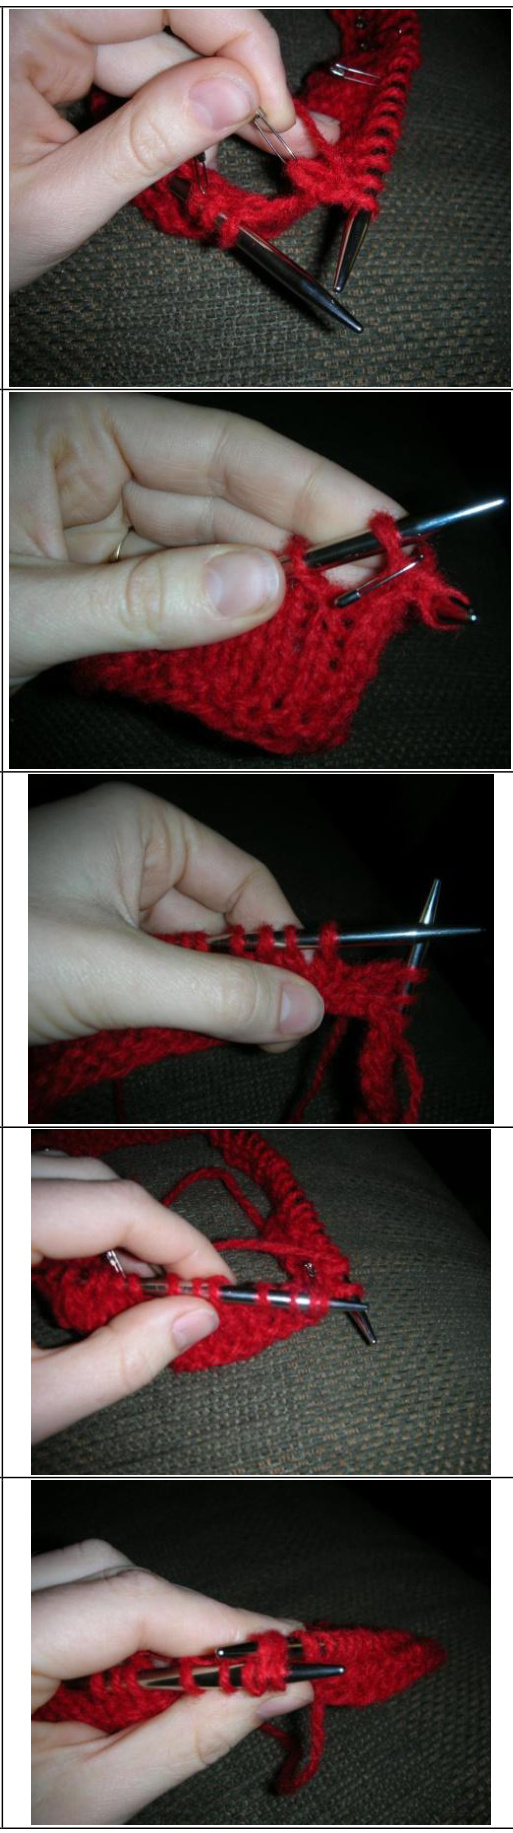
Pick up loop with safety pin and place on the left needle. It willbe pretty tight. Place slipped stitch back on to left needle and knit it together with the picked up loop like you would knit an ssk.
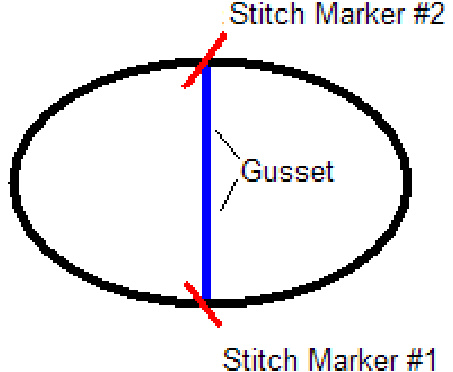
Split for Gusset:
From here on, we will be working on one leg at a time. Place next 40 (46, 50, 52, 56, 58) on a piece of waste yarn.
Left Leg:
Place stitch marker #1 one stitch before the end, provisional CO 18 (18, 20, 20, 20, 20) stitches. These stitches are the gusset and will bridge the back to the front. Place a stitch marker after 9 (9, 10, 10, 10, 10) stitch on the provisional cast on edge (needed for later). K1 from the body, place stitch marker #2 and begin knitting the stitches from the front.
Gusset Decreases:
These will all be made between stitch marker #1 and #2. 1. Knit to first marker, slip marker, ssk, knit to 2 sts before second marker, k2tog, slip marker, knit to end. 2 decreases made. 2. Knit to first marker, slip marker, sk, knit to 2 sts before second marker, do not decrease, slip marker, knit to end. 1 decrease made. 3. Repeat steps 1 and 2 until there are 10 (8, 8, 10, 8, 10) sts between markers. Remove markers and place 1 beginning round stitch marker between these gusset stitches. 48 (52, 56, 60, 62, 66) sts total. 4. Place a safety pin on the last gusset decrease round to mark that round.
Tapered Leg:
1. Knit 5 (6, 6, 6, 6, 7) rounds even. 2. Ssk, knit to last 2 sts, k2tog. 3. Repeat 1 and 2 until there are 38 (38, 40, 42, 42, 46) sts, or until you reached the desired width. 4. Knit even until piece measures 4 (6, 7, 8, 9, 10) inches from safety pin on last gusset round. 5. Work desired leg hem for $1^{\prime\prime}$
Straight Leg:
1. Continue knitting even until leg measures 4 (6, 7, 8, 9, 10) from safety pin on last gusset round. 2. Work desired leg hem for $1^{\,\prime\prime}$
Right Leg:
Gusset: Place held stitches back onto needle. 1. Join yarn at the middle of the provisional cast on (you will need to move the stitches on your needles so that you can begin knitting here) and mark beginning of the round. Place a marker #1 after 10 (10, 11, 11, 11, 11) sts and place marker #2, 10 (10, 11, 11, 11, 11) sts before the join. 2. Knit to 2 sts before the k2tog, slip marker, knit around to st marker #2, slip marker, ssk, knit to beginning. 2 decreases made.
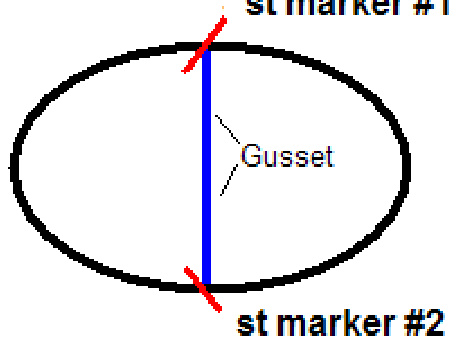
Right Leg Diagram 3. Knit to 2 sts before second marker, k2tog, slip marker knit to. stitch marker #2,slip marker, do not decrease, knit to beginning 1 decrease made. 4. Repeat steps 2 and 3 until there are 10 (8, 8, 10, 8, 10) sts between markers. Remove markers and place 1 beginning round marker between these gusset stitches, after 48 (52, 56, 60, 62, 66) sts. Tapered Leg: Same as for left.
$^{**}$ Thispattenisforersnlsenlyfyuwould litmakeand sethesbritheleaseail me at melanie@adorabubbleknits.com for information.


