Chasme Mittens www.danido.com
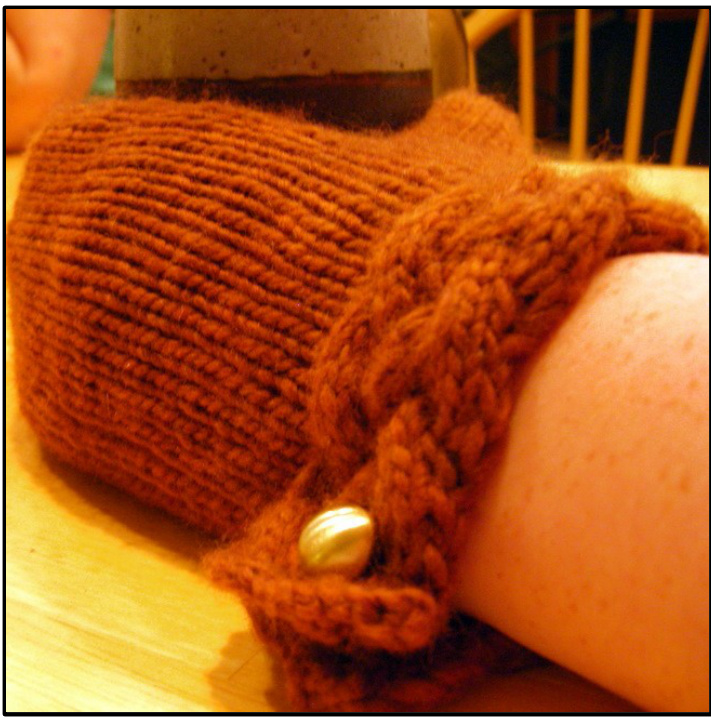
Add un peu de charme (or 'a little glamor') to your winter wear this year with these charming mittens. Simple, elegant and quick to knit these mitts worked up in a luxurious merino (like the Malabrigo pictured) will make a stylish and warm accoutrement this season.
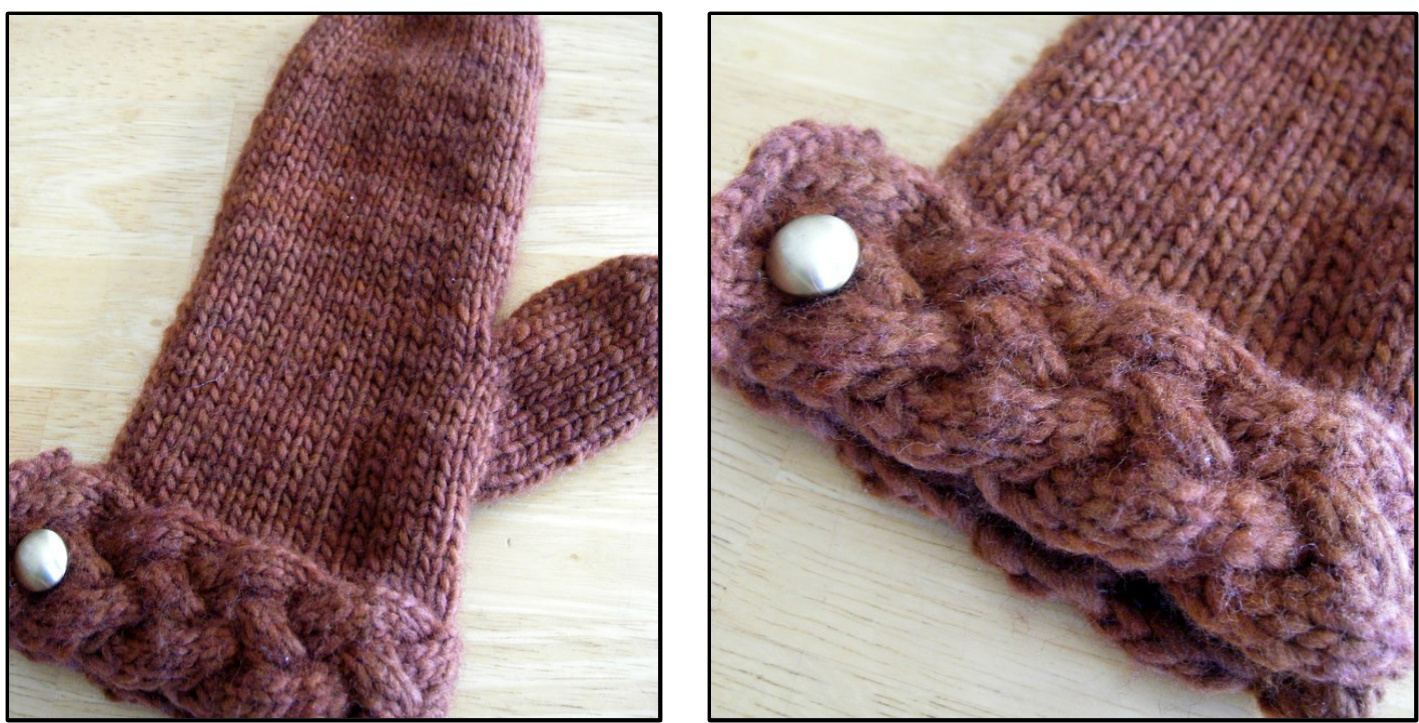
You will need: 1 hank of Malabrigo Worsted (less than 1 hank, approx. 60 grams of a hank) US7 DPN's or circular long enough for magic loop Cable needle Darning needle 2 sets of snaps for the inside of the French cuff Sewing needle and thread in color matching your yarn 2 buttons for show on the outside of the French cuff Note: You could skip the snaps and simply seam together cuff where it meets your wrist but Ifind the snaps useful to get the mittens on and off.
Abbreviations:
pm: place marker sl m: slip marker M1: with the tip of your needle pick up the bar between two knit stitches and slid it onto your left hand needle, knit into the back loop of this st. C6F: Slip 3 sts to cable needle, hold in front of work, k3, k3 from cable needle C6B: Slip 3 sts to cable needle, hold in back of work, k3, k3 from cable needle Cabled band: With smaller needles CO 14 Row 1 and all wS rows: sl1, purl across Row 2: sl1, (C6F) twice, k1 Row 4: sl1, knit across Row 6: sl1, k3, C6B, k4 Begin thumb gusset Round 1: k15, pm, k1, m1, k1, m1, k1, pm, knit to end of round Round 2: knit around all needles Round 3: knit to m, sl m, k1, m1, k to 1 before next m, m1, k1, sl m, knit to end of round
Rep these 6 rows 9 times, work rows 1-3 once more. BO knit wise loosely. About an inch in on the band (doesn't need to be precise just so you can pick up sts leaving the ends un worked as French cuffs) begin picking up sts with larger needles. Pick up and knit 33 sts, leaving approximately 1 inch (or the same length as you left at the beginning) unworked. It may help to place split ring markers at these points before you begin picking up sts, this will make it easier to pick up your sts evenly across. Distribute these 33 sts across 3 DPNs (or onto long circular needle) (11 sts per needle) Join in the round being careful not to twist, pm to mark beginning of round. Work in stockinette for 10 rounds. Rep last 2 rounds until there are 11 sts between markers Next round: Knit around Round 2: Knit to m, sl 11 sts to scrap yarn, C0 3 sts over gap, knit to end. Knit in stockinette rounds for 4 inches (or until mitt hits the tip of your forefinger) Begin top shaping Round 1: $^{*}{\sf k1}$ , k2tog\* rep around Round 2: knit even Round 3: $^{*}{\sf k}2\sf{t o g}^{*}$ around Round 4: knit even Break yarn leaving a tail of several inches, draw tail through remaining live sts and cinch of top of mitten. (Option: you could also graft these sts together instead of drawing the tail through the live sts, this will make for a more fitted mitten top and will eliminate the point at the top of the mitt.)
Charme Mittens
Pick up for thumb: Slip sts from scrap yarn onto 2 DPN's, pu 1 st at edge of held sts to close the gap, pu 3 sts along cast on edge, pu 1 st from other gap (16 sts), join in the round and work in stockinette for 2 inches or until work is nearly covering your thumb. Shape top of thumb: Round 1: $^{*}{\sf k}2\sf{t o g}^{*}$ to last st, k1 Round 2: knit even Round 3: $^{*}{\sf k}2\sf{t o g}^{*}$ to last st, k1 Break yarn and cinch up top of thumb as for top of mitten. With sewing needle and matching thread place snaps just past where the cuff closes snugly around your wrist, sew snaps into place going into part of the yarn on the backside of the cabled band but not all the way through (you do not want your thread to show on RS of work.), place button on outside of work on top of where the snaps are and sew into place. The button is just for show, if you don't want to put a button the outside it's not necessary but it does give a very finished look to the cuff.
Optional closure:
If you do not like the looks of the French cuff you can always seam or graft the ends of your cabled band together to make a circular cuff, as long as you have knit your mittens in a stretchy fiber (like the Malabrigo Worsted) you should have no problem getting the cuff over your wrist. You could also work a buttonhole loop at the end of one side of the band and fold it over to button. Feel free to experiment with your cuff to get the look you like.


