EMMA ASKED
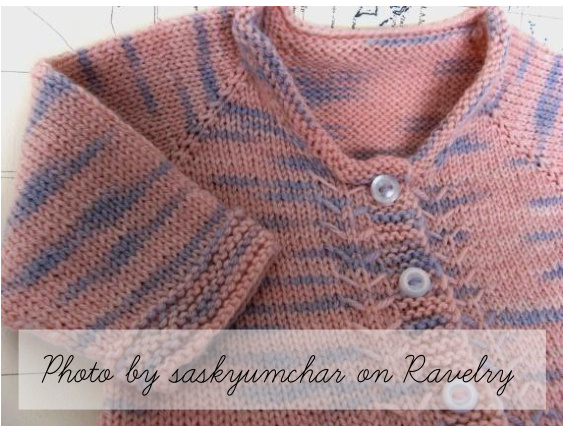
A FREE KNITTING PATTERN DESIGNED BY KELLY BROOKER DOWNLOADED FROM WWW. RAVELRY.COM My friend Emma came to me lamenting the lack of stylish fingering weight,genderneutralbabycardigansavailableatthemoment. What elsewould I do,but create one! This free pattern is written for 4ply/Fingering weight yarn, and to fit a newborn babe, approx 3-4kg (7-9lb) in weight, with an approx chestcircumferenceof37.5cm.
CONSTRUCTION
MATERIALS
ABBREVIATIONS
This pattern has you cast on at the neckline, and work flat utilising standard raglan increases until you reach the required chest size.From here the arm stitches are put on to waste yarn (or a stitch holder), and the body completed. You are working the garter stitch buttonband as you go. Once the body is completed, the sleeve stitchesarereturnedtotheneedles and worked in the round to the requiredlength.You will need to know how to knit small circumferencesintheroundto complete the sleeves - either utilising ‘Magic Loop'or with Double Pointed needles. You will also need to know how to work a backwardsloop cast on. Ifyou are not familiar with these techniques you may need to reference a knitting guide book, or view videos ontheinternet.
Augustbird White Gum Wool 4ply
(100g/472m)1skein NOTE: If you are wishing to use a partial skein, you will require upto70g/330m 4or510mmbuttons (dependent upon your row gauge) 2 small lengths of waste yarn or stitch holders EQUIPMENT 80cm3.0mm and3.25mm circular needles 5stitchmarkers darning needle (for sewing in ends) GAUGE (in stocking stitch) 28sts/10cm on 3.25mm needles

..knit. k2tog...knit stitches together kgf...knit into the front and back of a stitch M1L...insert the left- hand needle, fromfronttoback,underthestrand of yarn which runs between the stitch justworkedand thenextstitchonthe left-hand needle. Knit through the backloop MiR....inserttheleft-handneedle, from backto front, under the strand ofyarnwhichrunsbetweenthestitch justworkedandthenextstitchonthe left-hand needle.Knit this stitch normally ...purl RS.. Right Side sll...Slip stitch as if to purl W....Wrong Side yo....yarnover(anincrease; inthiscase used tocreatea buttonhole)
THE PATTERN
PART A: UPPER CHEST
Using the larger needle, cast on 45 stitches. Row 1 (WS): p3, place marker, p9, place marker, p21, place marker, p9, place marker, p3 Row 2 (RS): knit to 1 stitch before marker, kfb, slip marker, kfb, knit to 1 stitch before marker, kfb, slip marker, kfb, knit to 1 stitch before marker, kfb, slip marker, kfb,knit to1 stitchbefore marker,kfb, slip marker, kfb, knit to end of row (increased by 8stitches)
Row 3 (WS): purl all stitches
Repeat Rows 2 & 3,five more times (9/21/33/21/9) Repeat Shaping Rows 1 & 2 twice more (15/27/39/27/15)
PART B: LOWER CHEST
(RS) backwards loop cast on 7 stitches at the start of your row,then: Row 1 (RS): knit to 1 stitch before marker, kfb, slip marker, kfb, knit to 1 stitch before marker, kfb, slip marker, kfb, knit to 1 stitch before marker,kfb, slip marker, kfb, knit to 1 stitch before marker, kfb, slip marker, kfb, knit to end of row (23/29/41/29/16) (WS) backwards loop cast on 7 stitches at the start of yourrow,then: Row 2 (WS) - buttonhole row: s1p, k2, yo, k2tog, purl to 5stitchesfromendofrow,knit5
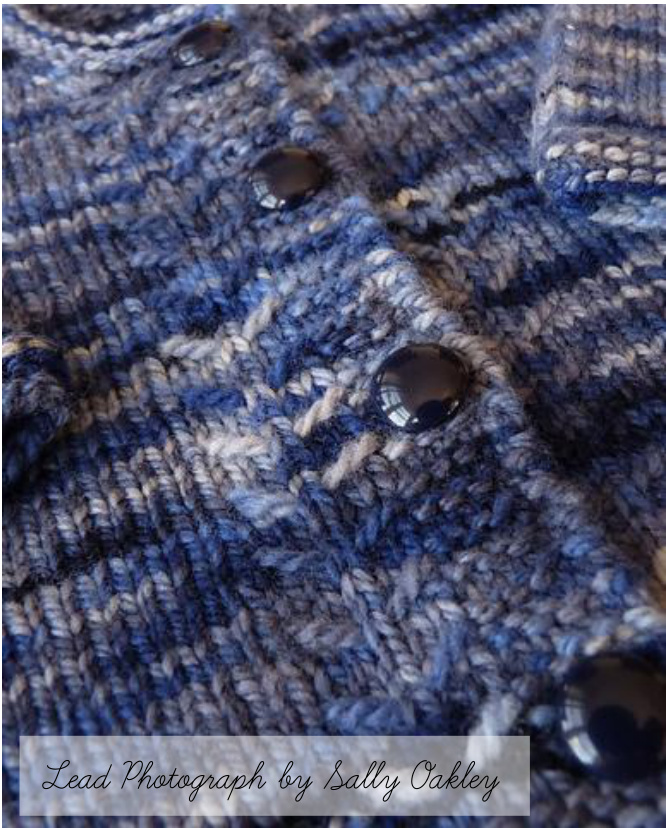
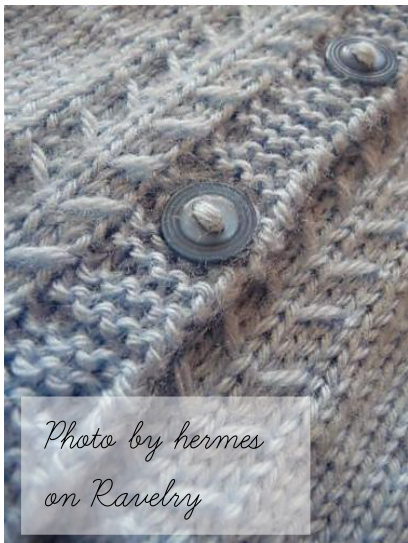
TEXTURE
Texture Row 1 (RS): slip 5 stitches purlwise with the yarn held to the front Texture Row 2 (RS): k2, insert needle under the loose strand from the front and knit the next stitch, bringing the stitch out under the strand. knit 2
BUTTONHOLES
Buttonholes are evenly spaced along the garter stitch edging. They are worked at the start of a WS row. Substitute the "s1p, k4"at the start ofeach ofthe WS rows with "s1p, k2, yo,k2tog", then work remainder of row as normal. You should insert a buttonhole approximately every 3 4cm of knitting
PART B: LOWER CHEST CONTINUED
Row 3 (RS): sl1p, k4, work Texture Row 1 over next 5 stitches, knit to 1 stitch before marker, kfb, SM, kfb, knit to 1 stitch before marker, kfb, SM, kfb, knit to 1 stitch before marker, kfb, SM, kfb, knit to 1 stitch before marker,kfb,SM,kfb,knit to 10 stitches from end of row, work TextureRow1overnext5stitches, knit5 Row 4 (WS): sl1p, k4, purl to 5 stitches from end of row, knit5 Row 5 (RS): sl1p, k4, work Texture Row 2 over next 5 stitches, knit to 1 stitch before marker, kfb, SM, kfb, knit to 1 stitch before marker, kfb,SM,kfb, knit to 1 stitch before marker, kfb, SM, kfb, knit to 1 stitch before marker,kfb, SM, kfb,knit to 10 stitches from end of row, work Texture Row 2 over next 5 stitches, knit5 Row 6 (WS): sl1p, k4, purl to 5 stitches from end of row, knit5 RepeatRows3to6threemoretimes (untilyou have the following stitchcount:31/45/57/45/31)
Don't forget buttonholes every 3-4cm!
SleeveSeparationRow(RS):sl1p,k4,work Texture Row1overnext5stitchesthenknit remainingfrontstitches,removemarker, place sleeve stitches on to waste yarn, remove marker,knit acrossback stitches, remove marker, place sleeve stitches on to waste yarn, remove marker,knitto10stitchesfrom end of row,workTextureRow1overnext5 stitches,knit5 Your sleeves are now on waste yarn, and remaining live on yourneedlesare2frontsand theback. PART C: BODY Row 1 (WS): sl1p, k4, purl to 5 stitches from end of row, knit5 Row 2 (RS): sl1p, k4, work Texture Row 2 over next 5 stitches,knitto10stitchesfrom end of row,work Texture Row 2 over next 5 stitches,knit5 Row 3 (WS): sl1p, k4, purl to 5 stitches from end of row, knit5 Row 4 (RS): sl1p, k4, work Texture Row 1 over next 5 stitches,knitto10stitchesfrom end of row,work Texture Row 1 over next 5 stitches,knit5 Row 5 (WS): sl1p, k4, purl to 5 stitches from end of row, knit 5 Repeat Rows 2 to 5 until work measures approximate 20- 21cm from shoulder, ensuring you remember to place buttonholesasdirected
PART C: BODY CONTINUED
Edging: Work in garter stitch, slipping the first stitch of every row, for 1.5-2cm. Cast off
PART D: SLEEVES
Return stitches from one piece of waste yarn to your needle, and pick up 4sts under each arm, placing a marker in the centre of these 4sts just picked up (49sts) CYou will beworkingsleevein theround.Themarker sits under the arm and marks the start/finish of round) Knit in stocking stitch (k all sts, every round) until sleeve measures approx1.25cm from underarm Decrease round: ssk,k until 2 sts from end of round, k2tog Alternate working 1.25cm stocking stitch with a decrease rounduntilyouhaveastitchcountof35sts Knit in stocking stitch until sleeve measures approx 10cm fromunderarm Work 4 rounds of garter stitch (k one round, p one round).Cast off Repeat for second sleeve
PART E: NECK EDGING
Using smaller needles, and with RS facing, pick up and knit stitches around the neckline. You should aim to pick up stitches at a 1:1 ratio along horizontal sections of the knitting (ie the back and sleeves cast on edge, and the front cast on edge), and a 3:4 ratio (pick up 3 stitches for every 4 rows of knitting) along curved and vertical sections of the knitting (ie the area between the back and front cast on edges) Work 1cm of reverse stocking stitch (purl on the right side of the work, knit on the wrong side) Cast off loosely. This is a rolled edge, which should roll inwards.
FINISHING:
Sewinallends Wash in a gentle wool wash, then lay flat and in shape, to dry Securely sew on buttons to garter stitch button band, corresponding with the buttonholes.
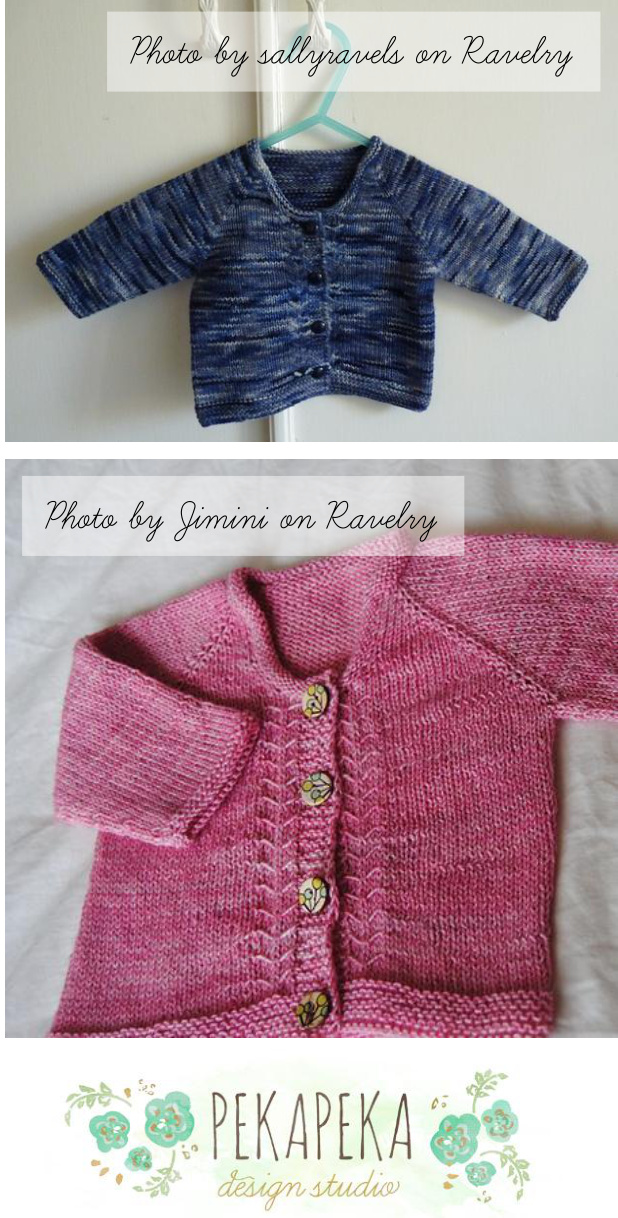
a knitting pattern by Kelly Brooker, of Pekapeka Design Studio Please respect designers and their intellectual property by obtaining your own legal copy of this pattern, and not providing others with a copy. @2013 Kelly Brooker all rights reserved I give my blessing foryou to knit and sell as many items using this patternasyouwish! Needpatternsupport? Visit http://www.ravelry.com/groups/pekapeka-design-studio


