Brickwork Hat
Designed by Rachael Tatman'
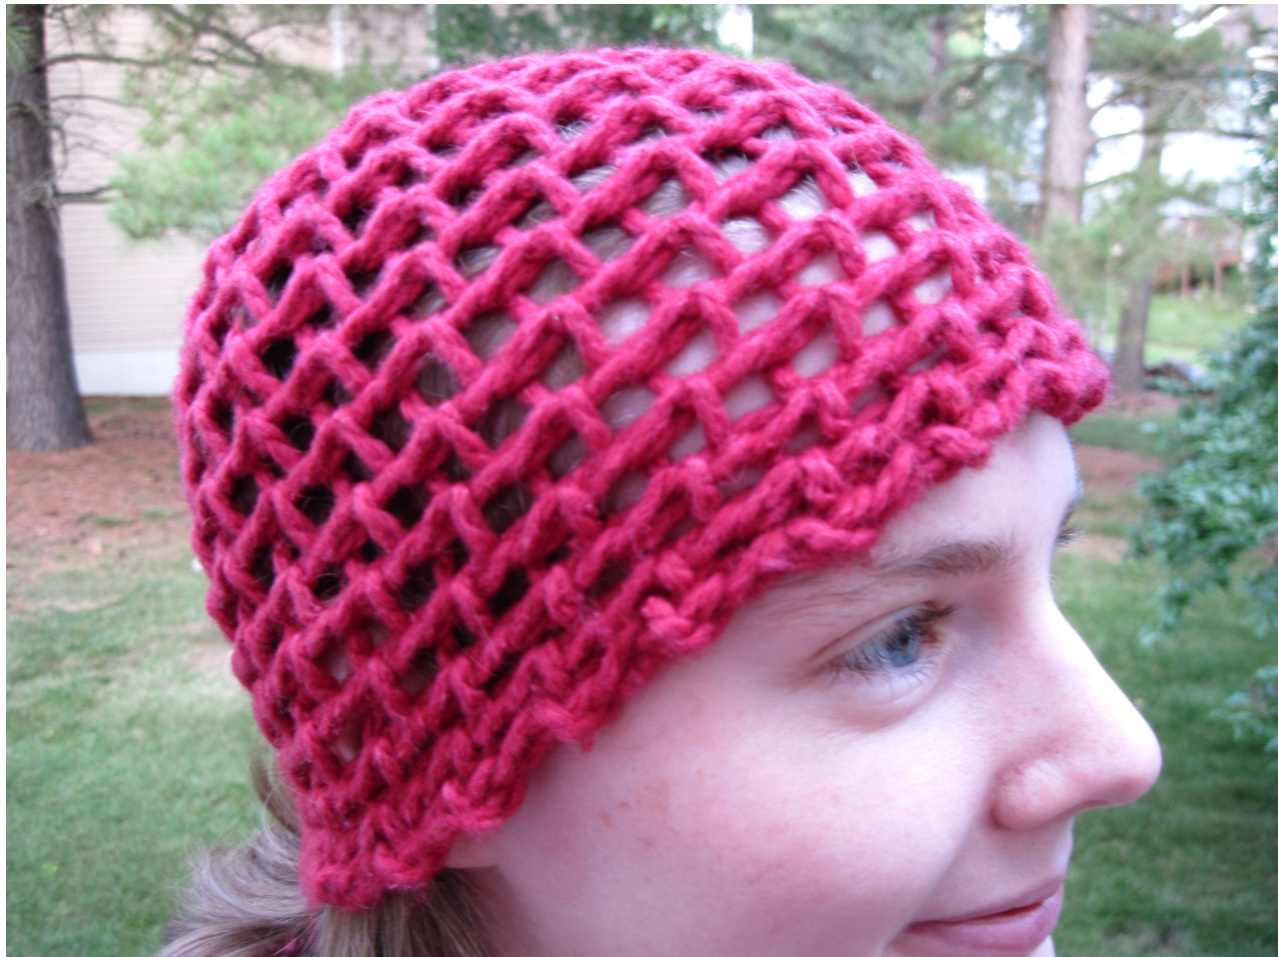
While I was knitting this up, several people asked me what I was knitting. No one believed me when I told them it was a hat! Knitted flat, this hat makes a great first lace project and works up in the jiffy. The best part, though, is that it only takes about fifty yards (46 meters) of bulky yarn! That means that you can get two out of a single skein of Juniper Moon's luscious wool cotton blend, Yearling.
Pattern notes:
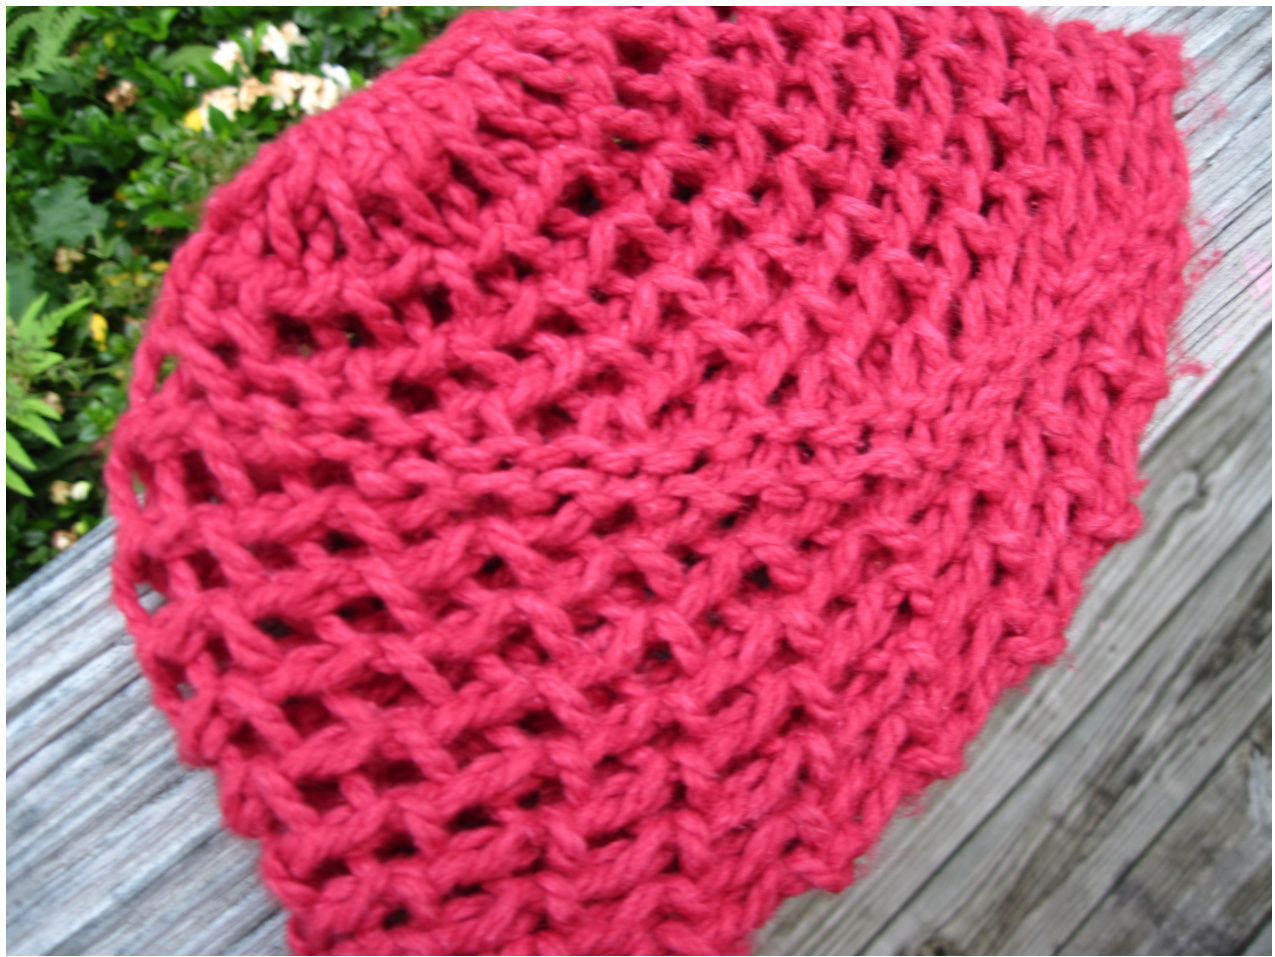
This pattern is written as a "true lace" pattern, meaning that you work the pattern every row. Don't worry, though; it's all in garter stitch. As you work, your knitting will start to develop a definite slant. Don't worry about that either; it's part of the pattern! When you're done, you'll unravel the provisional cast-on, graft the first and last rows together using the Kitchener stitch and gather the top of the hat together. The Kitchener stitch edge will spiral up the side of the hat like this:
I like the purl side out, but you can wear it either way. For the brim of the hat, you'll be making a yarn over at the end of every other row and dropping it on the return row. This insures that you've got a nice, loose brim (nothing worse than finishing a hat and finding out it's too tight) and also gives it a nice, decorative edge. It may be a little difficult to intentionally drop stitches, but just remember that, because you haven't knit any stitches into your yarn over, you won't be losing any work. Yarn: 50 yards (46 meters) Juniper Moon Yearling (60% Merino Wool, 40% Cotton ) in color #8, Firetruck. About half a skein. Needle: Size 10, or size needed to get gauge Gauge: 2 inches = seven stitches in pattern gauges (starting and ending w/ a knit stitch)
Pattern:
Using the provisional cast on, cast on 24 stitches. Follow chart 1 or written pattern, rows 1 through 3.
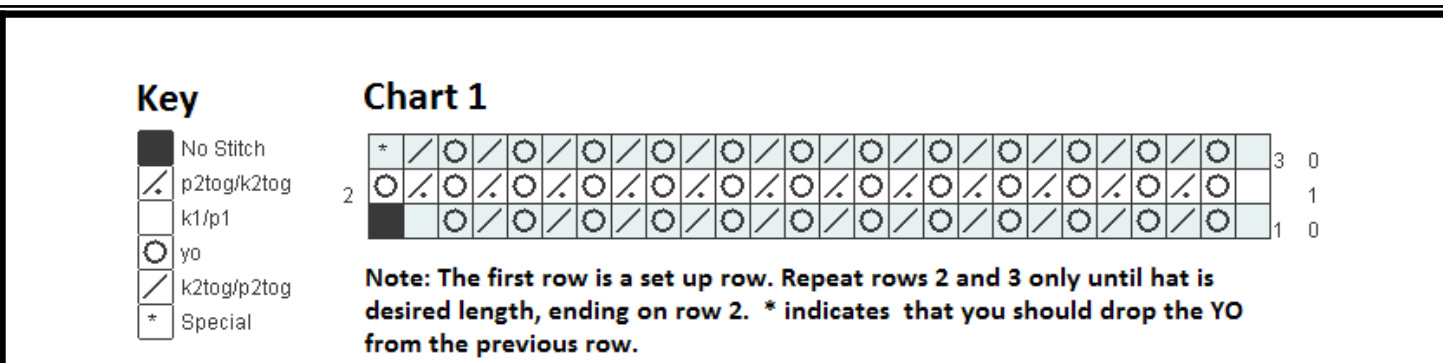
1st row: knit one, \*yarn over, knit two together, repeat from \* 11 more times, knit one 2nd row: yarn over (just wrap the yarn around the needle) \*knit two together, yarn over, repeat from \* 11 more times, knit one 3rd row: knit one, \*yarn over, knit two together, repeat from \* 11 more times. Drop the yarn over from the start of the previous row. Repeat rows 2 and 3 or the chart until the hat measures 20 inches along the brim edge (with the dropped yarn overs) OR the brim edge measures the same as the desired head circumference, ending with row 2. Final row: knit all.
Finishing:
Unravel provisional cast-on. Using Kitchener stitch, graft together first and last rows, starting at the brim. When you're grafting, be sure to adjust the tension every other stitch or so. I've found that Yearling can be difficult to adjust the grafting on. After you graft the last stitch, run the yarn through every other or every forth stitch on the edge of the non-brim edge. Gently pull the yarn until you've closed the top of the hat. Weave in ends, block and enjoy!
Mods:
For a longer (slouchier) hat, cast on more stitches to begin with. To fit a larger head, continue knitting for longer. This hat could be made into a snood (or a cute purse!) by making a longer and larger version, then running yarn through the yarn overs on the brim and pulling it tight. And, of course, there's plenty of room for embellishment.


