The Secret of the One-Skein Shawl
by Clara Parkes Originally published in KnittersReview.com 2007 I'll let you in on a little secret about triangular lace shawls: Most of them follow a very easy basic formula. Once you get this formula, you can do pretty much anything—with any yarn and any sized needle. The formula goes something like this. You cast on a few stitches, which corespond to the center top of your shawl. Then you'll work four increases into every other row, causing the shawl to get wider and wider and wider until you're ready to cast off. When you do, your cast-off edge willform the two diagonal bottom sides of the shawl. The four increases are placed after the first stitch and before the last stitch, and on either side of the center stitch (which is why many shawl patterns have you cast on an odd number). The increases are normally worked as a simple yarn-over (or YO), in which the yarn is wrapped around the needle. Not only does the YO add a stitch but it leaves a lofty "O" in the fabric. You'll usually work the reverse-side rows in a plain purl, perhaps with some degree of garter stitch on the border stitches.
The One-Skein Challenge
Yarn stores often have one or two baskets reserved for their "special yarns," those gorgeous, colorful, sensual, tactile, and—alas -rather expensive yarns we reserve for special occasions. Artyarns Silk Rhapsody is one such yarn. I played with Silk Rhapsody right after reviewing One-Skein Wonders, a book of 101 patterns that all require only one skein of yarn. My immediate thought: What kind of shawl could I create from one skein of this beautiful yarn? So that's exactly what I did. I followed the basic shawl formula, using larger needles than the yarn label suggested. And I simply kept working increases until I only had enough yarn left for the border.
How Much?
Yarn estimates for shawls are difficult because the shawl itself keeps getting wider. My method was highly unscientific: I tugged the yarn from the ball on the floor, measured the length of each tug, and counted the number of tugs I required to complete one row. I kept track of the number of tugs as the shawl widened, figured out how many rows my border would require, and kept measuring my yarn (yes, by the tug!) to make sure I'd have enough-adding a few extra tugs for good measure. As I said, highly unscientific, but it worked.
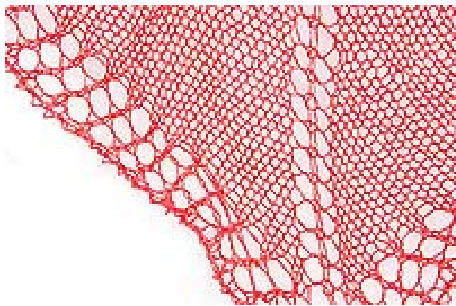
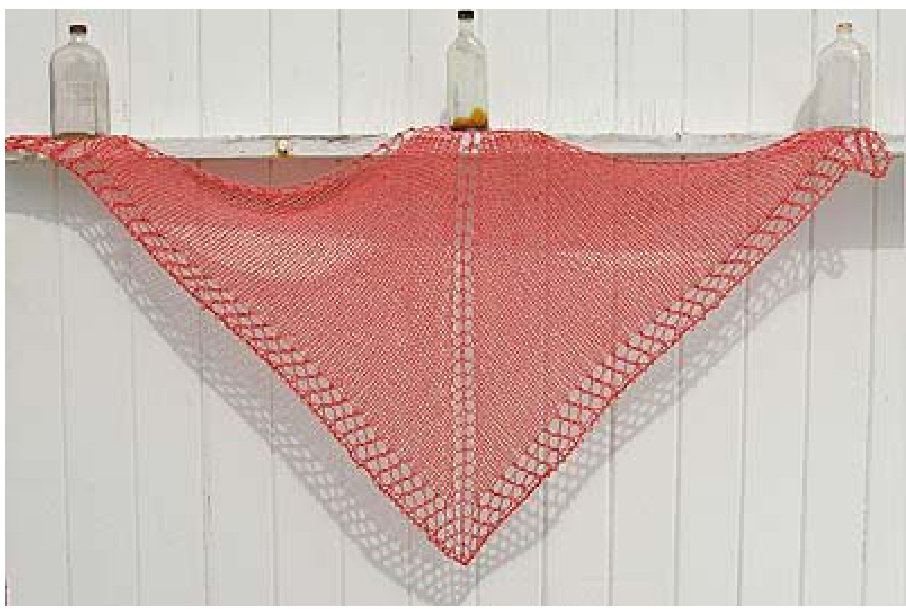
For this border I wanted something that would mirror the YO holes that run along the top of the shawl. (Those are the YOs worked at the beginning and end of each row.) So I chose a very basic YO/decrease repeat in which the stitches on the right side have a rightslanting decrease (a k2tog) and the stitches on the left side have a left-slanting decrease (an SSK). But even during these rows, I still worked the original fourstitch increase on every other row so that the fabric would continue to widen. Because the border itself is on an angle, the Os stacked up in an attractive diagonal manner. I kept notes of my progress and present them to you now in the following pattern. Have fun with it, and don't be afraid to experiment—I give you some tips at the end!
Materials
Yarn - One skein Artyarns Silk Rhapsody (two strands: $100\%$ silk and $70\%$ mohair/ $130\%$ silk), 100g/260 yards. Shown in color 18 but don't be afraid to try the variegated colors or even Silk Rhapsody Glitter. If you abhor knitting with such large needles, you can always switch to US 9 (5.5mm) needles and use two hanks of Silk Rhapsody for a tighter shawl. Needle - One size US 15 (10mm) circular needle, cord length a minimum of 32 inches Notions - Two stitch markers Gauge - Before blocking, 9 stitches per 4 inches (10cm). This is an extremely flexible pattern. I only list gauge to help you determine if you'll have enough yarn to complete this pattern using one skein of Silk Rhapsody. If you knit far more loosely than I did, you may need to eliminate one of the border repeats. If your knitting is tighter, you may be able to add another pair of rows before beginning the border repeats. A note about yarns: This pattern will work with any yarn, preferably DK-weight or finer and with a slinky, well-draping quality. Fiesta La Boheme and elann.com Endless Summer Luna come to mind as two alternatives. If you want a little more warmth, how about the Merino/Tencel blend Yarn Botanika Radiance—or even better yet, run to your LYS and see what they have in their special basket.
Terms Explained
These definitions assume that you hold the work in your left hand and pick up new stitches with your right-hand needle, working from right to left across the work. YO - Wrap yarn around your right needle. SM - Slip stitch marker to right needle. K2tog - Knit two stitches together. SSK - Slip two stitches to the right needle, one at a time, as if to knit. Then slide the tip of your left needle, from left to right, behind the fronts of those two. stitches. Wrap your yarn around the right needle, pull it through the two slipped stitches, and let them slide off the needle.
The Pattern
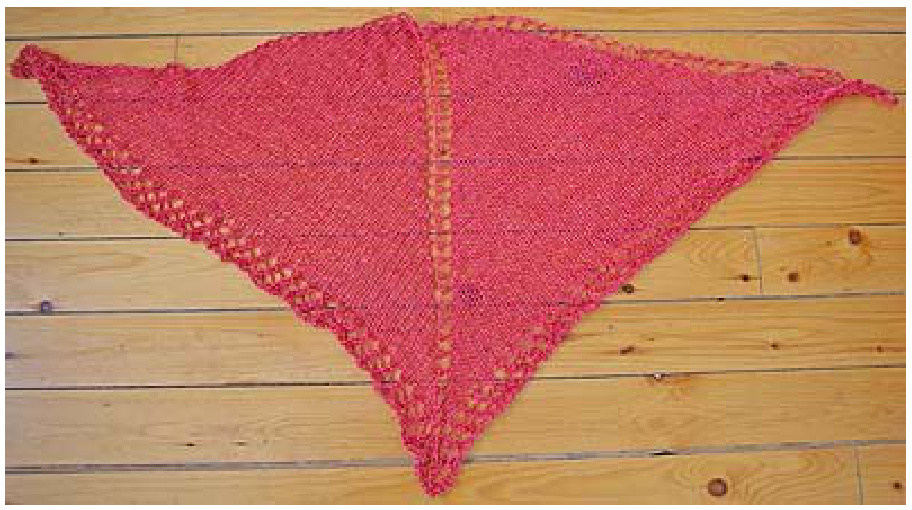
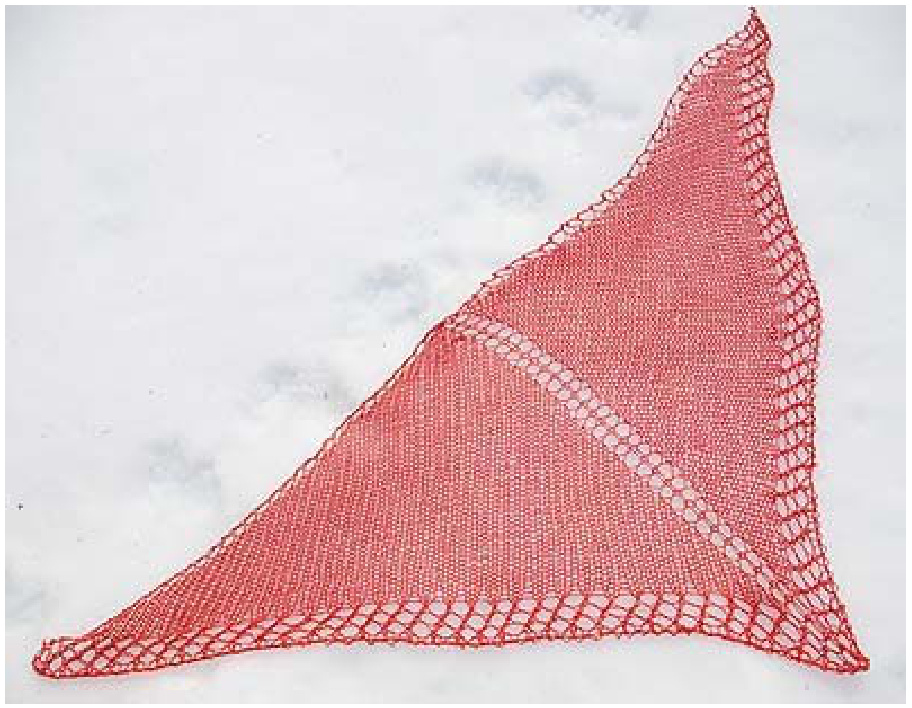
Cast on five stitches. Remember, you're starting at the top center of the shawl and working your way out. The finished triangle shape will not be apparent until you finish binding off. Row 1 (right side): K1, YO, k1, YO, place stitch marker, k1, place second stitch marker, YO, k1, YO, k1. Row 2 and all even (wrong-side) rows for the remainder of pattern: K1, purl across to last stitch, k1. Row 3: K1, YO, k3, YO, SM, k1, SM, YO, k3, YO, k1. Row 5: K1, YO, k5, YO, SM, k1, SM, YO, k5, YO, k1. Row 7: K1, YO, k7, YO, SM, k1, SM, YO, k7, YO, k1. Continue in this manner, always beginning your right-side rows with k1 and YO, knitting to the first marker and working a YO before slipping the marker, knitting the central stitch, slipping the second marker, working a YO, knitting across and working a YO before the final stitch. What you're doing is creating an ever-widening triangle with a central stitch that's flanked on either side by YOs. You'll want to take care to keep the YOs from migrating to the other side of the stitch markers. Just know that the markers should always have only one stitch between them, and that this center stitch can be traced in a visual line all the way back to your very first row. Once you have 64 stitches on either side of the central stitch (or 129 sts total) and have a right-side row facing you, it's time to begin the border pattern. This is what you see along both side of the final "v" of the shawl.
Border
Row 1: K1, YO, (k2tog, YO) across to first marker, ending with (k1, YO). SM, K1, SM, YO, K1, YO, then (SSK, YO) across remainder of row, ending with k1. Row 2 and all even rows: K1, purl across to last stitch, k1. Repeat rows 1 and 2 three times. A note about working adjoining SSKs and YOs: Left to its own devices, the previous YO tends to wander. it helps if you hold it down on the back of your needle with one finger while working the SSK. Which finger you use depends on how you knit—-I used my index finger and it definitely helped.
Flexible Bind-Off
$\star\mathsf{K}2$ , pass the first stitch worked (that is, the farthest from your right needle tip) over the most recent stitch worked (that is, the one closest to your right needle tip) and off the right needle, and slip the remaining stitch back onto the left needle. Repeat from \* across until last stitch, pull tail through that stitch and weave in ends.
Blocking
At this point we have a nice semi-triangular piece of fabric, but we don't have a shawl. That comes with blocking. Begin by filling a sink with lukewarm water and submerging the shawl. Let it sit for five minutes or until all the fibers are fully saturated. Drain the sink, gather the shawl and squeeze out excess wate before laying flat on a towel and blotting dry.
Spread out the shawl on a large surface—this can be a large blocking board or a bed or even a (clean) carpet. Slowly open up the shawl, gently tugging and stretching the fabric evenly to open up the stitches. You can pin down every few rows to help hold it in place. For more consistent results (or to use fewer pins), you can run straight stainless-steel blocking wires along each edge and pin the wires secure. With moderate stretching along the length and width of the shawl, I was able to block it out to 72 inches wide and 34 inches long (the unblocked shawl was 60 inches wide and 32 inches long).
Going to the Next Level
After you try this pattern once or twice, you may be ready to experiment with adding a simple lace stitch pattern to the body of the shawl. You'll add any such lace patterning to the stitches between the first and second YO, and to those stitches between the third and fourth YO. Stitch patterns work across a certain multiple of stitches, so you'll introduce the pattern as soon as you have that number of stitches between the first and second YO and the third and fourth Yo. Then, as the shawl grows wider and you've added enough new stitches on either side of the original repeat(s), you can add two new repeats--and the process continues as long as your yarn will allow. This pattern was originally published in Knitter's Review, www.knittersreview.com.


