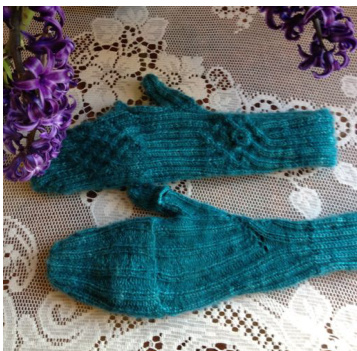
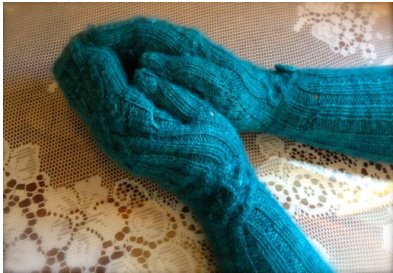
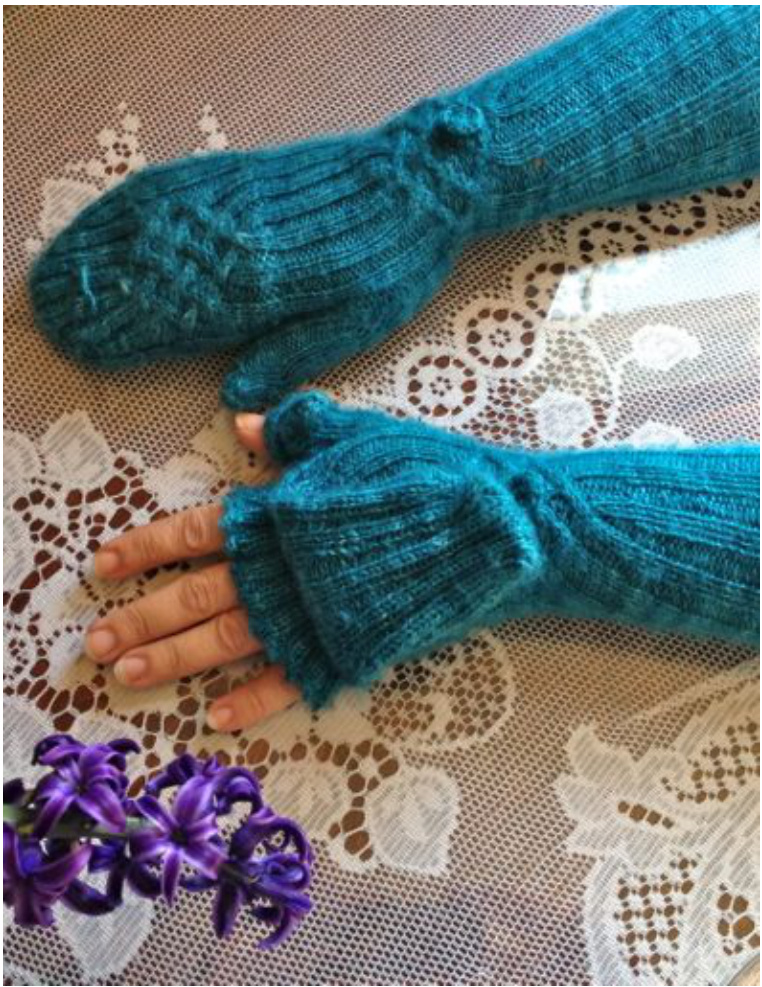
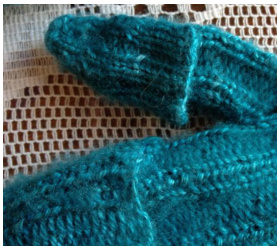
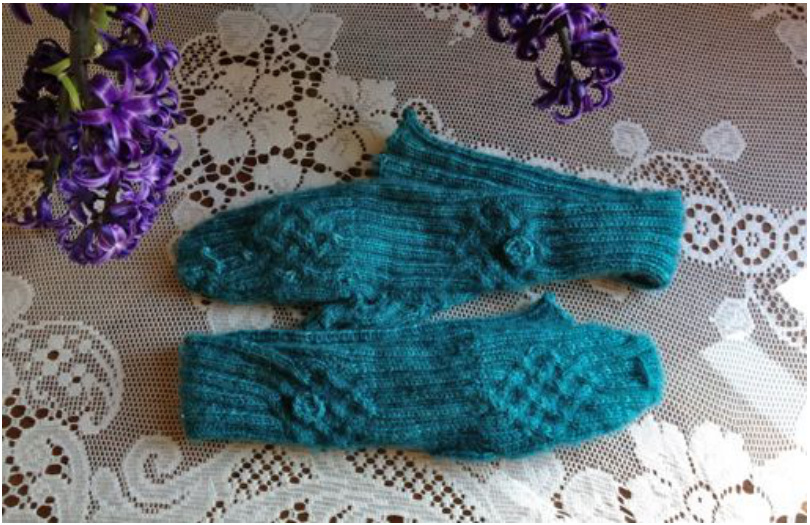
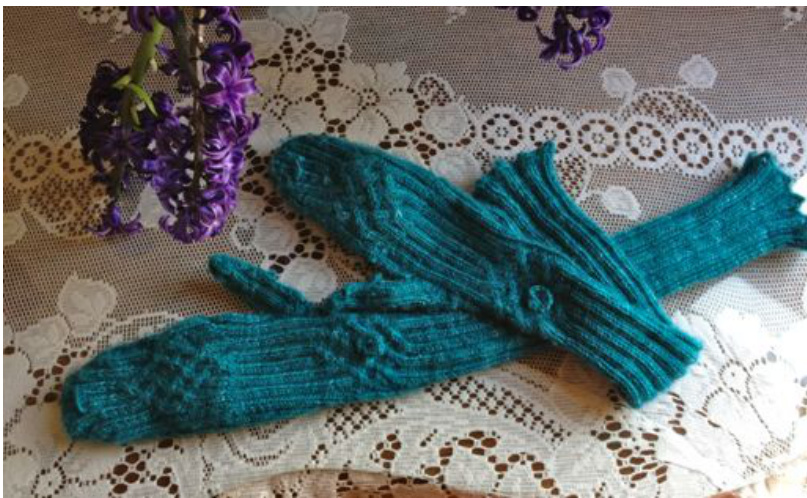
Deeply Aqua Convertible Mittens by Julie Clare
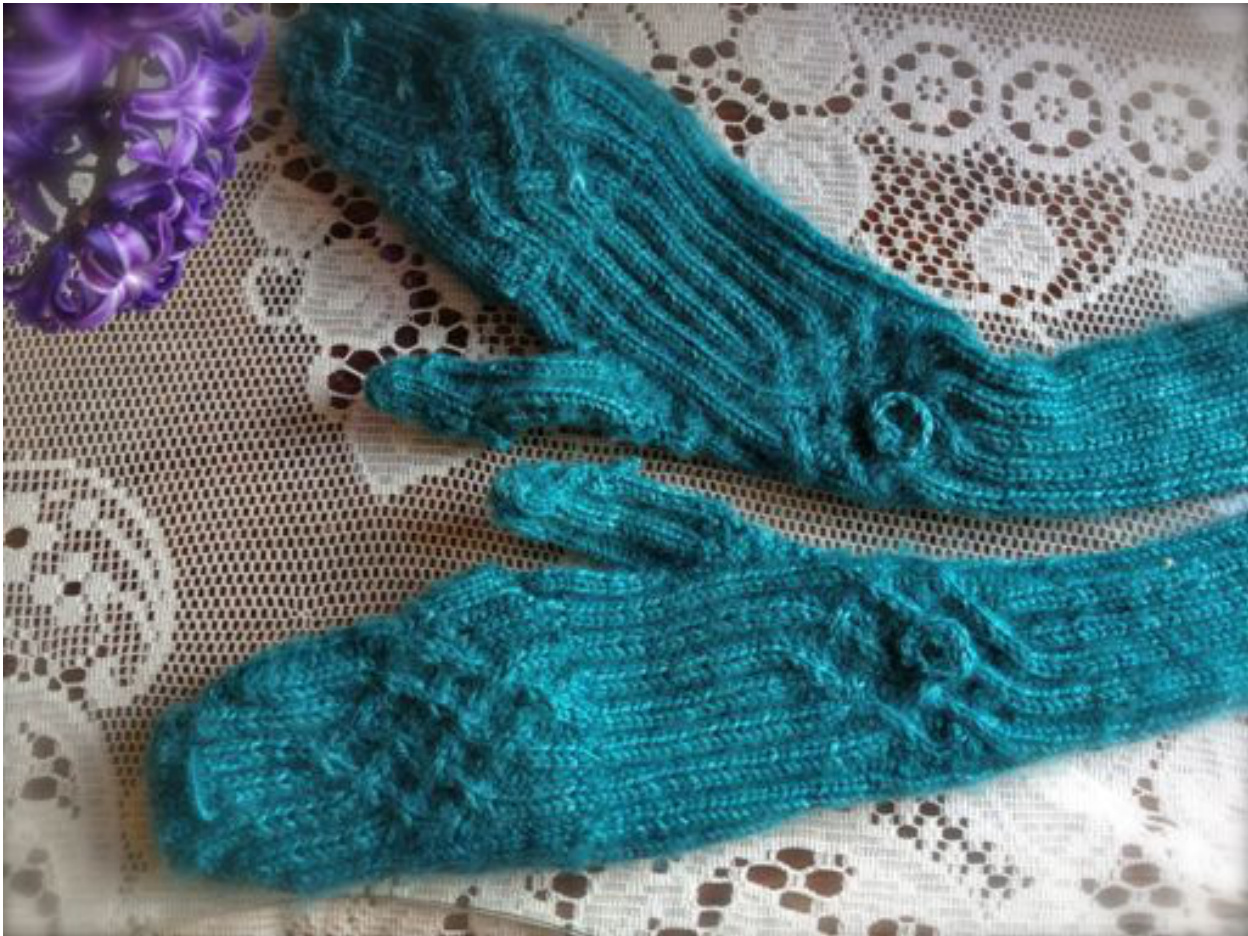
With enormous thanks to Petra (knitpet) for the original cable design from her Stulpen pattern. (www.ravelry.com/patterns/library/fingerless-gloves---stulpen) Also to Mrs Micawber for the crocheted button design which is simple elegance. (http://mrsmicawber.blogspot.co.uk/2011/08/simple-crochet-button.html) And lastly to Jess, who in her abundant generosity gifted me the yarn! These mittens also have convertible thumbs and a handy button to hold back your mitten flaps for when you need exposed fingers.
Materials
3.25mm circular needle (or size needed to obtain gauge) 1 skein cashmere fingering weight yarn = 402.3m (version shown done in Knitwitches Seriously Gorgeous Cashmere and Silk. Colourway - Deeply Aqua) 3.5mm crochet hook Darning needle to weave in ends
Gauge and Size
8sts and 10 rows = 1" [2.5cm] in 2x2 rib. Size - womens.
INSTRUCTIONS (for magic loop)
Cast On
Cast on 40 using magic loop, After joining and knitting 4 rows in P2, K2 rib, adjust so you have 26 stitches on one side (back of hand) and 14 on the other (palm). NB: It is CRUCIAL that the back of the hand starts and finishes with P2 if the cable pattern is to work. This means the palm side will start and finishwith K2 NBB: I used a provisional cast-on as I was unsure how much yarn I'd have left to go up the arms after I'd done the fingerless glove/mitten section. This meant I created the picot cast-off edge later when I knit back up the arm from wrist to elbow. If using the above wool you'll have more than enough to start at the elbow and put the picot edge on afterwards. Or do a picot cast on. For helpful video take a look on youtube (www.youtube.com/watch?v=DKBOr2IMBMY).
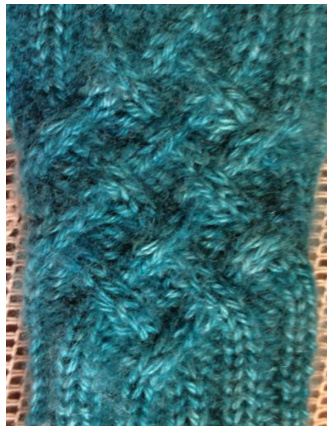
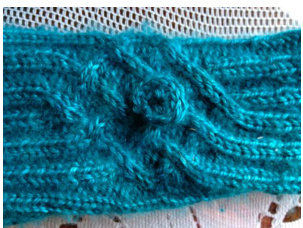
Fingerless Glove Cable Pattern
Work Petra's cable pattern (see below for written instructions and chart) Remember to start each row with purl stitches or the cable chart won't work
Increasing For Thumb (Right Hand)
On row 15 of the cable pattern start increasing at the beginning of the palm side by doing k2, m1, k1, m1 on every odd row. Make sure to maintain the 2x2 rib pattern as you knit the palm side of the fingerless glove. Do this until you have 24 extra stitches. Put 12 on waste yarn for the thumb. You will now have 26 stitches on the back-of-hand side and 26 on the palm side needle
Increasing For Thumb (Left Hand)
As above, but knit till there are 3 stitches left on the palm side then increase m1, k1, m1, k2. Continue as above.
Fingerless Glove After Cable Pattern
Keep knitting in rib until the fingerless glove reaches the second bend of your littl finger.
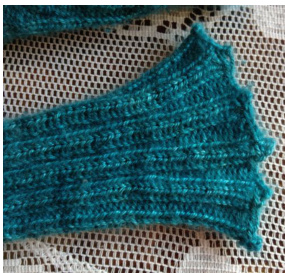
Cast-Off With Picot Edging
Do a back loop cast-on into the first stitch twice, creating 2 more stitches. Knit those 2 stitches and pass the first over the second. Repeat this cast-off 3 more times and put the loop you're left with back on to the left-hand needle. You have made your first picot! Repeat 12 more times until you have cast off allstitches. Pullyarn through and weave in end. Back loop cast-on: knit into stitch, half-twist the resulting loop back on to the left needle. NB: You always cast off twice as many as you cast on. So if you cast on 2 stitches you have to bind off 4. For helpful video see the invaluable tutorial from iknitwithcatfur(www.youtube.com/watch?v=-Nhm6n3tfHY)
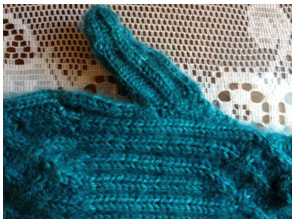
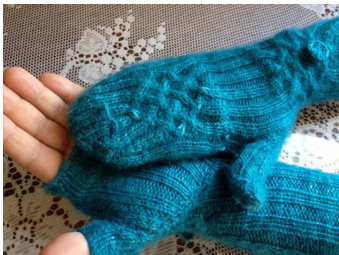
Thumbs
Remove waste yarn and put 12 thumb stitches on to needle. Knit in magic loop picking up an extra 4 stitches where the thumb joins the hand. You will now have 8 stitches on each side of the needle - 16 in total . Knit in 2x2 rib pattern until you reach the base of the thumb nail.
thumb slot:
When you reach what will be the 'palm side' of your thumb, cast off six stitches then continue till you reach the same place again. Use backwards loop cast-on to create 6 stitches and knit to the end of the round.
thumb decrease:
Decrease 3 times on each round until there are only 2 stitches left. Cut yarn and pull through the last 2 stitches. Weave in the ends and/or use them to sew up any hole between thumb and hand. NB: if you decide on more stitches for the thumb, bear in mind they will always need to be a multiple of 4 to accommodate the 2x2 rib pattern.
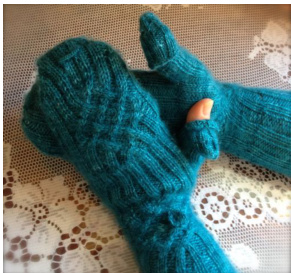
thumb flaps
Pick up 14 stitches approximately 4 rows above top of the thumb slot and, leaving a long tail do a 2x2 rib across. Continue in rib for 15 rows back and forth (reversing the rib on the way back). Cast of leaving long tail Use the tails to sow down the sides of the flap to approximately 3 rows before the end of the flap. You need some give so you can expose your thumbs with ease to work that iphone or do other useful tasks. Reverse the thumb and sew the top of the thumb slit to the flap vou've created on the inside so that when you put your thumb in it doesn't get caught on the join
NB: In my case, on the right glove I picked up from a kit rib, on the left glove from a purl rib. It will depend on where the rib pattern falls in relation to your thumb slots.
Convertible Mitten
Pick up 26 stitches across back of hand. Using back loop cast-on create another 26 stitches. Join and work using magic loop. Knit 4 rows in 2x2 rib pattern. Start the chart again.
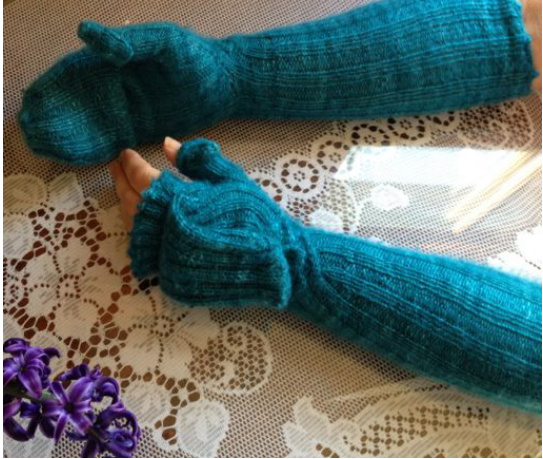
At the end of the chart keep knitting the 2x2 rib until the mitten reaches the top of your ring finger. Start decreasing on back-of-hand side by doing k1, k2tog - continue rib until you have 3 stitches left - ssk, k1. Do the same on the palm side. Do this every other row until you have 24 stitches left, 12 on the hand side, 12 on the palm side. Just like decreasing for a sock toe. Use Kitchener stitch to graft these stitches together. Weave in any stray ends. NB: I did the pick up 9 rows after the thumb join - adjust to suit your hand. A good guide is to pick up half way between the thumb join and the base of your fingers.
Arm
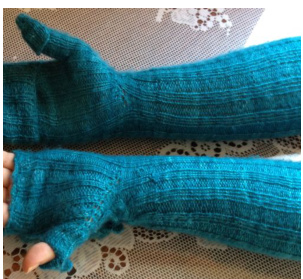
If using a provisional cast-on, pick up the held stitches at the wrist and knit up the arm in the 2x2 rib until you reach the desired length. Cast off using the picot edge cast-off you used on the fingerless glove as above.
Buttons (crocheted a la Mrs Micawber)
Using Magic Circle Cast-on (www.youtube.com/watch?v=YfKKoU4HpCs) and leaving a long tail, do 12 half double crochets (hdc's) then pull tight the centre loops left from the cast-on. Join with a slip stitch. Do a loose slip stitch into each hdc to create a chain effect on the outside. Pull yarn through leaving a long tail.
Sew this tail through to the centre of the button but on the opposite side from the tail you left when casting on. Iuullaveabutull! Position this in the first diamond created by the cable pattern on the hand side of the glove and sew it on firmly. Weaveinends. NB: Half double crochet - stitch on hook; wrap yarn round hook; put hook through loop and pick up yarn (3 loops on hook); wrap yarn and pull through all 3 loops. NBB: You could buy a button but I wanted it to be exactly the same colour as the wool so as not to detract from the pattern.
Button Loops (crochet)
Cut a long-ish piece of yarn and, leaving a long-ish end, chain approx 24 stitches. Sew this chain on to the top back of the mitten making sure you pull some of the chain through on each side and that the resulting loop is long enough to hook around the button when the convertible part of the mitten flips back to expose the fingerless glove underneath.
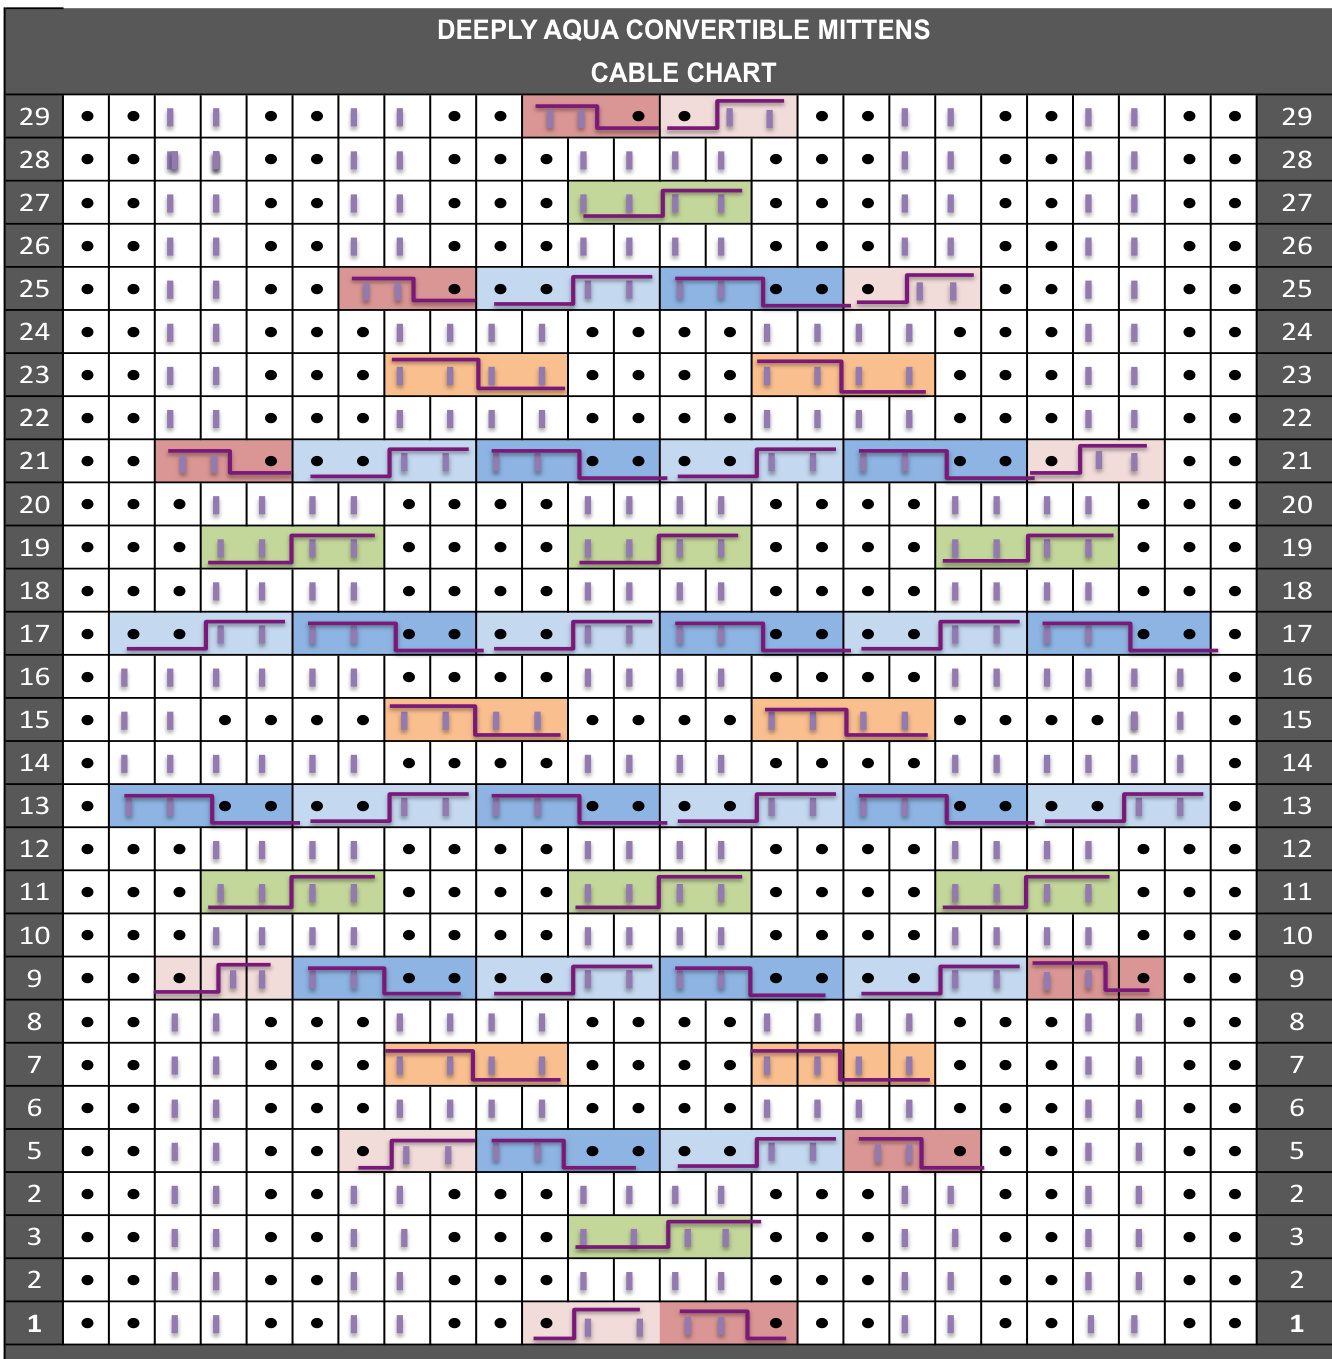
Cable Pattern
Row 1. p2, k2, p2, k2, p2, put 2 on cable needle in front of work, p1, k2 on cable needle, put 1 on cable needle in back of work, k2, p 1 on cable needle. p2, k2, p2, k2, p2 Row2. (p2, k2) x 2, p3, k4, p3, (k2, p2) x 2 Row 3. (p2, k2) × 2, p3, put 2 on cable needle in back of work, k2, k2 on cable needle, p3, (k2, p2) x2 Row 4. as row 2 Row 5. p2, k2, p2, put 2 on cable needle in front of work, p1, k2 on cable needle, put 2 on cable needle in back of work , k2, p2 on cable needle, put 2 on cable needle in front of work, p2, k2 on cable needle, put 1 on the cable needle in back of work, k2, p1 on cable needle, p2, k2, p2 Row 6. p2, k2, p3, k4, p4, k4, p3, k2, p2 Row 7. p2, k2, p3, put 2 on cable needle in front of work, k2, k2, p4, put 2 on cable needle in front of work, k2, k2, p3, k2, p2 Row 8. As row 6 Row 9. p2, put 2 on cable needle in front of work, p1, k2 on cable needle, (put 2 on cable needle in back of work , k2, p2 on cable needle, put 2 on cable needle in front of work, p2, k2 on cable needle) x 2, put 1 on the cable needle in back of work, k2, p 1 on cable needle, p2 Row 10. p3, (k4, p4) x2, k4, p3 Row 11. p3, (put 2 on cable needle in back of work, k2, k2 on cable needle, p4) x2, put 2 on cable needle in back of work, k2, k2 on cable needle, p3 Row 12. As row 10 Row 13. p1, (put 2 on cable needle in back of work , k2, p2 on cable needle, put 2 on cable needle in front of work, p2, k2 on cable needle) x 3, p1 Row 14. p1, k2, (p4, k4) x2, p4, k2, p1 Row 15. p1, k2, p4, put 2 on cable needle in front of work, k2, k2, p4, put 2 on cable needle in front of work, k2, k2,p4, k2, p1 Row 16. As row 14 Row 17. p1, (put 2 on cable needle in front of work, p2, k2 on cable needle put 2 on cable needle in back of work, k2, p2 on cable needle) x3, p1 Row 18. As row 10 Row 19. As row 11 Row 20. As row 10 Row 21. p2, put 1 on cable needle in back of work, k2, p 1 on cable needle, (put 2 on cable needle in front of work, p2, k2 on cable needle put 2 on cable needle in back of work, k2, p2 on cable needle) x 2, put 2 on cable needle in front of work, p1, k2 on cable needle, p2 Row 22. As row 6 Row 23. As row 7 Row 24. As row 6 Row 25. p2, k2, p2, put 1 on cable needle in back of work, k2, p 1 on cable needle, put 2 on cable needle in front of work, p2, k2 on cable needle, put 2 on cable needle in back of work , k2, p2 on cable needle, put 2 on cable needle in front of work, p1, k2 on cable needle, p2, k2, p2 Row 26. As row 2 Row 27. As row 3 Row 28. As row 2 Row 29. p2, k2, p2, k2, p2, put 1 on cable needle in back of work, k2, p 1 on cable needle, put 2 on cable needle in front of work, p1, k2 on cable needle, p2, k2, p2, k2, p2
Mittenstory
I started knitting again 2 years ago. One of the first things I made was Petra's fingerless gloves. I was so green I didn't realize you had to read the chart from right to left. Spatial awareness and logic are not my gifts! It took about 6 disastrous attempts before I messaged Petra for help. I couldn't believe someone as elevated as the designer would answer but she did, within the day. She was patient with my obvious ignorance and very gently set me straight. This is when I learnt about the kind-heartedness of knitters.

We rock!
Throw up your hands and wear with joy!!!
CHART SYMBOL KEY
| Knit | |
| Purl | |
| Put 2 on cable needle in front of work, P1, K2 on cable needle | |
| Put 2 on cable needle in front of work P2 K2 on cable needle | |
| 心 | Put 2 on cable needle in front of work K2 K2 on cable needle |
| Put 1 on cable needle in back of work K2 P1 on cable needle | |
| Put 2 on cable needle in back of work K2 P2 on cable needle | |
| 山 | Put 2 on cable needle in back of work K2 K2 on cable needle |