Dreamcatcher

A Dreamcatcher is supposed to snare nightmares in its net and let good dreams pass through the holes to find you. Some people say they work the other way around by letting the nightmares pass by and catching the good dreams to send down to you. Whichever way you think about it both ideas mean good dreams in and bad dreams out. I've been a vivid dreamer my whole life so this is an idea I like. A Dreamcatcher should be personal to the dreamer. So, when I set about making mine, I decided to knit as much of it as possible. This pattern is more of a recipe than a pattern as there are a lot of non-knitting steps. Pictures are included to help you along the way. The great thing about this project is that you can personalize it any way you want. Choose your own yarn (great stash buster) and beads or buttons. I knit little leaves to hang from my Dreamcatcher, but maybe you prefer flowers. In that case, look around for flower patterns to adapt. Have fun and let me know if you have any questions. Happy Dreaming! Yarn: 2 or more colors in any worsted weight yarn. I used Malabrigo Rio in the instructional pictures. The second Dreamcatcher in the photo above was made with Knitpicks Wool of the Andes. Only a small amount of yarn in needed. Needles: 2 Size 6 dpns (used as straight needles) Gauge: Gauge is not too important with this pattern.
Materials:
Any strong but flexible wire. The wire I used was 1/16 of an inch in thickness. Beadsorbuttons Yarn needle (with blunt end). Tape
Abbreviations:
k: Knit p: Purl kfb: Knit into the front and back of the dame stitch to increase. k2tog: Knit 2 stitches together. ssk: Slip one stitch knit-wise, then slip the next stitch knit-wise. Insert left needle into the front of the loops and knit them together from this position.
Dreamcatcher Instructions
Step 1
Cut a piece of wire to desire length and shape into a circle. In the picture, the wire is 12”.
Step 2
Knit a 3 stitch I-cord. Follow this link for a tutorial on making an I-cord. It is important for the length of your I-cord to be slightly shorter than the length of your wire. In the picture, the I-Cord is 3/4" shorter than the wire. Keep long tails on both your cast on and bind off edges.
Step 3
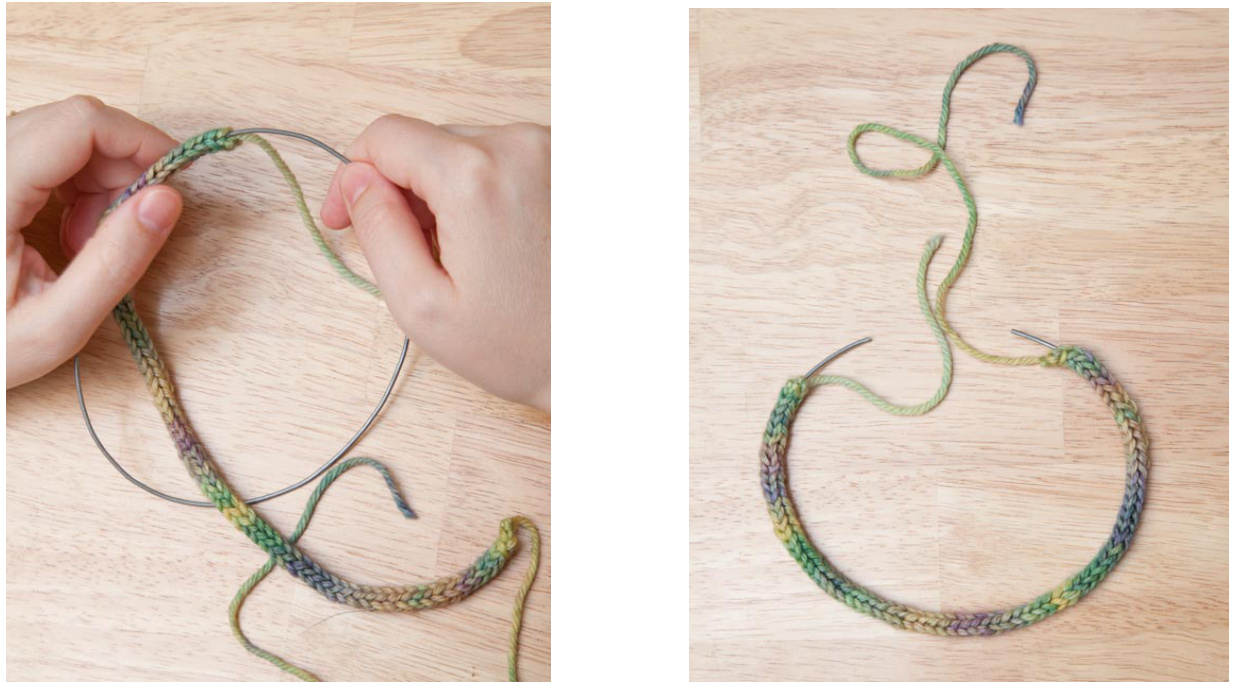
An I-Cord is really a tube. Locate the opening on the I-cord and thread the wire through the tube. This part can be a little fiddly because the wire has a tendency to catch on the yarn or poke through the stitches. I find that inching the I-Cord up the wire with a twisting motion works well. Be careful to keep the wire inside the cord. Don't let it weave in and out of the stitches.
Step 4
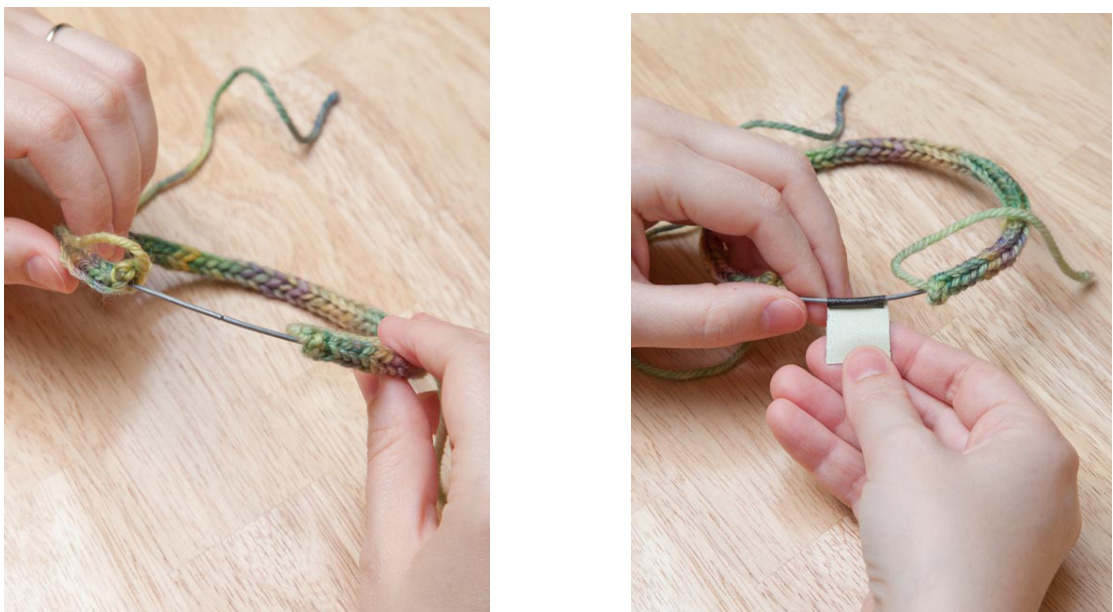
Once the I-Cord is all the way onto the wire, bend the wire to close the circle. I usually bend it a little past the closing point so that when the ends are touching it holds together on its own. You can then secure the closure with a small piece of strong tape. In the picture, I used Gaffers tape (which is fabric-backed) but electrical tape or duct tape should work fine.
Step 5
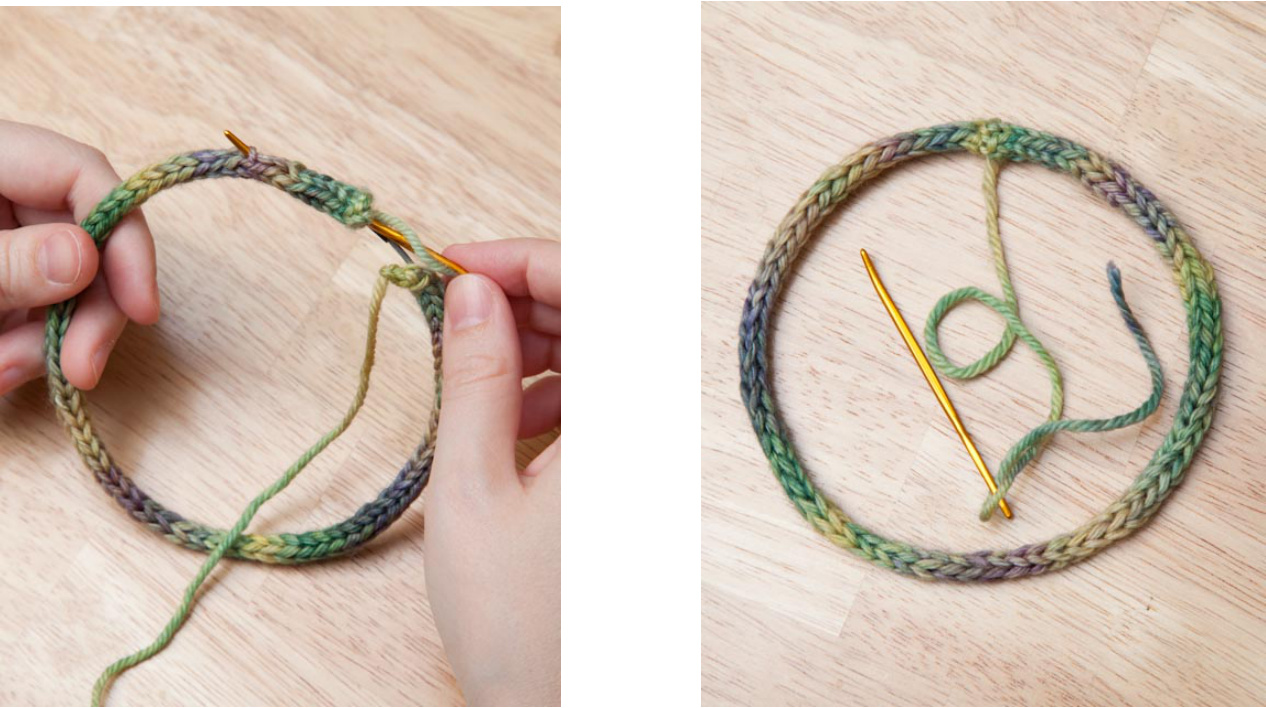
Stretch the I-cord so that the ends meet and cover the taped closure. Thread a darning needle with either the cast on or bind off tail. Use this tail to whip stitch the ends together. There is no wrong way to do this, just try to make it as strong and neat as possible.
Step 6
Here you have a choice. You can use the tails of the I-cord to make the hanging loop for the Dreamcatcher. In the main picture, I did this on the Dreamcatcher in the background. If you prefer to do this step later or with a different colored yarn, just pull the tails into the center of the I-cord using a darning needle. Run the yarn down the length (on the inside) of the cord and out again. Cut the yarn tail close to the cord and the tail will pop back inside the tube, hiding the tail. The picture below shows how to do this. Use this technique whenever you need to hide a tail.
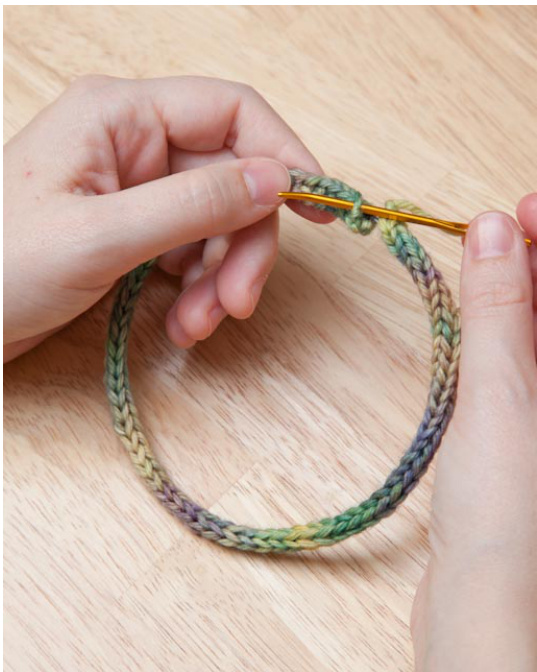
Step 7
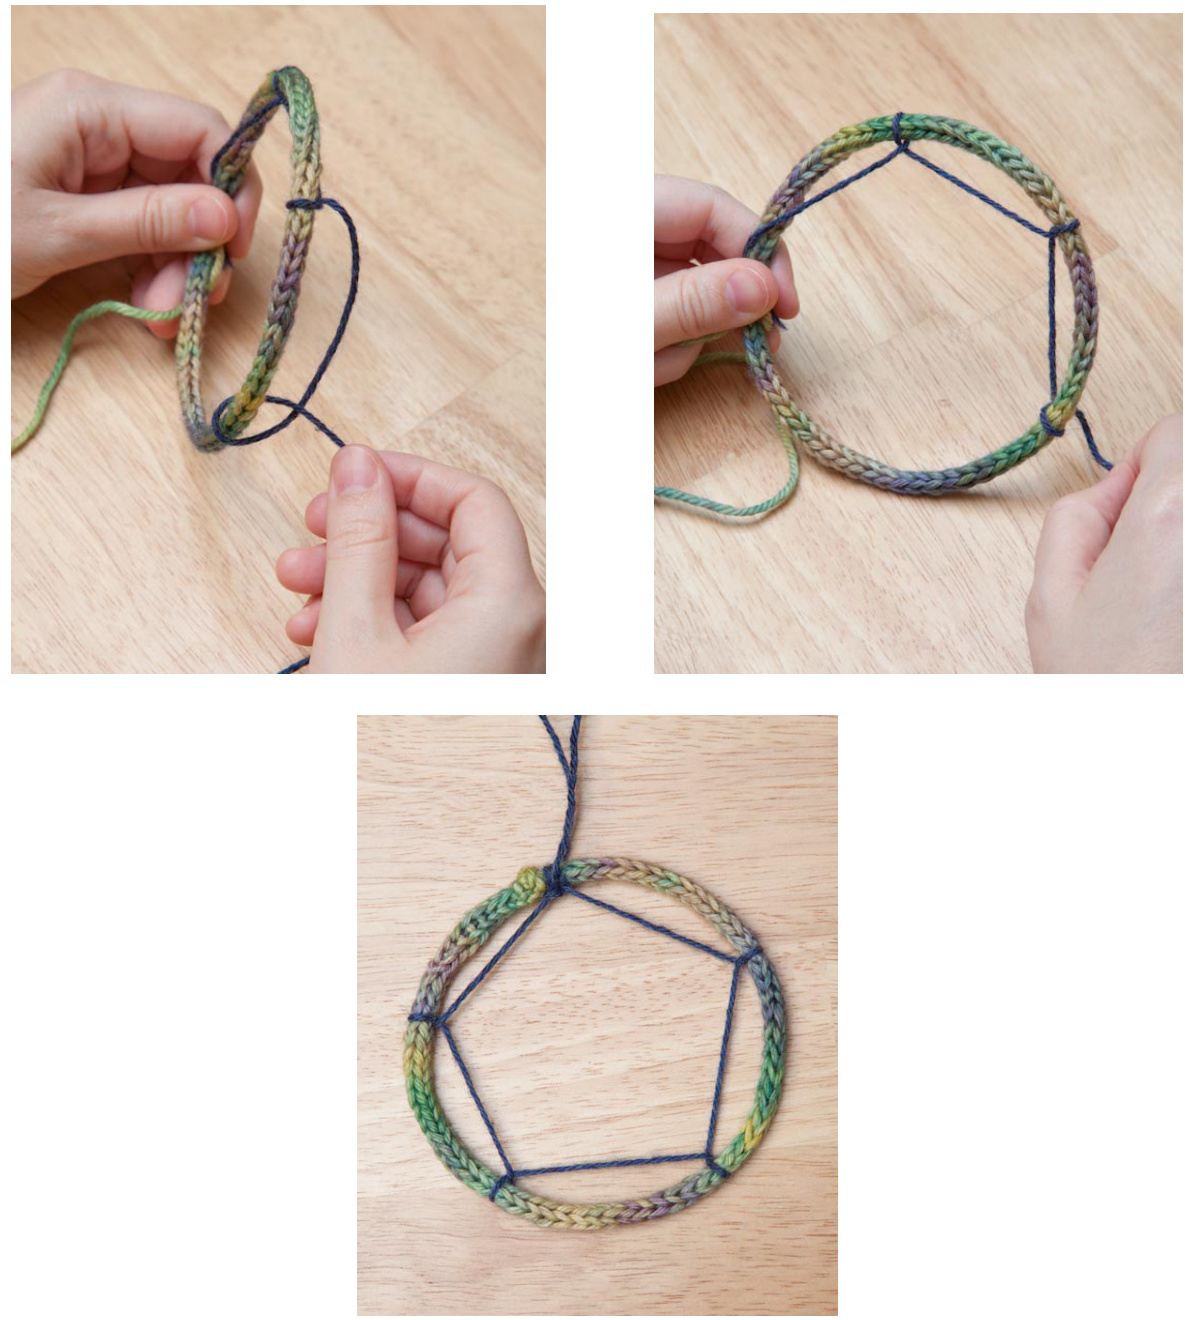
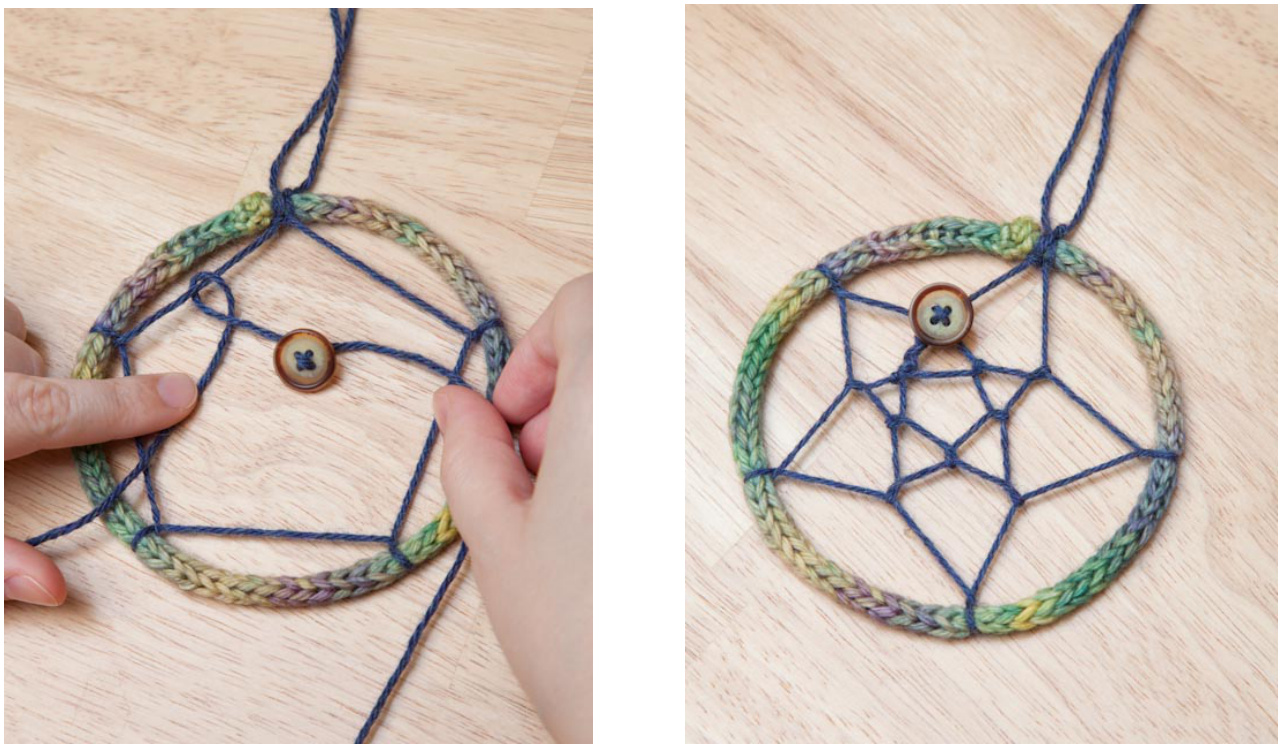
Now the frame is complete and you're ready to start the net. Decide where you want to put your beads or buttons. Cut a long length of yarn and, if desired, thread a bead onto the yarn. Wrap the yarn in loops, evenly spaced, around the frame making sure to secure each loop by crossing the yarn as shown in the pictures below. Don't be afraid to pull the yarn taught. It will stretch into the nice star shape when you add the next layer to the net. When you've made 5 or 6 loops around the circle, make one more loop right up next to the first one and secure the ends by tying them together. You can use these ends to make the hanging loop as seen on the Dreamcatcher in the foreground (just make sure to double knot it). Making the net will leave lots of ends to hide. You can often hide these by strategically placing your beads and tucking the ends inside.
Step 8
Repeat the process above but instead of making loops around the frame make each loop around the middle of each straight length of yarn on the layer above. Repeat this once more, so that you have 3 layers completing the net like in the picture.
Step 9
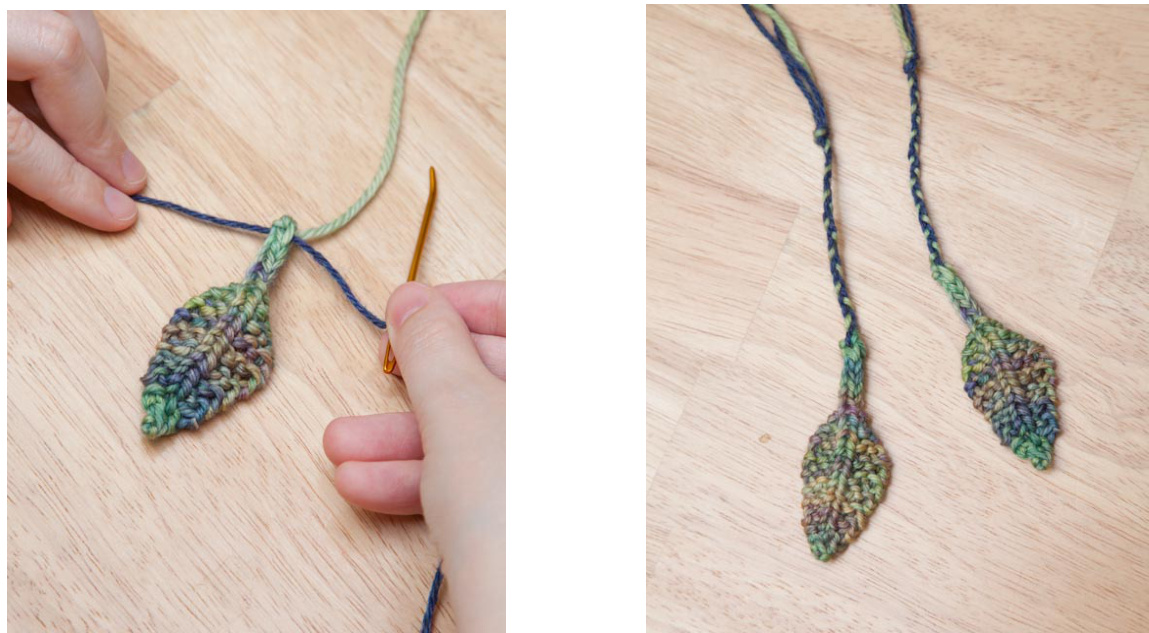
Now the net is complete and you can begin the hanging leaves. Usually, Dreamcatchers are made with feathers but I wanted to knit something to dangle and when I found this pattern for a leaf by Bonnie Sennott I knew that was what I wanted. Since my Dreamcatchers are rather petite, I modified the pattern to make it work. Here are the modified instructions: Cast on three stitches leaving a long tail. Knit an I-cord until it measures 12 inch. Base: 1. kfb, k1, kfb 2. k2, p1, k2 3. kfb, k to last st, kfb 4. kto center, p1, kto end Body: 1. k all 2. kto center, p1, kto end Repeat these rows two more times (3 times total) Tip: 1. k1, ssk, k1, k2tog, k1 2. kto center, p1, kto end 3. k all 4. k to center, p1, k to end 5. ssk, k1, k2tog 6. k1, p1, k1 7. ssk, k1 8. k2tog 9. Bind off and weave in tail.
Step 10
Once you've made a leaf, cut a length of contrasting yarn twice as long as the cast on tail. Thread a needle with this yarn and pass it through the cast on edge of the leaf pulling it through until it is even on both sides. Using this yarn and the cast on tail make a braid and knot it at the desired length. Make sure to leave enough of the tail free to secure it to the frame.
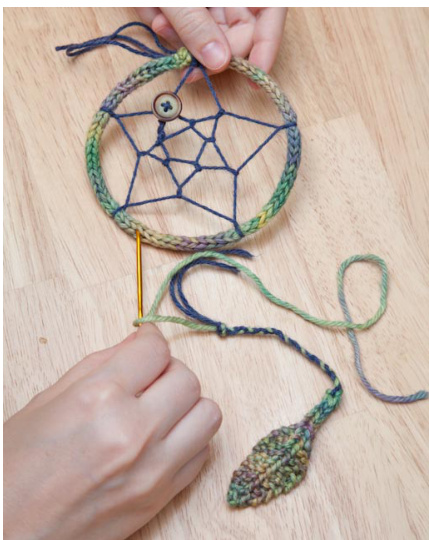
Step 11
Thread a needle with the end of the yarn. Decide where you want to attach it to the frame and insert the needle into the I-cord at the bottom of the frame. Wrap the yarn all the way around the wire inside the I-cord (this may take some fiddling). Poke the yarn back out and tie it just above the knot on the braid, making sure to secure the knot right up against the frame. Tuck all ends inside the I-cord as before. Repeat with the next leaf. And you're done! Hang above your bed or in a window and have sweet dreams!