Ladies sizes Durran Durra Cardi by renee fergusoi
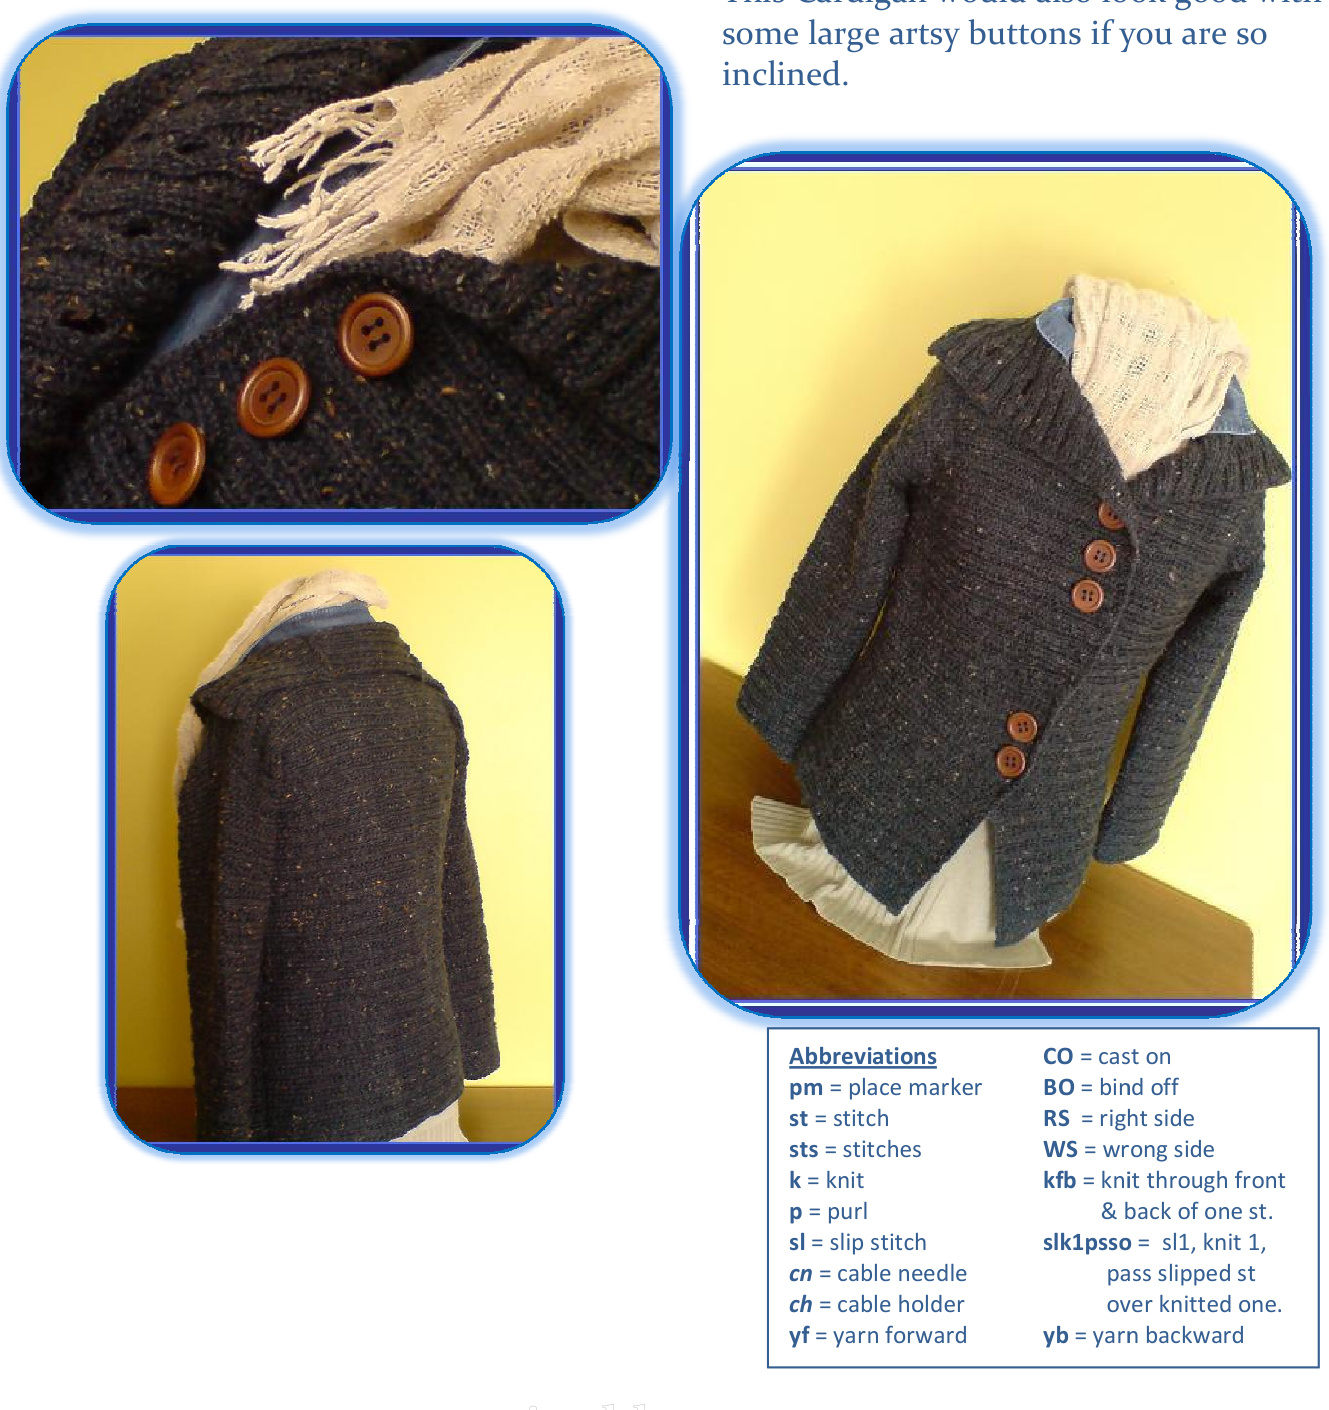
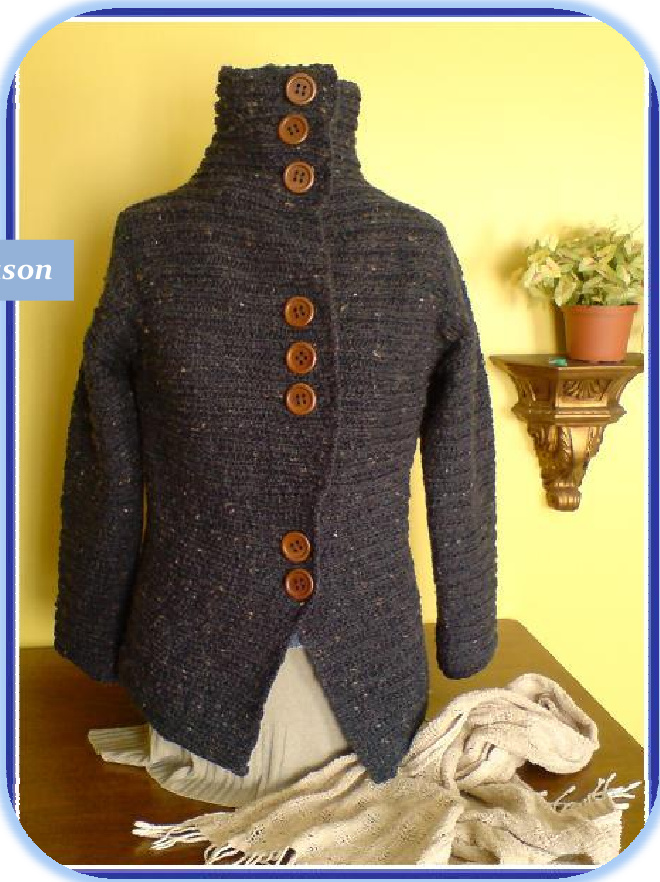
This is a very comfortable cardigan that always looks very sophisticated when worn casually. It has a collar that can be buttoned up to create a turtle-like neck for warmth. Worn open, it drapes beautifully. I made mine with $100\%$ Australian merino in a denim tweed that is ultra soft and has become a favorite to wear. Choose the same yarn or another as the design of this pattern is very versatile and can be jazzed up with a silk stranded yarn for a more formal look. This pattern fits a size Ladies SMALL (MEDIUM or LARGE). Where there is only one number, it applies to all sizes.
You'll need:
· 14 (16, 16) balls of Cleakheaton's 8-ply Tweed in Navy (50g, $100\%$ Wo0l, 217m), · #4.5 mm (US 7) needles, · stitch holder and stitch-markers, $\bullet~8$ wooden, toggle or round buttons (approx 35mm ea). Note: to achieve the horizontal ribbing, you will be working on pieces from left to right instead of from bottom to top. TENSION: 20sts x 26 rows measured over 10cm? ( 4") in St st using 4.5mm needles.
BACK
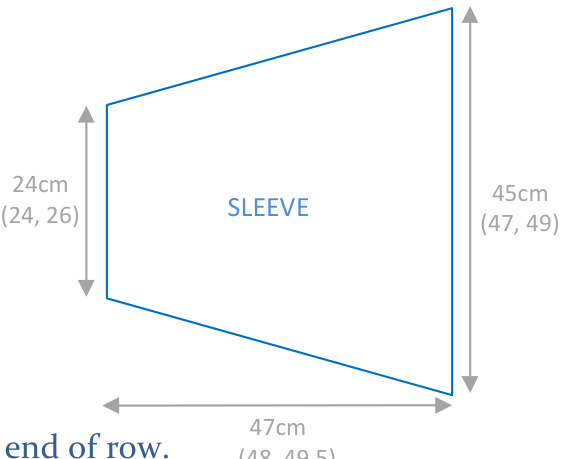
Using #5mm needles, CO 136 (142, 146)sts. The back will be knit into a large rectangle. Knit in Pattern A for 148 (154, 164) rows: Pattern A Row 1: $^{*}\mathrm{K}_{2}$ $\boldsymbol{\mathrm{P}2}^{*}$ repeat from \* to\*. Row 2: ${}^{\ast}\mathrm{P}_{2}$ yf, $s{\mathrm{l}}_{2}{}^{*}$ repeat from \* to\*. Row 149 (155, $_{165})$ : BO all sts. FRONT Right side —- on this side you will make 8 button holes. Using $\#4.5\mathrm{mm}$ needles, CO 136 (142, 146)sts. Knit in Pattern A for 24 (28, 34) rows: Shaping collar panel Pattern A Row 1: $^{*}\mathrm{K}_{2}$ $\mathrm{P}2^{*}$ repeat from \* to \*. Row 2: \*P2, yf, $s{\mathrm{l}}_{2}{}^{*}$ repeat from \* to \*. Row 25 (29, 35): on RS, K90 in Patt A; then K46 (52, 56) sts in Patt B, Row 26 (30,36): on WS, K46 (52, 56) sts in Patt B; K90 in Patt A. Knit this way for 10 (16, 18) rows. Shape FRONT neck: Row 37 (47, 55): Knit same as collar panel to end of row, then CO 38 (40, 40)sts, knit in Patt B. Pattern B Row 1: \*K2, $\mathrm{P}2^{*}$ repeat from \* to \*. Row 2: K the knit sts, P the purled sts. Row 38 (48, 56): K90 in Patt A; K84 (92, 96) sts in Patt B for 24 (28, 32) more rows. Shape Buttonholes--you will need 8 small balls of yarn for separate sections (approx 5m/ea). Row 63 (77, 89): K48 in Patt A, add new ball of yarn, K8 in Patt A, add new ball, K28 (30, 32) in Patt A, K2 in Patt B, add new ball, K8 in Patt B, add new ball, K8 in Patt B, add new ball, K30 (30, 32) in Patt B, add new ball, K8 (12, 14) in Patt B, add new ball, K8 (12, 14) in Patt B, add new ball, K6 (8, 1o) in Patt B to end of row. Work WS rows according to patterns. Knit these buuttonhole sections for 6 rows. Row 69 (83, 95): Clip other yarns, leaving approx 8cm strands for weaving in at the finishing stage, and continue in Patterns A & B knitting 8 more rows using only the first ball of yarn. Row 77 (91, 103): BO all sts. Left side -— No buttonholes on this side. Work same as Right side, reversing placement of Patterns A & B: Row 26 (30, 36): 0n WS, K46 (52, 56) sts in Patt B; K90 in Patt A. Row27 $(3\mathbf{1},37)$ : on RS, K9o in Patt A; then K46 (52, 56) sts in Patt B. COLLAR on left side Row 77 (91, 103): BO 136 (142, 146)sts. Knit remaining sts in Patt B for 40 rows. This will make the collar extension needed to sew to the back of neck later. SLEEVES—make two Using #4.5mm needles, CO 1osts. Knit in Pattern A while shaping sleeve as follows: Rows 1 & 2: Knit in Patt A. Rows 3 - 13: CO 1osts at end of each RS row [7osts]. Row 15: CO 21 (23, 26)sts at end of row [91 (93, 96)sts]. Knit these 91 (93, 96)sts for 91 (97, 99)sts rows. Row 106 (108, 111): decr 21 (23, 26)sts, knit in Patt A to end of row. Rows 107 - 117 (109-n9, 12 -122): BO 10sts, knit in Patt A to end. Row 118 (120, 123): BO remaining 10sts at the end.
FINISHING
Iron on wrong sides, covering with a cotton cloth or pillow case and using a steam iron before sewing front & back seems together at shoulders in mattress stitch. Sew collar extension from left Front side to the back along neckline $[23\:(24,\:24)\mathrm{cm}]$ , then along side of neck of right side collar (see diagram on page ifor reference). Sew sleeves on along shoulder edges first then sew along length of sleeves and complete work by sewing the sides of body together and attaching buttons to the front. This Cardigan would also look good with