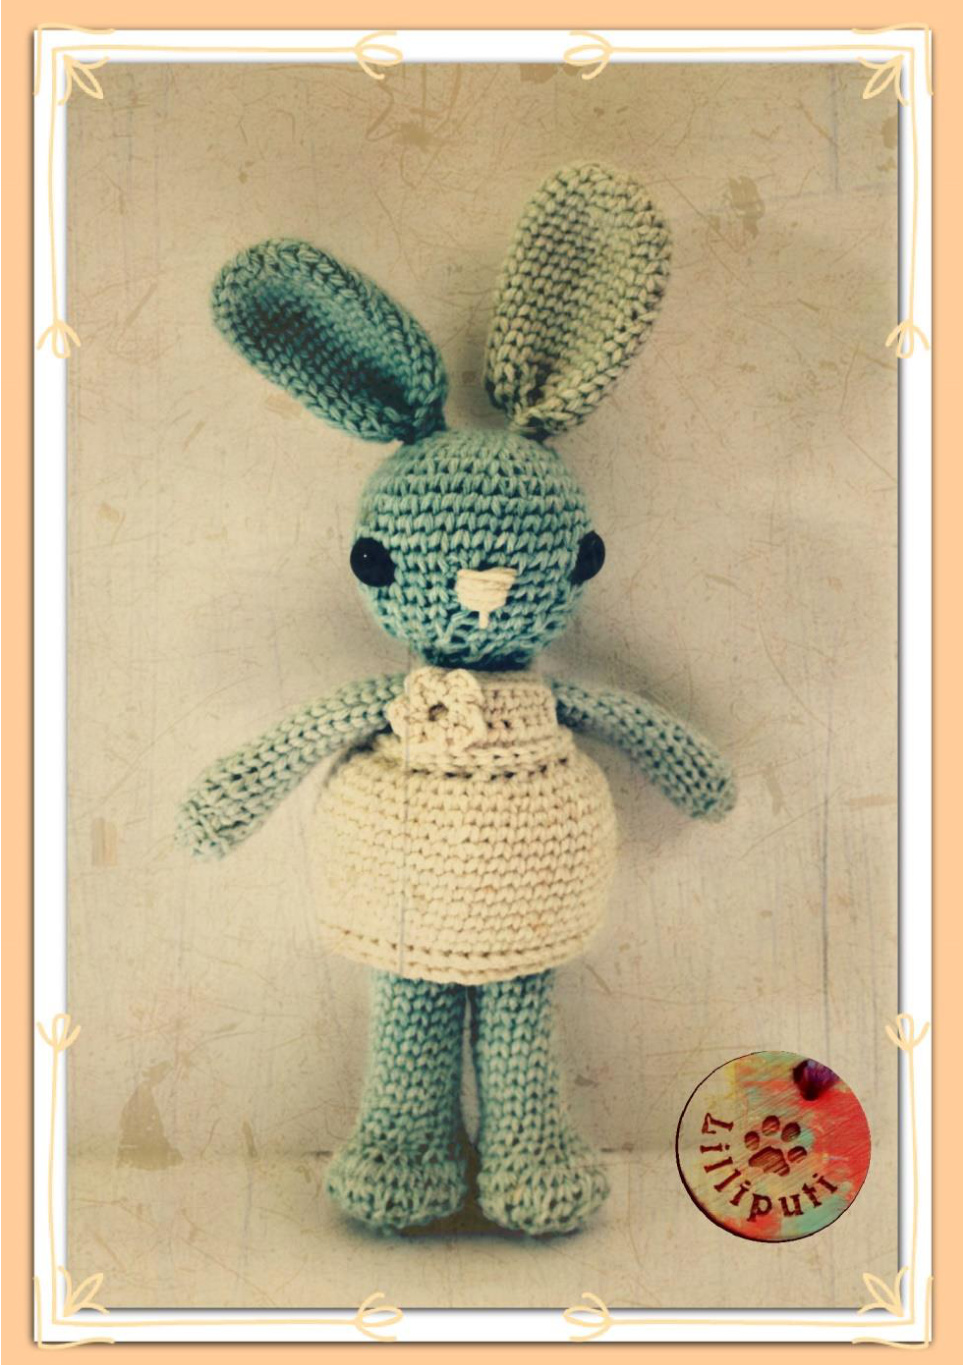
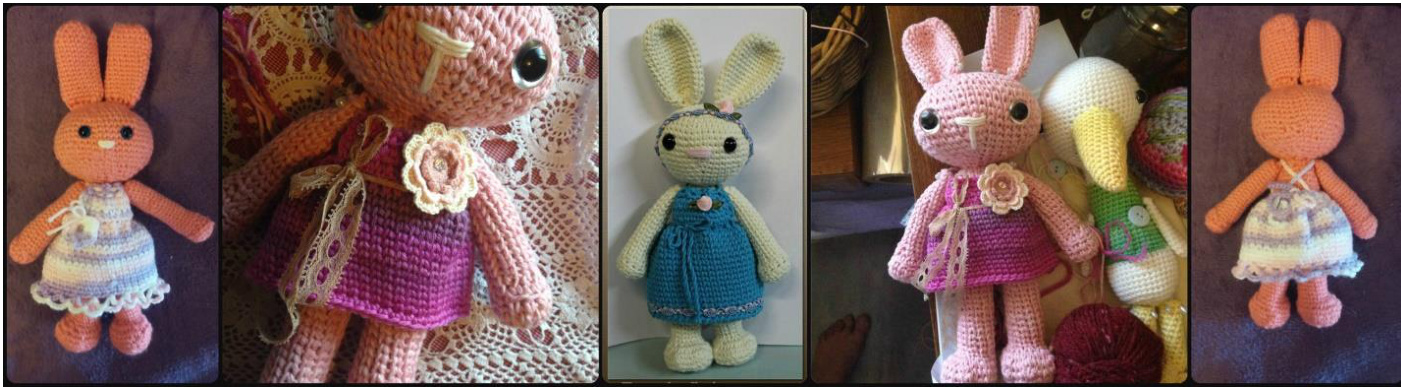
“ CleMentiUNe'- vINTAGE CROCHET BunNY
Sui generis parodia: a unique parody - This design was inspired by the vintage knitted toys of the early 2oth Century. An Amigurumi that appears knitted; instead uses a rare crochet stitch. An one-of-a-kind design that is unique from your common crochet softies. Author:AthenaField THISIS AN ORIGINAL AMIGURUMI DESIGN BY OLILLIPUTI ALL RIGHTS RESERVED.
DESIGNER COMMENTS
Clementine is crocheted in continuous rounds without joining, unless otherwise instructed. You will need a stitch marker to keep track of where the beginning of each round starts. This pattern uses a vintage stitch that works up dense - careful concentration is advisable. Each section (excl. dress) starts with a magic circle. If you don't know how to do this, do this instead: Ch 2, work 6 sc in first ch then continue to round 2. This pattern is easy to follow if you are familiar with this stitch & includes photos. Pages 8 & 9 are the printable version of the pattern. SKILL LEVEL Intermediate
ABBREVIATIONS
| IuseUsterminology: | |
| MC-MagicCircle | Ch - Chain |
| Sk st - Skip stitch | Slip stitch - sl st |
| R-Row/Round | Crab - crab stitch |
| Sc - Single crochet | WST - Waistcoat Stitch |
| BLO - Back Loop Only | FPsc - front post single crochet |
| Sc2tog - Single crochet 2 together | WST2tog- Waistcoat Stitch 2 together |
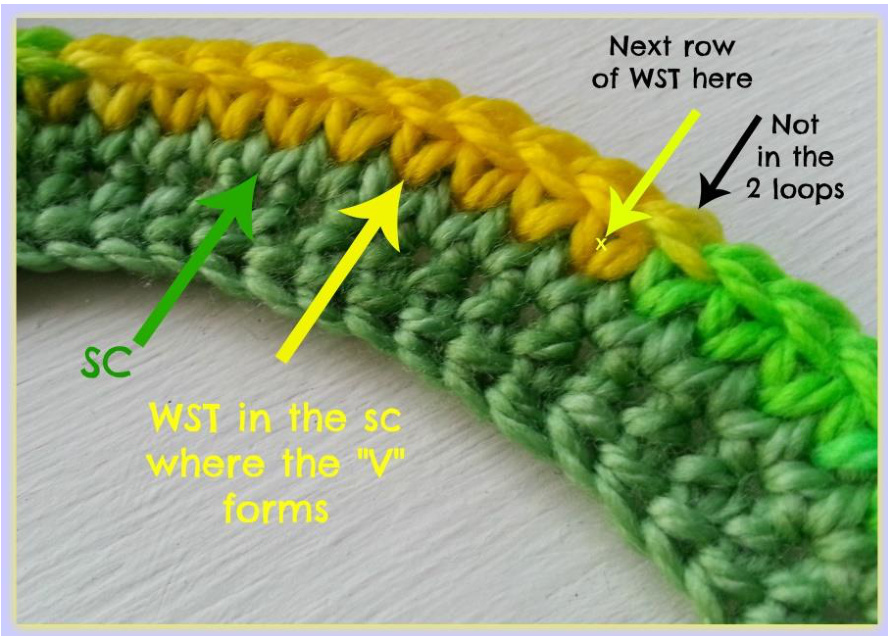
SPECIAL STITCHES
Waistcoat stitch (WST) - single crochet stitch done in the post of the stitch (where the "V" is formed); rather than in the front and back loops. This stitch works up dense, which can get a bit tight. Maintain a relaxed tension throughout. A pointy hook is recommended.
MATERIALS
DK Light Worsted 8ply yarn in 2 colours, 3mm hook, E-4 3.5mm hook, fibre filling, stitch marker, safety eyes, yarn needle, embellishments (optional).
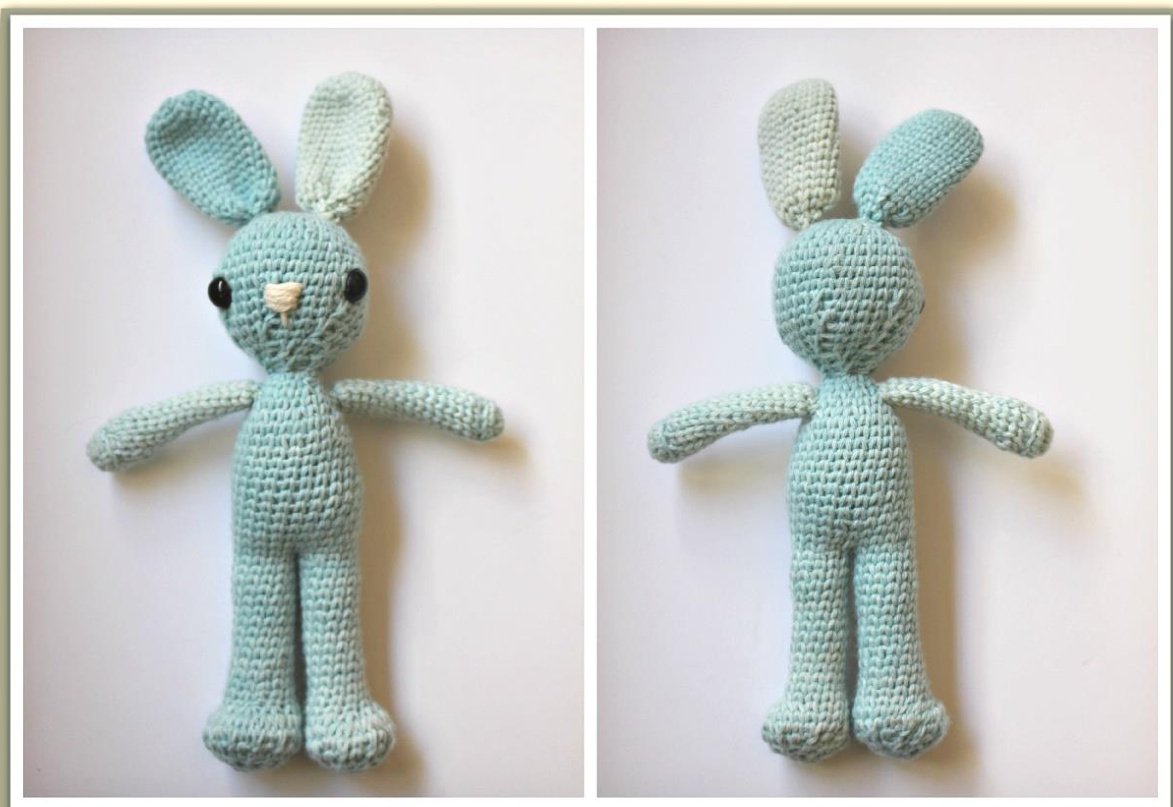
SIZE
With 3mm hook: Head to toe - approx. 20cm, (8"). With ears - approx. 26cm, (10").
GAUGE
Vith 3mm hook & 8ply yarn: R1-6 will measure approx. 6cm (2.5") in diamete
PATTERN
HEAD to FOOT, 3mm (This is worked in one round)
R1: MC and 6 sc into it. (6) R2: Work 2 WST in each st around (12) R3: (WST in next st, 2 WST in next st) rep 6 times (18) R4: (WST in each of next 2 sts, 2 WST in next st) rep 6 times (24) R5: (WST in each of next 3 sts, 2 WST in next st) rep 6 times (30) R6: (WST in each of next 4 sts, 2 WST in next st) rep 6 times (36) R7: (WST in each of next 5 sts, 2 WST in the next st) rep 6 times (42) R8: (WST in each of next 6 sts, 2 WST in the next st) rep 6 times (48) R9-13: WST in each st around (48) R14: (WST in each of next 6 sts, WST2tog) rep 6 times (42) R15: (WST in each of next 5 sts, WST2tog) rep 6 times (36) R16: (WST in each of next 4 sts, WST2tog) rep 6 times (30) R17: WST in each st around (30) R18: (WST in each of next 3 sts, WST2tog) rep 6 times (24) R19: (WST in each of next 2 sts, WST2tog) rep 6 times (18) R20: (WST in next st, WST2tog) rep 6 times (12) R21: (WST2tog) rep 6 times (6) Begin stuffing Eyes placement: between R11/12 - 8 WST between them Embroider nose: begins on R12 NECK R22: Work 2 WST in each st around (12) R23: (WST in next st, 2 WST in next st) rep 6 times (18)
BODY
RRVV = 2 M auf eine Hilfsnadel vor die Arbeit legen, die nächsten 2 M re, dann die Maschen der Hilfsnadel rechts str.
LEGS (Split 12/12 sts)
Depending where your last stitch ended on R38, make sure you are at the back of the toy, centre (bum section) before crocheting the legs. You can either sl st to there OR fasten off and begin a new stitch. Join the stitches to make 2 sections with 12 stitches each (leg 1 and leg 2 foundation). Begin with first leg: R39-53: WST in each st around (12) Continue stuffing.
FOOT
R54: WST in the next 6 sts, (2 WST in the next st) 6 times (18) R55: WST in the next 6 sts, (2 WST in the next st) 12 times (30) R56: WST in each st around. (30) R57: (sc in each of next 3 sts, sc2tog) rep 6 times (24) R58: (sc in each of next 2 sts, sc2tog) rep 6 times (18) R59: (sc in next st, sc2tog) rep 6 times (12) R60: (sc2tog) rep 6 times (6) Complete stuffing. Fasten off & shape foot.
REPEAT OTHERLEG.
HAND/ARM (Make 2)
R1: MC and 6 sc into it. (6) R2: Work 2 WST in each st around (12) R3-4: WST in each st around, (12) R5: BLO sc in each st around (12) R6: WST in the next 6 st, (WST2tog) 3 times. (9) Stuff hand/wrist part only R7-22: WST in each stitch around. (9) Sl st to fasten off. Leave a long tail for sewing. Sew on body.
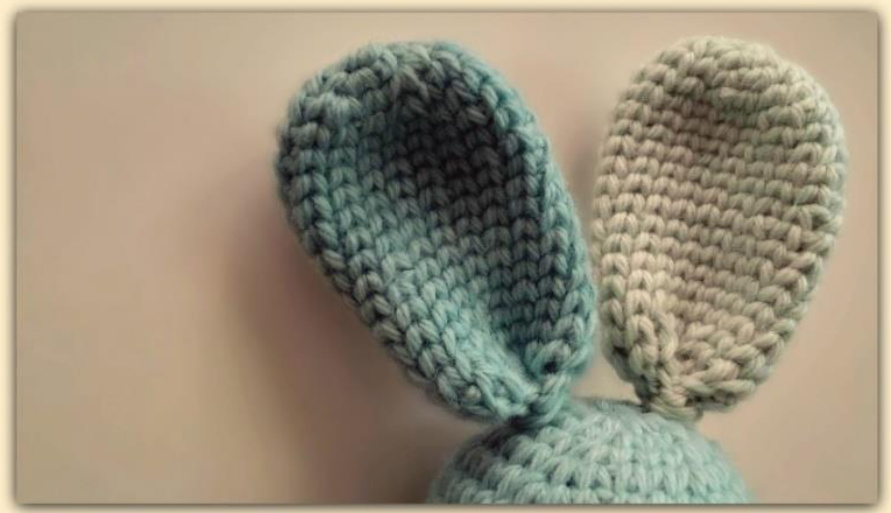
EAR (Make 2)
R1: MC and 6 sc into it. (6) R2: Work 2 WST in each st around (12) R3: (WST in next st, 2 WST in next st) rep 6 times (18) R4-18: WST in each st around, (18) R19: (WST in next st, WST2tog) rep 6 times (12) R20: (WST2tog) rep 6 times. (6) Sl st to fasten off. Leave a long tail for sewing. The ears do not need to be stuffed. Fold them slightly at the bottom and sew them on the head with the yarn tail.
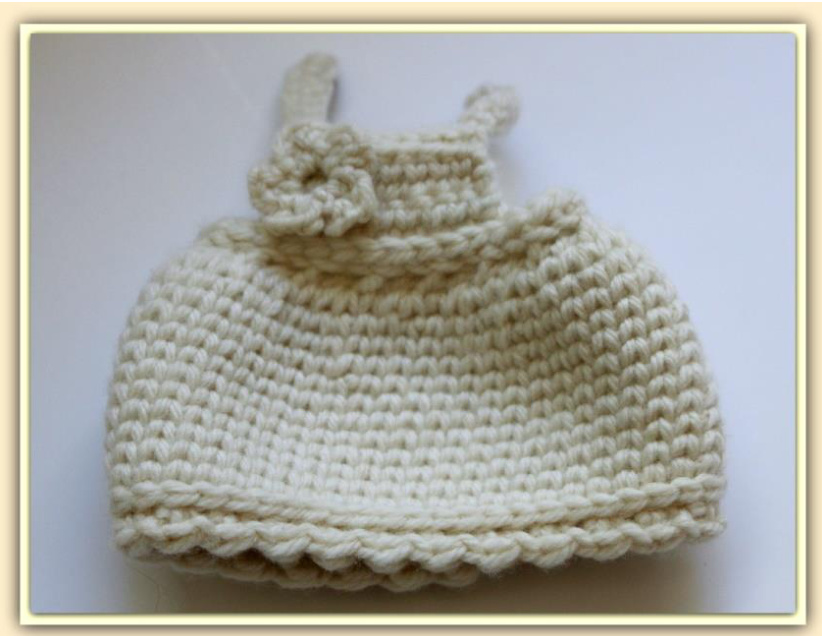
DRESS PATTERN
SKIRT, E-4 3.5mm
Ch 49 R1: Sc in the 2nd ch from the hook and in every ch across, sl st to the first sc to form a ring (48) R2: Ch 1, sc in the same space, (Ch 1, sk st, sc) around. The skipped stitches allow you to weave either a long piece of yarn, crocheted chain or ribbon. When pulled it will form a bell shape. The yarn/ribbon can be tied at the back of the bunny. R3: Ch 1, sc in every sc and ch space around. (48) R4-16: WST around (48) R17: FPsc around (48) R18: Crab stitch around OR crochet your own edging. Sl st to first st. Fasten off, weave in ends.
BODICE
Join yarn with a sl st to any sc in R1 of skirt. R1: Sc in 10 st across. Turn (10) R2-5: Ch 1, WST across. Turn (10) R6: (sc, ch 1, sk st) across, sl st to first st. (5sc, 5ch) Fasten off, weave in ends.
Again, the skipped stitches in the bodice allow you to thread either a long piece of yarn, crocheted chain or ribbon. This can be tied around the neck of the bunny e.g. halter neck tie. Embellish the dress with a crocheted/fabric flower, applique, beads, or ribbon etc. I would love to thank my testers for their time, spare yarn & support: Juliette Bland - April Showers Baby Boutique & Yarn, Amanda Crawford - Pinkies Omiyage, Angela McMurray - Pretty Twisted Knots - Crochet Creations, Joanne Jordan - Magoo, and Suzie Gilbert.
For personal use only. This design, pattern and its images may not be copied, shared, or sold in any manner. You can sell your finished item but please give me credit for the pattern. Thank you & happy crocheting! I would love to see your finished items, please share them on my Facebook page: www.facebook.com/lilliputi For any feedback, questions, assistance or corrections relating to this pattern, please email me at: lilliputi@outlook.com You can also find my other patterns at: www.ravelry.com/people/lilliputi & www.etsy.com/au/shop/Lilliputi Lilliputi is a registered fundraiser for the Black Dog Institute. 10% of my crochet sales are donated to them. The Black Dog Institute is a not for profit organisation dedicated to improving the lives of people affected by mood disorders through their high quality research, clinical expertise and educational programs.

BLACKDOGINSTITUTE "Crochet - calms the mind, soothes the soul and makes the black dog dance in a pretty little dress" \~ Athena Field, survivor.
Clementine Vintage Crochet Bunny PRINTABLE PATTERN VERSION
HEAD to FOOT (This is worked in one round)
R1: MC and 6 sc into it. (6) R2: Work 2 WST in each st around (12) R3: (WST in next st, 2 WST in next st) rep 6 times (18) R4: (WST in each of next 2 sts, 2 WST in next st) rep 6 times (24) R5: (WST in each of next 3 sts, 2 WST in next st) rep 6 times (30) R6: (WST in each of next 4 sts, 2 WST in next st) rep 6 times (36) R7: (WST in each of next 5 sts, 2 WST in the next st) rep 6 times (42) R8: (WST in each of next 6 sts, 2 WST in the next st) rep 6 times (48) R9-13: WST in each st around (48) R14: (WST in each of next 6 sts, WST2tog) rep 6 times (42) R15: (WST in each of next 5 sts, WST2tog) rep 6 times (36) R16: (WST in each of next 4 sts, WST2tog) rep 6 times (30) R17: WST in each st around (30) R18: (WST in each of next 3 sts, WST2tog) rep 6 times (24) R19: (WST in each of next 2 sts, WST2tog) rep 6 times (18) R20: (WST in next st, WST2tog) rep 6 times (12) R21: (WST2tog) rep 6 times (6) Begin stuffing, Eyes placement: between R11/12 - 8 spaces between them, Embroider nose: begins on R12, Continue stuffing.
NECK
R22: Work 2 WST in each st around (12) R23: (WST in next st, 2 WST in next st) rep 6 times (18) BODY R24: (WST in each of next 2 sts, 2 WST in next st) rep 6 times (24) R25-38: WST in each st around (24)
LEGS (Split 12/12 sts)
Depending where your last stitch ended on R38, make sure you are at the back of the toy, centre (bum section) before crocheting the legs. You can either sl st to there OR fasten off and begin a new stitch. Join the stitches to make 2 sections with 12 stitches each (leg 1 and leg 2 foundation). Begin with first leg: R39-53: WST in each st around (12) FOOT R54: WST in the next 6 sts, (2 WST in the next st) 6 times (18) R55: WST in the next 6 sts, (2 WST in the next st) 12 times (30) R56: WST in every st around. (30) R57: (sc in each of next 3 sts, sc2tog) rep 6 times (24) R58: (sc in each of next 2 sts, sc2tog) rep 6 times (18) R59: (sc in next sc, sc2tog) rep 6 times (12) R60: (sc2tog) rep 6 times (6) Complete stuffing. Fasten off. REPEAT OTHER LEG.
HAND/ARM (Make 2)
R1: MC and 6 sc into it. (6) R2: Work 2 WST in each st around (12) R3-4: WST in each st around, (12) R5: BLO sc in each st around (12) R6: WST in the next 6 st, (WST2tog) 3 times. (9) Stuff hand/wrist part only R7-22: WST in each stitch around. (9) Sl st to fasten off. Leave a long tail for sewing. Sew on body.
EAR (Make 2)
R1: MC and 6 sc into it. (6) R2: Work 2 WST in each st around (12) R3: (WST in next st, 2 WST in next st) rep 6 times (18) R4-18: WST in each st around, (18) R19: (WST in next st, WST2tog) rep 6 times (12) R20: (WST2tog) rep 6 times. (6) Sl st to fasten off. Leave a long tail for sewing. The ears do not need to be stuffed. Fold them slightly at the bottom and sew them on the head with the yarn tail.
DRESS PATTERN
Skirt Ch 49 R1: Sc in the 2"d ch from the hook and in every ch across, sl st to the first sc to form a ring (48) R2: Ch 1, sc in the same space (Ch 1, sk st, sc) around. (..sc, ...ch spaces) The skipped stitches allow you to thread either a long piece of yarn or ribbon. When pulled it will form a bell shape. The yarn/ribbon can be tied at the back of the bunny. R3: Ch 1, sc in every sc and ch space around. (48) R4-16: WST around (48) R17: FPsc around (48) R18: Crab stitch around OR crochet your own edging. Sl st to first crab. Fasten off, weave in ends.
Bodice
Join yarn B with a sl st to any sc in R1 of skirt. R1: Sc in 10 st across. Turn (10) R2-5: Ch 1, WST across. Turn (10) R6: (sc, ch 1, sk st) across, sl st to first sc. (5sc, 5ch) Fasten off, weave in ends. Again, the skipped stitches allow you to thread either a long piece of yarn or ribbon. This can be tied around the neck of the bunny e.g. halter neck tie. Embellish the dress with a crocheted flower, applique, beads, or ribbon etc.


