Braided Scarf by Schokolinda (All rights reserved, 2012)
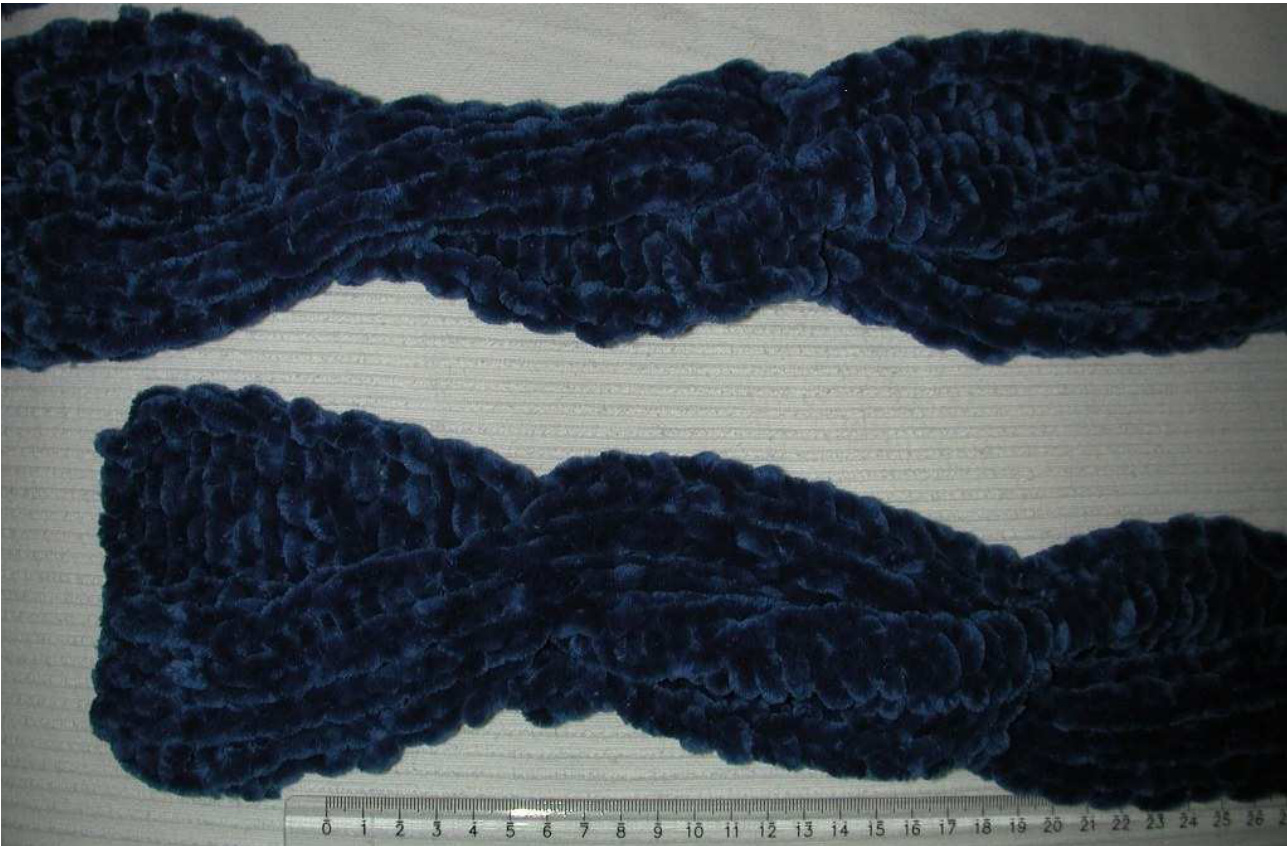
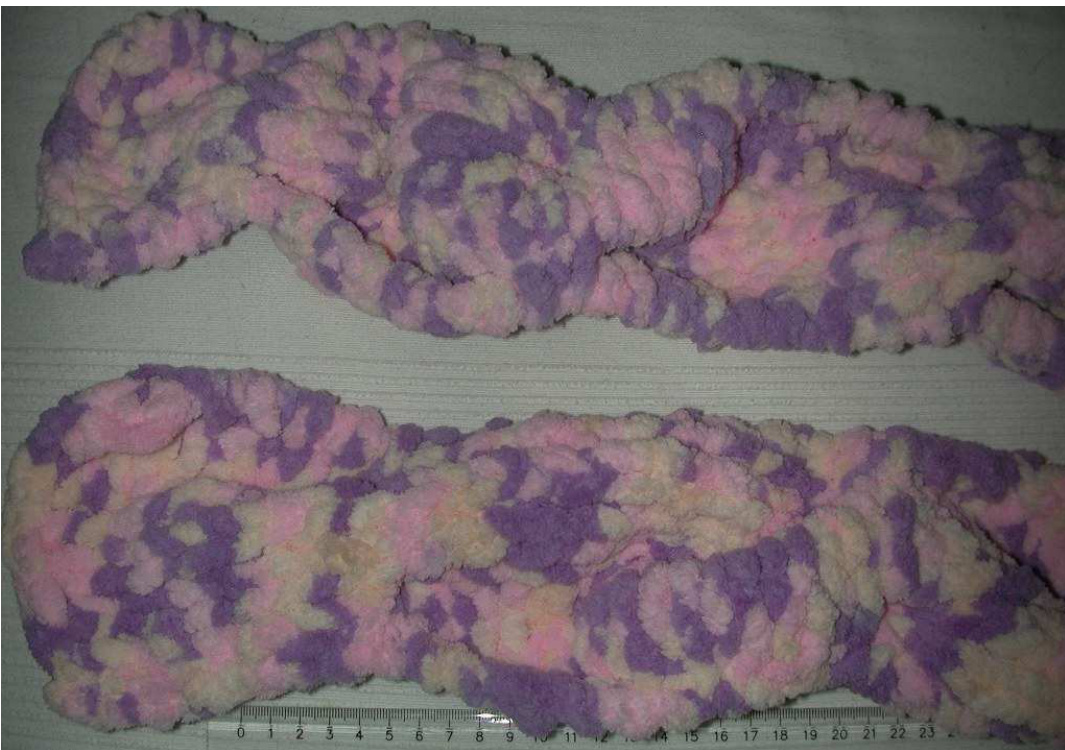
A simple pattern for a scarf, yet it has the advantage of two "good" sides - back and front look the same!
Material: Use thick needles and yarn -I used 6 mm needles and matching yarn. You need a third needle for the braid - comfortable is a cable needle, then you don't have to shift the stitches a second time. n 8 to 12 stitches - not to many stitches or you won't be able to braid the stitches. The number has to be ev 1. row: knit the first half of stitches (e.g. 6), purl the second half of stitches (e.g. the following 6 stitches). 2. row: purl the first half of the stitches, knit the following half of the stitches. And so on. You will get stockinette stitch on the right side of the scarf and reverse stockinette on the left side. After about 12 cm (4.7 inches) count the rows (how many rows are 12 cm?), then knit 1, put rest of the first half of the stitches (the stockinette half) onto the third needle. Put the third needle in front and take up the other two needles again. Now purl the reverse stockinette half of the stitches up until the last stitch (1 stitch remaining on the needle). Now put the stitches resting on the third needle back to your actual working needle and knit them or if using a cable needle knit them off the third needle, then purl the last stitch (which was left over from the left side) - you braided the stitches once! The result may look a bit messy at first, but with growing length the structure of the braid will get smooth. The next 12 cm (or respectable number of rows) you will have to purl half und knit half in uneven rows and knit half, purl next half in even rows with exception of the first (always knit) and last stitches (always purl)- but actually you just keep on working the stitches as you see them in the previous rows. Braid the stitches in regular spaces e.g. 12 cm. Be careful always to do the same twist - this is: always put the third needle in front - or your scarf will get irregular twists and maybe will look "untidy". If desired length is reached, bind off 12 cm after last twist.
Braided Scarf by Schokolinda (All rights reserved, 2012)
Ein einfaches Muster, das aber den Vorteil der beiden "schonen" Seiten hat - Ruck- und Vorderseite sehen gleich aus! Material: Benutze dicke Nadeln und Garn - ich hatte Nadeln Nr. 6 und entsprechend dickes Garn. Man braucht eine dritte Nadel fur das Zopfmuster - bequem ist eine Rundnadel, weil man sich dann das Zurucksetzen auf die Arbeitsnadelspart. Anschlag: 8 bis 12 Maschen - nicht zu viele oder man kann das Zopfmuster nicht machen. Es muss eine gerade Anzahl Maschensein. 1. Reihe: rechte Maschen uber die erste Halfte der Stiche (z.B. 6) stricken, dann linke Maschen uber die andere Halfte (folgende6Maschen)stricken. 2. Reihe: linke Maschen uber die erste Halfte, rechte Maschen uber die folgende Halfte. . Man bekommt auf der rechten Seite des Schals ein glatt rechts gestricktes Feld, und die linke Seite ist glatt Nach ungefahr 12 cm zahlt man die Reihen (wie viele Reihen sind 12 cm?), strickt 1 Masche rechts als Randmasche und schiebt den Rest der ersten Halfte der Maschen (die rechts gestrickten) auf die Hilfsnadel. Die Hilfsnadel vor die Arbeit legen und die beiden eigentlichen Stricknadeln wieder aufnehmen. Nun stricktmandie zweiteHalfte derMaschenglatt linksweiterbisinklusive dervorletztenMasche. Dann holt man die anderen Maschen von der Hilfsnadel zuruick auf die Stricknadel und strickt sie glatt rechts weiter. Wenn man eine Rundstricknadel hat, kann man auch gleich von dieser abstricken, dann strickt man die letzte Masche links - man hat den Schal einmal geflochten! Das schaut beim ersten Verschränken der Maschen vielleicht etwas unschon aus, aber mit zunehmender Länge wird das Muster lockerer und glatter. Die nächsten 12 cm (bzw. Die entsprechende Anzahl von Reihen) muss man zuerst eine Halfte links, dann die andere Halfte rechts stricken mit Ausnahme der ersten (immer rechts) und letzten (immer links) Masche - aber eigentlich muss man immer nur die Maschen so stricken, wie sie erscheinen. In regelmaBigen Abständen z.B. 12 cm die Maschen wie beschrieben zu einem Zopf verschränken. Achte darauf, immer den gleichen Zopf zu machen, d.h. lege die Hilfsnadel immer vor die Arbeit - oder das Muster wird unregelmäBig. Wenn die erwunschte Länge erreicht ist, dann 12 cm nach dem letzten Zopf abketten.


