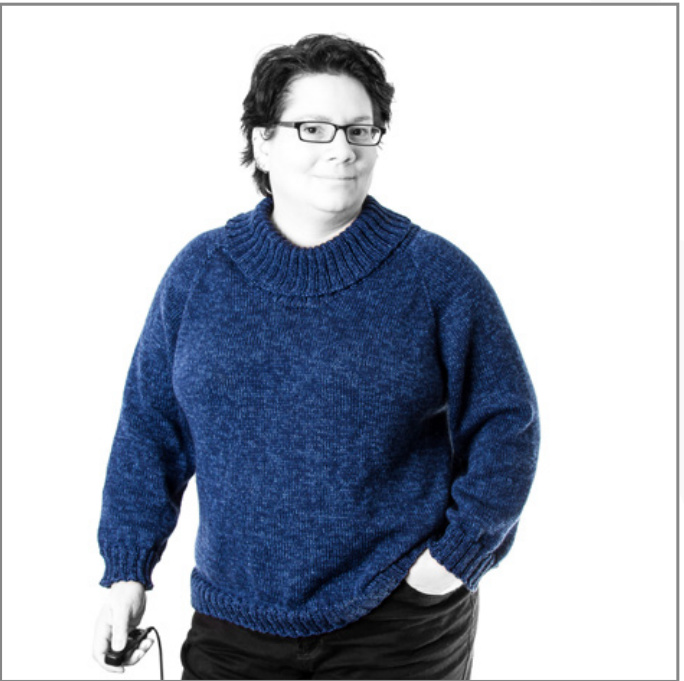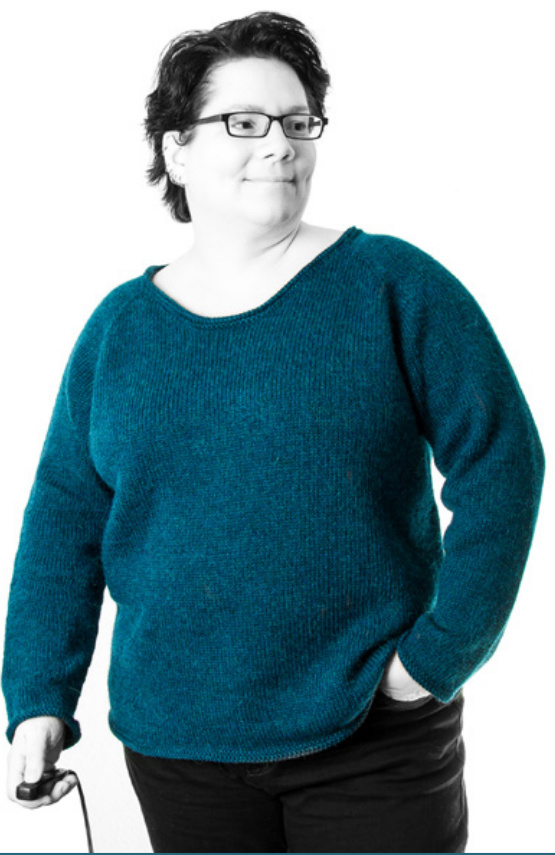
Raglano is a classic nobody-should-be-without - a seamless raglan sweater that is knitted top down. Knit Raglano as an airy summer top or cozy turtleneck sweater to keep you warm in winter, with short or long sleeves, bright or subtle colors, with or without stripes, ribbing, textured stitch patterns - with this basic pattern, anything is possible. Raglano is precisely what my >MAXIMUM FREEDOM《 patterns are about. Free yourself from required gauge! Take your favorite yarn and knit it as tightly or loosely as you want.I take you step by step through clear instructions, simple formulas and useful tips.
MATERIALS
· Yarn. The amount needed is completely different in every case,because thissweater has nopredetermined sizes. If you have already knitted sweaters for yourself, they are a good guide to how much yarn you will need. The information found on the yarn label is also a good startingpoint. · Circular needles of 60 - 100 cm (24 - 40 in) length. Knitting the sweater will be more comfortable if you have different cable lengths available (e.g. a needle system with interchangeable cables).
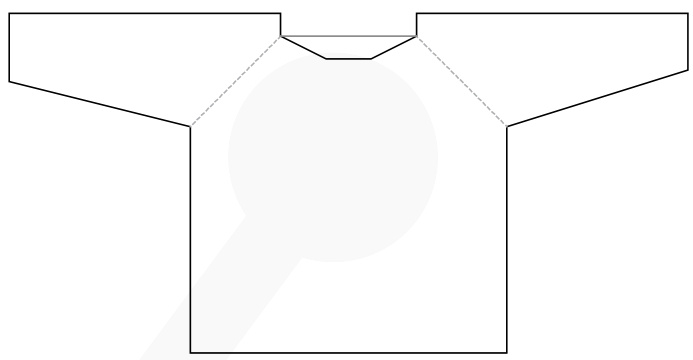
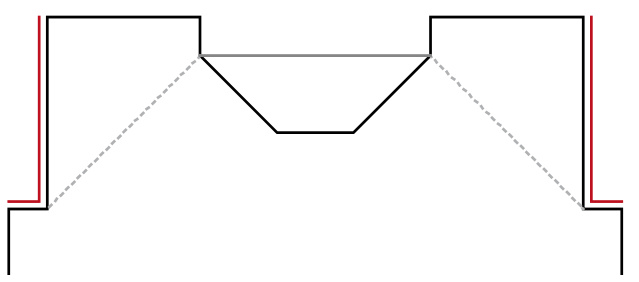
SCHEMATIC
ABBREVIATIONS
LLI Left-leaning lifted increase Lift the stitch two rows below the stitch just knit from back to front onto the left needle and knit it through the back loop. RLI Right-leaning lifted increase Lift the stitch directly below the first stitch on the left needle from back to Front and place it on the left needle, then knit it. coY Cast on Y stitches. m Marker pm Place marker sm Slip marker rm Remove marker st /sts Stitch /stitches r Row / round k2tog Knit 2 stitches together ssk Slip 2 stitches individually if as to knit, then knit these 2 sts together through the back loop [Rs] Right side [ws] Wrong side
BEGINNING
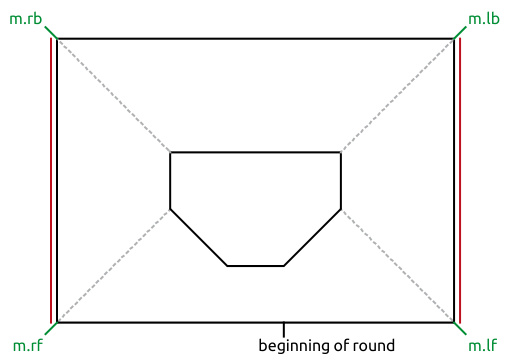
Raglano begins at the back of the neck. The neckline is formed through increases when knitting the rows. The first 15 - 20 cm (6 - 8 in) of the sweater are therefore knit flat until the rows are connected at a later point to form rounds. Place the markers as you are casting on as follows: co2, pm, coY, pm, 3x coY, pm, coY, pm, co2. You have placed 4 markers. Make raglan increases on every [RS]rowbefore and aftereachmarker. For a clear view the markers are named m.lf for left front, m.lb for left back, m.rb for right back and m.rf for right front. W+8= cm/in × st = =Y stitches Width W = cm/in
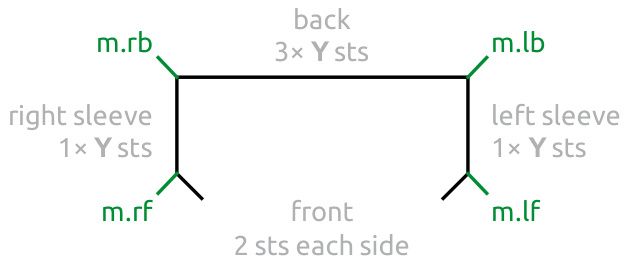
Measure your chest circumference, add 3-5 cm / 1-2 in and divide the total by two. Or find a pullover that fits you well, lay it flat and measure the width directly under the sleeves.
PREPARATION
Knit a swatch or be brave. Only the number of stitches is needed. Stitches per 10 cm / 4 in = ST = Stitches per 1 cm /1 in = st = (to make calculating easier) Let's get started! 1. [WS]: p all stitches. 2. [RS]: K1, RLI, k to m.lf, LLl, sm, RLI kto m.lb, LLl, sm, RLI k to m.rb, LLl, sm, RLI k to m.rf, LLl, sm, RLI k to 1 st before end, Lll, k1. Repeat these two rows until you have 2xY= sts in each front part (from the beginning of row to m.lf and from m.rf to end of row). End with a [RS].
RaGLano
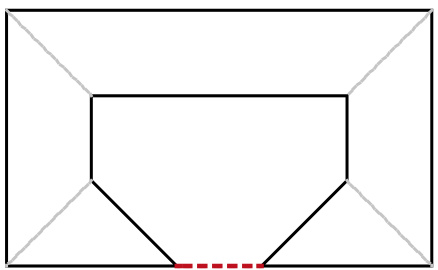
Now the neckline is deep enough to close the round. For this purpose you have to cast on some stitches so that front and back have the same number of stitches. Cast onY-2 = sts at the end of therow. Place a marker for the beginning of the round, join to other front to begin knitting in the round. 1. k all stitches. 2. k to m.lf, LLl, sm, RLI k to m.lb, LLl, sm, RLI k to m.rb, LLl, sm, RLI k to m.rf, LLl, sm, RLI k to end. Repeat these rounds until front and back each have 7xY= sts (do not count the sleeve stitches!). Knit one round without increases.
Tip
To reduce annoying stitch counting, I place an open marker every Y stitches to the left and to the right starting at the Y center neck stitches . Then Ijust need to count the blocks.
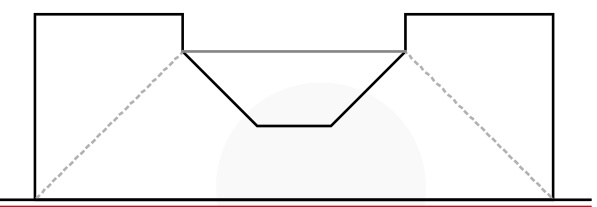
Now you separate sleeves and body. ·Knit to m.lf. Put stitches between m.lf and m.lb on scrap yarn and remove markers. ·Cast on Y sts between front and back. ·Knit to m.rb. Put stitches between m.rb and m.rf on scrap yarn and remove markers. · Cast on Y stitches between back and front.
BODY
Knit straight in rounds, until you have nearly reached the desired length. Purl one round, knit 4 rounds, then bind off. Alternative: → Ribbed hem.
RIBBED HEM CUFFCOLLAR
If you prefer a ribbed hem | cuff | collar, start a bit before the desired length with k2p2 ribbing. To knit k2 p2 ribbing, the number of stitches must be divisible by 4.If your number of stitches don't match, you can cheat with increases or decreases at the firstrow of the hem I cuff I collar. One has to turn a blind eye sometimes.?
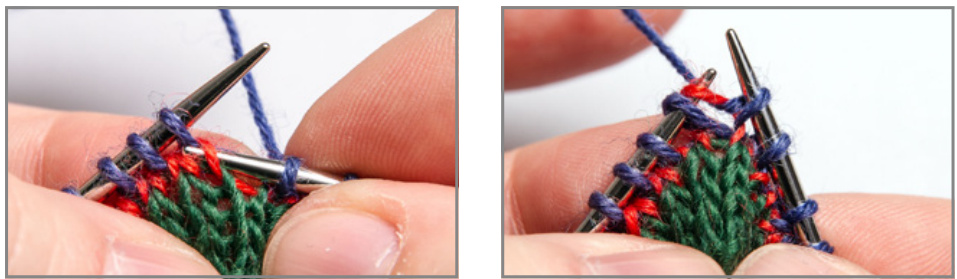
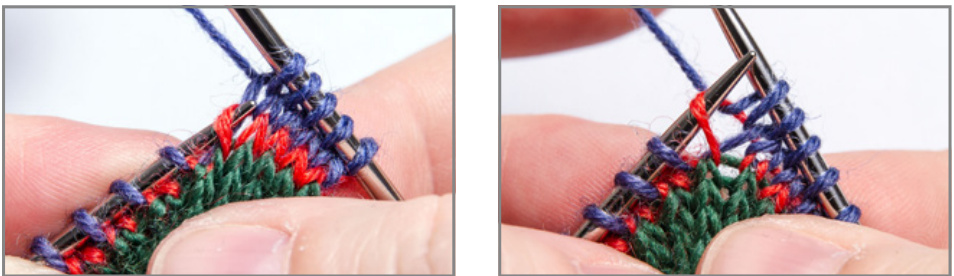
To avoid holes at the side, pick up additional stitches which are decreased directly in the following rounds. Put the sleeve stitches back onto the needle. Now you are at the end of the sleeve stitches and before gap. You have 5×Y stitcheson the needle. [RO]: pm, LLl, RLl, pick up and knit one stitch in every cast-on stitch (Y sts), LLl, RLl, pm. Now you have 6 x Y + 4 sts. [R1]: k to m, sm, k2tog, k to 2 sts before m, ssk, sm. [R2]: k to m, rm, k2tog, k to 2 sts before m, ssk, rm. Now you have 6 xY sts.
If Y is an even number:
Place a marker at the center of the picked-up stitches under the arm.
If Y is an odd number:
Place a marker before the center stitch of the picked-up stitches under the arm. Knit the sleeves in the round and work a decrease round every 6th (for a man's sweater on every 8th) round as follows:
If Y is an even number:
k to 3 sts before m, ssk, k1, sm, k1, k2tog. If Y is an odd number: k to 2 sts before m, ssk, sm, k1, k2tog. Knit until desired sleeve length has nearly been reached. Purl one round, knit 4 rounds, then bind off. Alternative: → Ribbed cuff. If you reach the desired width before desired length is reached, simply continue knitting with no decreases until the length iscorrect.
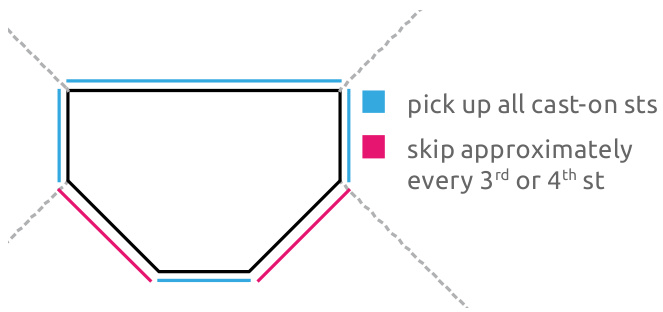
Pick up and knit one stitchin each of the cast-on stitches along the straight lines. Skip approximately every 3rd or 4th edge stitch along the diagonal lines. Purl one round, knit 4 rounds, then bind off. Alternative: → Ribbed collar (also good for a turtle neck).
AFTERWASHING
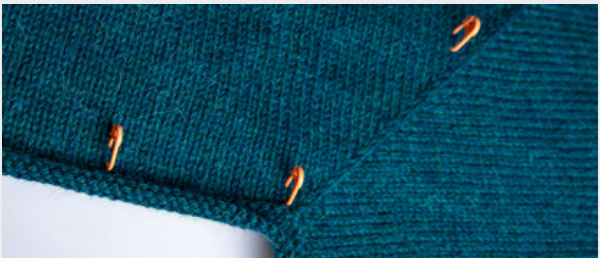
Lay the sweater flat and block it in shape. You may need to straighten and pin the raglan lines into place.
RLI = Right leaning lifted increase
LLI = Left leaning lifted increase
[RS]: Lift the stitch directly below the first stitch on the leftneedlefromback to front and place it on the left needle, then knit it. [RS]:Lift the stitch two rows below the stitchjust knit from back tofront onto the left needle and knit it through the back loop.
VERSION WITH RIBBED COLLAR,CUFFSAND HEM