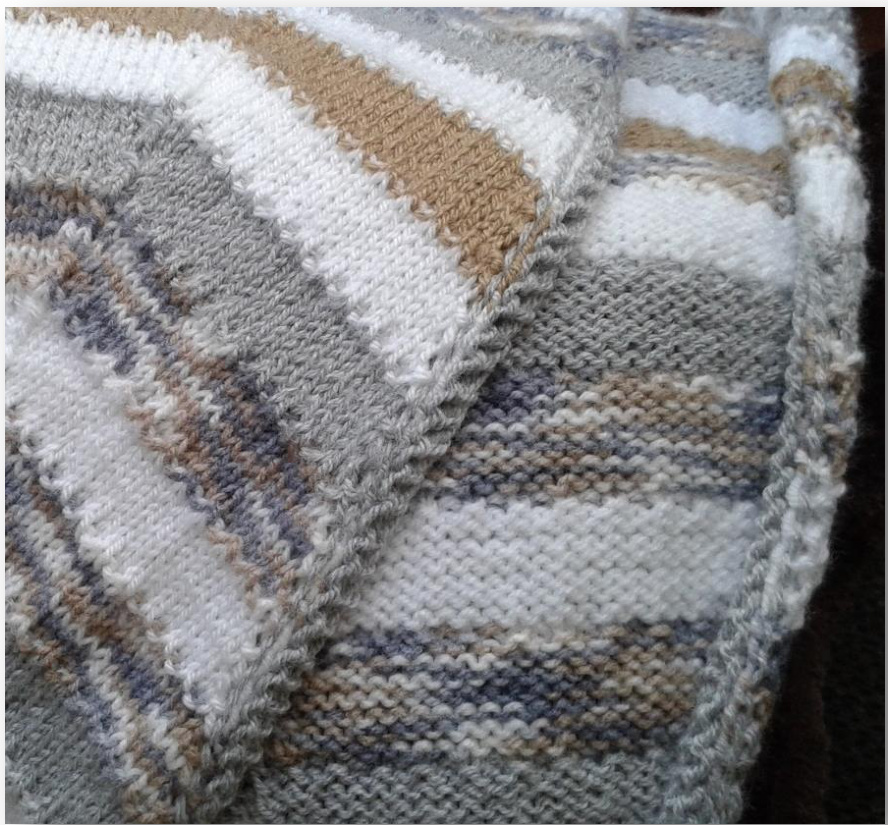
MY (ZIGZAG) TV BLANKET
Haven't you ever wanted to have something to knit that would allow you to watch TV or talk to someone and knit at the same time? And to still end up with a useful, lovely, warming product that you can cuddle into (alone or with someone!) on those wintery nights? This blanket now graces the living room sofa, and provides a topic of talk and envy whenever friends come over. It took over 4 kilometers of wool - the final dimensions of the blanket: 180 x 150 cm - and provided me with many hours of knitting pleasure. I used cheap synthetic wool - you know, the 400g monster balls - but any 6 to 8 ply (or thereabouts) wool would do the trick.

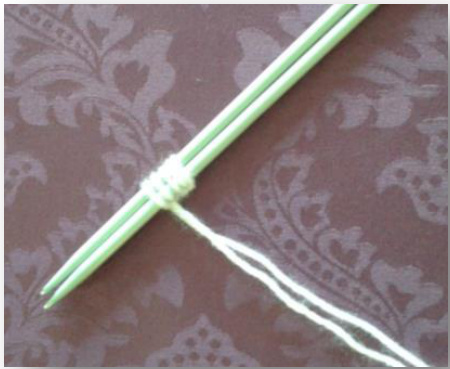
The Russian Join
There is one major item that will help you with the color changes and avoid all that weaving after the knitting is over. It's called the Russian join. The following is a visual tutorial curtesy of Lion Brand Yarns. The longer the ‘threading' of the yarn is, the better. I tried to thread at least 5cm (2 % ") through the yarn (see pic.3). This means that when you cut the excess yarn off, the threaded yarnstays put. Once both yarns have been threaded, make sure that the loops are as small and tight as possible (tighter than in pic.3). I made the Join around 6 stitches before the end of the row. This meant that the color change would occur very close to or literally at the end of the row.

THE INSTRUCTIONS.
CO multiples of 44 plus 2. For example, I have 7 zigzags in my blanket, so the CO was 44 x 7 (= 308), plus 2 end stitches (= 310). Hint: The CO should be very loose. One way is to use a much larger needle, or two needles.
Rows 1 -8 = the pattern
| Row 1: | Purl to last st. |
| Row 2: | Lastst(INEACHROW): yarn in front, slip st as if to purl. K1, K in front & back of next st. Then, |
| *K20, Slip next st, K2tog, psso, k20, K in front, back, & front of next st*. This is | |
| till 2 stitches remain on the left needle. The 2nd last stitch should be the last | |
| stitch of the zigzag pattern. Instead of the double increase, knit in front and back only. | |
| Last st. | |
| Rows 3, 5, 7: | |
| Row 4: | Purl to last st.Last st. Knit to last st. Last st. |
| Row8: | NEW COLOR. K2, *P1 K1*, repeat to last 2 stitches, K1, Last stitch. |
| Repeat row 2. | |
| Row 6: | |
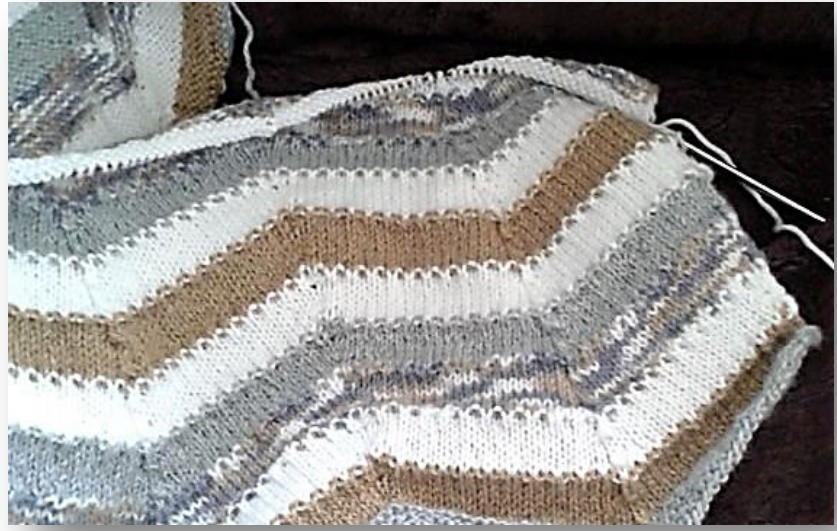
This photo is intended to illustrate the effect of Row 8. It highlights the color change.
BO. K1. \*Bring yarn forward. Place knitted stitch on left needle. K2 together.\* Repeat to end of row. This BO is very loose - again, a necessary part of the zigzag design.
Optional Extra:
I actually crocheted (!) a border around the blanket as well.