Tillingbourne Beret
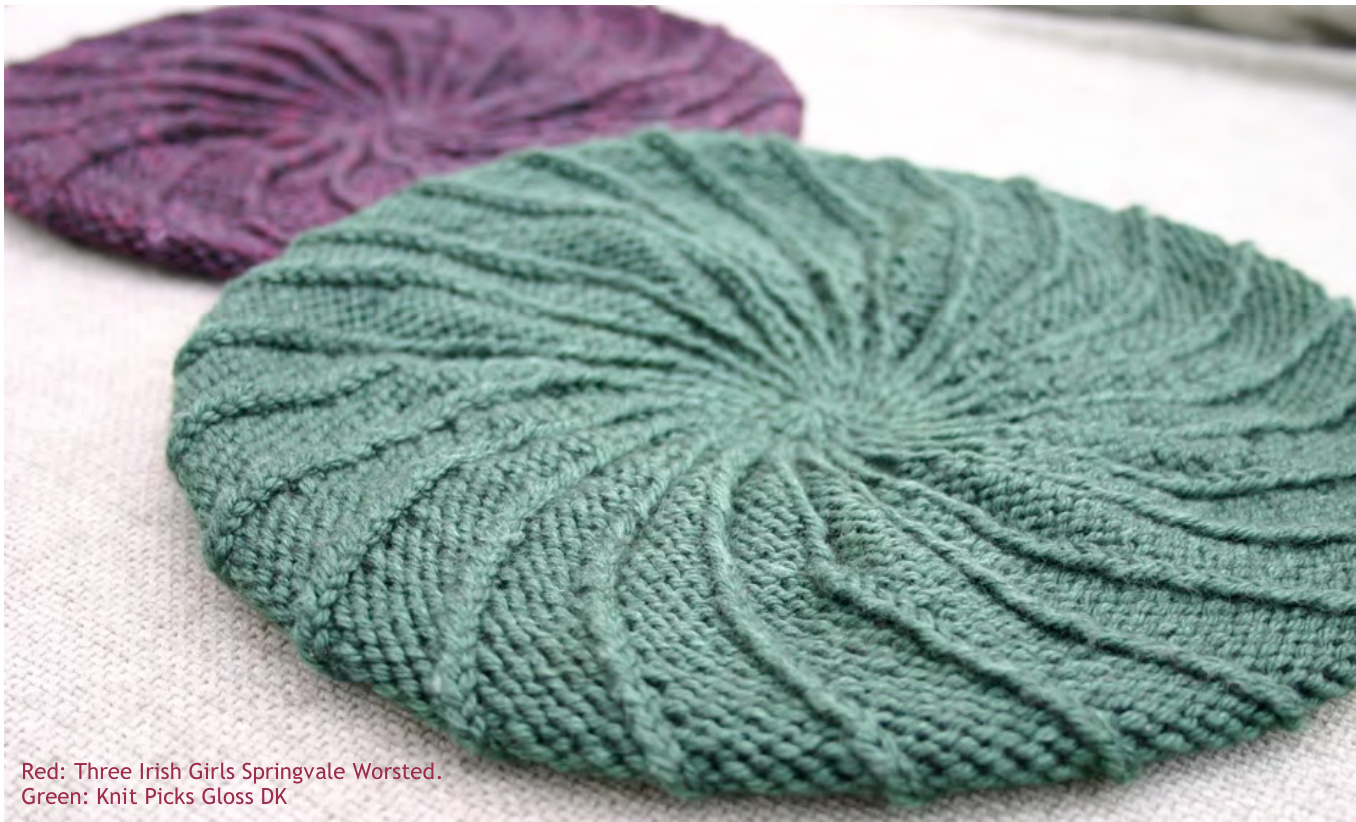
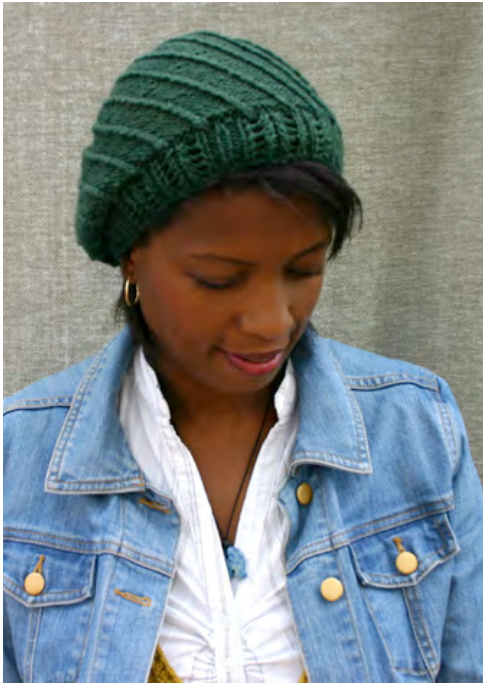
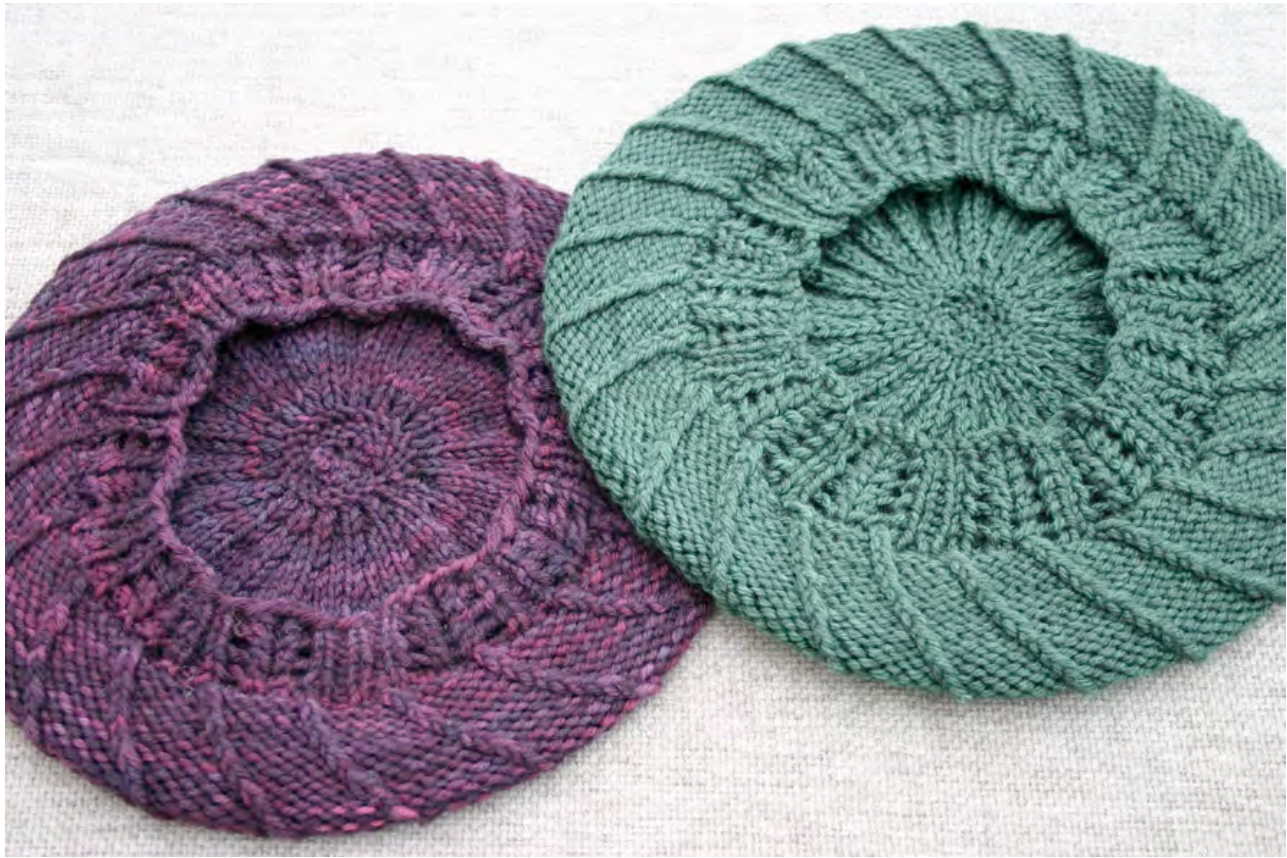
This beret is based on my very first sock pattern, Sakana. The brim is made of a stretchy lace, while the rest of the hat features the spiralling twisted stitches that swim upwards from right to left. This hat would suit a worsted weight or heavy DK yarn.
Materials
100g (3.5oz) Heavy DK/Worsted weight yarn (100% Merino) Suggestedyarns:1skein:ThreeIrishGirlsSpringvale Worsted -100% Superwash Merino,100g (230m/250yds);1skein:FibreHarvestKnitByNumbers DK-100%Superwash Merino,100g (250m/273yds); 2 balls:Knit Picks Gloss DK:70% Merino wool / 30% Silk,50g (112m/123yds). ■3.5mm (Us 5) Circular Needles ■4.0mm (US 6) Circular Needles ■Removablestitchmarkers Tapestry needle for weaving in ends.
Sizes available
Small: to fit 46cm (18") head circumference Medium: to fit 53cm (21") head circumference Large: to fit 58cm (23") head circumference
Gauge
For guideline purposes, this gauge is based on the suggested yarnbelow: Knit Picks Gloss DK: 70% Merino wool / 30% Silk Gauge: 23 sts x 27 rows = 10cm (4") on 4.0 mm (US 6) needles. Everybody's gauge is different, so it is always best to do a swatch to check your gauge! Note:The brim is a lacy ribbing (see chart below), while the rest of the hat is a diagonal line formation of T2F (Twist 2 Front - also known as LEFT TWisT). The twists occur at every ODD round. The Twists are a Knit/Purl crossover. All K sts in this formation are KTBL (knit through back loop). On the EVEN rounds, simply KTBL where Knit stitches appear and PURL the rest. A detailed explanation on how to do this, plus abbreviations help is at the end of this document. DPNs may not be suitable for this pattern (except for the last few stitches towards the end).
Caution!
The twist pattern is designed to spiral around the entire hat, so watch out for twists that go from end of one round to the beginning of the next round. This will affect your 'end of round' marker placement. Be aware of this and deal with it by shifting your marker over to the left or right by a few purl stitches before you reach the end of that round. - but really, don't worry! It's not as important as it sounds! Note: All stitch numbers for each size are highlighted in their respected colours: small / medium / large. Numbers or stitch counts that have no colour reference applies to ALL sizes.
Start Here!
Using smaller sized needle, cast on 80 / 96 / 112 sts. Join in the round, being careful notto twist.
Brim
Work the set up round below for one round: Set up Round: [P1, k6, p1, k6, p1, k1] repeat [] to end of round. Work lacy ribbing as per chart below until brim measures 2.5cm (1") long (or desired length). End on an EVEN round.

Written version of above Chart:
Round 1: [P1, k1, yo, ssk, k2tog, yo, k1, p1, k1, yo, ssk, k2tog, yo, k1, p1, k1] repeat [] to end of round. Round 2: [P1, k6, p1, k6, p1, k1] repeat [] to end of round.
Hat body
Change to larger sized needles. Increase Round: [k1, kfb] repeat [] to end of round. Total no.of sts = 120 / 144 / 168 Work the set up round below for one round: Set up Round: [K1tbl, P5] repeat [] to end of round. Work the Left Twist stitch pattern as charted below until hat measures about 15cm (6") from cast on edge. For a slouchier beret, continue for a few more rows until desired length. End on an EvEN round. Note: For your information, there are 20 / 24 / 28 pattern repeats in each hat. T2F - LEFT TWIST (for a ‘How To', please see last page of this document)
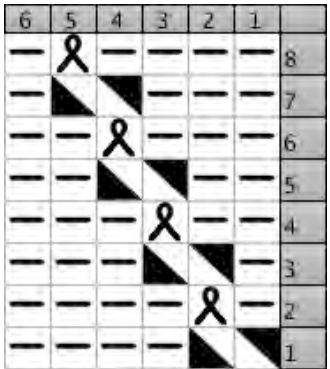
The chart indicates the first 8 rows of pattern. From the gth row onwards, simply follow the stitch positions to infinity!
Written version of T2F Chart:
Round 1: [T2F, p4] repeat to end of round Round 2: [P1, ktbl, p4] repeat to end of round Round 3: [P1, T2F, p3] repeat to end of round Round 4: [P2, ktbl, p3] repeat to end of round Round 5:[P2, T2F, p2] repeat to end of round Round 6: [P3, ktbl, p2] repeat to end of round Round 7: [P3, T2F, p1] repeat to end of round Round 8: [P4, ktbl, p1] repeat to end of round
Decreasing crown
om here on, there will be no further twisting to do. Decrease sts in line with the pattern as follows ■Round 1: [p to the next k st, ssk] repeat [] to end of round Round 2: p the p sts, ktbl the k sts. Repeat these 2 rounds until 40 / 48 / 56 sts remain. End on an EVEN round. 口Next round: ssk every k st Next round: knit Repeat these 2 rounds until 10 / 12 / 14 sts rema
Finishing
Finish off by cutting off your working yarn, leaving about 15cm (6") of length. Thread the yarn onto a needle and thread it through all the remaining sts. Pullfirmly to close up the hole. Sew up to secure in place. Weave in ends. Block as necessary.
HOWTO:
|T2F - (left twist):
1)Slip the K stitch and the following P stitch onto the Right hand needle. 2) Insert Left hand needle into front loop of K stitch. 3) Pinch and hold both sts and pull free your Right hand needle. This will release both sts but the K st is still held on by the Left hand needle. 4) Quickly insert Right hand needle back into the free P st and put back onto the Left hand needle. 5)Purl, K1tbl. 6) Purl to the next K&P stitch pairing.
Video Tutorial onYouTube:
LEFT TWIST: http://youtu.be/MqGISHX-GBO
Abbreviations (in alphabetical order)
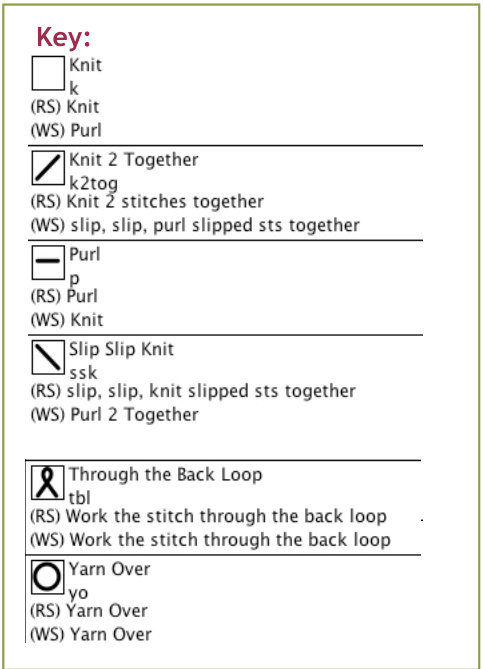
CO = Cast on K = knit K2TOG = Knit 2 sts together (1 stitch decrease) KFB = Knit through front then back of same stitch (1 stitch increase) KTBL = Knit through back loop K1TBL = Knit 1 stitch through back loop P = Purl PM = Place Marker SM = Slip Marker SSK = slip slip knit. Slip 2 sts knit-wise then k2tog through back loop (1 stitch decrease) T2F=Twist2Front (LeftTwist)
Page 3| Tillingbourne Beret - Version 1.4 - 2012-09-04 @ Jimenez Joseph This pattern is for personal use only. Please do not reproduce this pattern, or sell this pattern, or sell any items made from this pattern. Contact me on: jimiknits@yahoo.co.uk Ravelry: JimiKnits


