Catnip Mousies
Gifts of Love by Mady's Originals Most cats love catnip. Our current feline seems immune but sometimes deigns to pretend delight. For our former boys, I created these mousies to keep up with demand. They are very quick and easy to make. Make a few for your own cats, or make some to donate to the local shelter. For discriminating cats, place a half dozen or so in a recycled candy box as a Christmas or other gift. Your friend (the one who does not actually own the cats but merely lives with them) will be delighted with the presentation. The cat just wantsthemousies.
Materials
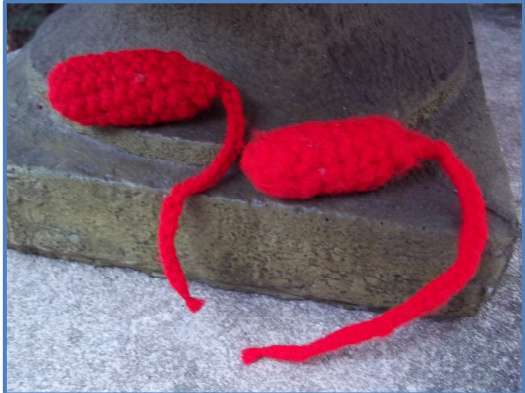
Theleft mousie is newly made - the one on the right has seen some use and it sort of'felting' on its own. Worsted weight, sturdy yarn (I prefer acrylic but wool is nice too) leftover scraps, any color Stuffing (this can be rags, recycled nylons, yarn scraps or polyfil stuffing for toys) Dried Catnip (available at pet shops or via mail order) Crochet hook in appropriate size - E, F or G US works well with worsted Gauge is not important but work tightly to achieve a dense fabric so the stuffing cannot escape Chain 2, then work 9 to 12 single crochet (or more) into the second chain from the hook (more stitches will make a fatter mousie, fewer stitches a more svelte figure - let your yarn and hook be your guide). Do not join but continue working around, 1 single crochet into each stitch, until the piece is about 2 inches long, or about % inch shorter than you want your finished mousie tobe. Stuff a wad of stuffing into the "toe" of the mousie. Now wrap about a teaspoonful of catnip in a scrap of stuffing or a cotton ball and stuff that into the mousie. Add another catnip ball if you wish. Continue stuffing until the mousie is fat and full. Begin decreasing by pulling up a loop in the next two stitches then yarn over and pull the yarn through all the stitches on the needle. Continue around in this manner, adding more stuffing as the mousie grows, to keep it plump. When you are down to the last few stitches decrease as many as you can, then just reach across with your hook to the other side, pull a loop through, yarn over and pull a loop through the loops on the hook, pulling this stitch very snug. Work this "stitch" a few more times until opening is fully closed. Now, work a chain as long as you wish for the tail, cut the yarn and pull through the last stitch, fastening tightly. Roll your mousie in your fingers to shape it nicely and trim the tail, working in any ends if necessary. Optional: you can add eyes and whiskers but I never did - Otis used to snatch the mousie right out of my hand the second it was done, and sometimes before! Obviously, he knew it was for him! You can present the mousie to your cat right away or, for more deliciousness, store it in the container of catnip for a few hours to get it highly scented. Meow! @2012 Madeline Nelson


