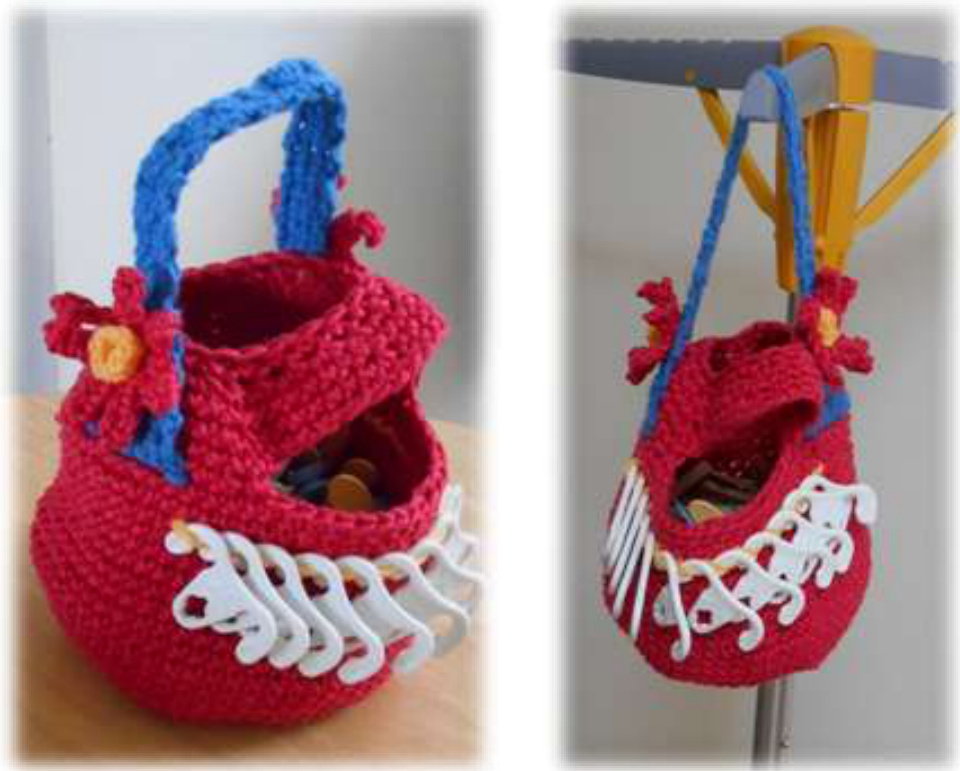
PEG BAG: Free Standing \~ Hanging
CROCHET PROJECT
HO0k: 5mm hook with CHUNKY 4mm hook with DK yarn
YARN A: Wendy Supreme Luxury CHUNKY Cotton yarn [Shade 1428] approx 160g YARN B: Hayfield Baby Chunky [Shade 0403] approx 25g YARN C: DK Special yarn by Stylecraft [Shade 1081- Saffron] approx20g Yarn NEEDLE / Tapestry needle; st markers

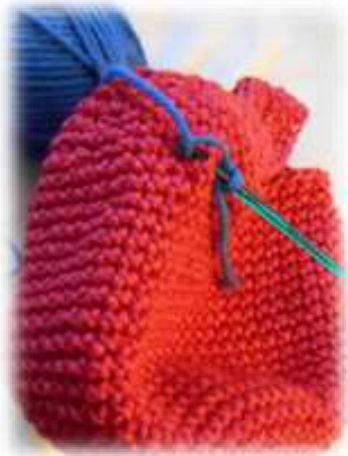
ABBREVIATIONS: NB: While UK EHwool ply is used for this project crochet instructions (i.e. SC dcetc.) CAN/US terminology is used for Sl st = slip stitch DK = Double Knit = Worsted Chunky=Bulky PM = place stitch marker SM = Slip stitch marker, YO = Yarn Over GAUGE: 10 sc over 10 rows = 3" (8cm) DESIGN NOTES: I prefer to use peg bags that not only hang on my rotary-airier washing line, but are also free standing. This bag has two openings wide enough for all hand sizes, so that the pegs can be accessed from either side, should the bag swing round on a windy day. It also includes loops at the front for easy access to your useful coat hanger 'Hook -Ups' pegs. You have the option of attaching your own hook to your bag strap for non rotarywashing lines. BAG: With 5mm hook and DK YARN A, make adjustable ring/ magic loop. You will be making a series of traditional increase rounds until you have 60sts to create the base of the bag [Diameter 6 %" (17cm)]. PM at beginning of round, SM to beginning of next round as you work. Round 1: Work 6sc in ring, sl st to join, Do not turn. (6 sts) PM Round 2: Work 2sc in each st around, (12 sts) Round 3: Work 1 sc in first st, 2 sc crochet in next st. \*1 sc in next st, 2 sc \*around (18sts) Round 4: Work 2 sc into next st, 1 sc into next 2 sts around. (24sts) Round5: Work 1 sc in next st, 1 sc crochet in next 3 sts around. (30sts) Round 6 Work 2 sc into next st, 1 sc into next 4 sts around. (36sts) Round 7: Work 1 sc in next st, 1 sc crochet in next 5 sts around, Sl st in first sc to join. (42sts) Round 8: Work 2 sc into next st, 1 sc into next 6sts around. (48sts) Round 9: Work 1 sc in next st, 1 sc crochet in next 7 sts around. (54sts) Round 10: Work 1sc into every st with no increases. (54sts) Round 11: Work 2 sc into next st, 1 sc into next 8sts around. (60sts) Rounds 12 -27: Work 1sc into every st (15 rounds) Round 28: Work 1 sc. Ch 18. Skip 18 sts (to create opening); Sc2tog in next st; sc 9; \*sc2tog, sc 8 sts\* to last 2sts. 1 sc in each st. (56 sts) Round 28: Work 1sc into every st with no increases. Round 29: Work \*Sc 2tog sc7\* to last 2 sts. 1 sc in each st. (48 sts) Round 30: Work 1sc into every st with no increases. Round 31: Work Sc 2tog into each st around. (24 sts) fasten off and weave in loose ends with yarn needle.
STRAP:
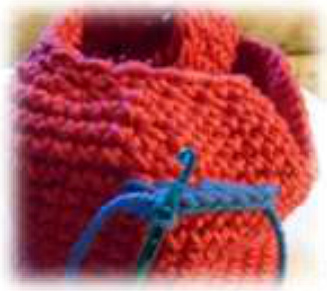
With 5mm hook and YARN B, count 5 sts from bottom edge of opening. Row 1: Insert hook front to back coming out through next st and pull loop through, YO and pull through loop to create st. (See images below)
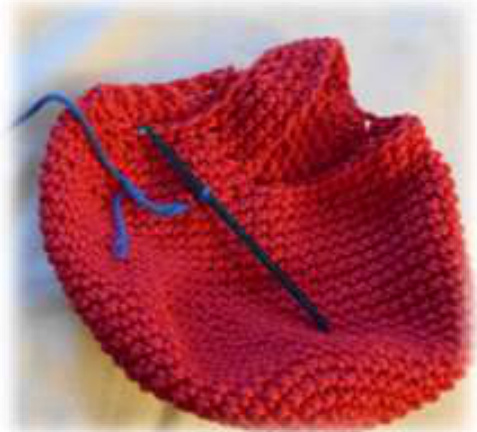
#1
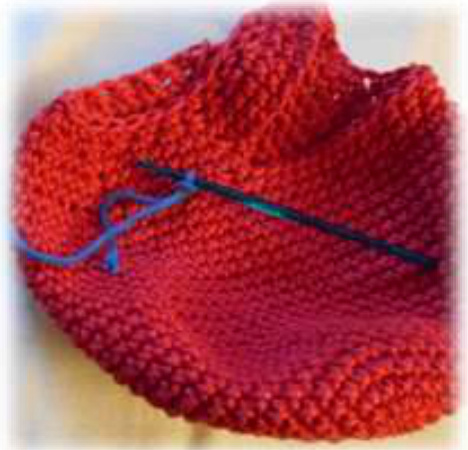
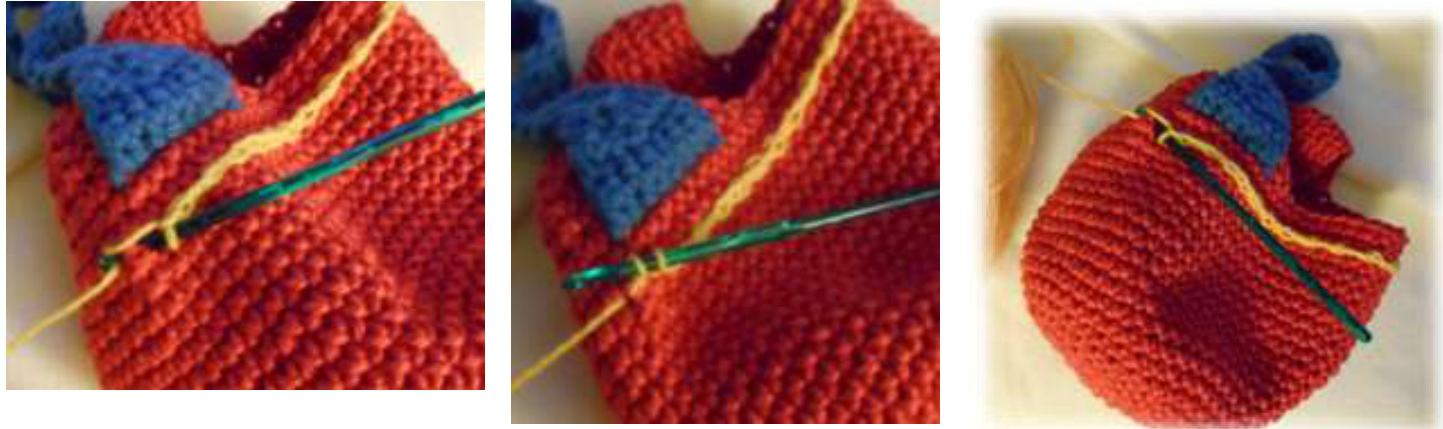
#3 Row 1 cont: Continue along the row of sts until you have made 7 sts. Ch1 turn. (7sts) Row 2: Work 1 sc into each st. Ch 1 turn Row 3: Work 1 sc into each st. Ch 1 turn Row 4: 1 sc in next st, 2 sc tog, 1 sc in next st, 2 sc tog, 1 sc in last st, Ch 1 turn. (5 sts) Row 5: 1 sc in next st, 2 sc tog, 1 sc in last st, Ch 1 turn. (3 sts) Rows 6-36: Work 1 sc into each st for 30 rows.
Row 37: Work 1 sc into next st, 2 sc into next 2 sc Ch 1 Turn (5sts) Row 38: Work 1 sc into next st, 2 sc into next sc, 1 sc in next sc, 2 sc in next sc, 1 sc in last st. Ch1 Turn (7 sts) Cut yarn with 20" tail and whip stitch onto opposite side of bag, measuring and placing it so that it matches the placement on the other side. fasten off, weaving ends into back of work. HOOK LOOP ROW: With 4mm hook and YARN C, Start below bag strap edge two rows down below straps. Makes sts for row as per strap instruction, but in addition, making 2 chains between each st to allow for space to attach Hook-ups. Cut yarn and fasten off, weaving ends into back of work.
FLOWERS:
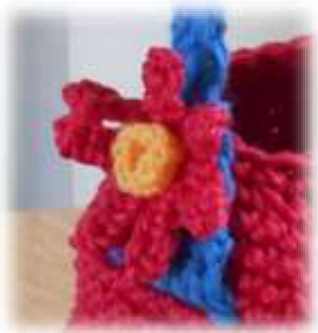
With 4mm hook and DK YARN C, make adjustable loop/ring for FOUNDATION CIRCLE OF FLOWER. Round 1: Work 3sc in ring, sl st to join, Do not turn. (3 sts) Round 2: 2sc in each st around, sl st in first sc to join, (12 sts) fasten off weaving in loose ends. Round 3: Attach Yarn A for PETALS. Make 1 sc, ch4, turn sc into each ch, sc into first sc. (1 petal) Rounds 4-8: Work around centre of flower as in round 3. Sl st to join and fasten off weaving in loose ends. Set aside. CENTRE OF FLOWER With 4mm hook and DK yarn C, make adjustable loop/ring Round 1: Work 6sc in ring, sl st to join, Do not turn. (6 sts) Round 2: Work 2 dc into each sc, sl st to join. Cut yarn leaving 6" tail and weave through edge, pulling gently to create a slightly concave shape. Sew centre of flower onto main flower piece. Position a flower onto each side of bag, where the handle meets top of bag and sew through all layers to secure in place.
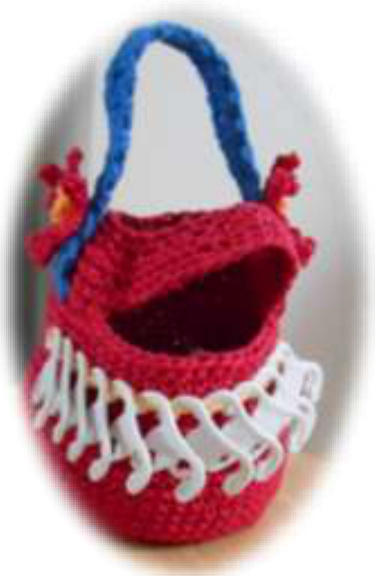
Fill your bag with pegs, attach hook-ups and enjoy...


