Simple Cro-Tat Bookmark
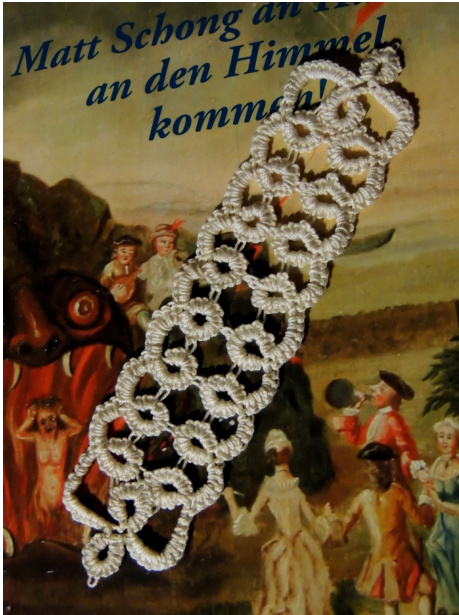
After following Enfys' lovely tutorial (http://www.enfys.me.uk/crotat-stitches-ontutorial.htm), I was looking for free simple beginners patterns for cro-tatting, but there does not seem to be so much: many patterns around are for other tatting techniques, mainly for shuttle tatting, and a lot of them can't be easily followed without in-depth knowledge. So I decided to improvise, and the result is this simple bookmark.
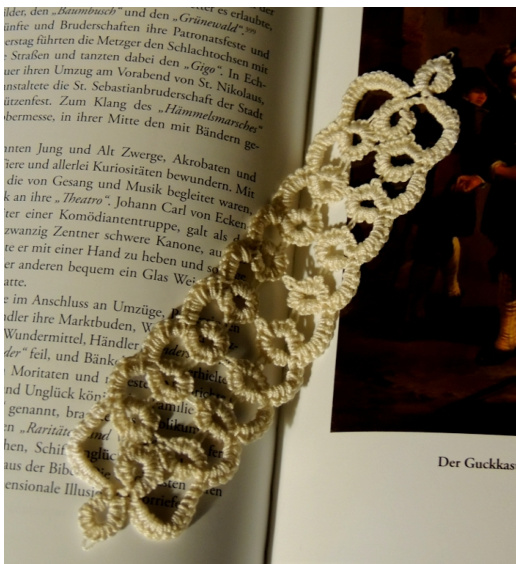
I am sure this has been done millions of times before, by every tatter in the world, but this what I came up with when I couldn't find a pattern to follow...
Knowledge required:
tatting double stitch (ds) picot (p) joining picots (jp) closing a ring (clr) chain stitch (crochet) (ch) slip stitch (crochet) (slst) single crochet (US terminology) (sc)
Notions:
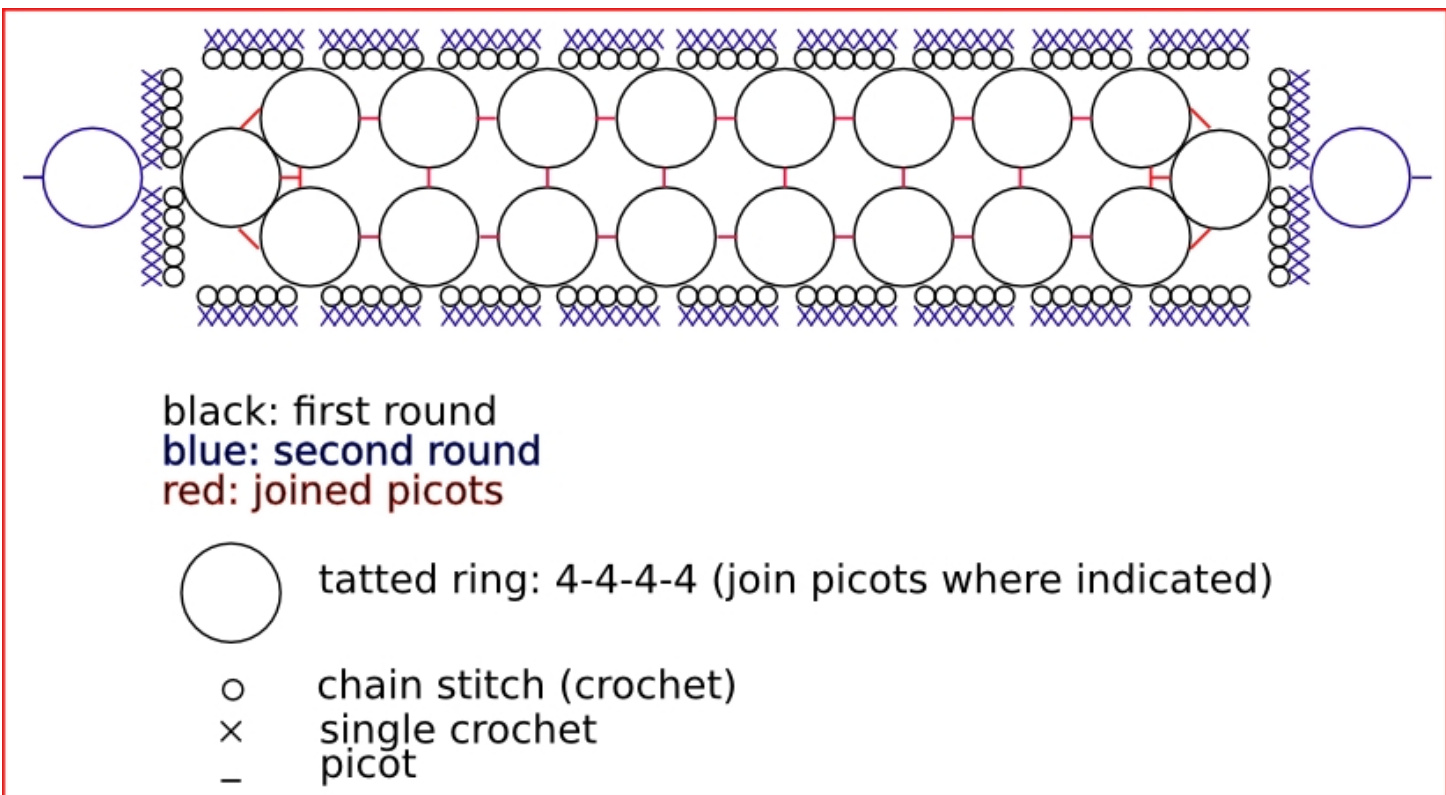
crocheting thread (I've lost the label of the one I was using so can't tell you what itwas) tatting hook (l used a 1.5 mm one, a tad too big but workable; for tidy stitches and easier manipulation of the stitches, it is recommended to use a smaller hook than the one indicated for your yarn / thread) · crochet hook indicated for your yarn or the same gauge as your tatting hook tapestry needle, scissors A rudimentary chart can be found below the written instructions.
And here's how you do it:
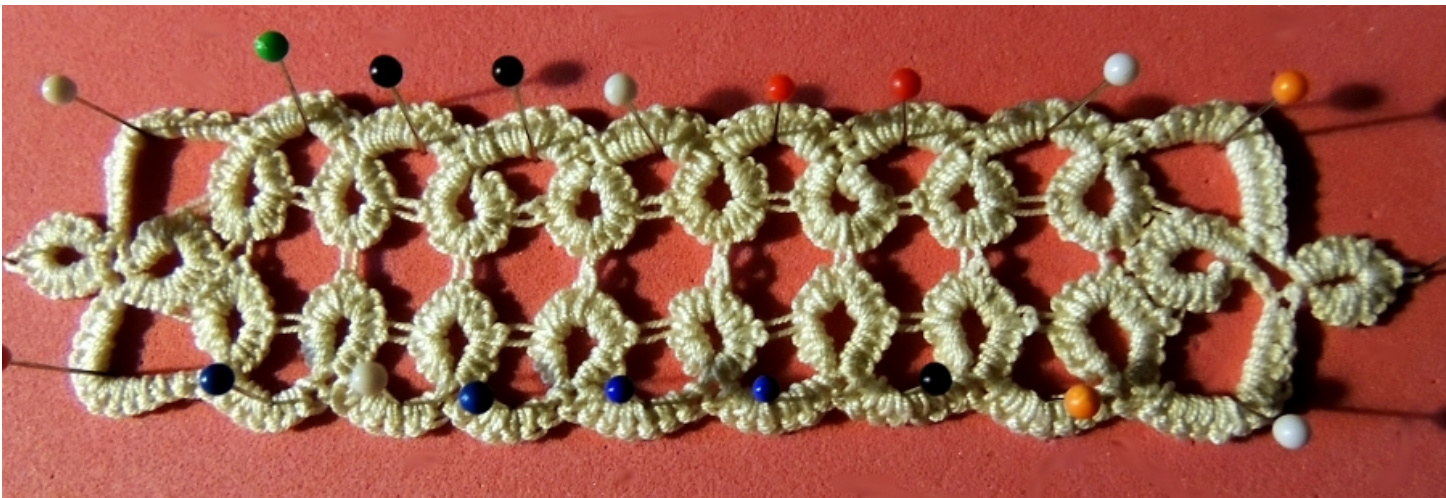
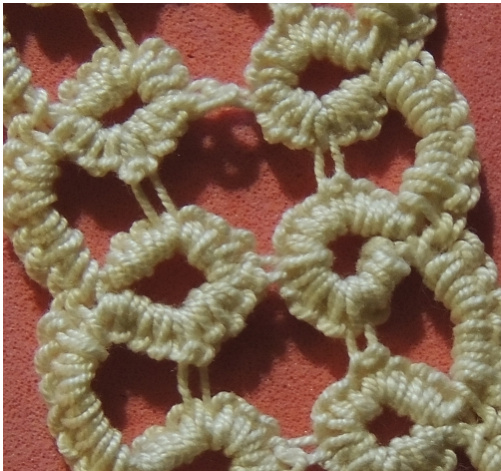
First tatted ring: put 4 ds on hook, p, 4 ds, p, 4 ds, p, 4 ds close ring ; Chain 5 Make next ring in the same fashion: 4ds-jp-4ds-p-4ds-p-4ds BUT take care to join the first picot (ip) to the last one you made on the previous ring. 2 rings made. Make 6 more rings this way, chaining 5 between rings each time. After the 8"h ring, chain 10 Corner ring: 4ds-jp-4ds-jp-4ds-p-4ds Here you join the first picot of the ring to the last one of the previous ring AND the second picot to the top one of the previous ring. Chain 10 Next ring, return "row": 4ds-jp-4ds-jp-4ds-p-4ds Here you join the first picot of the ring to the last one of the previous ring AND the second picot to the top one of the ring directly opposite it. The first would go into the SAME one you joined the corner ring in; the next one into the next one in the row and so on. Continue this way until all 8 rings in a row have a counterpart, don't forget to chain 5 between each ring! After the 8th ring: chain 10 This one (= second corner ring) joins ALL of its picots: 4ds-jp-4ds-jp-4ds-jp-4ds the first one into the previous ring; the second picot joins where you joined the previous ring; the third picot joins with the first picot of the first ring. Chain 10, slip stitch into the starting ds of the first ring (look where the other chains start and end and you'll see where it has to go).
Second round:
Change to the crochet hook and chain one. Around every chain of 5 ch, make 7 single crochet stitches. When you arrive to the ch10, make 14 sc Change back to the tatting hook and tat the outer ring: 8ds - p - 8 ds With the crochet hook, continue around with sc, make outer ring on opposite side the same way (use the tatting hook), sc around the last chain, join to start of sc round with a slst. (The slip stitches are not shown on the chart since in theory, you could start with any ring you'd like!)
Finish off by cutting thread and pulling through the last loop on the hook (some prefer to add a single chain stitch before finishing off), sew in ends and block, stiffen if you wish.
I just blocked lightly, to enhance the continuous loops illusion.
Have fun and thanks for downloading the pattern!


