Skill Building:
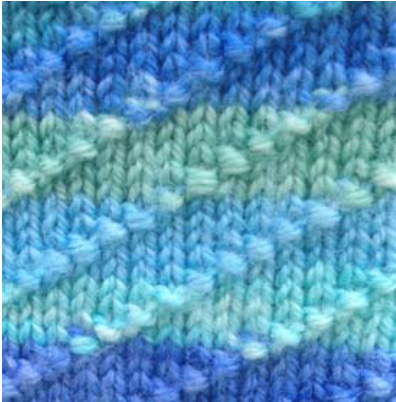
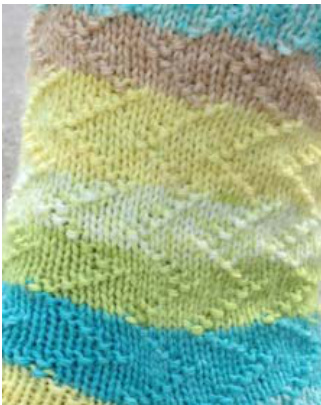
·Use knit and purl STS to create movement in pattern · Modified eye of partridge heel flap Round toe Kitchener Stitch Reading a chart in the round (optional)
MaterialsNeeded:
Needles: US Size I.5(2.5 mm) needles or size to obtain gauge Approximately350-400yds fingering weight yarn or 300- 350 yds sport weight ·Three markers: ·One Green (GO) · One Red (STOP) · One other color for end of round (EOR) ·Tapestry (Chibi) needle
Abbreviations:
EOR: End of round ST: Stitch STS: Stitches K: Knit P: Purl K2TOG: K 2 STS Together P2TOG:P2STS Together RS: Right Side WS: Wrong Side SL1: Slip 1 ST as if to P unless told otherwise SSK: SL1 as ifto K to right needle, SL1 next ST as if to K to right needle K2TOG through back loop WYIB: With Yarn In Back WYIF: With Yarn In Front YO: Yarn over
Twisted Breeze Socks Easy Breezy Sock Pattern
Sock Model:
Lollipop Beefcake—Heavy Fingering Weight Yarn (Colorway: Breakers) Size: Medium (Measures approx 3.75" if measuring one half of sock lying flat) Sizes included in pattern: Extra Smal/Small/Medium/Large (54 / 60 / 66 / 72 STS) StitchRepeat:Multiples of 6 Sport/heavy fingering \~ 8 STS/inch OR Light weight to regular weight fingering \~ 9 STS/inch
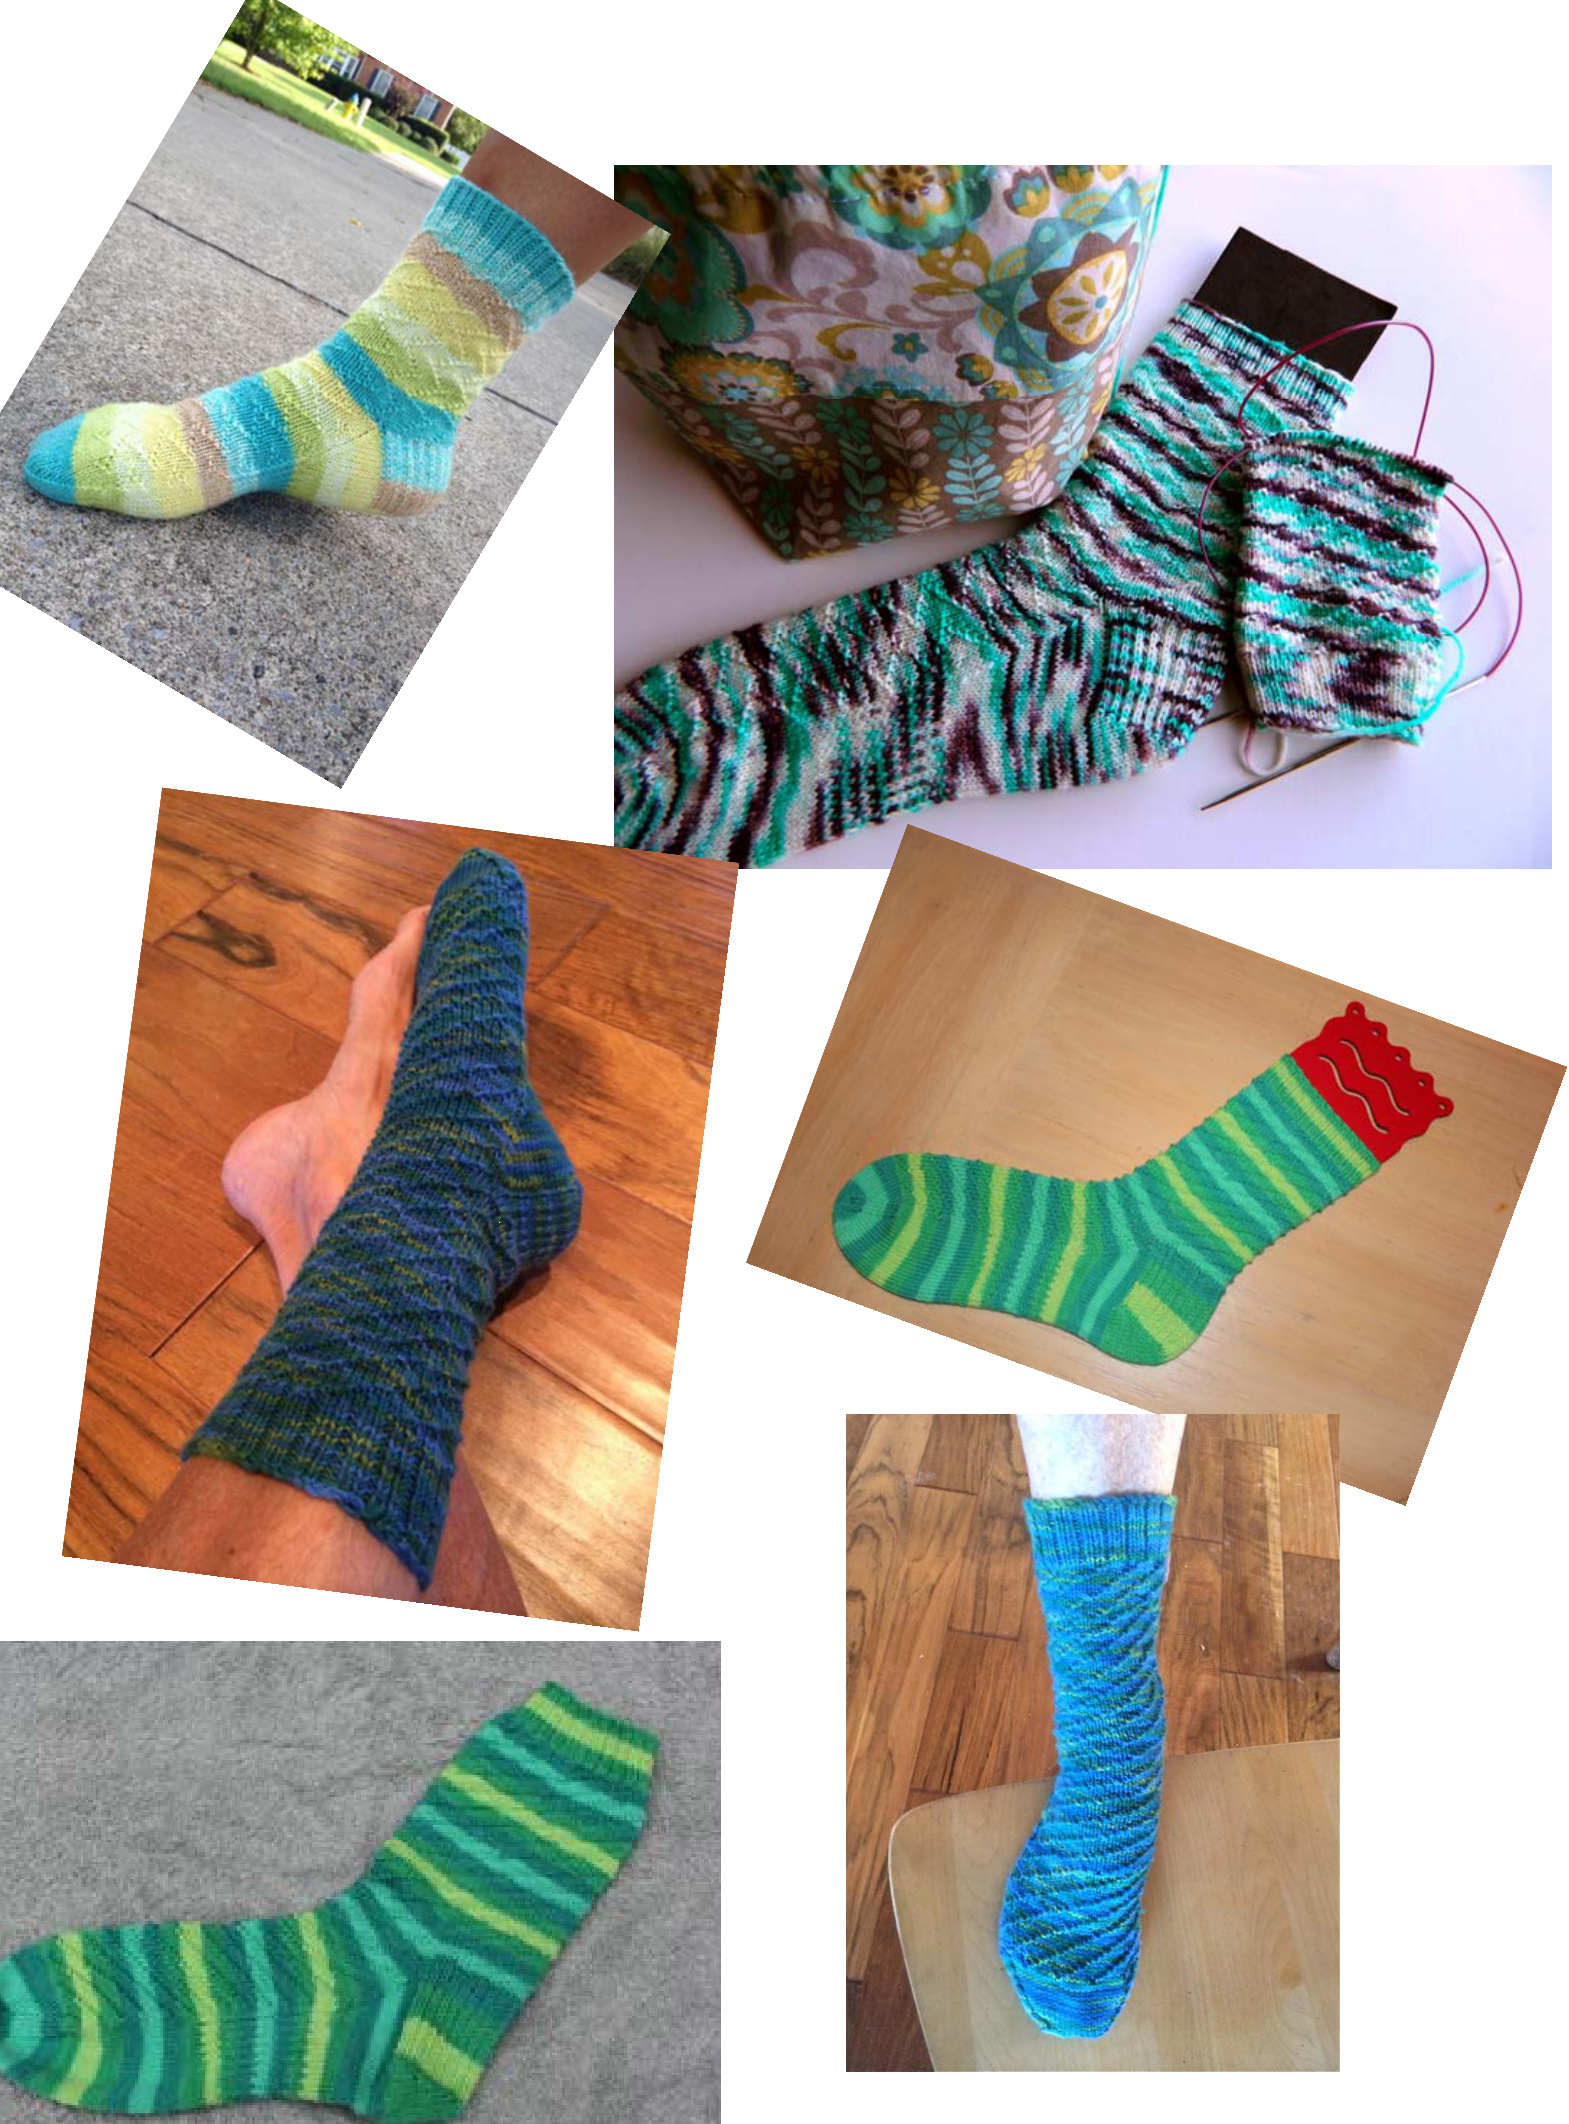
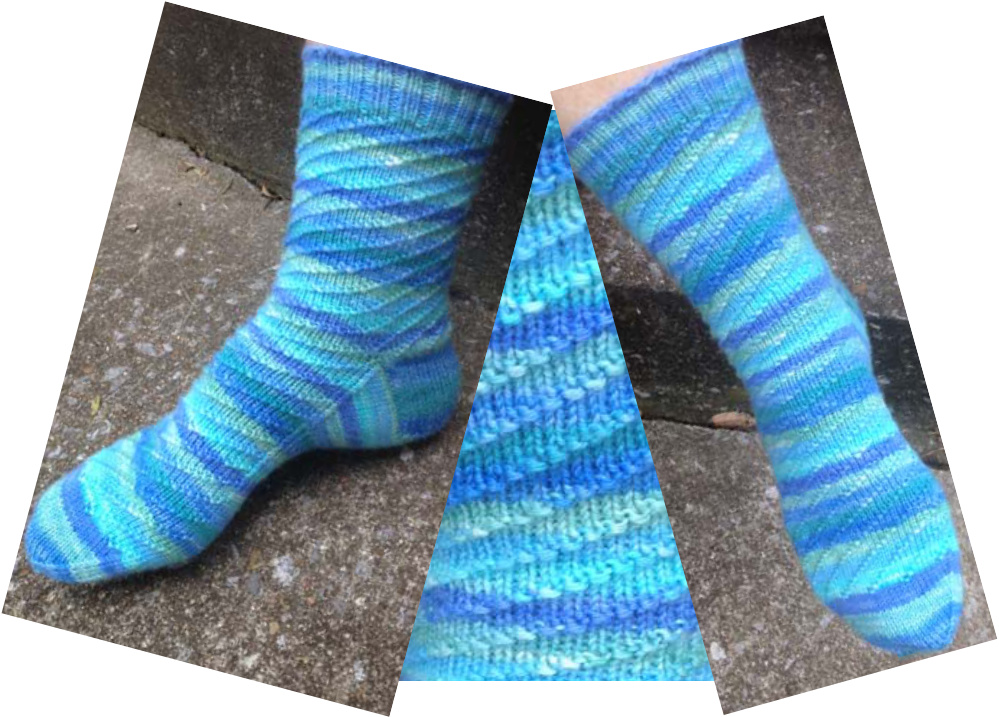
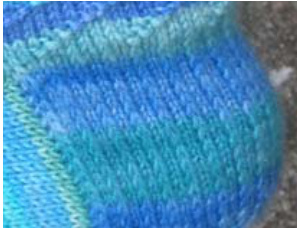
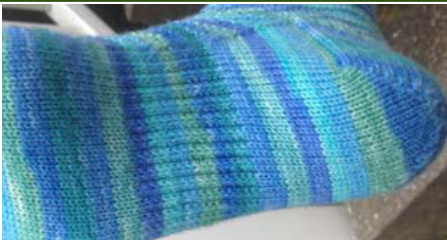
This is an easy, versatile pattern that offers options of knitting a swirl or zig zag pattern and four different sizes.
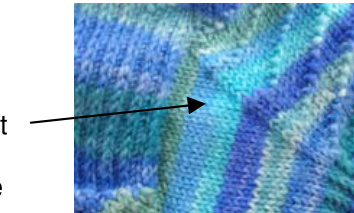
Yarn—-Self-striping or solid (highly variegated yarns may not highlight ST pattern well Fingering weight or sport weight yarn
Selecting size
Using light weight to regular weigh fingering? Choose ST count nearest to what you usually usetoknitasockwith. Using heavy fingering to sport weigh yarn? Choose ST count one size down from your usualsockSTcount For example, if using a light to regular fingering weight yarn, I use 72 STS This sock model was knit from a light sport or heavy fingering yarn so I chose one size smaller and workedon66STS.
Type of Needles
This pattern provides instructions for knitting the sock, but does not designate type of needles to use (two circs, magic loop, DPN, etc.). ST markers are suggested to indicate where you are in the pattern. If your needle style does not require these markers, ignore them.
DIRECTIONS:
Cuff—Cast on 54/60/66/72 STS. Join work without twisting STS (place EOR marker, if needed to mark end of round). Work \* K 2, P 1 \* Repeat \* \* to end of round. Continue working by repeating between \* \*. Repeat until cuff measures 1-1/4" or desired length.
Leg/Cuff Options and Directions:
At beginning of round, select a pattern below (Swirl or Zig Zag pattern) and repeat for 6" or desired length. Ideal place to end would be after working round 6 or 11.
Options
Abbreviations: EOR: End of round ST: Stitch STS: Stitches K: Knit P: Purl K2TOG: K 2 STS To gether P2TOG:P2STS Together RS: Right Side WS: Wrong Side SL1: Slip 1 ST as if to P unless told otherwise SSK: SL1 as if to K to right needle, SL1 next ST as if to K to right needle K2TOG through back loop WYIB: With Yarn In Back WYIF: With Yarn In Front 1) One Swirl for both socks 2) Left Swirl for one sock and a Right Swirl for the other sock to create mirror image 3)ZigZags f you prefer knitting from a chart for the options below, Charts are offered on Page 5 1) One Swirl for both socks Swirl A pattern: Round 1 \* K5, P1 \* Repeat \*\* to end of round 2 \* K4, P1, K1 \* Repeat \* \* to end of round 3 \* K3, P1, K2 \* Repeat \* \* to end of round 4 \* K2, P1, K3 \* Repeat \* \* to end of round 5 \* K1, P1, K4 \* Repeat \*\* to end of round 6 \* P1, K5 \* Repeat \*\* to end of round
2) OR Mirror Image Swirls—Work Swirl A for one cuff and Right Swirl B for other cuff RSwirl Bpattern: Round 1 \* P1, K5 \* Repeat \*\* to end of round 2 \* K1, P1, K4 \* Repeat \* \* to end of round 3 \* K2, P1, K3 \* Repeat \* \* to end of round 4 \* K3, P1, K2 \* Repeat \*\* to end of round 5 \* K4, P1, K1 \* Repeat \*\* to end of round 6 \* K5, P1 \* Repeat \*\* to end of round 3) OR Zig Zag pattern can be used for entire sock or mix with the swirl
Zig Zag pattern:
1-6 Repeat Rounds 1-6 of Left Swirl 7-11 Repeat Rounds 2-6 of Right Swirl 12-17 Repeat Rounds 2-6 of Left Swirl 18-? Repeat Rounds 7-17 until desired length before heel flap
Abbreviations: EOR: End of round ST: Stitch STS: Stitches K: Knit P: Purl K2TOG: K 2 STSTo gether P2TOG:P2STS Together RS: Right Side WS: Wrong Side SL1: Slip 1 ST as if to P unless told otherwise SSK: SL1 as if to K to right needle, SL1 next ST as if to K to right needle K2TOG through back loop WYIB: With Yarn In Back WYIF: With Yarn In Front
Heel Flap
At EOR, turn work (WS now facing you) and begin working Modified Eye of Partridge Heel Flap on 27/29/33/35 STS (place remaining 27/31/33/37 STS on hold) Work until heel flap measures 2/2.25/2.25/2.25" & ending after right side (RS) row Modified Eye of Partridge Heel flap: Row1 (WS) K 1, P to last ST, SI 1 WYIF2 (RS) K 1, \* SL 1 WYIB, K1 \* repeat \* \* to last 2 STS, SI 1 WYIB, SI 1 WYIF
Turn Heel—-
SL1, P 14/15/17/18, P2TOG, P1, turn work SL1, K 4, SSK, K1, turn work SL1, P 5, P2TOG, P1, turn work SL1, K 6, SSK, K1, turn work SL1, P 7, P2TOG, P1, turn work SL1, K 8, SSK, K1, turn work Continue in this manner until all STS have been worked ending after a RS row. You should have 15/17/19/19 STS remaining
Gusset
1. Pick up gusset STS on first side of heel flap until you reach the STS that have been on hold (See Tips and Tricks for picking up STS on page 6) 2. Place Go (green) marker on right needle, begin working on STS that have been on hold and work Row 1 of Swirl or Row 2 of Zig Zag pattern over 27/31/33/37 STS, place Stop (red) marker, and pick up STS by knitting into back loop along the edge of heel flap (pick up same amount of STS as was done on other side of heel flap). K 8/9/10/10 STS, place EOR marker to mark end of round. You will be at the middle of sole or bottom of foot. NOTE: you can omit EOR marker if you remember where the end of the round is. 3. Including your number of STS picked up, you should have an uneven number of STS on the bottom of the foot and 27/29/33/35 STS on the top of foot 4. Work the following two rounds until you return to original number of STS (Total of 54/60/66/72 STS-27/29/33/35 STS on the sole and 27/31/33/37 STS on the Instep) Round 1: K to Go marker, slip marker, work in established Swirl or Zig Zag pattern to Stop marker, slip marker, K to EOR Round 2: K to 3 STS before Go marker, K2TOG, K 1, slip marker, work in established Swirl or Zig Zag pattern to Stop marker, slip marker, K1, SSK, K to EOR 5. You should have original number of STS—54/60/66/72 STS (27/29/33/35 STS on the sole and 27/31/33/37 STS on the Instep)
Fitted Arch—Optional If you do not wish to work the Fitted Arch, continue to Foot section
You have 27/29/33/35 STS on the sole and 27/31/33/37 STS on the Instep when working on the foot for a total of 54/60/66/72 STS. Note: When you reach EOR marker, just slip to right needle as you work STS Abbreviations: EOR: End of round ST: Stitch STS: Stitches K: Knit P: Purl K2TOG: K 2 STS To gether P2TOG:P2STS Together RS: Right Side WS: Wrong Side SL1: Slip 1 ST as if to P unless told otherwise SSK: SL1 as if to K to right needle, SL1 next ST as if to K to right needle K2TOG through back loop WYIB: With Yarn In Back WYIF: With Yarn In Front
Repeat Rounds 1 & 2 for 1.5 / 1.75 /2 / 2" Round 1: Knit to GO marker, knit in established pattern until you reach Stop marker, slip marker, \*Sl1, K1 \* to one ST before GO marker, end with Sl1 Round 2: Slip GO marker, knit in established pattern until you reach Stop marker, slip marker, K to EOR
Foot
Work in established pattern on top of foot (includes STS after Go marker to STS before Stopmarker) K all ST on bottom of foot (includes STS after Stop marker to STS before Go marker) until sock is: Fingering Weight: 1.5" / 1.5" / 1.75" / 1.75" shorter than desired length Heaving Fingering/Sport Weight: 1.25" / 1.25" / 1.5" / 1.5" shorter than desired leng There are 27/29/33/35 STS on the sole and 27/31/33/37 STS on the Instep when working on thefootforatotalof54/60/66/72STS. Small (60 STS) and Large (72 STS) Sizes Only: Work following directions one time: At beginning of round, K to Go marker, remove marker, K1, place marker in new position on right needle, K Stop marker, slip marker, K to EOR. You should now have (Small) 30/ (Large) 36 STS on both the sole and instep of your sock. Total of 60 / 72 STS. Continue to Toe instructions Extra Small (54 STS) and Medium (66 STS) Sizes Only: Continue to Toe instructions
Toe
Repeat the following two rounds until you have total of 26/32/34/40 STS remaining
Round 1: K
Round 2: At beginning of round (ST after the EOR marker), K to 3 STS before Go marker, K2TOG, K1, slip marker, K1, SSK, then K to 3 STS before Stop marker, K2 TOG, K1, slip Stop marker, K 1, SSK, K to EOR When you have total of 26/32/34/40 STS remaining, work only Round 2 above until 14/20/18/20 STS remain. Note: On last round, K past EOR marker to Go marker) Cut yarn, leaving at least 16" of yarn. Thread the yarn into a tapestry needle. Graft (kitchener) the remaining STS together as follows. See Tips and Tricks on page 6 for instructions on how to graft/kitchener.
Charts
Abbreviations: EOR: End of round ST: Stitch STS: Stitches K: Knit P: Purl K2TOG: K 2 STS T0- gether P2TOG:P2STS Together RS: Right Side WS: Wrong Side SL1: Slip 1 ST as if to P unless told otherwise SSK: SL1 as if to K to right needle, SL1 next ST as if to K to right needle K2TOG through back loop WYIB: With Yarn In Back WYIF: With Yarn In Front Swirl A
| 6 | ||||||
| 5 | ||||||
| 4 | ||||||
| 3 | ||||||
| 2 | ||||||
| 3 | 1 | |||||
| 6 5 4 | 2 | 1 | ||||
Swirl B
| 6 | ||||||
| 5 | ||||||
| 4 | ||||||
| 3 | ||||||
| 2 | ||||||
| 1 | ||||||
| 6 5 4 3 | 2 1 | |||||
Zig Zag
| 11 10 6 8 7 6 | ||||||
| . | ||||||
| 5 | ||||||
| 4 | ||||||
| 3 | ||||||
| 2 | ||||||
| 1 |
Easy Breezy Sock with MultipleCuff Options Abbreviations: EOR: End of round ST: Stitch STS: Stitches K: Knit P: Purl K2TOG: K 2 STS To gether P2TOG:P2STS Together RS: Right Side WS: Wrong Side SL1: Slip 1 ST as if to P unless told otherwise SSK: SL1 as if to K to right needle, SL1 next ST as if to K to right needle K2TOG through back loop WYIB: With Yarn In Back WYIF: With Yarn In Front
Tips and Tricks
1. Picking up heel flap STS: When picking up STS, a nice look can be obtained by picking up the ST and knit into back of loop. Grumperina shares wonderful directions on her blog (http://grumperina.com/knitblog/archives/2005/10/theres_the_easy.htm). 2. Picking up heel flap STs: Turn to look on back or WS of heel flap to see slipped STS to be used when picking up STS 3. I knit tight when knitting socks and usually use a US 1.5 needle and 72 STS. Because I was using a heavy fingering weight that was borderline sport weight, I went down to the next ST count and used the Medium or 66 ST count size. I knit socks using two circular needles 4. Grafting/Kitchener—-Hold both needles together and needle with Instep (top) is in front facing you and the Sole (bottom) is behind that needle. SETUP ROW: Begin by bringing tapestry needle yarn under needles, insert tapestry needle into first ST on front needle as if to purl and pull yarn through: then bring yarn under needle to back and insert tapestry needle into first ST on back needle as if to knit and pull yarnthrough Repeat the following four steps until only last ST remains on front and back needles: Front needle: 1. Insert tapestry needle into first ST as if to K and pull yarn through, slip this ST off needle & draw up yarn to same tension as rest of sock 2. Insert tapestry needle into second ST on same needle as if to P and pull yarn through
Back needle:
3. Insert tapestry needle into first ST as if to P and pull yarn through, slip this ST off needle & draw yarn up to same tension as rest of sock 4. Insert tapestry needle into second ST on same needle as if to K and pull yarn through When only 2 STS remain (one on each needle): End by working steps 1 and 3 only. Bring yarn end through to inside of sock and weave in ends