Cathedral Hat
non-cabled version
Materials
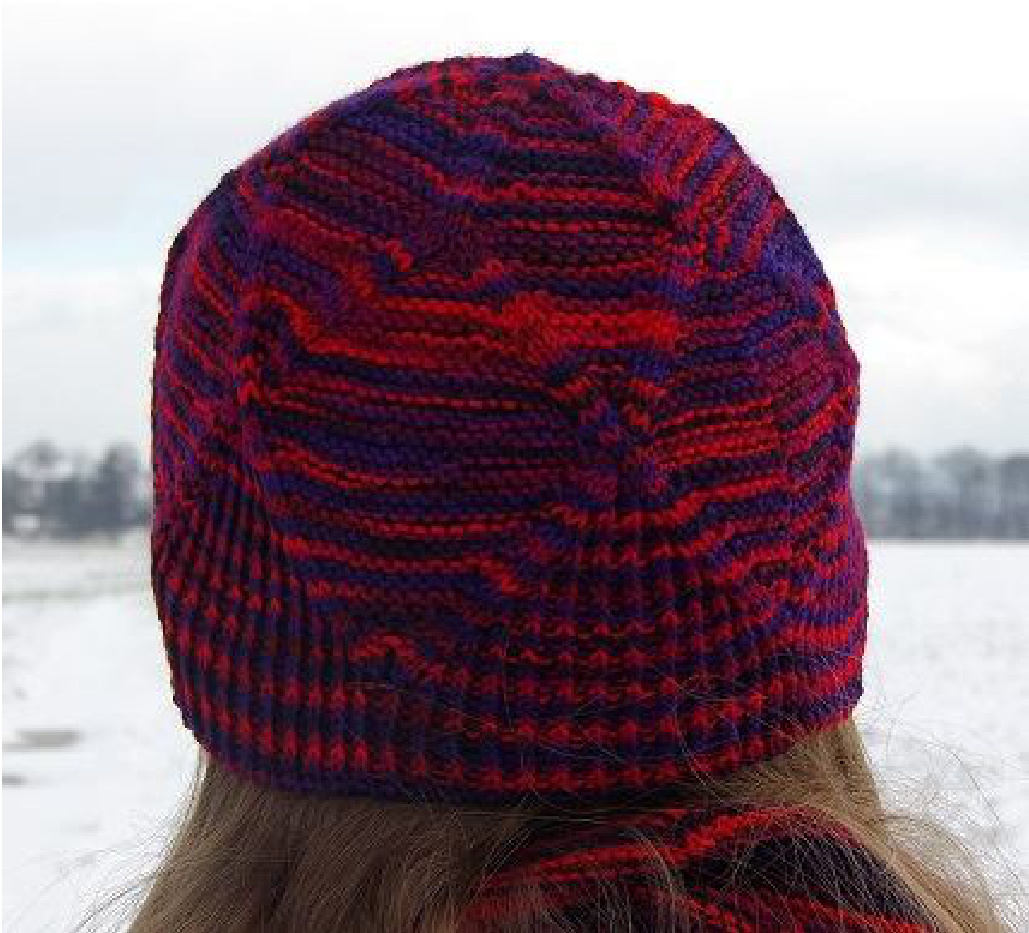
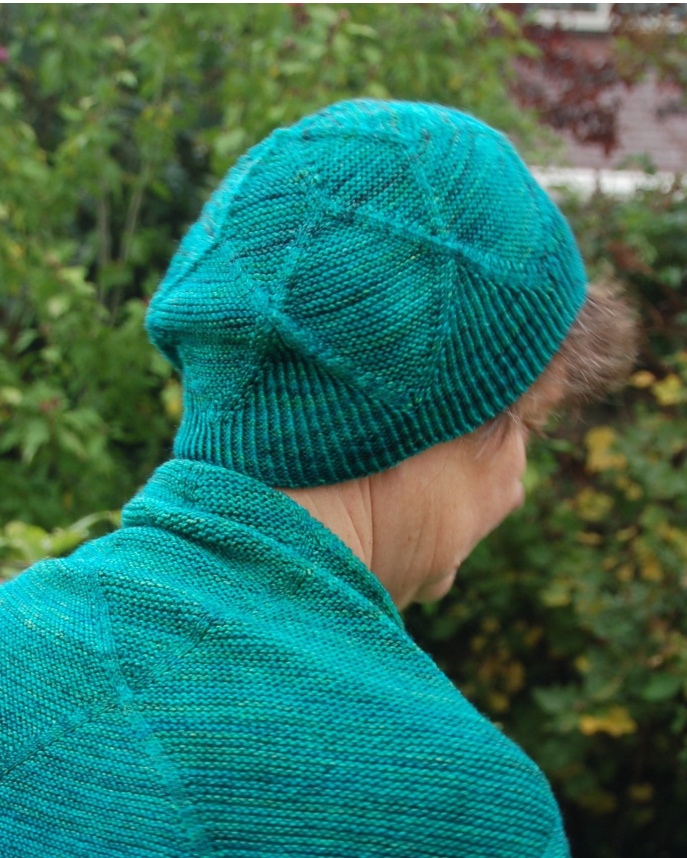
baby and child/small adult version: Scheepjes Invicta colour (75% Wool, 25% Nylon, 421 m(460 yd)/100 g). For the babysize I used 16 g and for the child/small adultsize 33 g. toddler and child/small adult version: Wollmeise Pure (100% Merino, 525 m(574 yd)/150 g) colorway Maria's Deepest Purple. For the toddler size I used 35 g and for the child/small adult size 47 g. large adult version: Fyberspates Vivacious 4Ply (100% Superwash Merino, 365 m(399 yd)/100 g) colorway Sea Green. I used 56 g. 3-mm (Us 2,5) circular needle, 80 cm (32 inches) or more. cable needle. 3-mm crochet hook. 2 spare 3-mm needles for bind off, circular or doublepointed. You could also use a needle size smaller, if you don't have the right size. 12 stitchmarkers in total, 6, 5 and 1 markers in 3 different colors. yarn needle.
Size
Baby(toddler, child/small adult, large adult)
To fit headcircumference
37-45(45-49, 49-55, 55-60) cm/15-18(18-19.5, 19.5-22, 22-24) inches.
What size to choose
Due to the stretchability of this hat, one size fits a wide range of heads, but the length may vary with different headcircumferences in one size. Since the hat is knit topdown, you can try the hat on to determine how many rounds of ribbing you need to make the head fit to your head.
Gauge
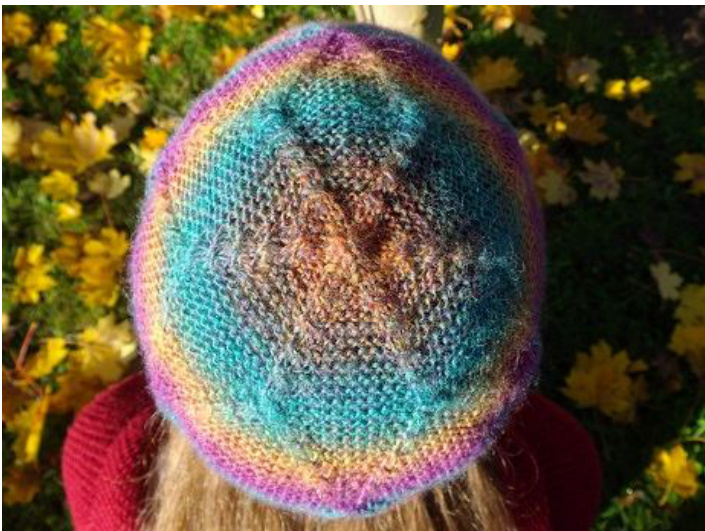
25 sts and 50 rows in garter stitch (25 ridges) are 10 x 10 cm (4 x 4 inches).
Stitchmarkers
If you use the written instructions, you will need stitchmarkers in three different colors. There is one marker A (mA), 5 markers B (mB) and 6 markers C (mC). If you use the charts, you only need one mA to mark the beginning of the round. You could use the 5 mB's to mark the repeats of the chart in one round.
Twisted rib
In the third section starts the twisted rib. It is made by repeating p1, kitbl. Depending on which round is worked it starts with p1 or with kitbl. Always work the same stitches over one another, so p1 over p1 and kitbl over kitbl.
Abbreviations
CO cast on k knit k1tbl knit one through back loop k2tog knit two together miL make one leftleaning stitch (tutorial on page 10) m1R make one rightleaning stitch (tutorial on page 10) mA marker A mB marker B mC marker C p purl pmA place marker A pmB place marker B pmC place marker C smA slip marker A smB slip marker B smC slip marker C ssk slip, slip, knit st stitch sts stitches
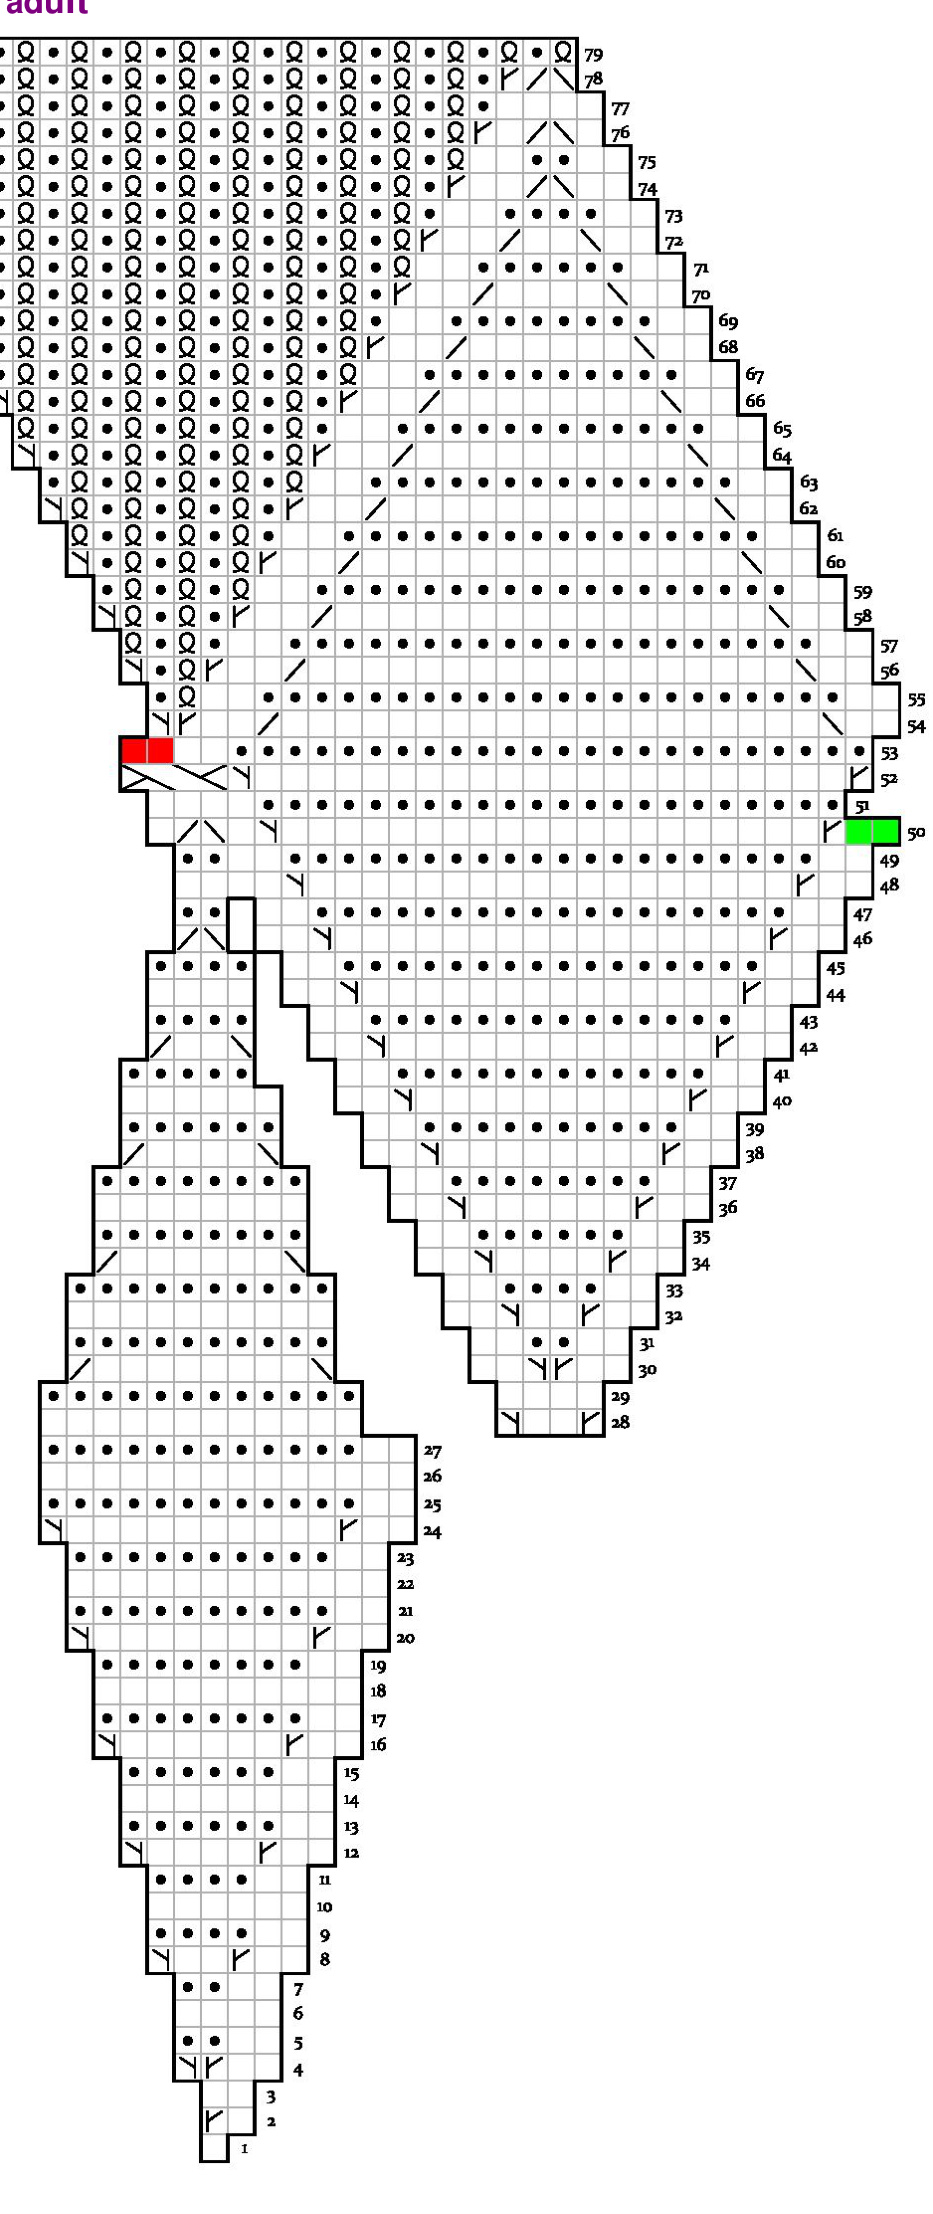
Written instructions (charts from page 5)
Setup for first section
Using Emily Ockers Cast On, CO 6 sts. Place marker A to mark the beginning of the round. Round 1: smA, k6. Round 2: smA, (k1, m1R) x6. Round 3: SmA,k12. Round 4: smA, (k2, m1R, m1l, pmB) x5, k2, m1R, m1L. Round 5: smA, (k2, p2, smB) x5, k2, p2. At the end of the first setup section you should have a total of 24 sts. Last round worked in this section is round 5 of chart.
First section
Round 1: smA, (k to next mB, smB) x5, k to end of round. Round 2: smA, (k2, p to next mB, smB) x5, k2, p to end of round. Round 3: smA, (k2, m1R, k to next mB, m1L, smB) x5, k2, m1R, k to end of round, m1L. Round 4:as round 2. Work those 4 rounds 3(4, 5, 6) times, then work rows 1 and 2 another time. 60(72, 84, 96) sts in total, 10(12, 14, 16) sts between markers. Last round worked in this section is round 19(23, 27, 31) of chart.
Setup for second section
Round 1: smA, (m1R, k1, pmC, k1, m1L, k to next mB, smB) x5, m1R, k1, pmC, k1, m1l, k to end of round. Round 2: smA, (k2, smC, k2, p to next mB, smB) x5, k2, smC, k2, p to end of round. Round 3: smA, (k2, m1R, m1L, smC, k2, ssk, k to 2 before next mB, k2tog, smB) x5, k2, m1R, m1l, smC, k2, ssk, k to 2 before end of round, k2tog. Round 4: smA, (k2, p2, smC, k2, p to next mB, smB) x5, k2, p2, smC, k2, p to end of round. At the end of the second setup section you should have 72(84, 96, 108) sts. Last round worked in this section is round 23(27, 31, 35) of chart.
Second section
Round 1: smA, (k2, m1R, kto next mC, m1L, smC, k to next mB, smB) x5, k2, m1R, kto next mC, mil, smC, k to end of round. Round 2: smA, (k2, p to next mC, smC, k2, p to next mB, smB) x5, k2, p to next mC, smC, k2, p to end of round. Round 3: smA, (k2, m1R, k to next mC, m1L, smC, k2, ssk, k to 2 before next mB, k2tog, smB) x5, k2, m1R, k to next mC, milL, smC, k2, ssk, k to 2 before end of round, k2tog. Round 4: as round 2. Work those 4 rounds 2(3, 4, 5) times, then work rows 1 and 2 another time. 108(132, 156, 180) sts in total. Last round worked in this section is round 33(41, 49, 57) of chart.
End of second section and setup for third section
Round 1: remove mA, k2, pmA (new beginning of round), (m1R, k to next mC, miL, smC, k1, ssk, slip next st, remove mB, slip st back to left needle, k2tog, k1) x6. Round 2: smA, (p to next mC, smC, k4) x6. Round 3: smA, (m1R, k to next mC, m1L, smC, slip next 2 sts on cable needle in front of the work, k2, k the 2 sts of the cable needle) x6. Round 4: smA, (p to next mC, smC, k4) x5, p to next mC, smC, k2, slip next two sts to right needle, remove mA, slip sts back on the left needle, pmA at the new beginning of theround. Round 5: smA, (k2, ssk, k to two before next mC, k2tog, smC, k2, m1R, m1l, pmB) x5, k2, ssk, k to two before next mC, k2tog, smC, k2, m1R, m1l. Round 6: smA, (k2, p to next mC, smC, k2, kitbl, p1, smB) x5, k2, p to next mC, smC, k2, ktbl, p1. At the end of third setup section you should have 120(144, 168, 192) sts. Last round worked in this section is round 39(47, 55, 63) of chart.
Third section
Round 1: smA, (k2, ssk, k to two before next mC, k2tog, smC, k2, m1R, twisted rib to next mB, m1l, smB) x5, k2, ssk, k to two before next mC, k2tog, smC, k2, m1R, twisted rib to end of round, miL. Round 2: smA, (k2, p to next mC, smC, k2, twisted rib to next mB, smB) x5, k2, p to next mC, smC, k2, twisted rib to end of round. Work those 2 rounds 6(8, 10, 12) times. 120(144, 168, 192) sts in total. Last round worked in this section is round 51(63, 75, 87) of chart.
End of third section and final section
Round 1: smA, (k1, ssk, slip next st, remove mC, slip st back to left needle, k2tog, k1, m1R, twisted rib to next mB, m1L, smB) x5, k1, ssk, slip next st, remove mC, slip st back to left needle, k2tog, k1, m1R, twisted rib to end of round, m1L. Round 2: smA, (k4, twisted rib to next mB, smB) x5, k4, twisted rib to end of round. Round 3: smA, (ssk, k2tog, m1R, twisted rib to next mB, m1l, remove mB) x5, ssk, k2tog, m1R, twisted rib to end of round, mil. Round 4: smA, twisted rib to end of round. Work round 4 8(10, 14, 16) times or until you reached desired length. Break yarn, leaving a long enough tail to graft all stitches together (about 4 times the circumference of the hat).
Bind off
The first stitch on the needle should be a knit stitch. If this is not the case, purl one more stitch before working the bind off. Take 2 spare needles in the right hand against each other. Slip all (twisted) knit stitches on the front needle, all purl stitches on the back needle. If you are using double pointed needles for this, only slip as many stitches as fits on the needles. Graft all stitches together using kitchener stitch.
Charts
Using Emily Ockers Cast On, CO 6 sts. Start working the chart, working 6 repeats in one round. Work last round 8(10, 12) times or until you reached desired length.
Green and red sts
In the charts I marked a few sts in colours. You have to change the position of marker A (beginning of the round) at these points. You will find these rounds in the written instructions in the end of second section and setup for third section. The green sts are in round 1 of this section, the red sts in round 4.
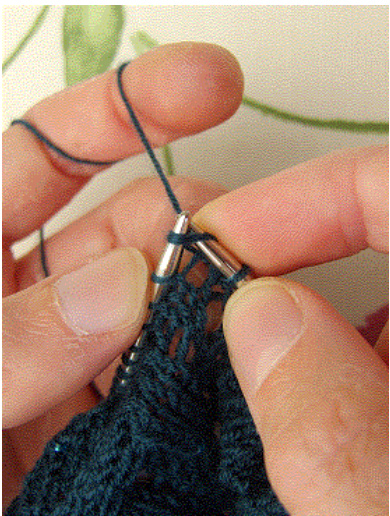
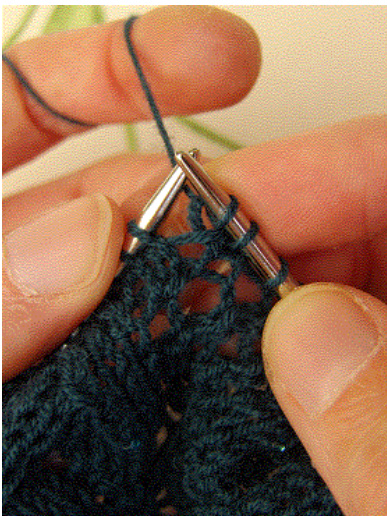
slip next 2 sts on cable needle in front of work, k 2 sts, k sts fromthecableneedle
at the beginning of the round, remove marker A, knit these sts, place marker at the new beginning of the round. The other 5 repeats, ignore these sts knit those sts 5 times. At the end of the round, slip these stitches, remove the marker A, slip the stitches back to the left needle, place marker at the new beginning of the round.
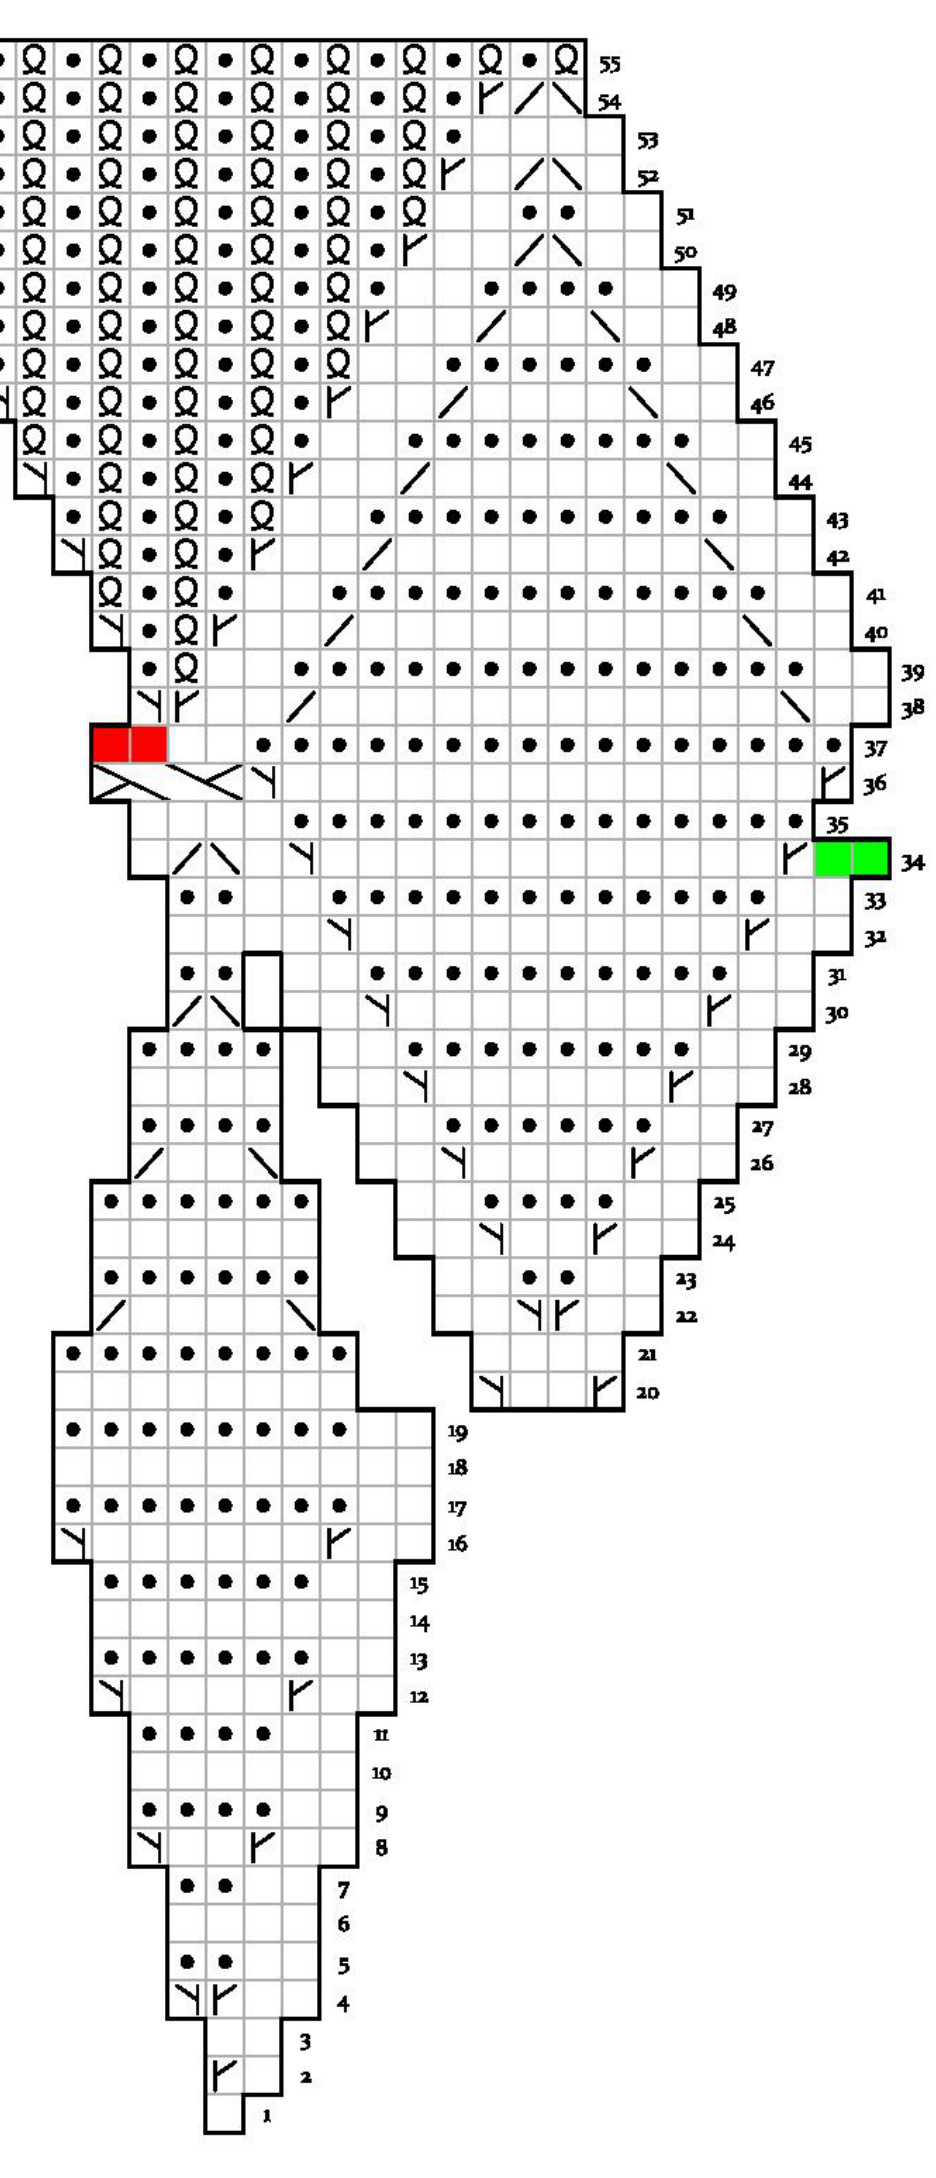
toddler
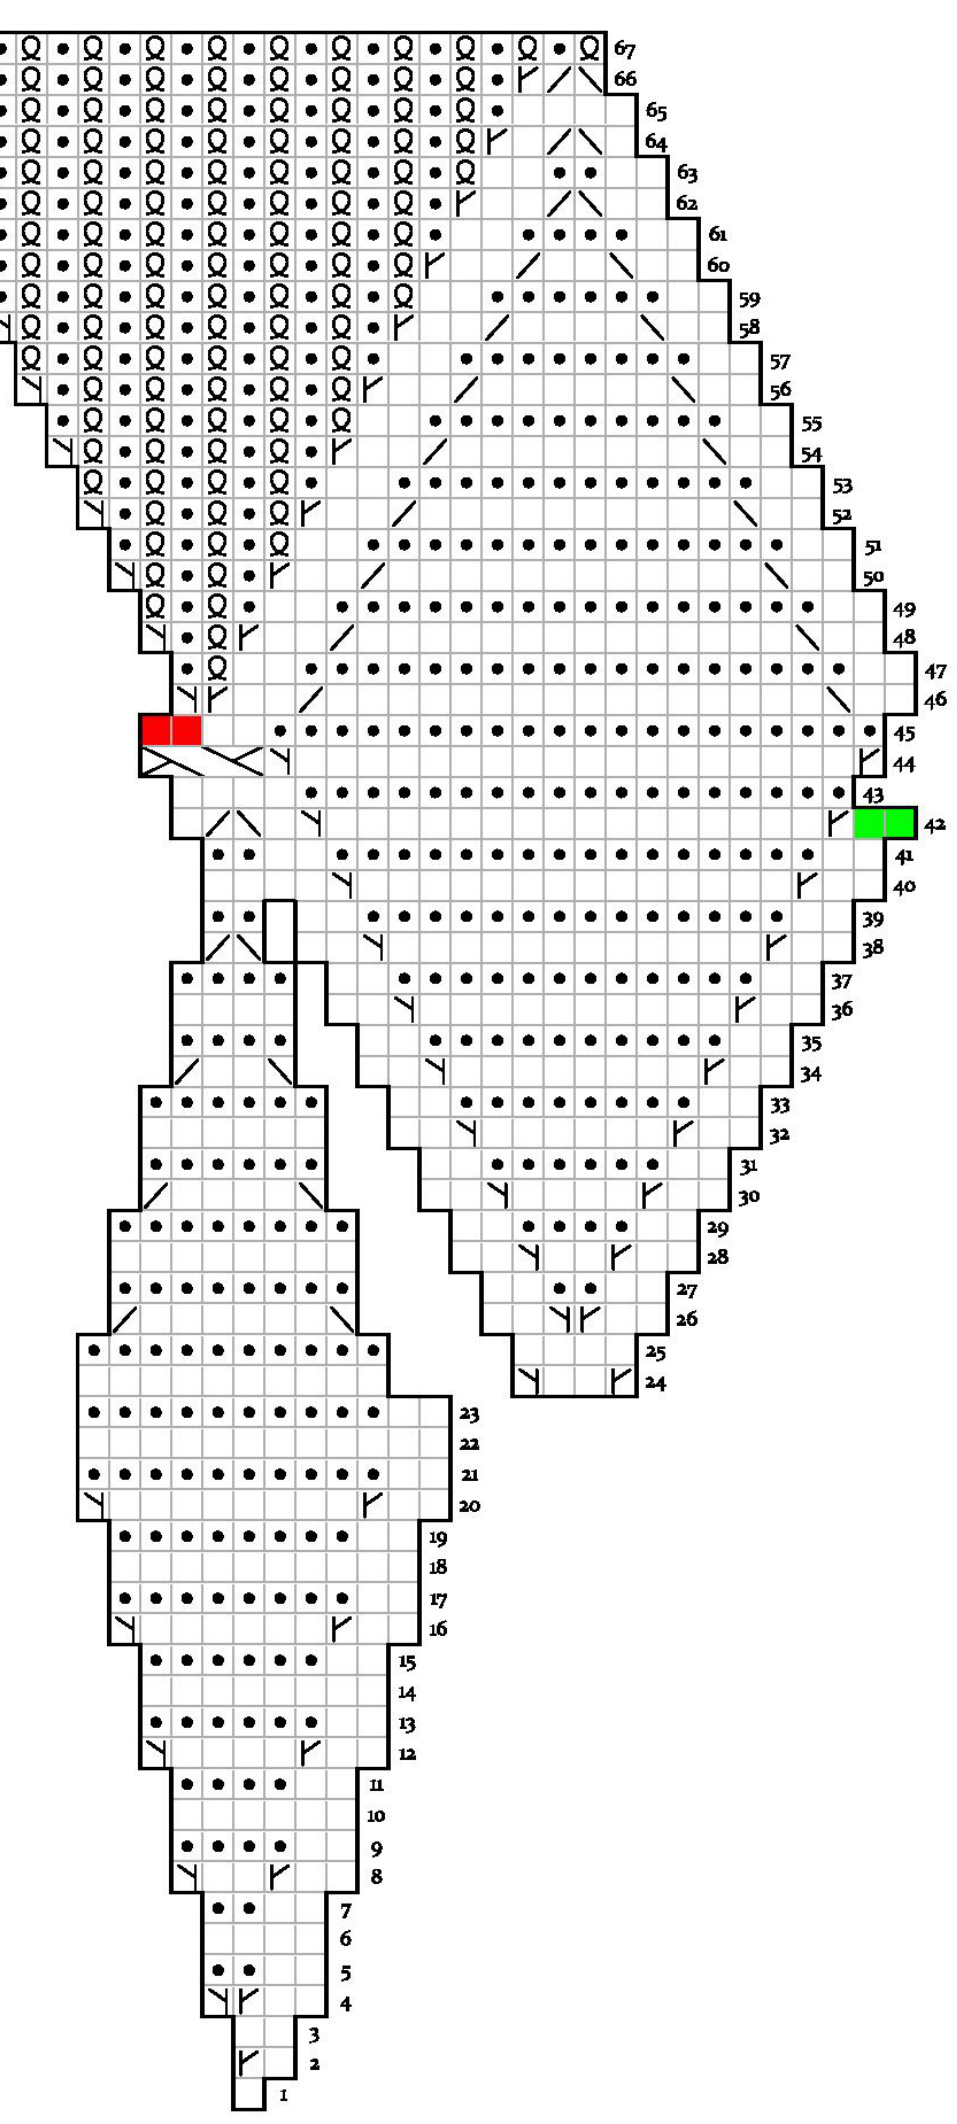
child/small adult
large adult


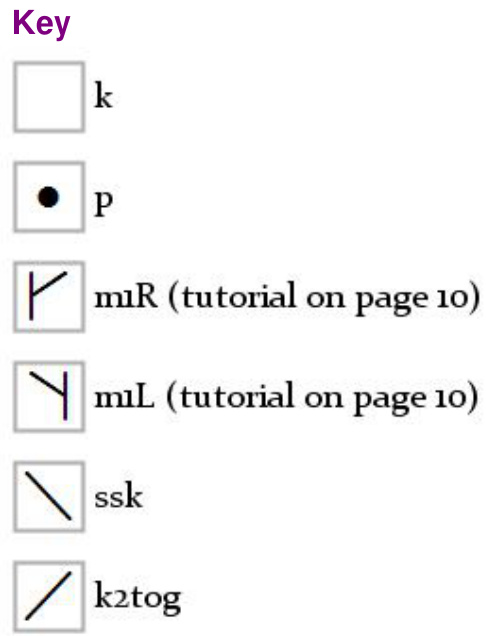
1. Pick up the thread between two sts from back to front. 2. Knit the stitch. 3. The stitch made is leaning to the right.
M1L
1. Pick up the thread between two sts from front to back. 2. Knit the stitch through back loop. 3. The stitch made is leaning to the left.


