SACRE-COEUR'sMittens
--- According with SACRE-COEUR's Shawl of Nim Teasdale --- As winter is coming with colder days, and after making this gorgeous shawl, I thought : " why not creating the assorted mitts and hat/beanie ?" So, there they are ! Well, the Mittens first. you can find the pattern of the Hat on my Ravelry shop here : http://www.ravelry.com/patterns/library/sacrecoeurs-hat These Mitts are according to SACRE COEUR's Hat and Shawl. It was "named for the beautiful forms of the famous Parisian Cathedral, and also for the beauty of a heart that is full of joy". I couldn't find more accurate words : thanks Nim Teasdale ! (you can find her original shawl pattern here : http://www.ravelry.com/patterns/library/sacre coeur)
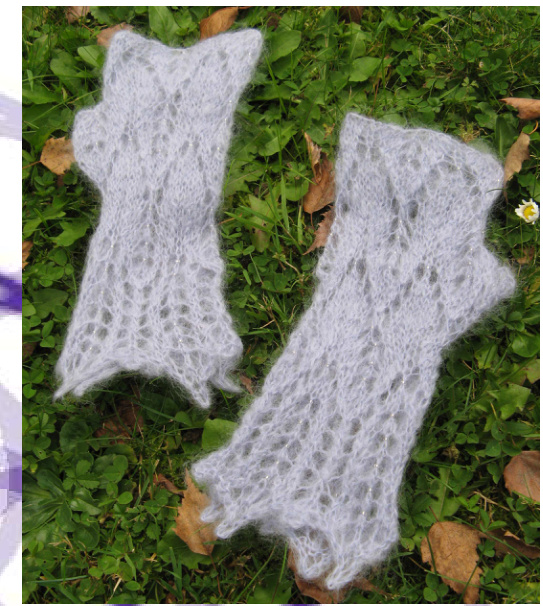
Sizing is adaptable to any yardage of lace to DK weight. Gauge , needles and beads will vary with yarn weight Pictured mitts have been made in Drops Vivaldi on 4.0mm (US size 6) needles and measures approx. 20.5cm x 12 cm (24cm unsewed) before blocking.
Material
less than a 0.9 oz (25g) = approx. less than 153yd (140m) of yarn (lace or a little thicker ) for the 2 mittens.
Gauge / Sizing note
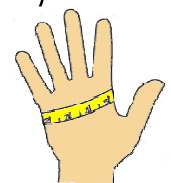
The size of the mittens depend of your hand, but also how loosely (or tight) you knit. Take the measurement of you hand (as shawn in the picture below) to see in witch group you're in (32 or 42 sts). Then cast on the number of stiches and make 3 or 4 rows of the pattern and check : it must fit around your hand (carreful : the mitt is open, not sewed yet)
| CircumferenceoftheHand | FR size | GB size | US size (adults) | Numberofstitchestocaston 4.0mm (US size 6) needles | |
| Ininches | Incentimeters | ||||
| 5.4 to 7.5 | 13,5 to 19 | 5.5 to7 | 6 to 7.5 | XXS to m | 32 sts (3 patterns) |
| 7.6 to 9.8 | 19.5to27 | 7 to 10 | 7.5 to 10.5 | MtoXXXL | 42 sts (4 patterns) |
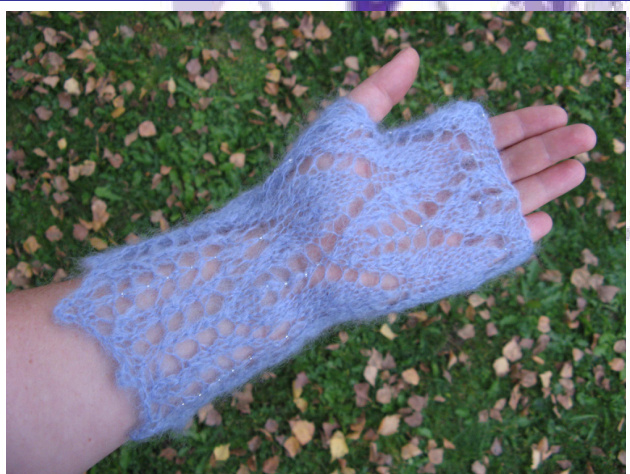
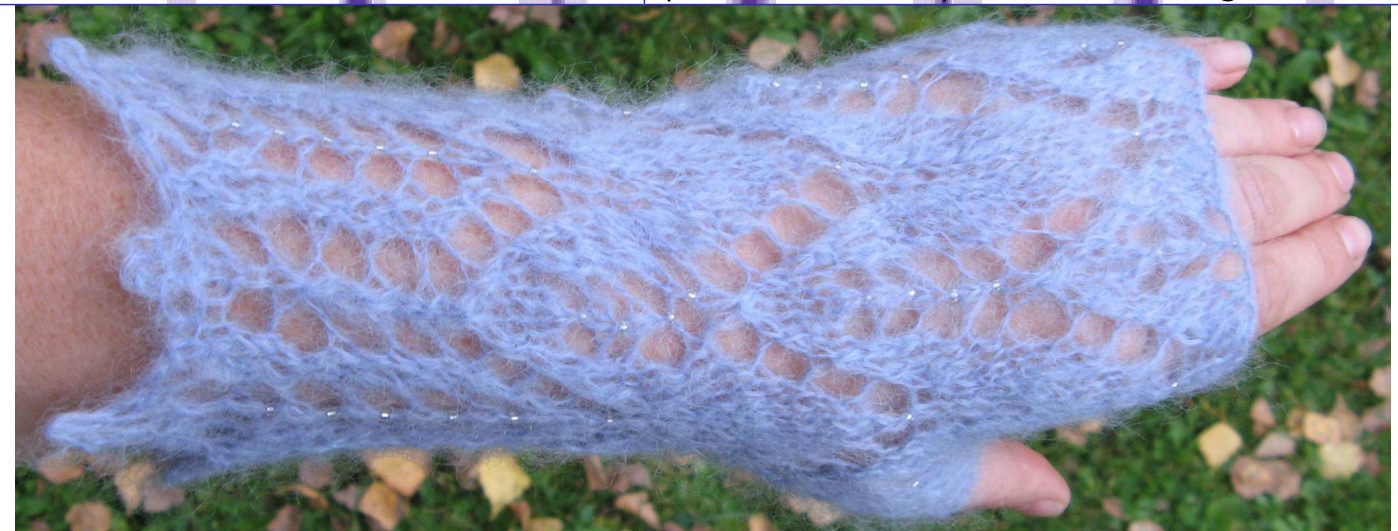
This pattern offers several variable to play with. The size of the forearms are adaptable, both on Arches and Stained Glass Edding : make the size you prefer (short mitts like in the photos or long one, as you wish). Beading is optional. The number of beads required will depend on the size Of the mitts.
Left hand Mitt
Cast on loosely the number of stitches suitable for your measurements found in the gauge section (32sts or 42sts).You can use both needle if it helps for loose stitches' regularity.
First part : Arch Lace Section (palm and thumb)
Row 1 (K1), \* B, YO, K2, K2tog, K1, SSK, K2, YO, repeat from\* until last 1 st, (K1) B indicate a beaded K1. Row 2 and all ws rows. (K1), P to last I st, (K1) Row 3 (K1), \* B, YO, K2, K2tog, K1, SSK, K2, YO, repeat from\* until last 1 st, (K1) (Try to wrap the mittens around you hand to check if the size is ok. ) Row 5 (K1), \* B, YO, SSK, K2tog, YO, repeat from\* until last 1 st, (K1) Row 7 (K1), \* K2, K2tog, YO, K3,YO, SSK, K1, repeat from\* until last 1 st, (K1) Row 9 (K1), \* K1, K2tog, YO, K5, YO, SSK, repeat from\* until last 1 st, (K1) Row 11 (K1), K2tog, YO, K7, YO \*SK2P, YO, K7, YO, repeat from\* until last 2 sts, (K2tog) Row 13 (K1), \*B, YO, K2, K2tog, K1, SSK, K2, YO, repeat from\* until last 1 st,(K1) +cast on 10 sts Row 15 (K1), \*B, YO, K2, K2tog, K1, SSK, K2, YO, repeat from\* until last 1 st, (K1) Row 17 (K1), \*B, YO, K2, K2tog, K1, SSK, K2, YO, repeat from\* until last 1 st, (K1) Row 19 (K1), \*B, YO, SSK, K2tog, YO, repeat from\* until last 1 st, (K1) Row 21 (K1),\* K2, K2tog, YO, K3,YO, SSK, K1, repeat from\* until last 11 sts, K2, K2tog, YO, SK2P, YO, SSK, K1, (K1) Row 23 (K1), \* K1, K2tog, YO, K5, YO, SSK, repeat from\* until last 9sts, K1, K2tog, YO, SK2P, YO, SSK, (K1) Row 25 (K1), K2tog, YO, K7, YO \*SK2P, YO, K7, YO, repeat from\* until last 8 sts, SK2P, SK2P, (K2tog) Row 27 (K1), \* B, YO, K2, K2tog, K1, SSK, K2, YO, repeat from\* until last 3 sts, SK2P) Row 29 (K1), \*B, YO, K2, K2tog, K1, SSK, K2, YO, repeat from\* until last 1 st, (K1) Row 31 (K1), \*B, YO, K2, K2tog, K1, SSK, K2, YO, repeat from\* until last 1 st, (K1) Row 33 (K1), \*B, YO, SSK, K2tog, YO, repeat from\* until last 1 st, (K1) Row 35 (K1), \* K2, K2tog, YO, K3,YO, SSK, K1, repeat from\* until last 1 st, (K1) Rows 1-14 can be repeated (except the cast on of 10 sts) to extend the knitted forearm to the prefered length. (Just done the 35 rows in the example on the photos). You can go to the 2nd section of this mitt right below.
Second part : Stained Glass Eding (forearm)
Row 1 (K1), \*K1, (K2tog, YO)x2, B, (YO, SSK)x2, repeat from\* until last 1 st, (K1) Row 2 and all wS rows. (K1), P to last 1 st, (K1) Row 3 (K2tog), YO, K2tog, K1, YO, B, YO, K1, SSK, YO, \*SK2P, YO, K2tog, K1, YO, B, YO, K1, SSK, YO, repeat from\* until last 3 sts, K2tog, (K1) Row 5 (K2tog), YO, K2tog, K1, YO, B, YO, K1, SSK, YO, \*SK2P, YO, K2tog, K1, YO, B, YO, K1, SSK, YO, repeat from\* until last 2 sts, (K2tog) Row 7 (K2tog), YO, K2tog, K1, YO, B, YO, K1, SSK, YO, \*SK2P, YO, K2tog, K1, YO, B, YO, K1, SSK, YO, repeat from\* until last 2 sts, (K2tog) Row 9 (K2tog), YO, K2tog, K1, YO, B, YO, K1, SSK, YO, \*SK2P, YO, K2tog, K1, YO, B, YO, K1, SSK, YO, repeat from\* until last 2 sts, (K2tog) Row11 (K1), YO, SSK, K2tog, YO, \*K1, YO, SSK, K2tog, YO, repeat from\* until last 1 st, (K1) Row 13 (K1) , K2tog, YO, K3, YO, SSK, K1, \*K2, K2tog, YO, K3, YO, SSK, K1, repeat from\* until last 1 st, (K1) (- ws row only if the pattern is repeated, if not go to Picot section below-) Rows 1-14 can be repeated to extend the knitted forearm to the prefered length. (Only time knit in the example on the photos).
Picot
Bind of loosely in knit on ws. For Picot finish as pictured, bind of 5 stitches, make 3 stitches ( like crochet chain stitches) and bind them of in the first of the 3, continue to bind 5 stitches, make 3 stitches to bind on themselves, ad nauseum...
Finish
Sew the right side and the left side of your work , tanking care of letting enought space for your thumb . Block.
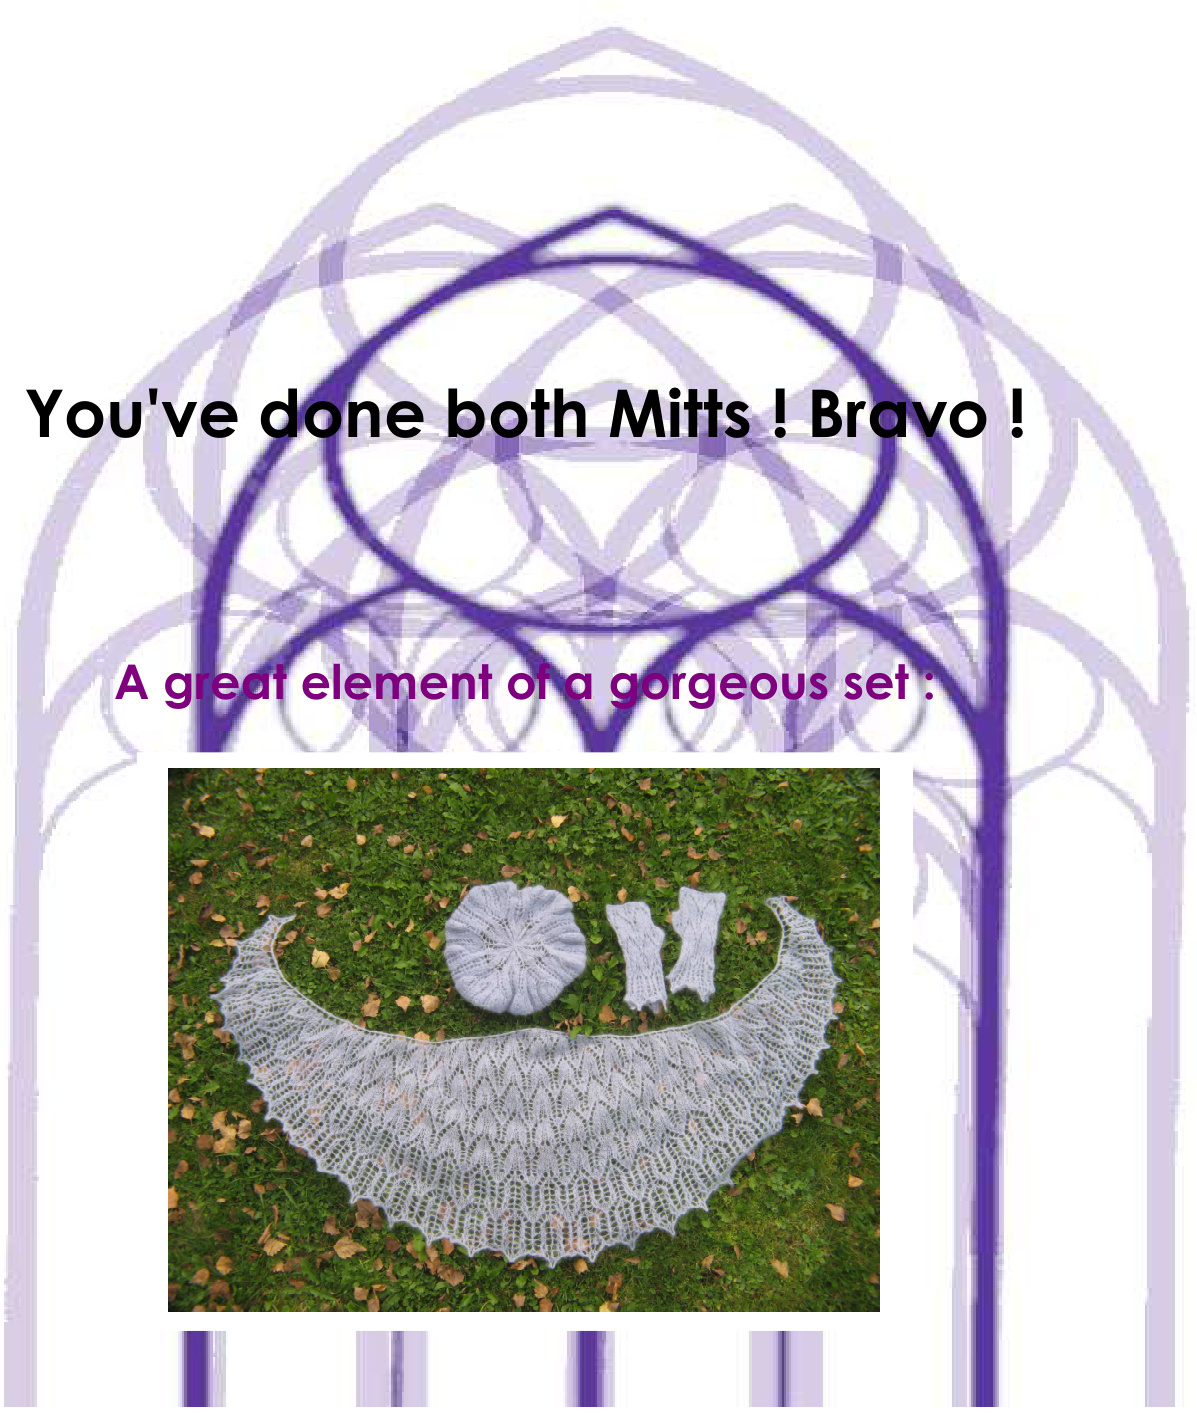
You've done the first Mitt ! Great !
Right hand Mitt
Cast on loosely the same number of stitches used for the first mitten (32 or 42). You can use both needle if it helps for stitches regularity. First part : Arch Lace Section (palm and thumb) Row 1 (K1), \*B, YO, K2, K2tog, K1, SSK, K2, YO, repeat from\* until last 1 st, (K1) Row 2 and all wS rows. (K1), P to last 1 st, (K1) Row 3 (K1), \*B, YO, K2, K2tog, K1, SSK, K2, YO, repeat from\* until last 1 st, (K1) Row 5 (K1), \*B, YO, SSK, K2tog, YO, repeat from\* until last 1 st, (K1) Row 7 (K1), \* K2, K2tog, YO, K3,YO, SSK, K1, repeat from\* until last 1 st, (K1) Row 9 (K1), \* K1, K2tog, YO, K5, YO, SSK, repeat from\* until last 1 st, (K1) Row 11 (K1), K2tog, YO, K7, YO \*SK2P, YO, K7, YO, repeat from\* until last 2 sts, (K2tog) Row 13 (K1), \*B, YO, K2, K2tog, K1, SSK, K2, YO, repeat from\* untillast 1 st, (K1) - WS row + cast on 10 sts - Row 15 (K1), \*B, YO, K2, K2tog, K1, SSK, K2, YO, repeat from\* untillast 1 st, (K1) Row 17 (K1), \*B, YO, K2, K2tog, K1, SSK, K2, YO, repeat from\* untillast 1 st, (K1) Row 19 (K1), \*B, YO, SSK, K2tog, YO, repeat from\* until last 1 st, (K1) Row 21 (K1), K2, K2tog, YO, SK2P, YO, SSK, K1, \* K2, K2tog, YO, K3,YO, SSK, K1, repeat from\* until last 1 st, (K1) Row 23 (K1), K1, K2tog, YO, SK2P, YO, SSK, \* K1, K2tog, YO, K5, YO, SSK, repeat from\* until last 2 st, (K2tog) Row 25 (K1), SK2P, SK2P, \*SK2P, YO, K7, YO, repeat from\* until last 1 st, (K2tog) Row 27 (SK2P), \*B, YO, K2, K2tog, K1, SSK, K2, YO, repeat from\* until last 1 st, (K1) Row 29 (K1), \*B, YO, K2, K2tog, K1, SK, K2, YO, repeat from\* untillast 1 st, (K1) Row 31 (K1), \*B, YO, K2, K2tog, K1, SSK, K2, YO, repeat from\* until last 1 st, (K1) Row 33 (K1), \*B, YO, SSK, K2tog, YO, repeat from\* until last 1 st, (K1) Row 35 (K1), \* K2, K2tog, YO, K3,YO, SSK, K1, repeat from\* until last 1 st, (K1) Rows 1-14 can be repeated (except the cast on of 10 sts) to extend the knitted forearm to the prefered length. (Just done the 35 rows in the example on the photos). You can go to the 2nd section of this mitten just below. Second part : Stained Glass Eding (forearm) Row 1 (K1), \*K1, (K2tog, YO)x2, B, (YO, SSK)x2, repeat from\* until last 1 st, (K1) Row2 and all ws rows. (K1), P to last 1 st, (K1) Row 3 (K2tog), YO, K2tog, K1, YO, B, YO, K1, SSK, YO, \*SK2P, YO, K2tog, K1, YO, B, YO, K1, SSK, YO, repeat from\* until last 3 sts, K2tog, (K1) Row 5 (K2tog), YO, K2tog, K1, YO, B, YO, K1, SSK, YO, \*SK2P, YO, K2tog, K1, YO, B, YO, K1, SSK, YO, repeat from\* until last 2 sts, (K2tog) Row 7 (K2tog), YO, K2tog, K1, YO, B, YO, K1, SSK, YO, \*SK2P, YO, K2tog, K1, YO, B, YO, K1, SSK, YO, repeat from\* until last 2 sts, (K2tog) Row 9 (K1), 2P, YO, K2tog, K1, YO, B, YO, K1, SSK, YO, \*SK2P, YO, K2tog, K1, YO, B, YO, K1, SSK, YO, repeat from\* until last 2 sts, (K2tog) Row 11 (K1), YO, SSK, K2tog, YO, \*K1, YO, SSK, K2tog, YO, repeat from\* until last 1 st, (K1) Row 13 (K1), K2tog, YO, K3, YO, SSK, K1, \*K2, K2tog, YO, K3, YO, SSK, K1, repeat from\* until last 1 st, (K1) (- wS row only if the pattern is repeated, if not go to Picot section below-) Rows 1-14 can be repeated to extend the knitted forearm to the prefered length. (Only time knit in the example on the photos).
Picot
Bind of loosely in knit on ws. For Picot finish as pictured, bind of 5 stitches, make 3 stitches ( like crochet chain stitches) and bind them of in the first of the 3, continue to bind 5 stitches, make 3 stitches to bind on themselves, ad nauseum..
Finish
Sew the right side and the left side of your work , tanking care of letting enought space for your thumb . Block.
Have fun knitting !


