Sandra Alice Designs
Cables and Lace Slouchy Beret
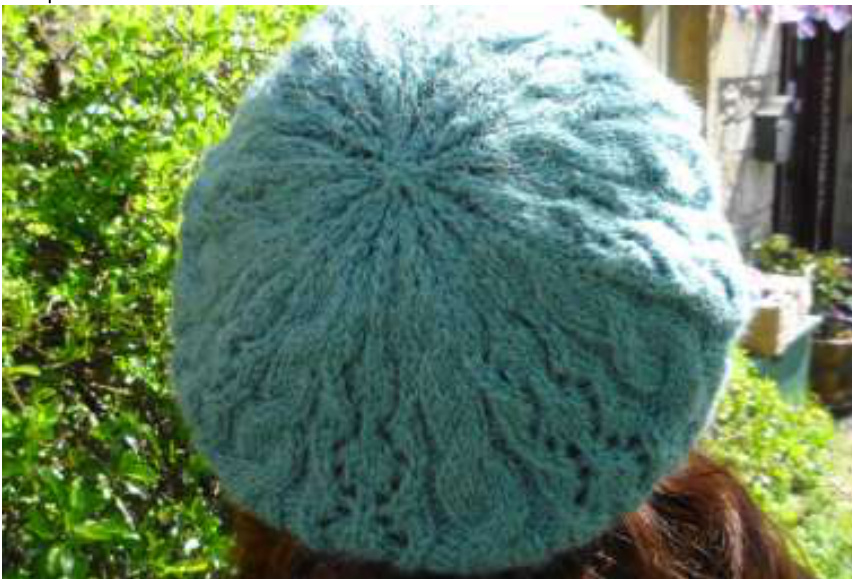
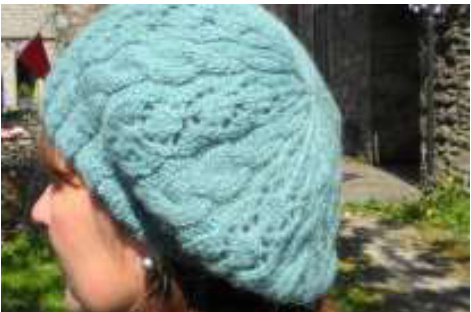
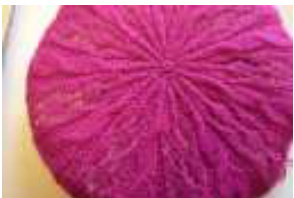
This picture shows the first size
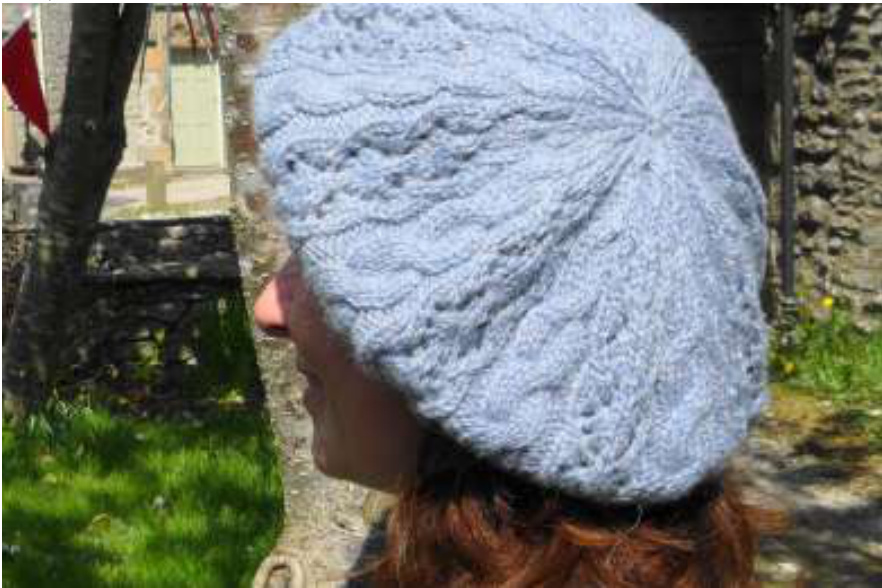
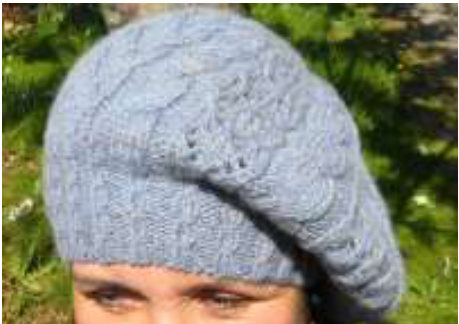
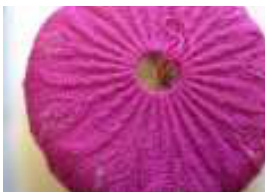
This picture shows the second size
First size
First size

Sandra Alice Designs
Any number of repeats of chart 1 can be worked but remember more repeats willtake more yarn. I have also knit this hat in Louisa Harding Thistle' and Araucania Toconao'. The Thistle' came out beautifully soft with more drape. The Toconao' was slightly thicker and gave a firmer finish. If you prefer a deeper brim you can work an extra repeat of the brim pattern but you will need extra yarn. Sizes:- First size: willfit from a 15" - 17" round head and willfit a child or small adult. Second size: 19" - 2" round head willfit an average adult. Gauge: 19sts x 26 rows over stocking stitch on 4mm needles measures 4" (I worked the swatch flat) First size: working 2 repeats of chart 1: unblocked from cast on to top 8". After blocking: from cast on to top of beret 8.75". 10" in diameter. Second size: working 3 repeats of chart 1: unblocked from cast on to top 10". After blocking: from cast on to top of beret 10.5" 11" il diameter. These measurements are a guide only and are dependent on how hard you block your beret and the yarn you use. It will also depend on whether you wait until your beret is thoroughly dry before removing it from your blocking form. I prefer to remove mine whilst it is still very slightly damp then it springs back slightly allowing a bit of texture to return which I like.
Requirements:
2 x 5Ogrm balls of aran weight yarn such as Debbie Bliss Fez, Louisa Harding Thistle. Small diameter 3mm& 4mm circular needles US sizes 2%& 6 3mm & 4mm sets of double pointed needles.US sizes 2%& 6 You can also work this design using 'magic loop' or alternatively on two sets of circularneedles. 8/9 stitch markers, have one of the stitch markers a different colour to denote the beginning/end of round. Thanks to Susi(susisoo on Ravelry) for test knitting and special thanks to Miriel (mirielgw on Ravelry) for test knitting my design and for the valuable feedback she has given me. Link to Miriels helpful notes on Ravelry, you canalsoseehowshebeadedherberet. http://www.ravelry.com/projects/mirielgw/beadedcables-and-lace-slouchy-beret Link to Susi's project page on Ravelry. http://www.ravelry.com/projects/susisoo/deuxieme Thanks to Susi for modelling for me.
Abbreviations:
P: purl. k: knit. m1kw: make one knit wise: insert right needle into bar between stitches from front to back; place on left needle and knit into the back of it. m1pw: make one purlwise: insert right needle into bar between stitches from back to front; place on left needle and purl into the back of it. k2tog: knit 2 stitches together. ssk: slip first stitch knitwise slip next stitch purlwise, insert tip of left hand needle into the front of both stitches, knit both stitches together. yo: yarn over: bring yarn to front of work between needles. tw2: twist 2: knit into front of second stitch leaving stitch on needle, knit into front of first stitch, take both stitches off needle. Or: knit 2 stitches together leaving on needle then knit the first stitch again and slip both stitches off needle. sl2 k1 psso: slip 2 stitches together knitwise; knit 1, pass 2 slipped stitches over knit stitch. (pm): place marker, on following round, slip marker onto right hand needle as you come to them. The markers are optional but they do help you keep track of the pattern. Instructions: Using size 3mm circular or double point needles cast on 96(108)sts being careful not to twist your stitches, Join into a round. Place stitch marker to denote start of round. Starting with p2, work in p2, k2, rib for 4 rounds Next round: (p2, tw2) to end of round Work these 5 rounds a total of 3(4) times Work p2, k2 rib for two rounds Increase round: \*p2, k6, m1pw, p1, m1kw (k1, m1kw) 3 times\* repeat from \* to \* to end of round 136(153) sts Change to 4mm needles and continue on to chart one or follow the written instructions. NOTE: On round 1 you may find it helpful to place a stitch marker after every 17 stitch repeat, on following rounds slip marker onto right hand needle as you come to them. Chart 1: Round 1: and all following alternate rounds. \*p2, k6, p2, k7, (pm)\* repeat from \* to \* to end of round Round 2: \*p2, k6, p2, k1, k2tog, yo, k1, yo, ssk, k1,\* repeat from \* to \* to end of round Round 4: \*p2, k6, p2, k2tog, yo, k3, yo, ssk\* repeat from \* to \* to end of round Round 6: \*p2, k6, p2, k1, yo, ssk, k1, k2tog, yo, k1\* repeat from \* to \* to end of round Round 8: \*p2, C6B, p2, k2, yo, sl2 k1 psso, yo, k2\* repeat from \* to \* to end of round Work the last 8 rounds 2(3) times or 3(4) times for more slouch.
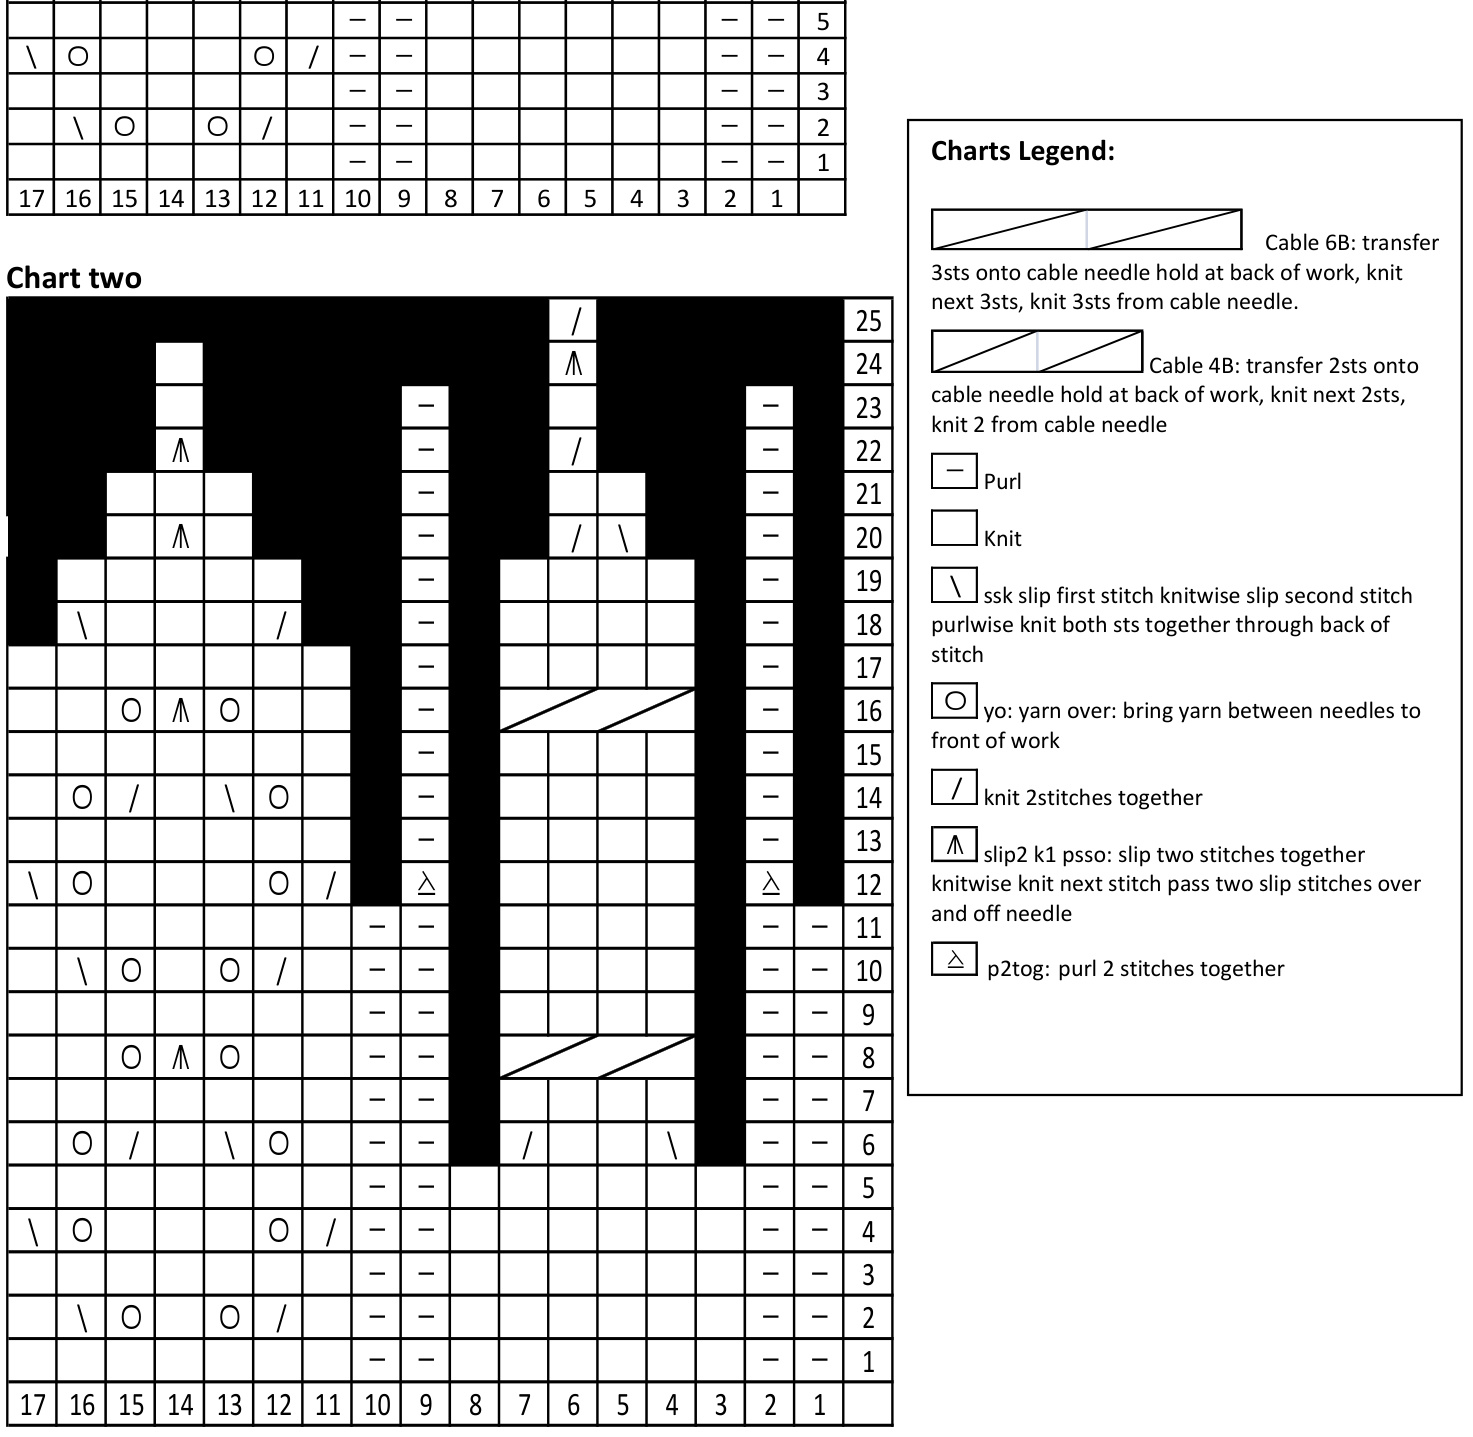
Chart 2: Start of decrease rounds:
Round 1: \*p2, k6, p2, k7\* repeat from \* to \* to end of round Round 2: \*p2, k6, p2, k1, k2tog, yo, k1, yo, ssk, k1,\* repeat from \* to \* to end of round Round 3: \*p2, k6, p2, k7\* repeat from \* to \* to end of round Round 4: \*p2, k6, p2, k2tog, yo, k3, yo, ssk\* repeat from \* to \* to end of round Round 5: \*p2, k6, p2, k7\* repeat from \* to \* to end of round Round 6: \*p2, ssk, k2, k2tog, p2, k1, yo, ssk, k1, k2tog, yo, k1\* repeat from \* to \* to end of round. Round 7: \*p2, k4, p2, k7\* repeat from \* to \* to end of round. Round 8: \*p2, C4B, p2, k2, yo, sl2 k1 psso, yo, k2\* repeat from \* to \* to end of round. Round 9: \*p2, k4, p2, k7\* repeat from \* to \* to end of round. Round 10: \*p2, k4, p2, k1, k2tog, yo, k1, yo, ssk, k1\* repeat from \* to \* to end of round. Round 11: \*p2, k4, p2, k7\* repeat from \* to \* to end of round. Round 12: \*p2tog, k4, p2tog, k2tog, yo, k3, yo, ssk\* repeat from \* to \* to end of round. Round 13: \*p1, k4, p1, k7\* repeat from \* to \* to end of round. Round 14: \*p1, k4, p1, k1, yo, ssk, k1, k2tog, yo, k1\* repeat from \* to \* to end of round. Round 15: \*p1, k4, p1, k7\* repeat from \* to \* to end of round. Round 16: \*p1, C4B, p1, k2, yo, sl2 k1 psso, yo, k2\* repeat from \* to \* to end of round. Round 17: \*p1, k4, p1, k7\* repeat from \* to \* to end of round. Round 18: \*p1, k4, p1, k2tog, k3, ssk\* repeat from \* to \* to end of round. Round 19: \*p1, k4, p1, k5\* repeat from \* to \* to end of round. Round 20: \*p1, ssk, k2tog, p1, k1, sl2 k1 psso, k1\* repeat from \* to \* to end of round. Round 21: \*p1, k2, p1, k3\* repeat from \* to \* to end of round. Round 22: \*p1, k2tog, p1, sl2 k1 psso\* to end of round. Round 23: \*p1, k1, to end of round. Round 24: sl2 k1 psso, k1 to end of round. Round 25: k2tog, to end. Cut yarn leaving a long enough tail to thread through remaining stitches, draw up tightly and fastel securely
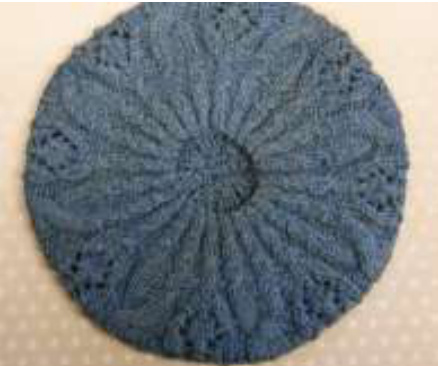
Chart one
Sandra Alice Designs
Blocking instructions:
I usually block my hats on a plate but I don't care for the hard crease line you get so I like to tape some bubble wrap around the edge of my plate first. Take a length of yarn and thread it through the cast on edge. Now soak your hat For 15 minutes or so until the fibres are thoroughly wet.
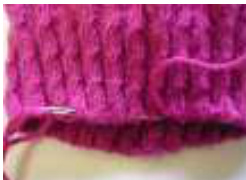
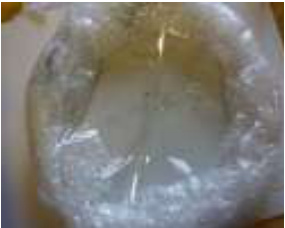
Gently squeeze out then wrap in a towel to blot out the excess water. Carefully stretch your hat over the plate making sure it is all central.
Draw up the yarn which is threaded through the brim and tie into a loose bow. You can tighten the brim as much or little as you wish but bear in mind this wil make a difference to the finished size i.e. how slouchy your hat will be.
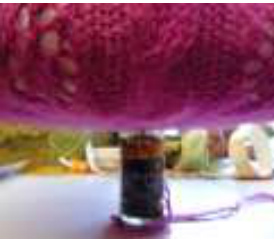
Stand the whole thing on something to suspend it in mid air. I stood mine on a pepper grinder as it just fit into the space where the brim is drawn up.
Leave too dry. I usually take mine off the plate while it is still just very slightly damp. This allows the fibres to draw up a little andgivesabitof texturetoyourhat. Re-tighten the yarn round the brim and allow to dry thoroughly before removing the yarn. Other methods of blocking your beret are on a balloon or on an upturned mixing bowl


