Backward Mitten Recipe
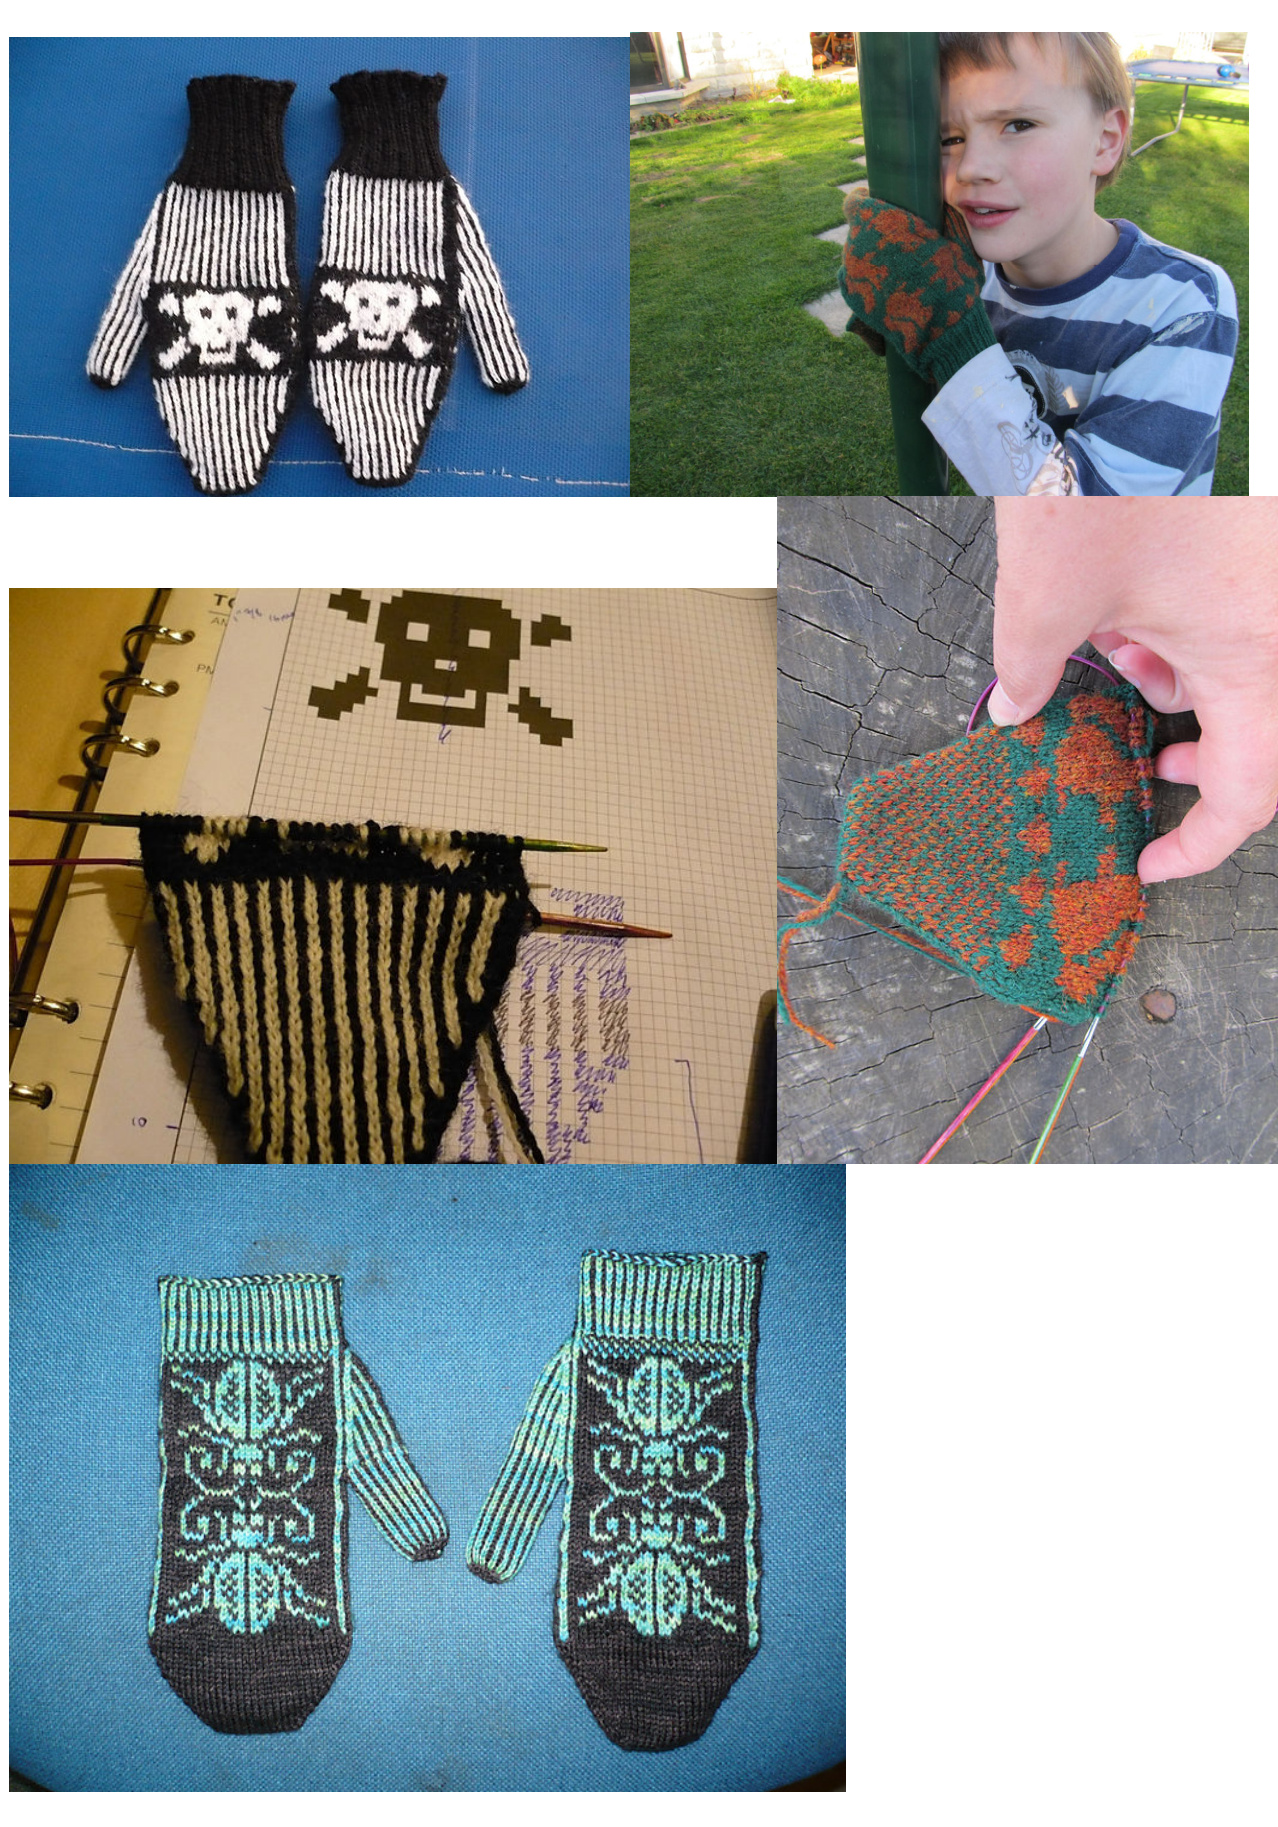
At this point this is just a recipe, it came about because I wanted to knit a toe-up sock pattern into a pair of mittens. That sock was the Bug Out pattern by Morag McKenzie (Vintage Purls on Ravelry). I had to do some experimentation for the new idea to work out and there are some options that you can choose to do if you wish. I am only including my own charts in this recipe. The Bug Out chart belongs to Morag so if you wish to use this then you need to purchase her sock pattern (and I recommend you do, it's lovely), the squirrels are also not my chart so I can't include those, though the acorns were mine. The skull and crossbones are mine though, so are at the bottom of the recipe and I hope you enjoy using them. Yarn: Any fingering weight yarn. I've used Vintage Purls Sock, John Q Creative 4ply and also Jamieson and Smith Jumper Weight. All have worked well, though the John Q came out at a different gauge which worked well for kids mittens. Needles: 2.75mm (US 2) or whatever size is needed to get gauge; I use magic loop using a flexible circular needle. You will need 2 circular needles, the second is for the thumb which is worked separately. Tension: Should be 36 stitches and 40 rows. Keep in mind if using the pattern for colourwork there is less stretch than in stocking stitch. My main size differences came in the length I knit the mittens, I used a similar stitch count for all 3 pairs I've made so far simply to fit the designs I wanted. I started by casting on using Judy's Magic Cast On (instructions on Knitty.com) in your background colour with 13 stitches on each needle, increase every second row using your preferred increase. I used kfb for the bug mittens and for the other 2 sets I put both colours into one stitch for a colourwork increase. If using kfb I like to knit 1 stitch first, then kfb, knit to last 3 stitches on the needle, kfb, k2, repeat on second needle. If doing a colourwork increase section you can either keep your colours going in a vertical line like in the Skull and Crossbone Mittens, or you can set them up like a chessboard, offset every row like the Squirrel Mittens. Keep increasing until you have enough stitches to allow for your colourwork pattern, or until the circumference will fit your hand width with a little room for movement if knitting plain mittens. My mittens were either 33 stitches on each needle or 35 stitches depending on the pattern (66 or 70 stitches respectively). At this point you can start your chart and you will knit the same number of stitches with your chart carrying your yarn on the inside of your work (I recommend twisting the colour you're not working with every 5 stitches so fingers don't get caught). Keep knitting your chart until the mittens are long enough to cover your fingers and palm up to the point where your thumb joins your hand, maybe a centimeter longer. Note which row you are on in your chart. On the second mitten make sure to stop halfway through a round so you have a thumb on the opposite side of the first mitten. At this point we put the hand part aside and cast on for the thumb. Using your background colour, cast on 7 stitches and join in the round, being careful not to twist your cast-on. Increase by kfb into 6 of those 7 stitches, you will now have 13 stitches. Increase in all stitches this round using kfb giving you 26 stitches. Next round you add your second colour, knitting every second stitch in your foreground colour. Keep knitting until the thumb is slightly shorter than your thumb; try it on. I found that if I knit to the same length as the thumb it was invariably too long by at least a centimeter. You will now join your thumb to the body of the mitten; knit across the thumb stitches using the same needle as your mitten body is on; you will weave in the ends later which will close up the gap you can see. You may want to put markers to show you where the thumb joins on as you will be making your decreases on the thumb side of this join. Continue knitting as per your chart, but incorporate decreases on the thumb side. Your decreases depend on whether this is for an adult or a child. The decreases I used were k2tog and ssk. For my mittens (adult) I decreased every 3rd row 3 times, then every 2nd row 5 times, then every row until the thumb stitches were all gone. For my son's mittens (child) I decreased 3"d row after joining 1 time, then changed to every 2"d row 4 times, then every row until the thumb stitches were all gone. Once your thumb stitches are all decreased and gone check your length, if not quite as long as you want before the cuff keep going in chart, if you can't fit a full chart repeat in then use the chessboard, line or other suitable option instead. Once long enough you need to choose your cuff. I've done 3 different options, mine were colourwork ribbing, so very little stretch, but they did look the part. Knit in the background colour, purl in foreground. Eldest son got 2x2 rib and youngest got 1x1 rib; for both of those I cut the foreground yarn and just continued the cuff in the background yarn. Once the cuff reaches the desired length, cast off, using your preferred method. Weave in all ends, making sure to sew up the wee gap on the inside of the thumb join. Wash and block and they're all done!
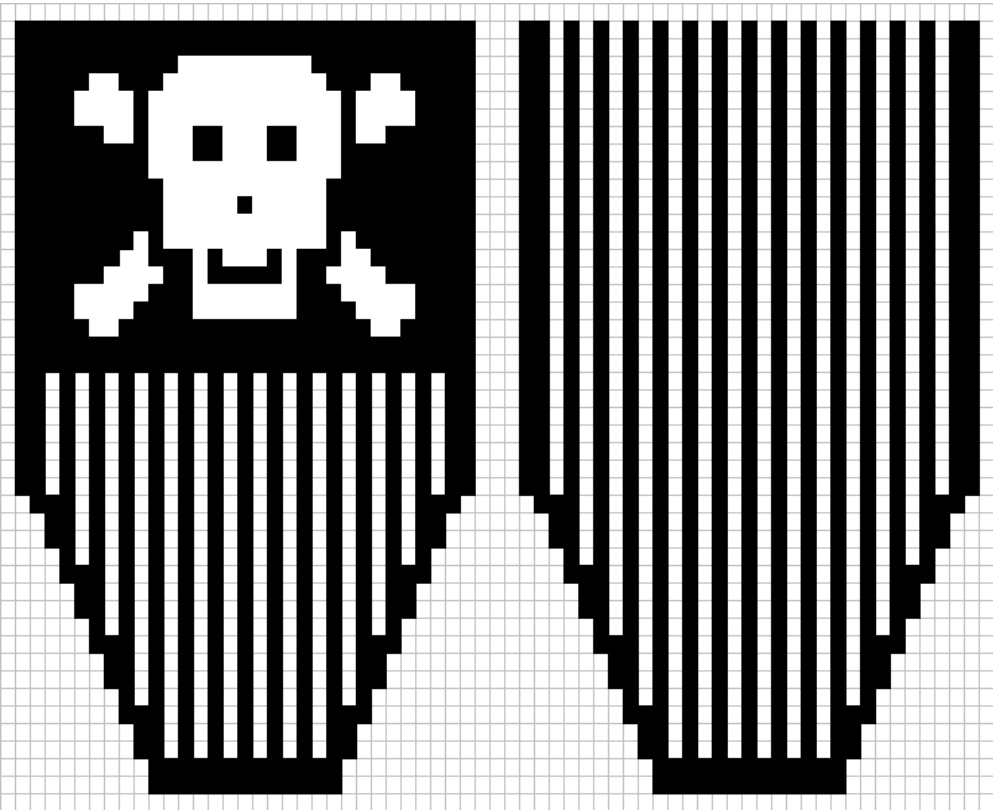
Chart for Skull and Crossbone mittens
Note: stitch count was customized for this pair.