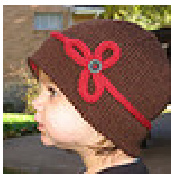
Eleni's Hat
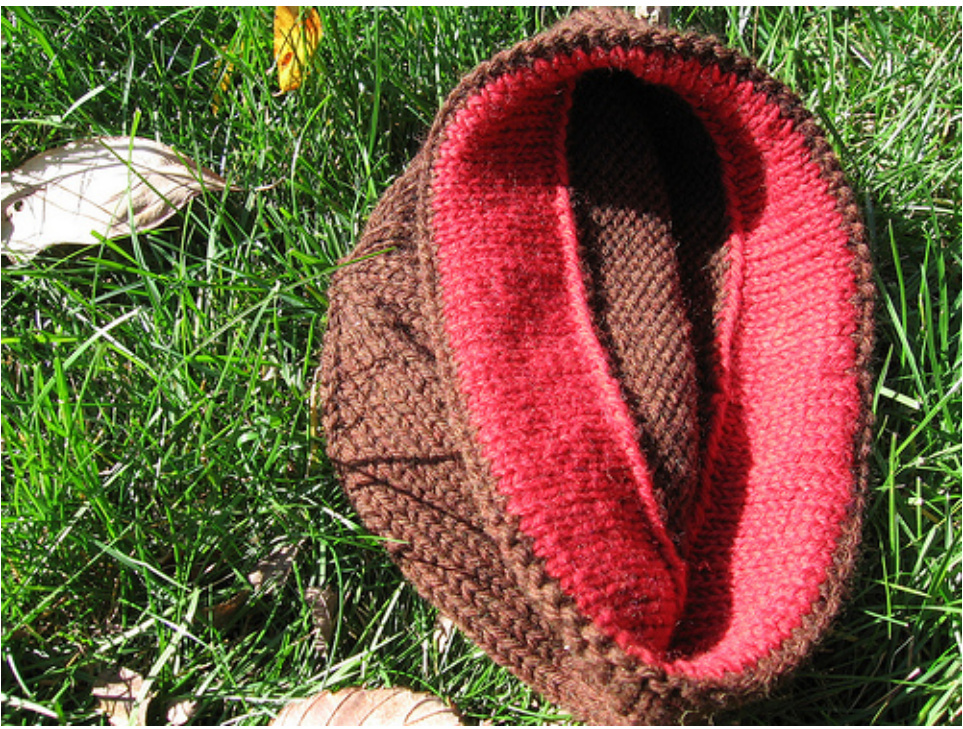
Some times a special hat is required to jazz up an ordinary winter coat. I designed this hat for my 2 year old daughter when I couldn't find the perfect pattern to knit. The hat is knit with very little negative ease in order to flare slightly around the face. A wide hem is folded under to add some structure and warmth around the ears. I added some i-cord detailing ending in a three petal flower but the possibilities are endless with how you could embellish this hat. While I knit this to fit my 2 year old, I have used the same pattern on her "4 year old" winter hat as well without any modifications. It also fits me, if I added a couple inches to the length. Materials- Main color (MC)- 1 skein Cascade 220. Contrasting color (CC)- aprox 50 yards Cascade 220. Needles- Size US 7, 16 inch circular needle and size US 7 double pointed needles (or needles to obtain gauge) Gauge- 5 sts per inch Using CC, co 90 sts. Place marker and join to work in the round Work in stockinette stitch (knit all sts) for at least 1.5 inches. Switch to main color. K 1 row in main color P 1 row (this makes the fold on which to turn the hem under) Work in Stockinette st for 5 inches even Begin decreases Row 1- (K9 k2tog) 9 times Row 2- and all even rows, k across all sts Row 3-(k8 k2tog) 9 times Row 5- (k7 k2tog) 9 times Row 7- (k6 k2tog) 9 times Row 9- (k5 k2tog) 9 times Row 11- (k4 k2tog) 9 times Row 13- (k3 k2tog) 9 times Row 15- (k2 k2tog) 9 times Row 17- (k1 k2tog) 9 times Row 18- k2tog across remaining sts. Cut yarn and pull tail through remaining stitches, weaving in the tail to secure.
Finishing:
Use yarn to whip-stitch the hem inside the hat making sure to avoid pulling too tightly and keep the hem even.
Decorative i-cord:
CO 3 or 4 sts and work in i-cord until desired length. It should be long enough to comfortably wrap around the circumference of the hat unstretched. And any extra to make a design as pictured. I left mine unfinished while I sewed it onto the hat so in the event I needed more or less length it would be easy enough to adjust. Before sewing the i-cord to the hat, take the time to run a piece of contrasting yarn through a row of stitches on the hat where you want it to be sewn. It is easier to make a straight line this way and can be pulled out as you go, or after you have completely attached the icord.
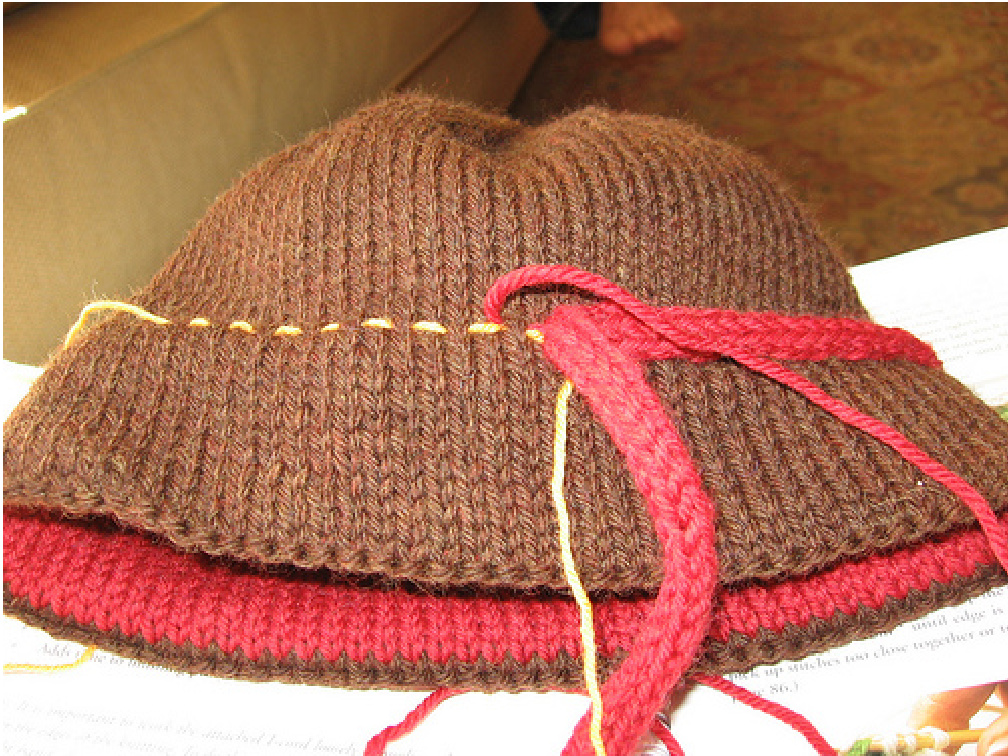
On this hat, I placed the cord at the same level the hem came to inside the hat. This helped disguise the difference in thickness. I used a simple whipstitch to attach the i-cord to the hat using the contrasting color. Before reaching the end, I left room to free form a simple 3 petal flower with the i-cord and used a button to hide the end of the i-cord.
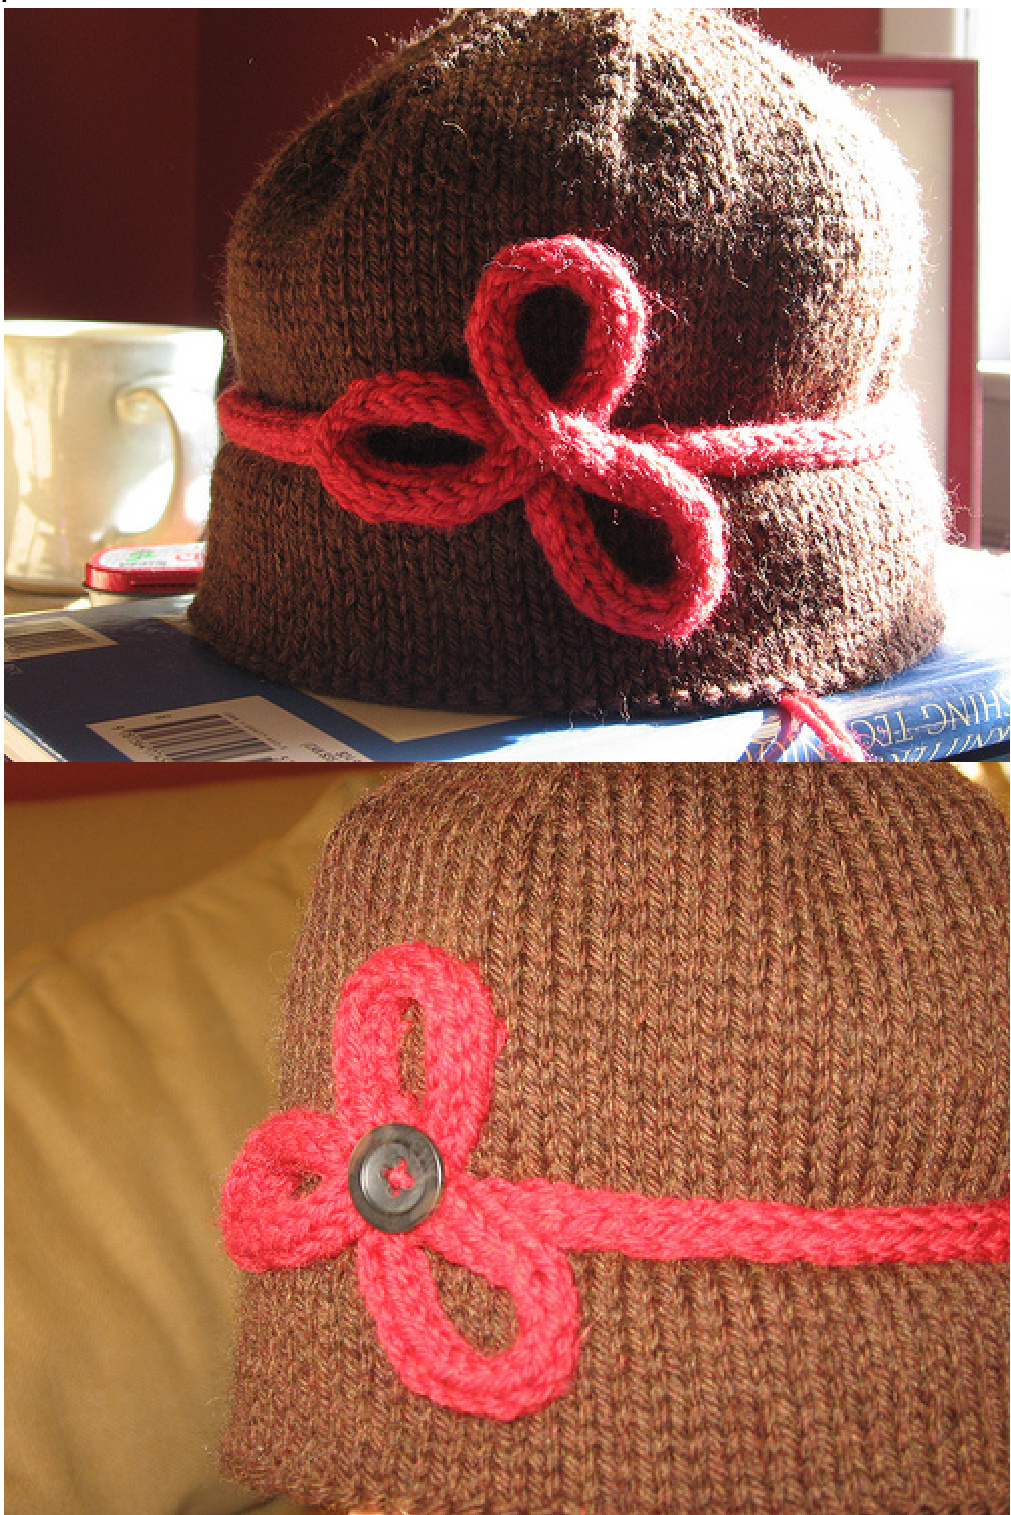
Flower detail:


