College Tote- Knit Version
Designed by Merri Purdy Email questions or comments to: merripurdy@verizon.net
Materials:
Approximately 600-800 yards of felting wool (A self-striping wool would look very nice for this bag design.) For my knit version I used a combination of wool I had in my stash including: Patons Wool (Peacock), Lion Brand Wool Prints (Flower Garden) and Ella Rae Classic Solids (Pink) US Size 10 % - 6.5 mm circular knitting needles 2 double pointed knitting needles for I-cord 2 - 1" purse rings 2 or 4 - %" buttons for decorative purposes Stitch markers Large-eyed yarn needle Fabric for lining (optional)
Stitches Used:
Bind Off (BO) Cast On (CO) Garter Stitch (GS) Knit (K) Place Marker (PM) Purl (P) Slip Marker (SM) Stockinette Stitch (SS) Notes: Several people have told me that they love my crocheted college tote bag, but that they would love to have the pattern in a knit version. So, I took it upon myself to LEARN how to knit, and along the way, I took notes of the process I went through to achieve the intended bag. The original crochet version used 6 skeins of Patons SWS. The bag foundation is worked in rows. The main section of the bag is knit in continuous rounds, which are broken up in the pattern directions to indicate where I made a color change. You could change your colors as often as you like to add more striping to your bag. Once marker has been placed, simply slip the marker to the right needle as you complete each round. College Tote - Knit Version The drawstring section is written so that there will be an ODD number of holes made. This is done so that both ends of the drawstring will be threaded through the front center hole. If this section is confusing to you, simply continue to knit around until you have reached the desired height of the bag, then, go on to the handle tab section. Once felted and dried, simply cut the number of holes you would like to have for the drawstring (add grommets if desired) and thread your drawstring through.
Instructions
Foundation: With (Pink), CO 50. Row 1 - 25: Working in garter stitch, knit for 25 rows. At the end of the 25th row, PM after the last stitch of the row. DO NOT FASTEN OFF. As you continue on to the main section of the bag, you will use this marker as a reference point for the beginning of each round of the main section of the bag. Main Section (knit in continuous rounds until bag measures 14 - 15 inches from the foundationedge) Round 1: Turn piece 90 degrees and pick up 12 stitches along the short side edge of your foundation piece. (I used a crochet hook to help me pick up the stitches along the outer edge of the foundation rectangle.) Turn piece 90 degrees; pick up 50sts along bottom edge of your piece, turn piece 90 degrees and pick up 12 stitches along opposite short side edge, turn piece 90 degrees and pick up 50 sts along top edge. (124 K sts total) und 2 - 10: Knit 124 sts around, SM. Change to a new color (Flower Garden) Round 11 - 40: Knit 124 sts around, SM. Change to a new color (Peacock) Round 41 - 52: Knit 124 sts around, SM. Change back to (Flower Garden). Round 53 - 57: Knit 124 sts around, SM. At the end of this round, you should have knit approximately 14 - 15 inches from the base of your bag. If not, continue to knit until you have reached the desired height.
Draw-string Section
Round 58: K 12, BO 3, K9, BO 3, K8, BO 4, K 8, BO 4, K8, BO 3, K9, BO 3, K 12, BO 3, K9, BO 3, K 8, BO 4, K 8, BO 3, K 9, BO 3. Round 59: Knit in all knit stitches, CO the same number of stitches over all bound off stitches. [K 12, CO 3, K 9, CO 3, K8, CO 4, K 8, CO 4, K 8, CO 3, K9, CO 3, K12, CO 3, K 9, CO 3, K 8, CO 4, K 8, CO 3, K 9, CO 3.] College Tote - Knit Version Round 60 - 62: Knit 124 stitches for each round. Round 63: Knit 120, PM, knit 4, remove original marker. Round 64: K 16, BO next 42 sts, K 20, BO 42. (Continue on to the first handle tab)
First Handle Tab (Knitting back and forth in rows)
For each handle tab you will work back and forth in rows, decreasing at each end on everyotherrow. Row 1: K1, then K2tog TBL (through back loop), K to the last 3 sts, K2tog, K1. (18 sts) Row 2: Purl in each stitch. Row 3 -10: Repeat Rows 1 and 2 until there are 10 sts remaining. Row 11 - 16: Continue to knit all stitches on odd rows, purl on even rows. Bind off, leaving several inches (10 - 12) which you will use to sew handle tabs around the purse rings..
Second Handle Tab
Repeat handle tab directions for opposite handle tab.
Handle Strap (Worked in Garter Stitch)
Leave 10 to 12 inches at the beginning of the cast on; CO8. Working in GS, knit until your handle strap measures 24" (or desired length). Bind off, leaving a 10 to 12 inch tail for sewing your strap around the purse rings.
Draw String:
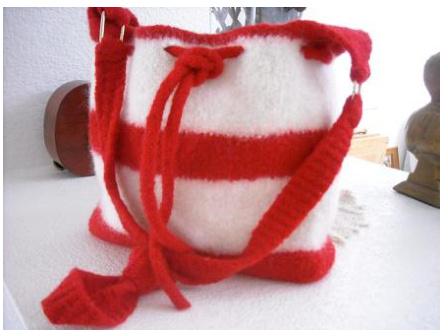
If you plan to felt the draw string, then you should make an I-cord that is at least 1/3 longer than the desired finished length of the draw string. Using two double pointed needles, CO4 sts and knit a basic Stockinette-Stitch I-cord. The length should be approximately 4 % - 5 feet prior to felting. Photo to left: My current knit tote -in progress.
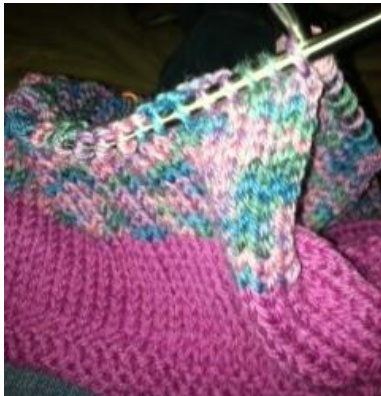
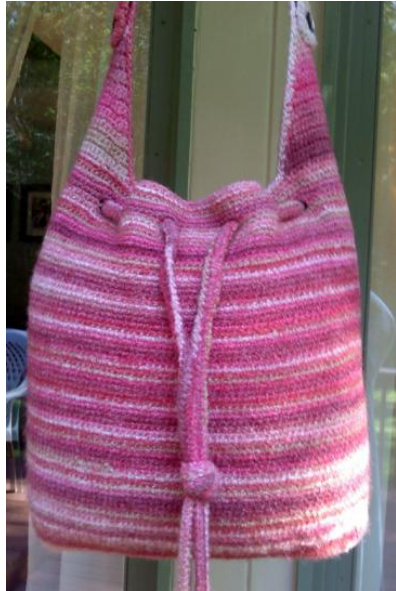
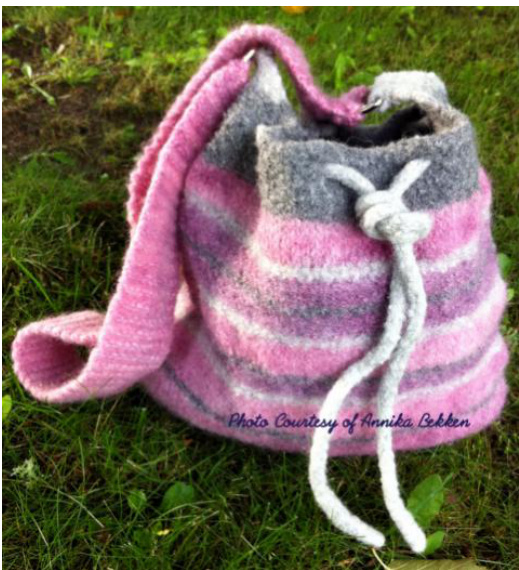
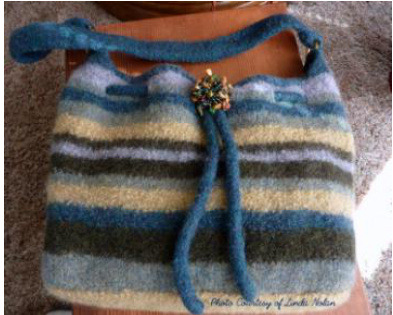
Photo to right: This is my original "College Tote," completed in crochet and also my inspiration for the “"Knit College Tote." College Tote - Knit Version
Before Felting Your Bag:
Thread one handle tab through a purse ring, fold tab over to the inside of the tab and whip stitch into place to secure the purse ring. Repeat for second handle tab. Thread each end of the handle strap through one of the purse rings and secure (whip stitch) the strap into place. The drawstring is NOT threaded through the bag until AFTER it has been felted.
Felting Your Bag:
Place your completed bag and the drawstring in a zippered pillowcase and place in washing machine (top loading machines work best for felting). Set the water HOTTEST temperature setting and select the LOWEST water level setting. Add 1 tsp of detergent. Check your bag after the machine has completed 1 agitation cycle. (The fabric should be dense and should not show any stitch lines). If needed reset machine for 1 or more cycles, being careful to check the felting progress FREQUENTLY. Remove from the washer and rinse in cold water. (Do not rinse or spin in machine; this may add unwanted creases to your fabric.) ?Squeeze out excess water and shape by hand. I usually insert a small couch pillow or travel pillow covered by a plastic shopping bag (turn the bag inside out so the coloring doesn't rub off onto your bag) as an insert for shaping for the first 12 hours, then I remove it. Allow the bag to dry completely. This may take a day or two.
Finishing and Assembly:
·Sew a button onto each handle and strap for decoration. ?Thread the drawstring through holes made near the top edge of the bag. Tie an overhand knot in the drawstring. ?Line your bag and add a magnetic closure if desired. ?ENJOY your finished tote!
Mamaelyan
FamilyDiva
Bobnlin


