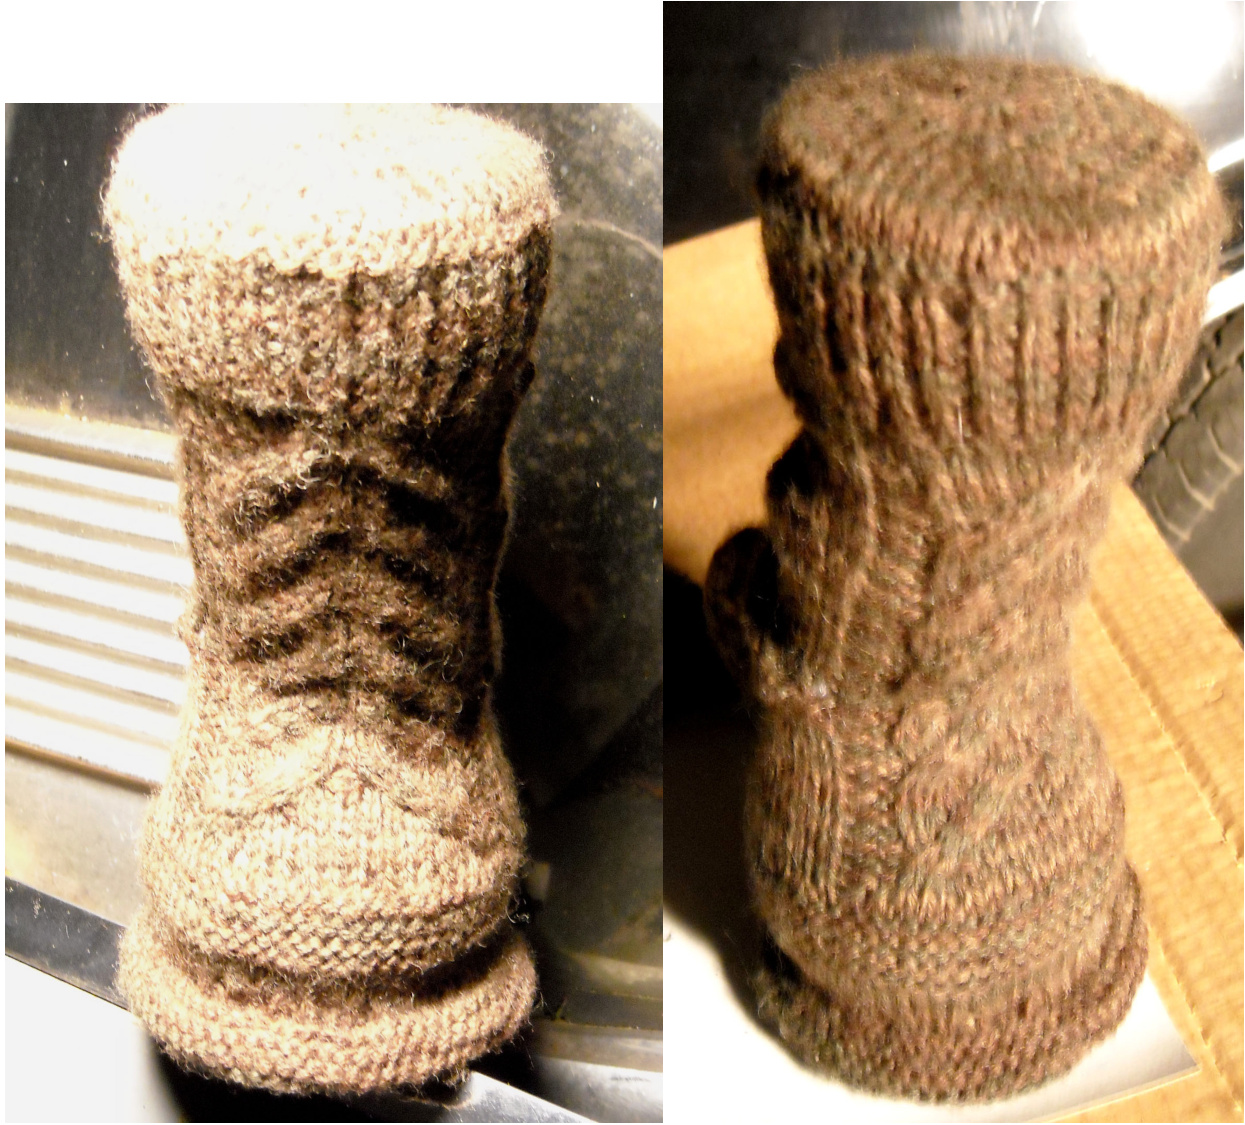
TiKi TERROR!
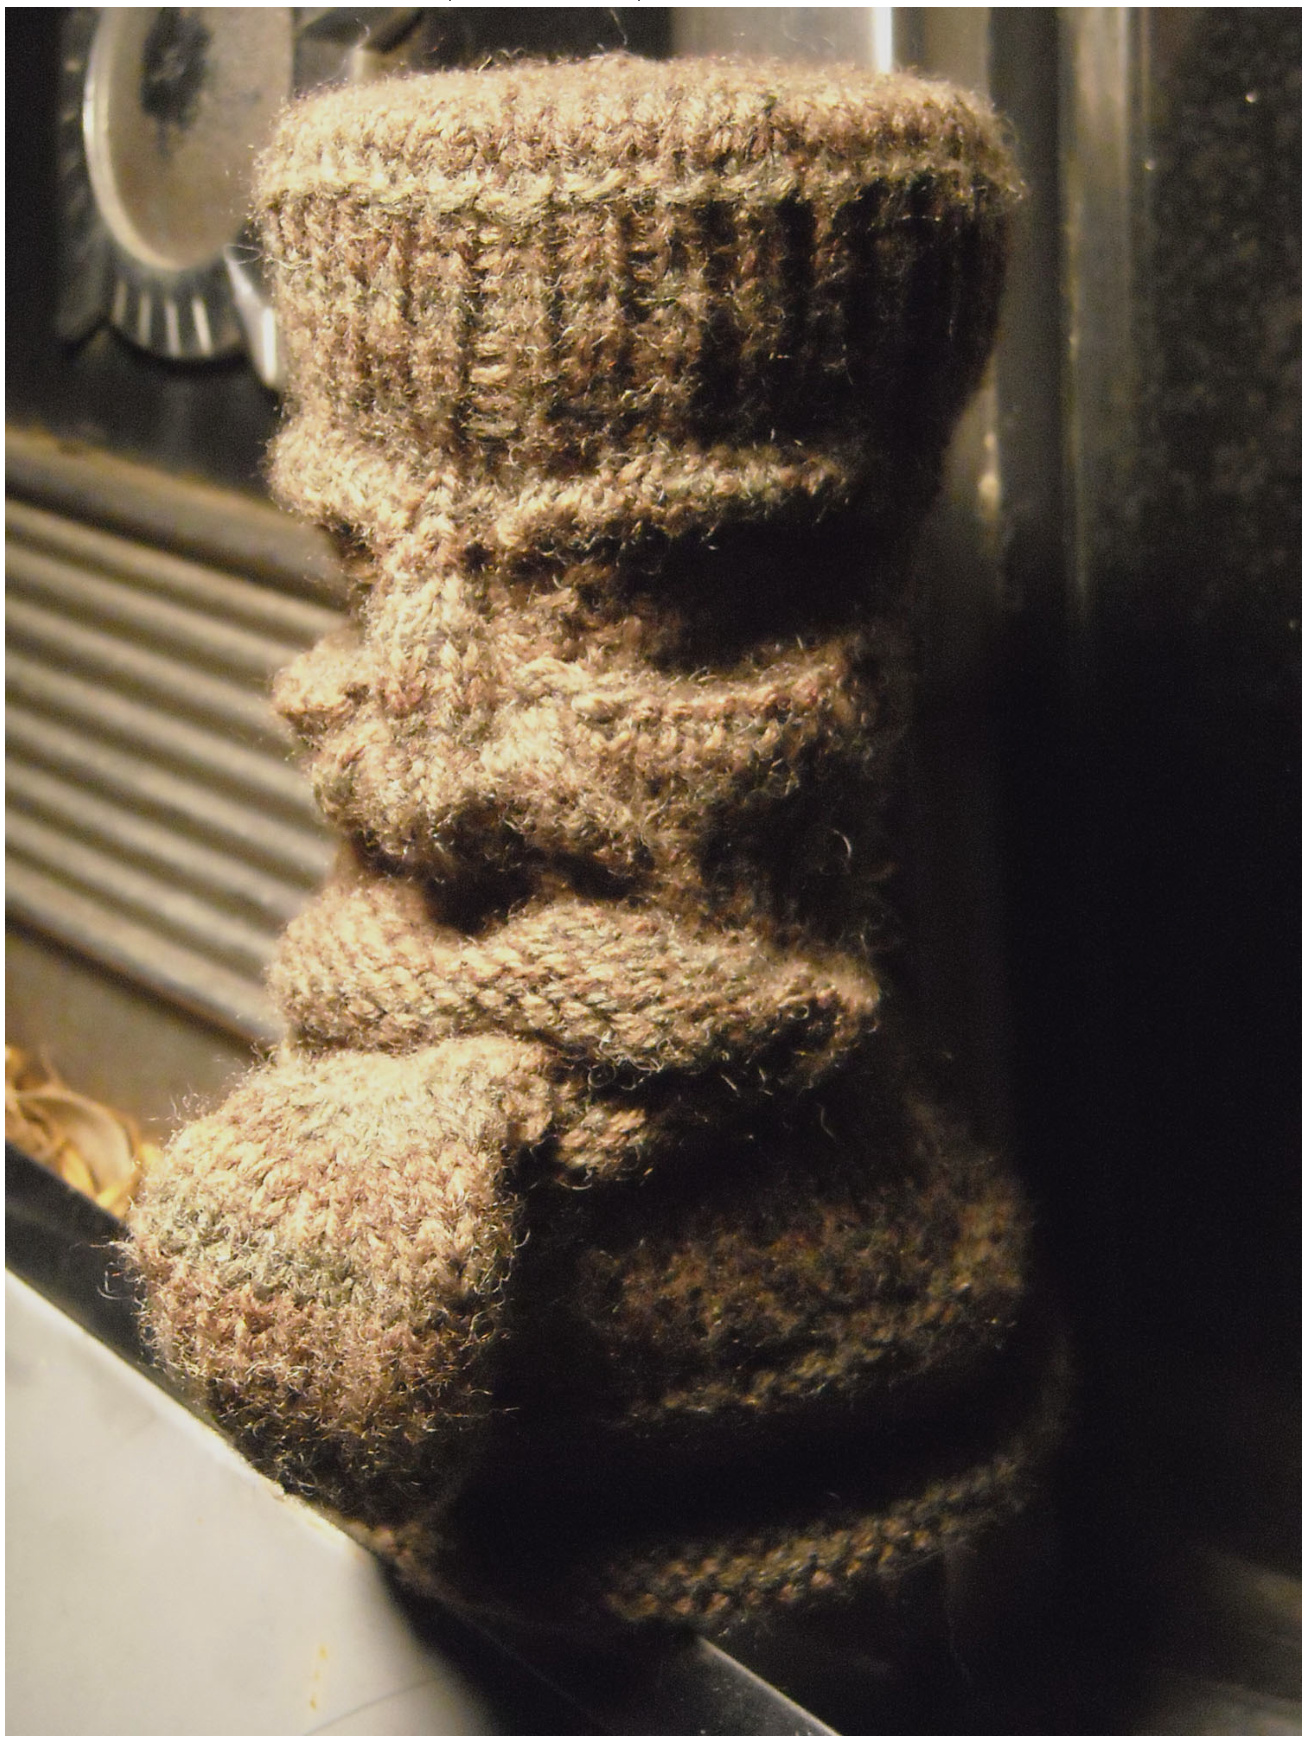
Materials: 150 yds worsted weight (sample in Lion Brand Wool-Ease), polyfil stuffing, one chenille stem (any color), some sturdy cardboard or plastic canvas big enough to make disks for the top ( $3.5^{\prime\prime}$ diameter) and bottom ( $\mathrm{[4^{n}}$ diameter), and a yarn needle. US6 (or size needed to obtain a solid fabric!) dpns or circular long enough to work in magic loop, cable needle optional. Gauge: 6 st/inch - unstretched stockinette stitch Finished size: approx. $8^{\prime\prime}$ high $\times\,4^{\prime\prime}$ diameter These measurements may vary depending on what needles you require to achieve a solid fabric, what yarn you choose, etc. That you have the exact same gauge is not vital, but with the short rows, cabling and stitching, this guy gets stretched around quite a bit and of course you want to be careful that your fabric isn't showing the stuffing. And now that I've made it sound all scary, a few reassuring words. This pattern has a litle bit of everything, so it's a great choice to try things out. If you are new to any of these techniques, knittinghelp.com is a wonderful resource with step by step video. They also have lists of standard abbreviations which are what I use. (w/t is the standard wrap and turn for short rows. Slip the next stitch, wrap the working yarn, then return the slipped stitch to the left needle and turn the work) And as always, feel free to change the cable pattern, leave the tongue off, throw in a cable down the nose, whatever you'd like to try, this is a great canvas to do just a bit of it before you commit to a larger pattern. Plus who doesn't love tikis? Staghorn Cable pattern: R1: p2, k16, p2 R2: p2, k4, c4b, c4f, k4, p2 R3: p2, k16, p2 R4: p2, k2, c4b, k4, c4f, k2, p2 R5: p2, k16, p2 R6: p2, c4b, k8, c4f, p2 The overall game plan is to start at the top, decrease down to the main cylinder size, start cabling the back and shaping the front. The eye sockets, mouth and tongue use short rows in much the same way as a sock heel. After you start working in the round again for the chin, a couple of reverse stockinet stripes hide some increasing and form the base. The bottom is a simple whirlpool decrease, but after a couple of rounds I would highly recommend adding the top disc, stuffing and adding the bottom disc, then finishing the decreases. On to the details! CO 8, join (careful not to twist) and work a whirlpool increase as follows.. R1: kfb around R2: knit R3: k1, kfb around R4: knit R5: k2, kfb around R6: knit R7: k3, kfb around R8: knit R9: k4, kfb around R10: knit R11: k5, kfb around R12: knit R13: k6, kfb around (64 sts) R14: purl R15: k1, p1 around Continue to work in 1x1 ribbing for $1^{\prime\prime}$ Next row: k1, k2tog around (43 sts) Knit one row plain. At this point whether you're using a circular or dpns, rearrange your stitches so that all of your back stitches (20 sts) are on one needle. From this point, begin cable pattern on those stitches. Those back stitches will not be mentioned in the pattern until we get to the base. Kind of like Uncle Fred with the hairy shoulders and the penchant for tank tops, we're just not gonna mention it til later. So stop pointing and laughing.. for now. R1: k4, kfb x3, k3, kfb, k1, kfb, k3, kfb x3, k4 (23 sts) R2: k3, (kfb, k7) x3, kfb, k3 (35) R3: knit R4: k2, k2tog, (k1, k2tog) x4, k5, (k2tog, k1) x5 (25) R5: k11, kfb x2, k12 (27) R6: k12, kfb x2, k13 (29) R7: k3, p9, k5, p9, k3 (29) Working back and forth, short row eye sockets: k11 w/t, p8 w/t, k7 w/t, p6 w/t, k5 w/t, p4 w/t, k3 w/t, p2 w/t, k3 (picking up wrap from previous row and knitting it with its stitch) w/t, p4 w/t, k5 w/t, p6 w/t, k7 w/t, p8 w/t, k22 w/t, p8 w/t, k7 w/t, p6 w/t, k5 w/t, p4 w/t, k3 w/t, p2 w/t, k3 (picking up wrap from previous row and knitting it with its stitch) w/t, p4 w/t, k5 w/t, p6 w/t, k7 w/t, p8 w/t, k11, begin working in the round. R8: k3, p9, k5, p9, k3 picking up any wraps left from short row section (29) R9: Knit R10: k14, kfb x2, k13 (31) R11: k2tog, k13, kfb x2, k12, k2tog (31) R12: k1, k2tog, k25, k2tog, k1 (29) R13: k2, k2tog, k11, kfb x2, k10, k2tog, k2 (29) R14: k2, k2tog, k4, kfb x3, k2tog, k2, k2tog, kfb x3, k4, k2tog, k3 (31) R15: k4, k2tog x3, k11, k2tog x3, k4 (25) R16: k5, k2tog x2, k7, k2tog x2, k5 (21) R17: k6, k2tog x2, k1, k2tog x2, k6 (19) R18: knit R19: k8, kfb x3, k8 (21) R20: k9, kfb, ki, kfb, k9 (23) R21: knit Mouth and tongue section: To create the mouth and tongue, a compound angle is created with short rows. The mouth is in reverse stockinet to allow for contrast and a rounder lip. Upper mouth: K1, p21 w/t Ki9 w/t, p18 w/t, k17 w/t, p16 w/t, k15 w/t, p14 w/t, k13 w/t, p12 w/t, k11 w/t, p10 w/t,k9 w/t Tongue: Skip this section and move to the lower mouth if you prefer. RS: K9 WS: P9 Work 7 more rows of stockinet RS: k3, kfb, k1, kfb, k3 (11) WS: purl RS: k4, kfb, k1, kfb, k4 (13) WS: purl RS: k5, kfb, k1, kfb, k5 (15) WS: p13 w/t Short rows for tip of tongue: k11 w/t, p10 w/t, k9 w/t, p8 w/t, k7 w/t, p6 w/t, k5 w/t, p4 w/t, k3 w/t, p4 w/t, k5 w/t, p6 w/t, k7 w/t, p8 w/t, k9 w/t, p10 w/t, k11 w/t, p13 w/t, k15 I find it easier to do the next bit with the tongue turned inside out, but use your preference. Work a corresponding number of rows of stockinet to return back to the mouth, reversing the shaping (6 evenly spaced decreases) and picking up a stitch from the other side of the tongue and knitting it together with the first stitch on each row as you go. Once you've worked back to the mouth, you should have 9 stitches at the same depth as the beginning of the tongue, ending on a right side row. Turn the tongue back the right way around. If you'd like a prehensile tongue, take your chenille stem, trim to about $8^{\prime\prime}$ long and wrap the ends overlapping to form an oval. Tuck the oval into the tongue and sew the back of the tongue shut. Lowermouth: K10 w/t, p11 w/t, k12 w/t, p13 w/t, k14 w/t, p15 w/t, k16 w/t, p17 w/t, p18 w/t, k19 w/t, p20 w/t, k22 and return to working in the round. R22: purl R23: k5, p4, pfb x5, p4, k5 (28) R24: k7, p14, k7 R25: k10, p8, k10 R26: k12, p4, k12 R27: knit R28: k8, k2tog, k8, k2tog, k8 (26) R29: k9, k2tog, k4, k2tog, k9 (24) R30: k10, k2tog x2, k10 (22) Continue to knit until the back reaches cable pattern R1. Base: K2, kfb around (56) Work 5 rows reverse stockinet, then 4 rows stockinet.K3, kfb around (70) Knit Work 5 rows reverse stockinet. Knit Base decrease: R1: k8, k2tog around R2 (and all even rows): purl R3: k7, k2tog around R5: k6, k2tog around Warning! Remember to pop the top disc in, stuff until relatively firm (the mouth and eyes are recessed) R7: k5, k2tog around R9: k4, k2tog around R11: k3, k2tog around R13: k2, k2tog around Finishing: Break off yarn with a long tail, thread through remaining stitches and pull tight, secure thread then punch upward through your base disc center and work the needle up to the back of the mouth, coming out at one corner, going across the inside and back down the other corner through the base. Rearranging stuffing as you go to give the mouth depth, pull the thread taut and secure against center bottom. Take a piece of yarn at the base, secure the start and run a line of stitches around the bottom of the regular stockinet stripe, pull to snug the bottom disc against the base decreases, allowing the reverse strip to form the edge. Secure with a backstitch. At this point the tiki probably looks a little odd, upper portion flopping toward the back cables, eye sockets bulging. No worries, it all pulls into shape. With a new thread, pinch together the increases and decreases at the top of the face to form eyebrows. Working from far right to left, use a back and forth (almost like a mattress stitch) to pull the eyebrows together, secure at near right, run your thread under the nose stitches and do the same for the left eyebrow. Secure, then take needle up through the center of the top disc. Working back down, repeat the mouth stitches in miniature for each eye socket. Through one corner, across and down though the other corner, back to the disc and repeat. Secure at top. In a similar fashion to the eyebrows, pinch up the nose as much as you like and work thread back and forth until you reach the top of the nostrils (another increase row). Perpendicular to the bridge of the nose, use the same technique to shape each boldly flaring nostril. If needed, secure a stitch in the center of the nostril and run it behind your shaping to the other side center and pull taut to give the nostrils more depth. Secure. And lastly the mouth. This is where the tiki gets a lot of his personality, so work with it until you are happy with how it looks. You have options! Do you want have the mouth open? Partially shut? Shut? Did you include the tongue? How full do you want the lips? I recommend deciding on the lips first. Work the stuffing up to plump the lips, then run a thread from the inside of the mouth out to the edge of the lip, letting the reverse stockinet form a nice round lip. Be sure and include a extra stitch at the center top if you'd like to accent that. The lower lip is worked the same way, just follow the purl edge. You can make a pucker if you like by stitching from one side of the lower lip to the other. To close the mouth, just work back and forth from the outside edge toward the center, and sew it shut as much as you need. My test knit had a pretty bodacious tongue, so I closed his mouth all the way to the tongue on either side. Secure everything, weave in your ends. Use a dpn to scoot stuffing around, pinch up the edges of his eye sockets, whatever looks like it needs to be done... and take pictures! If you're on Ravelry, please post your projects. I can't wait to see what everyone else's carven idols look like.
All images and content copyright 2009, Lara Breese, DarkTwist.com


