The SHallOw End Of the PoOL
By Rowan Martindale
This mobius cowl was designed to be a simple introduction to the art of "planned pooling", where you knit a piece of fabric at just the right width to make the colours line up and "pool". This technique can create simple bands of colour or elaborate argyle patterns; for some amazing examples go to www.plannedpooling.com/ or www.ravelry.com/groups/pooled-knits. Gladys we has some excellent explanations of how to plan your pooling, and how to choose a suitable yarn (with some great photos to boot) find her tutorials here: www.ravelry.com/designers/gladys-we or
www.socksummit.com/images/Planned Pooling handout.pdf. This pattern can easily be adapted to a wrap (knit a wider, shorter cowl) or a gradient scarf or shawl (cast off the ends rather than grafting them together). YARN: 1-2 skein(s) of yarn that will pool (see below) \~ 400 yards/meters of fingering weight should do for a scarf, less if you use dk weight and larger needles. For a shawl or a big scarf, go with 600 yds/m or even 800 yds/m for something really big. NEEDles: whatever size creates a nice fabric and makes pooling easy. For this I use Us size 5 (3.75 mm) 50cm (24") long circular needles. You can use longer or shorter circulars (or straights) as long as you have enough room for your stitches. GAUGE: Not important Notions: Stitch markers, pencil, or sharpie to mark "turning points", and a darning needle for kitchner stitch. FiNIsHeD size: Roughly 8" (20cm) wide and 60" (160cm) long, blocked. FYl: The garter stitch grows a lot during washing/blocking/wearing.
PICKING A YARN
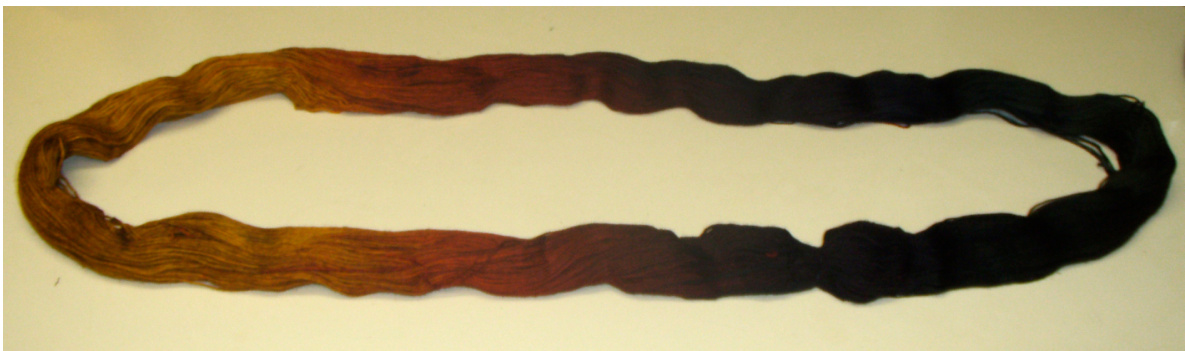
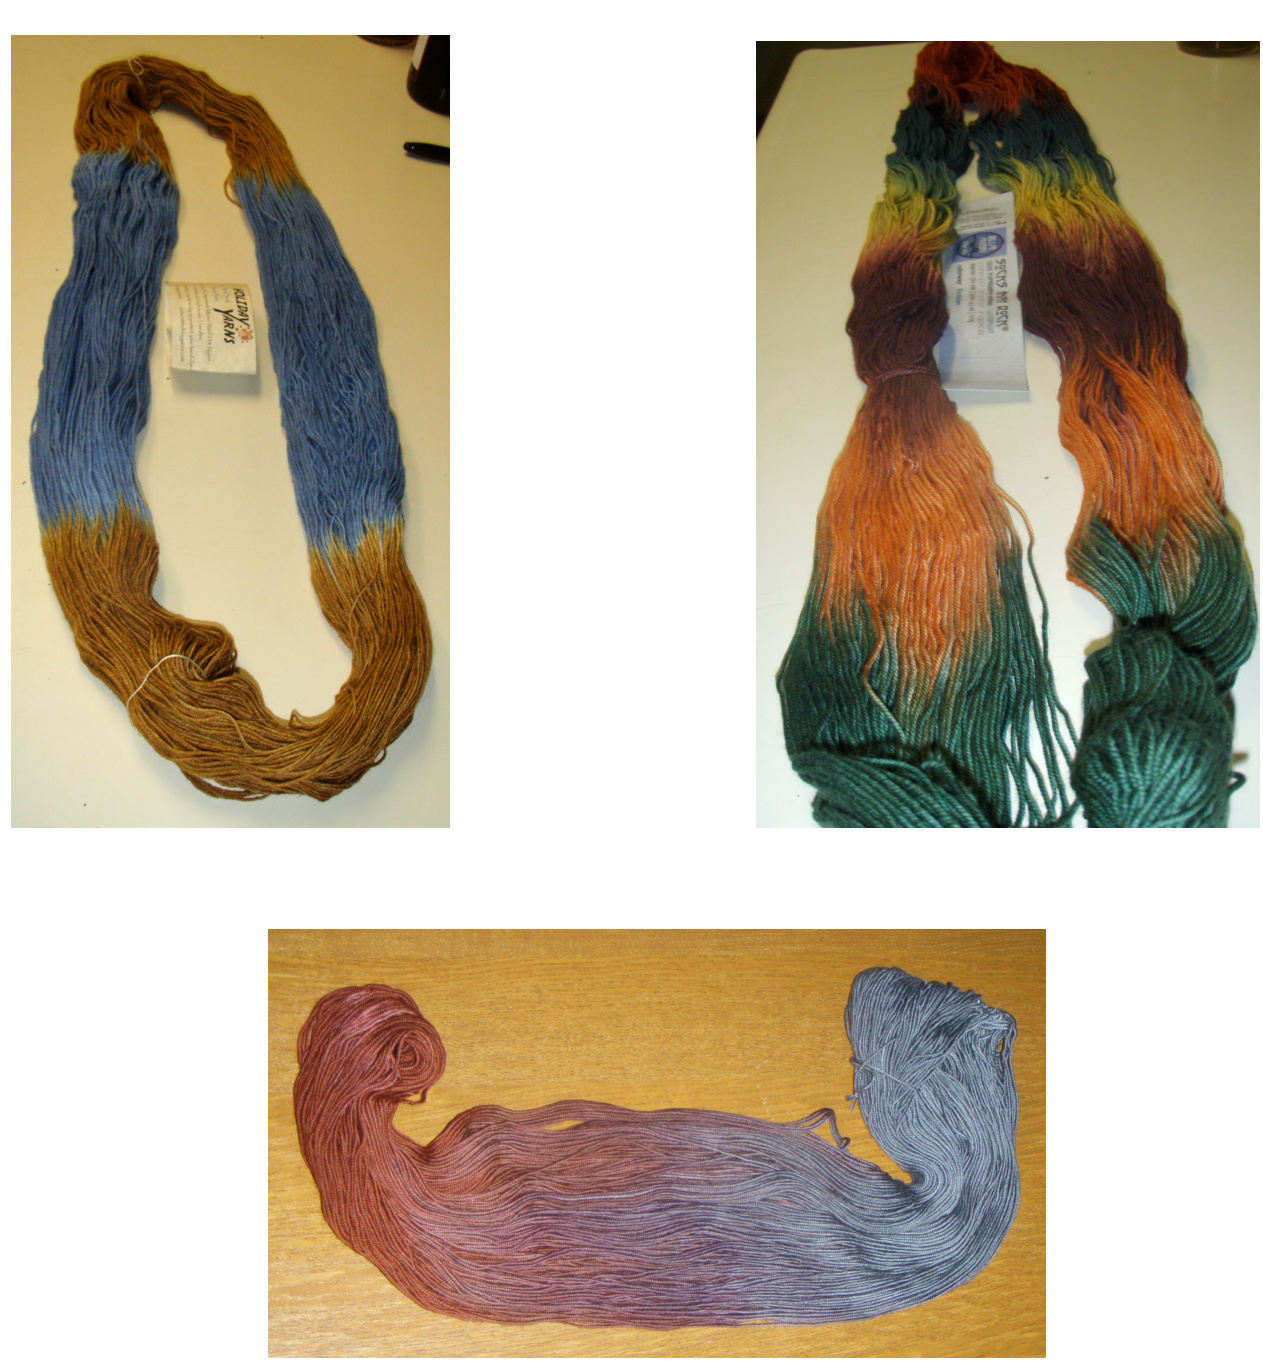
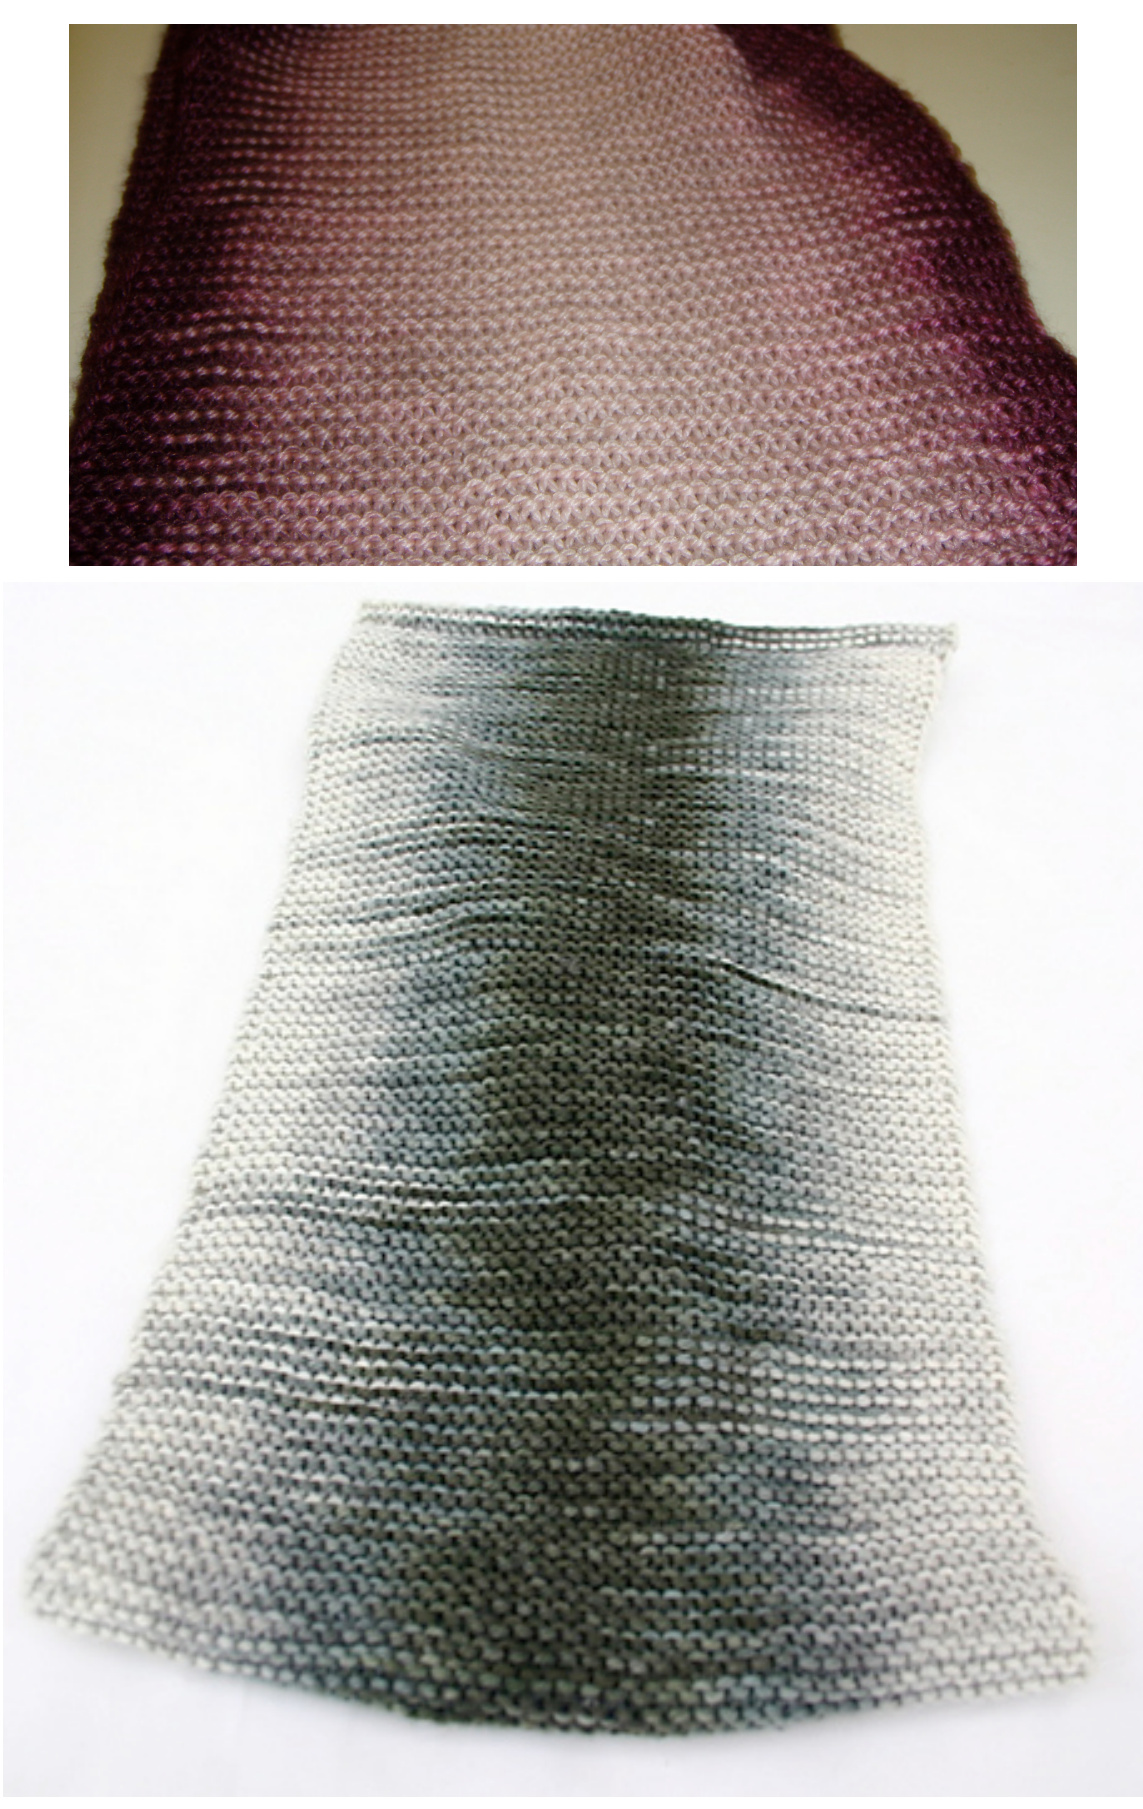
Great yarns for pooling are often hand dyed, with multiple colour changes. For instance, Blue Moon Fiber Arts yarns, Holiday Yarns Tsock Flock yarns, Wollmeise yarn, Three Irish Girls yarns, and many more. You need to pick a yarn with short, solid colour repeats. The easiest way to test this is untwist your skein and lay it in an ellipse in front of you (see photos below). Make sure that you can line up the colours on the top of the skein with the colours on the bottom of the skein so you can knit back and forth, lining up the stripes of colour from the row you're knitting, with the stripes of colour from the row you're knitting into. Like this:
Or These:
Rowan Martindale, 2011 Find me as MountainAsh on ravelry, or email me, seahorse.rowan@gmail.com Pull out the first few colour repeats before you cake or wind the yarn, then mark the first few turning points with a pencil, sharpie, or safety pin so that you know when you reach the end of each row and need to turn your knitting.
THE GARTER STITCH SCARF PART
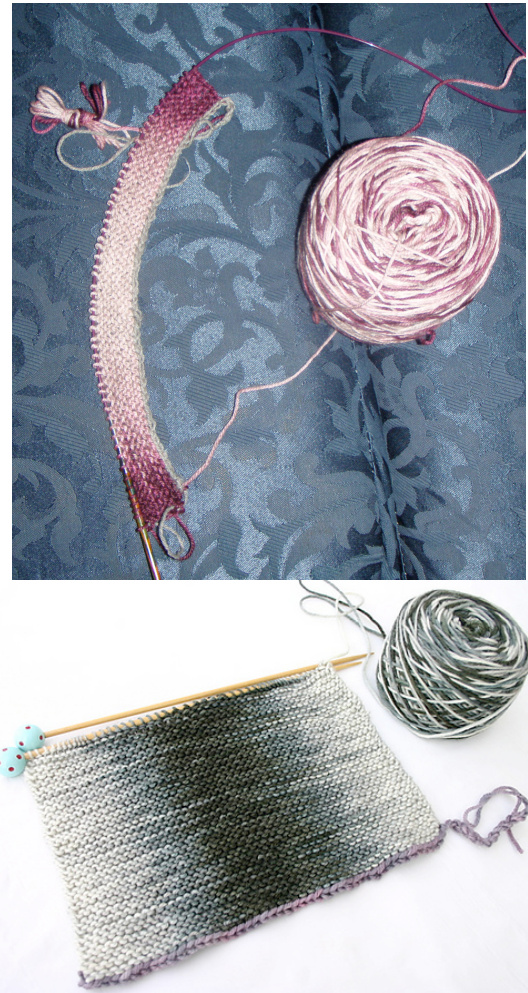
\*This is my suggestion for how to figure out the right number of stitches to make a pooling scarf. If you know your "magic number" already, provisionally cast on that number and knit in garter stitch. If you have never done pooling before, try my method for a while. If that isn't working, give the tutorials a look over (www.socksummit.com/images/Planned Pooling handout.pdf), the same techique doesn't work for everyone and this pdf has some great instructions! Using a provisional cast on (I like the crochet provisional cast on, like this: www.youtube.com/watch?v=aqWfea8oOH8), cast on "too many" stitches (60 stitches should be good for most fingering weight yarns, you might need 1o0 for longer repeats). This will allow you to turn the work where you hit your "turning point" markers and drop the extra cast on stitches whenever possible. Begin with your pooling yarn, start knitting at one "turning point" and knit to your next turning point. Turn work Row 1: Slip 1 with yarn in front, knit to next turning point making certain your colours are stacking. Like the examples on the right -->
DONOT BEDISCOURAGEDIFITTAKES AWHILETO FIGUREOUT THERIGHTNUMBEROFSTITCHES!
Figuring out the stitch number for your tension and yarn is hardest part of pooling. It took me \~10 rows to figure out my magic number for the 3lG skein (to right) was 53 stitches. Be patient and keep trying, if you are really having trouble try going up or down a needle size since your magic number on Us size 5 needles might be 52.5! Also note that your mood can sometimes change your gauge (i.e. if you are tense or very relaxed). Once you know the number of stitches you need, start again. Using a provisional cast on, cast on the number of stitches that you have determined is correct. working with your pooling yarn, start knitting at one "turning point" and knit to your next turning point.
Knit Row 1 (Sllwyif, knit to end of row) until your scarf is at the desired length, or until you have a little over one colour repeat left (garter stitch "scarf")
MAKING YOUR SCARF A COWL (FINISHING)
Undo the provisional cast on and place the live stitches on a spare needle or piece of yarn. Decide whether you want a flat loop cowl, or whether you want to spice things up by putting a single twist in the "scarf" and making it a mobius loop. Graft together the beginning and end of your "scarf" using kitchner stitch (WWw.yOUtube.COm/watch?v=IZilzwO5Nv4), BEING CAREFUL TO MAINTAIN YOUR COLOuR STAcKING! This means you need to keep your grafting loose and even. Wash according to the ball band directions and block or hang to dry.
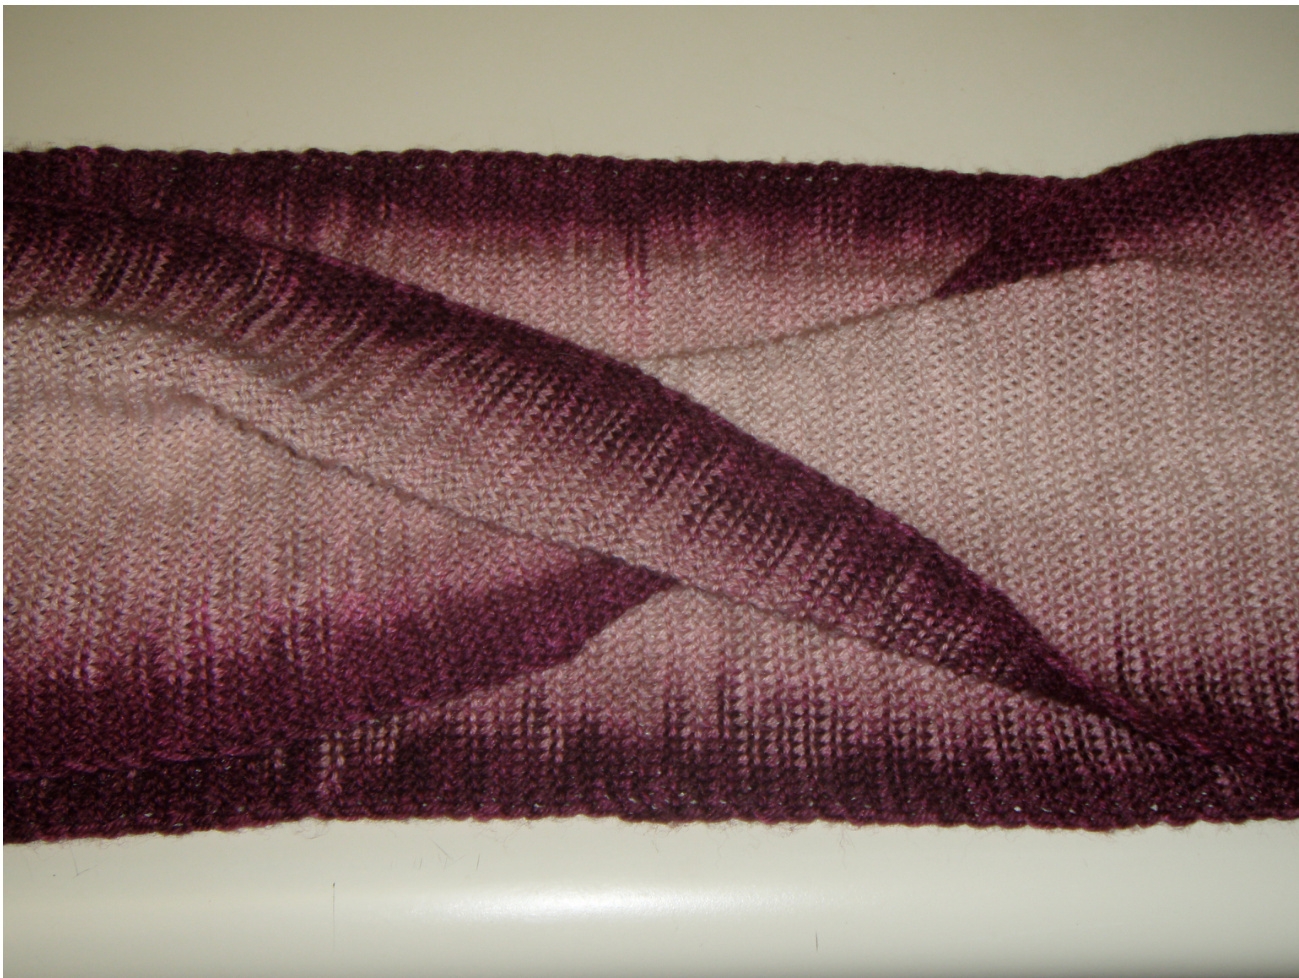
Enjoy your "planned pooling" cowl. If you liked knitting this "shallow end" pooling project, you are now ready to tackle some "deep end" pooling projects such as these: www.ravelry.com/designers/gladys-we/patterns !
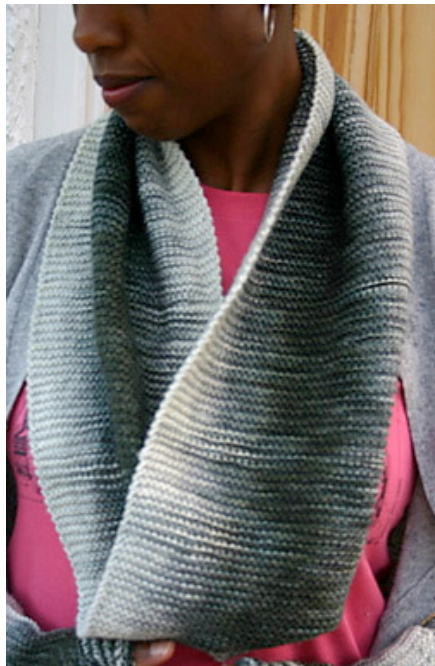
Thanks to my test knitters and to the lovely Jimi Joseph (JimiKnits of ravelry) for the photos of the green pooling scarf!


