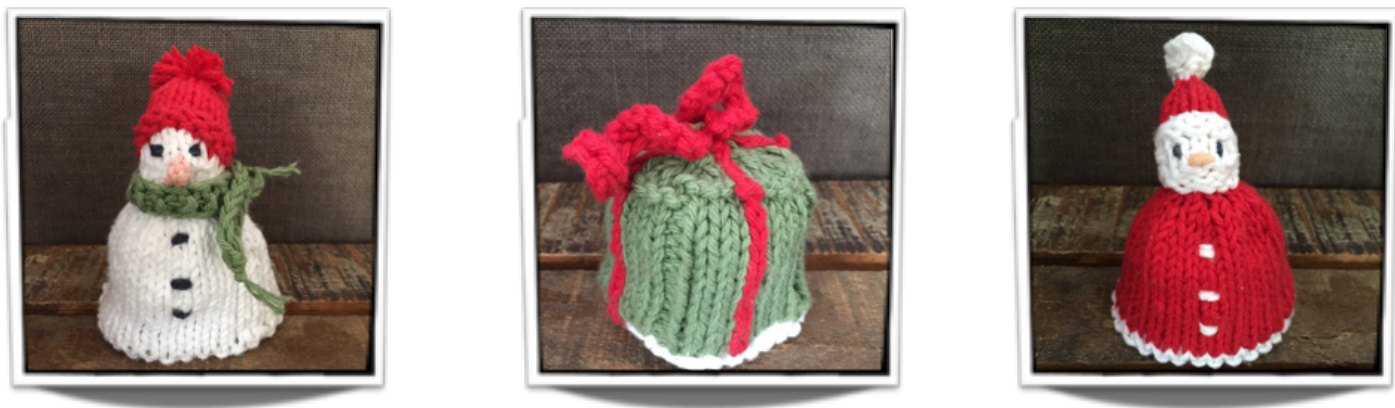
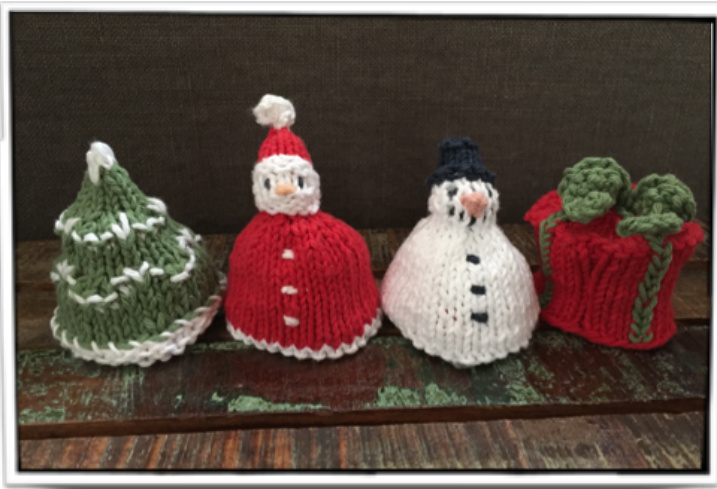
Hohoho... Holiday Quartet
With this pattern you can create at least six different holiday-themed inside-out toys! What do you need? Scraps of any yarn, DK or Worsted, merino or cotton will work. If you want to knit a toy for a toddler, you might like to use a washable yarn. You will need approximately 50 yards of yarn altogether for one inside-out toy. Mainly three typical holiday colors are needed, like red, green and white. You will also need a bit of fiberfillfor Frosty and Santa, and a yard each of some other colors for a top hat, charcoal buttons, carrot noses and other details. But you can decide which combination you would like to try. Maybe Santa in a Christmas tree or Frosty in a present box? Why not a snowman that turns into Santa?! It's your choice. Make this toy your own! What skills are required to knit this toy? You need to be comfortable using double pointed needles. Otherwise the making of this toy requires skills like knit, purl, increase, decrease, simple colorwork for the present and the tree, and short rows for Santa and Frosty. If you choose to give the snowman a top hat, which is only one option, a simple crochet stitch is called for. You will also need to embroider facial features if you go for Santa or Frosty. Happy Holidays!
My thanks go to:
Susan B. Anderson for her inspirational books and my husband for suggesting the following inside-out combination: an ugly sweater in a present - bless his nerdy brain. @ Sandra Ronca Designs - all rights reserved. For non-commercial purposes only. No part of this publication may be reproduced or transmitted without prior permission. Suggested Yarn: Any worsted weight yarn, for example Lily Sugar 'n Cream. Colors: Mainly green (C1), red (C2), white (C3), about 25 yards per one item (half of an insideout toy), and scraps in various colors for facial features and/or christmassy decoration. Needles: US size 4 dpns and a yarn needle. Gauge is not important for this project.
Santa
Body, head and hat: CO 30 sts on 3 dpns in C3 (10 sts on each needle). Join in the round. R1+2: Purl all sts. R3-12: Cut C3, switch to C2, knit all. R13: (k1, k2tog) repeat teor. R14: Knit all sts. R15: k2tog, repeat teor. Distribute 10 sts: 3 on needle 1, 4 on needle 2, 3 on needle 3. R16: Add C3, knit all sts on needle 1 and 2, w&t. R17: Knit all sts on needle 2, w&t. R18: Purl all sets on needle 2, w&t. R19: Knit all sts on needle 2, w&t. R20: Knit all sts on needle 2 and needle 3. R21+22: Purl all sts. R23-26: Cut C3, switch to C2, knit all. R27: k2tog, repeat teor. Catch live sts, pull together and weave in ends. Fill hat and head lightly with fiberfill and secure with some crosswise sewing stitches on the inside around the neck. Embroider white buttons and face (see photo). Bobble (you can make a mini pompom instead): CO 3 sts in C3 on one needle. R1: Purl all sts. R2: k2, m1, k1. R3: Purl all sts. R4: k2, m1, k1, m1, k1. Catch all living sts and leave a 15 inch tail. Use tail to whipstitch around the triangle. Pull together and secure end to create bobble. Sew bobble to top of the hat and weave in ends. Abbreviations k = knit w&t = wrap and turn dpn(s) = double point needle(s) p = purl teor = to end of row CO = cast on m = make a st using a st k2tog = knit two sts together R = row/round in the row below ssk = slip slip knit st(s) = stitch(es) s = slip a sts BO = Bind off @ Sandra Ronca Designs - all rights reserved. For non-commercial purposes only. No part of this publication may be reproduced or transmitted without prior permission.
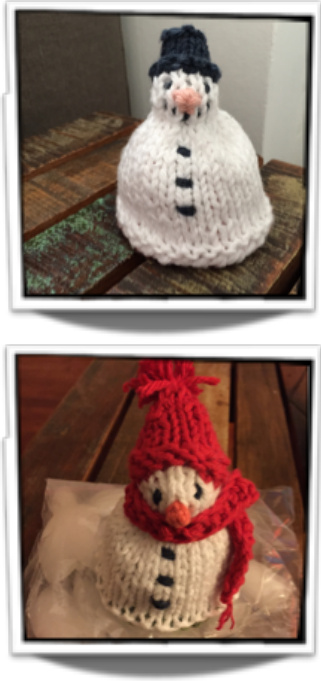
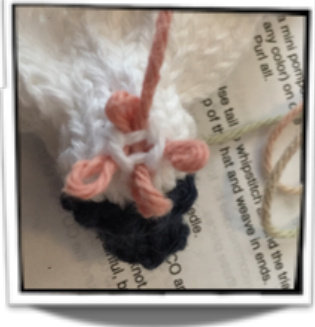
Frosty
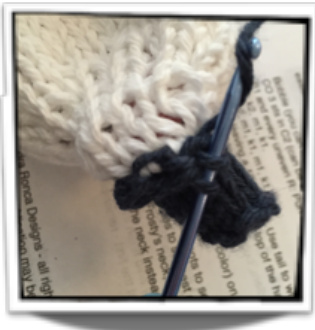
Body, head and hat: CO 30 sts on 3 dpns in C3 (10 sts on each needle). Join in the round. R1: Purl all. R2-12: Knit all. R13: (k1, k2tog) repeat teor. R14: Knit all. R15: k2tog, repeat teor. Distribute 10 sts: 3 on needle 1,4 on needle 2, 3 on needle 3. R16: Knit all sts on needle 1 and 2, w&t. R17: Purl all sts on needle 2, w&t. R18: Knit all sts on needle 2, w&t. R19: Purl all sts on needle 2, w&t. R20: Knit all sts on needle 2 and needle 3. Top hat: R21: Cut C3, switch to dark blue/black. R22-25: Knit all sts. R26: Purl all sts. R27: k2tog, repeat teor. Or bobble hat: R21+22: Cut C3, switch to C2 (can be any color), purl all. R23-26: Knit all. R27: k2tog, repeat teor. Both hats: Catch live sts, pull together and weave in ends. Fill hat and head lightly with fiberfill and secure with some crosswise se stitches on the inside around the neck. Embroider charcoal buttons. Bobble-onlyfor thebobblehat: See Santa. Use C2 or color you use for the hat. Rim - only for the top hat: Pick up stitches (one by one) all along the edge of the hat in dark blue/black and crochet around with single crochet stitches (see photo). Nose,eyes and mouth: Pick up 4 sts - preferable with an orange colored yarn - in the middle of the face (see photo). Catch all sts and pull together. Weave in end. Embroider charcoal eyes after the nose is done - the positioning will be easier. Embroider mouth as seen in photo above (optional). Scarf (optional): CO 3 in any color on one needle. Work 50 rows in garter stitch. Catch all live sts and make knots to secure both the CO and the BO. Cut tails leaving 2 inches to suggest a fringe. Wrap scarf around Frosty's neck, but don't make a knot (too bulky). Sew the scarf onto the neck instead. Sounds painful, but he will be fine. @ Sandra Ronca Designs - all rights reserved. For non-commercial purposes only. No part of this publication may be reproduced or transmitted without prior permission.
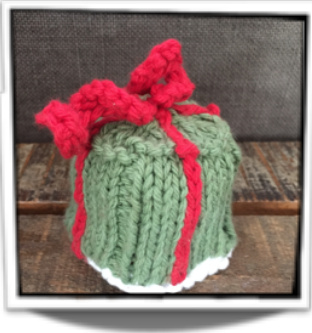
The Present
Box: CO 32 sts on 4 dpns in C1 (8 sts on each needle). Join in the round. R1: Knit all sts. You can choose any set of color combinations for C1 and C2 for this item. Cut four yard long threads of C2 and add one to each needle, where the pattern calls for C2 in R2. R2-14: (k3 in C1, k1 in C2, k3 in C1, p1 in C1) repeat on each needle. R15: Purl all in the colors they appear. R16: Knit all in the colors they appear. R17: (k2tog, k1 in C1, k1 in C2, k1, ssk, k1 in C1) repeat on each needle. R18: Knit all sts as they appear. R19: (k2tog in C1, k1 in C2, ssk, k1 in C1) repeat on each needle. Catch live sts, pull together and weave in ends (or use to attach curls). Curl (optional - make two in any color): CO 10 sts on one needle with long tail method. k1, m1, BO (k1, BO, m1, BO) repeat teor. Cut yarn. Sew onto box in the middle of the top, weave in ends.
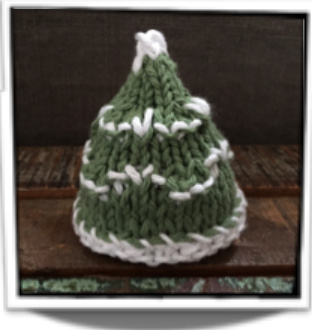
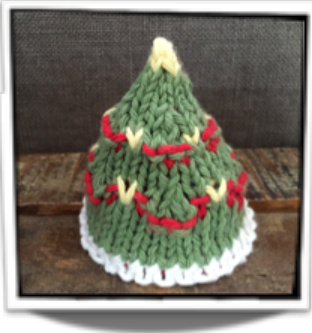
The Snow-covered Tree
CO 30 sts on 3 dpns in C1 (10 sts on each needle). Join in the round. R1-5: Knit all. R6: Add C3, (k3 in C3, k3 in C1) repeat teor. R7: (p3 in C1, k1 in C3, k1 in C1, k1 in C3) repeat teor. R8: (k3, p1 in C1, k1 in C3, p1 in C1) repeat teor. R9: (k1, k2tog, k3 in C1) repeat teor. R10: (k2tog, k3 in C1) repeat teor. R11+13: Knit all sts in C1. R14: s2, (k1 in C1, k3 in C3) repeat teor including the slipped sts. R15: (k1 in C3, p3 in C1) repeat teor. R16: Knit all sts in C1. R17: (k2, k2tog in C1) repeat teor. R18: (k1, k2tog in C1) repeat teor. R19-21: Knit remaining 10 sts in C1. Cut C1. R22: Switch to C3, k2tog, repeat teor. R23: Knit all sts in C3. Catch live sts, pull together and weave in ends. Instead of a snow-cowered tree, you can make garlands in any color substituting C3. You can also make candles using yellow or gold in R8 and R15, where pattern calls for 'k1 in C3'. For a beaded version of the tree (not recommended for toddlers, but surely for grown-up toy aficionados) you can use C1 instead of yellow and add beads in these places.
Wrapping it up
When you're done with two items of your choice, sew item 1 and item 2 together: Turn item 1 inside out. Place it inside item 2. Use a thread of yarn or the tail of one of the items to whipstitch around the CO edges of both items. If you know in advance, which items you want to combine, you may also finish the first item, and pick up the stitches for the second item around the CO edge of the first - remember to knit the item that needs filling first. @ Sandra Ronca Designs - all rights reserved. For non-commercial purposes only. No part of this publication may be reproduced or transmitted without prior permission.


