Adaptation
by Roxanne R. Richardson

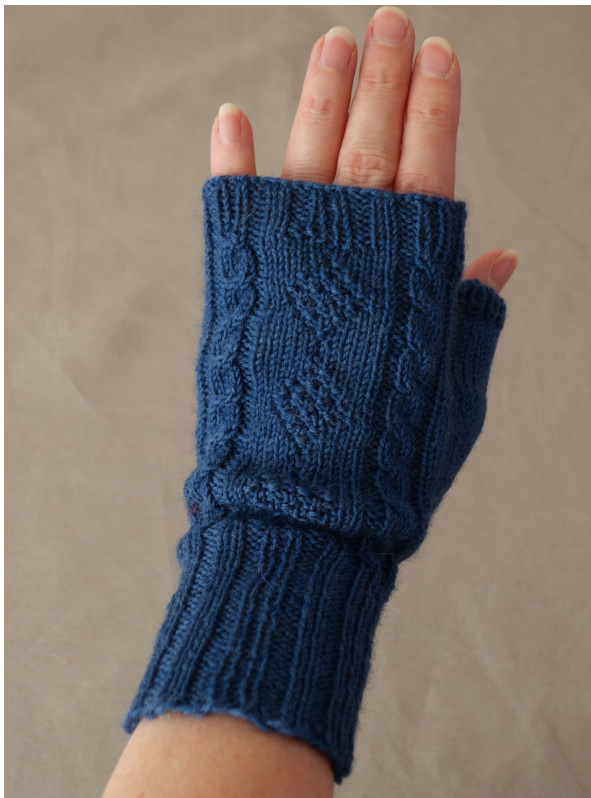
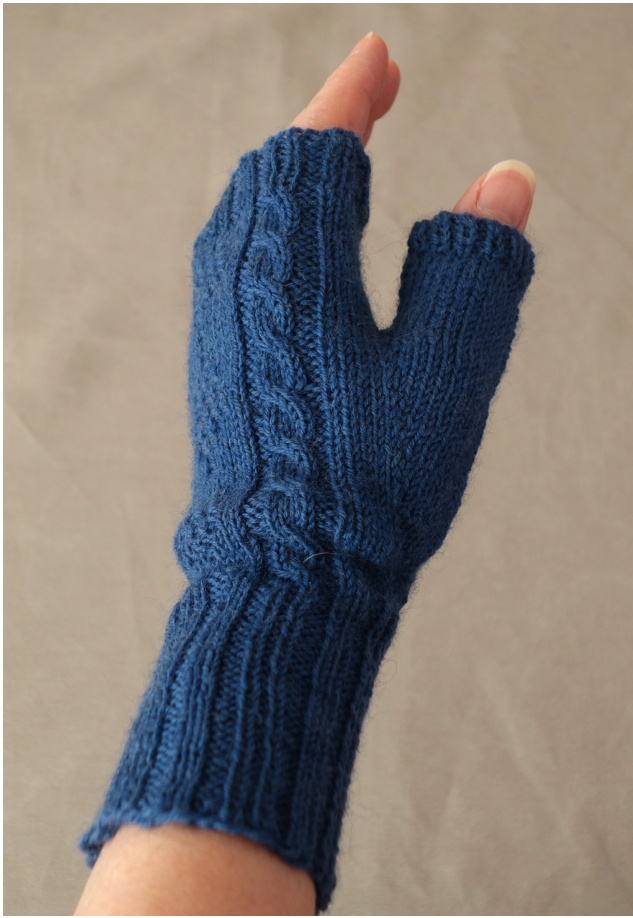
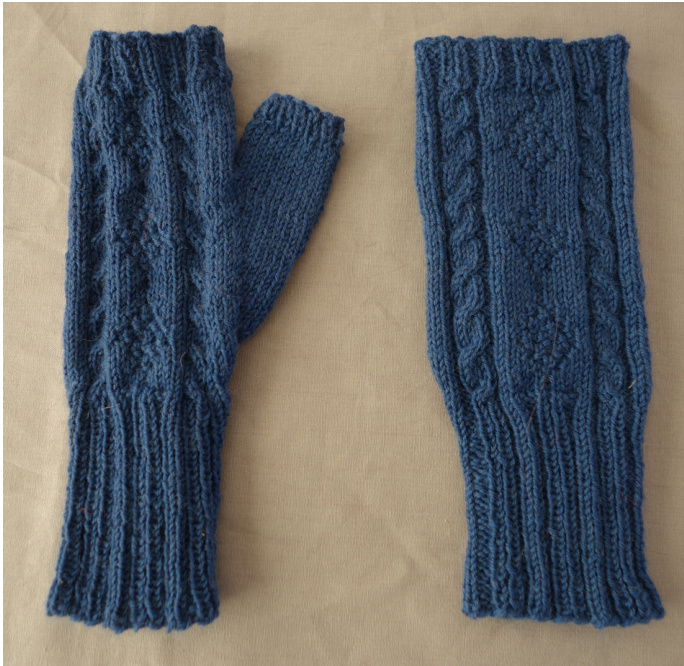
These mitts are an adaptation of the Filey sock pattern by Ingleside Belle, which itself was an adaptation of the Filey gansey sweater patterns that incorporate diamonds and cables. It's a simple moss stitch diamond pattern flanked by mirrored rope cables. The ribbing pattern is designed to frame each panel with knit stitches and to separate them with purl columns, while also allowing for the incorporation of increases for the cables. The top edge ribbing mirrors the cuff, allowing the pattern to flow back into the ribbing. The thumb is placed on the palm to keep the pattern centered on the back of the hand.
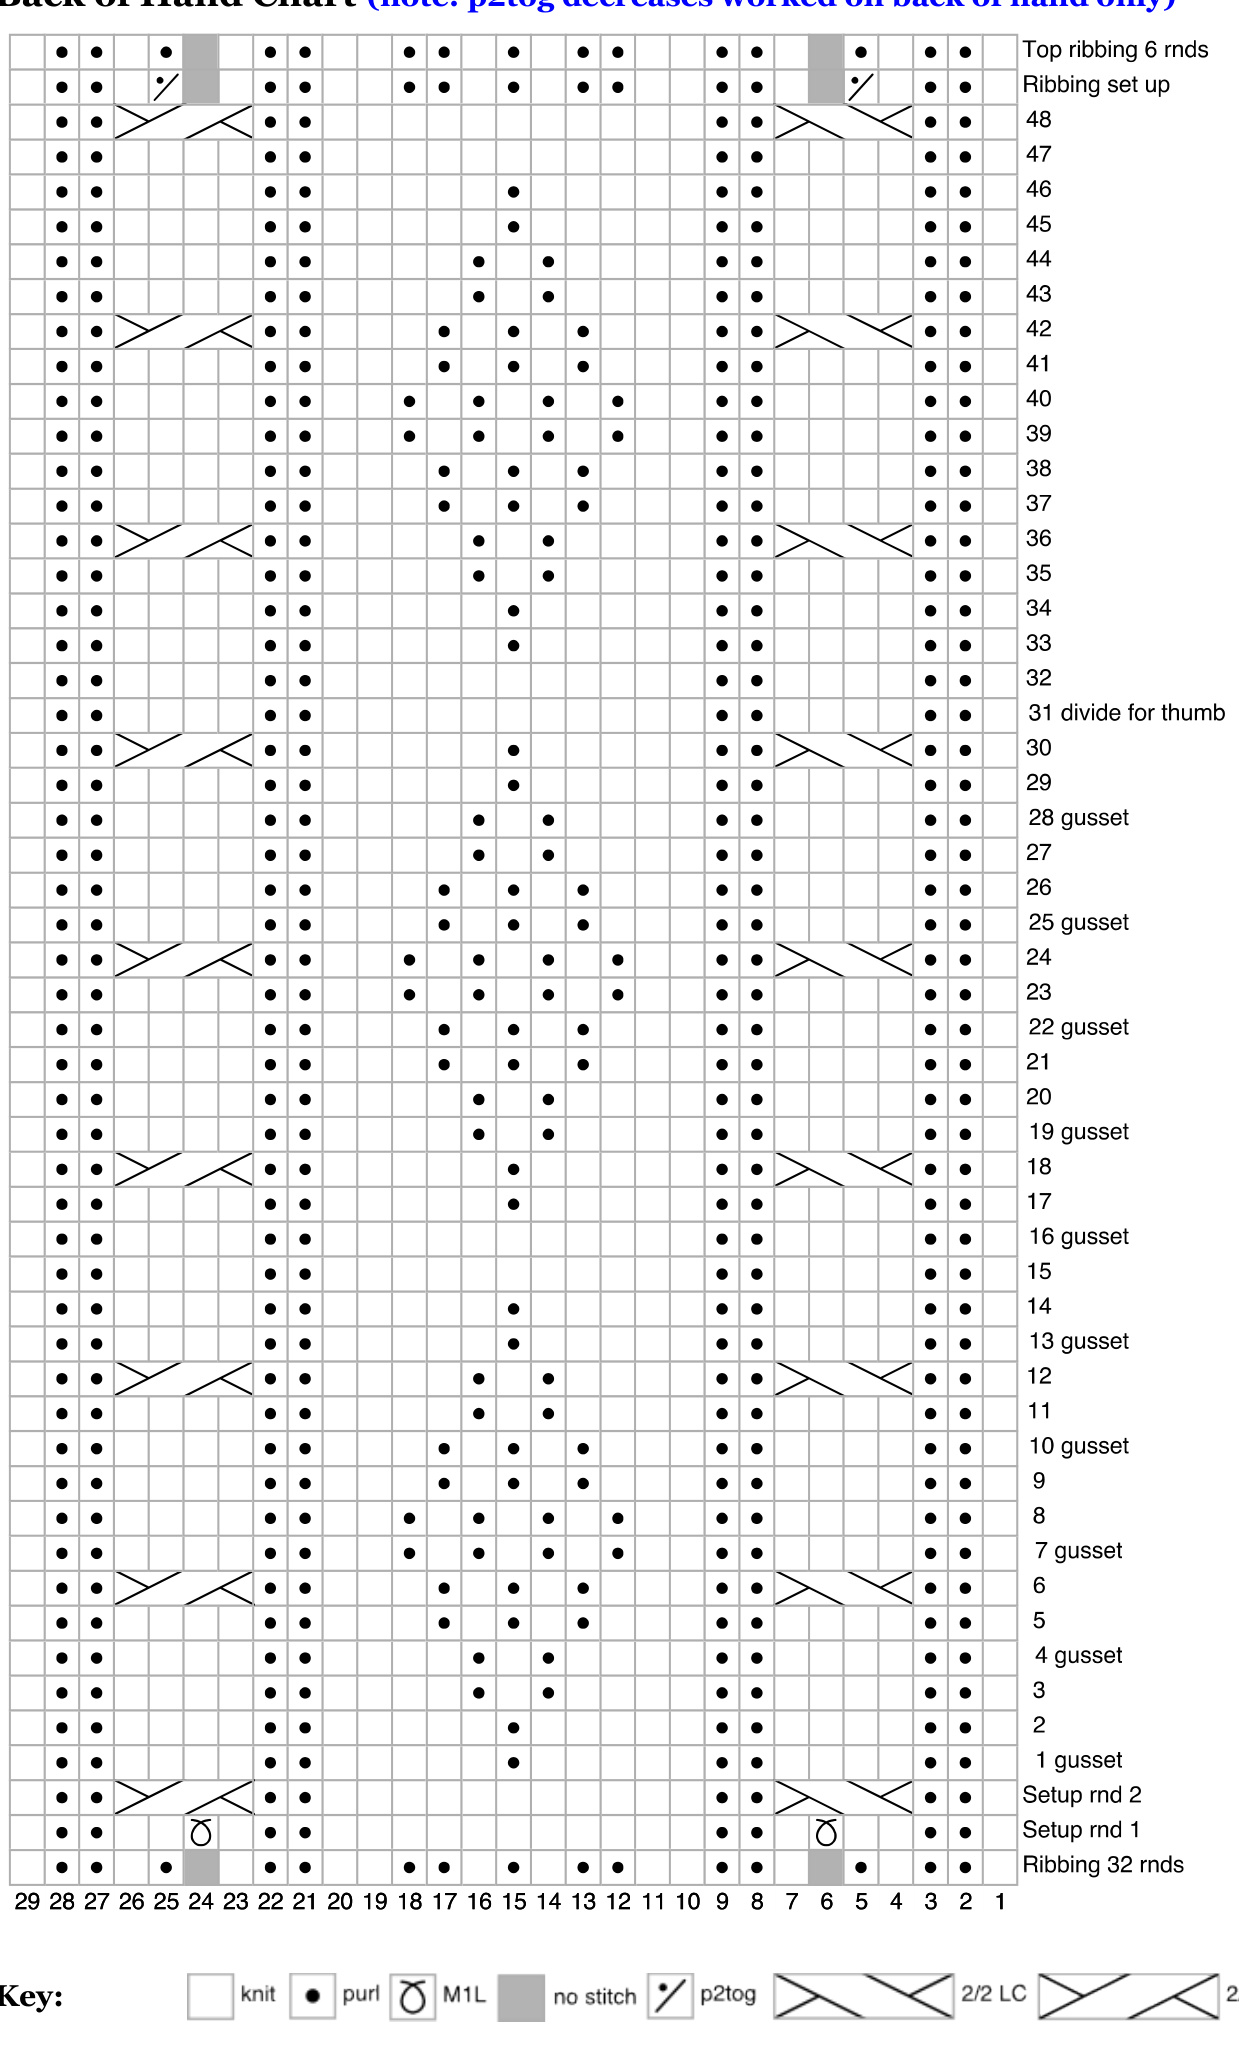
Written instructions have been provided for the chart-averse, but this is a good project for learning to use charts, if you haven't already. The entire back of the hand is in one chart, which includes set up rounds, as well as notations for rounds that have special instructions, making it easy to keep track of where you are.
@ 2015 by Roxanne R. Richardson, roxanne.richardson@gmail.com Adaptation ver 1.1 026-MT, 17 Jan 2015
Techniques required:
Row 12. k2tog all along row =9 sts Row 11. k3, \*(k2tog k1,) rep from \* to last 2 sts,k2tog Row 3. K3,\*(k2tog,k5,)rep from \* to last 6sts,k2tog, k4 Row 1. k3 \*(k2tog ,k6,)rep from \* to last 7 sts ,k2tog,k5 Row 5. k3,\*(k2tog,k4,) rep from \* to last 5sts,k2tog,k3 2nd and alt rows KNIT Knitting small circumferences in the round (your choice of dpns, Magic Loop using one long circ, or two circs). SIZE To fit hands 7-8" in circumference, when measured around hand, just above thumbpit.
FINISHED MEASUREMENTS
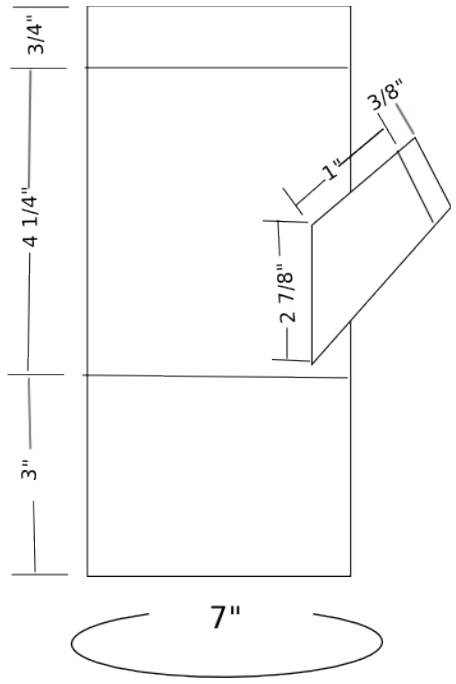
7" inches in circumference (after blocking), 8" in length (3" cuff, 5" hand). The finished mitt is quite stretchy. approx. 165 yds fingering weight yarn. Sample knit in Opal 4-ply solid (75% wool, 25% Nylon), 450 yds/100 g. (165 yds/35 g used.) Any similar “4-ply” fingering weight yarn will work, including Cascade Heritage, Regia 4-ply, Meilenweit 4-ply, and others. Solid colors work best. Needles 2.5 mm/US 1 1/2 needles for working small circumferences (dpns, two circs, or one long circ, depending on preferred method), or needle size you need to get required gauge. Notions cable needle stitch markers waste yarn yarn needle
GAUGE
32 sts and 43 rows per 4" in Stockinette Stitch. To save time, always take time to check gauge.
PATTERN NOTES Abbreviations cn cable needle EOR End of round inc increase K tbl Knit through back loop K tfl Knit through front loop LHN Left hand needle M1L Make 1 left inc; with LHN, lift running thread between sts from front to back. K tbl. M1R Make 1 right inc; with LHN, lift running thread between sts from back to front. K tfl. P2tog Purl 2 sts together pm place marker Rep repeat RHN Right hand needle Rnd(s) Round(s) sm slip marker St st Stockinette stitch 2/2 RC 4-st Right Cross: sl 2 sts to cn and hold to back of work, k2 from LHN, k2 from cn. 2/2 LC 4-st Left Cross: sl 2 sts to cn and hold to front of work, k2 from LHN, k2 from cn.
Stitch patterns
Left Cross Rope Cable Rnds 1-5: P2, k4, p2. Rnd 6: P2, 2/2 LC, p2. Rep Rnds 1-6for Left Cross Rope Cable pattern Right Cross Rope Cable Rnds 1-5: P2, k4, p2. Rnd 6: P2, 2/2 RC, p2. Rep Rnds 1-6 for Right Cross Rope Cable pattern Moss Diamond Rnds 1 & 2: K5, p1, k5. Rnds 3 & 4: K4, p1, k1, p1, k4. Rnds 5 & 6: K3, (p1, k1)2x, p1, k3. Rnds 7 & 8: K2, (p1, k1)3x, p1, k2. Rnds 9 & 10: K3, (p1, k1)2x, p1, k3. Rnds 11 & 12: K4, p1, k1, p1, k4. Rnds 13 & 14: K5, p1, k5. Rnds 15 & 16: Knit. Rep Rnds 1-16 for Moss Diamond pattern
of Hond Chont (noto. notoc doenooaoa wworlod on hoel ofhond o
PATTERN INSTRUCTIONS
Work one each of Right Mitt and Left Mitt. The back of hand is worked the same for both mitts, while the thumb is placed on the palm just after the mid-round for the right mitt and just before the end-of-round for the left mitt. When the instructions differ for each mitt, side-by-side instructions are provided. Full written instructions are below. If desired, back of hand pattern can be worked by following the chart. The chart indicates which rnds have special instructions. Refer to written instructions below to guide you for what to do on those rnds.
Cuff
CO 54 sts. If using circs, divide sts evenly amongst needles. If using dpns, divide sts as desired, placing markers for EOR and the midpoint of the round. Join in round and work in rib as follows for first half of the round (back of the hand): K1, p2, k1, p1, k1, p2, k2, p2, k1, p1, k1, p2, k2, p2, k1, p1, k1, p2, k1; rep rib patt for second half of the round (palm). Work sts as they present (k the knits and p the purls) until cuffis 3" long (about 32 rnds), or to desired cuff length.
Back of Hand and Gusset
Set up rnd 1: Back of hand: K1, p2, k2, m1L, k1, p2, k11, p2, k1, m1L, k2, p2, k1 (29 sts); palm: k to EOR. 56 sts. Set up rnd 2:
| Left Mitt | Right Mitt |
| Back of hand: K1, p2, 2/2 LC, p2, k11, p2, 2/2 RC, p2, k1; palm: k21, place gusset marker, k2, place gusset marker, k to EOR. | Back of hand: K1, p2, 2/2 LC, p2, k11, p2, 2/2 RC, p2, k1; palm: k4, place gusset marker, k2, place gusset marker, k to EOR. |
Rnds 1-30
Back of hand: First 29 sts of each round are the back of hand, which are worked as follows: K1, Left Cross Rope Cable pattern, Moss Diamond pattern, Right Cross Rope Cable pattern, k1. Note that Moss Diamond is a 16-rnd rep while rope cables have a 6- rnd rep. Palm/gusset: The rest of the round is the palm, worked in stockinette, with gusset increases worked on Rnds 1, 4, 7, 10, 13, 16, 19, 22, 25, 28. For each gusset inc rnd, work palm as follows: K to gusset marker, sm, m1L, k to next marker, m1R, sm, k to EOR. 2 sts increased. For each rnd where there are no gusset increases: Knit across, slipping markers when you come to them. At the end of Rnd 28, you will have 22 sts between the gusset markers, 57 sts total on the palm, and 76 sts total for the entire mitt. Work even for two more rnds, in estab patt for back of hand and St st for palm.
Rnds 31-48 Divide for thumb
Rnd 31: Work estab patt for back of hand, then work palm as follows: K to gusset marker, remove marker, sl next 22 sts onto waste yarn, remove marker, CO 2 sts using backwards loop CO, k to EOR. 56 sts (27 sts for palm). Work mitt even through Rnd 48. You will have completed 3 reps of Moss Diamond and 8 reps of the rope cables.
Rnds 49-55
Top Ribbing Set up Rnd: K1, p2, k1, p2tog, k1, p2, k2, p2, k1, p1, k1, p2, k2, p2, k1, p2tog, k1, p2, k1, rep for palm, replacing each p2tog dec with p1. 54 sts. Work rib as estab, for 6 more rnds, or desired length. BO in patt.
THUMB
Move 22 sts for the thumb from waste yarn to needles to work in round. Join yarn and PU 4 sts along the hand side of the thumb hole (where the 2 sts were cast on after the thumb sts were put on waste yarn). Rnd 1: K21 sts, k2tog (first PU st together with last st of original thumb sts), k2, ssk (last PU st and first st of rnd). 24 sts Work in St st for 11 more rnds, then work 3 rnds kip1 ribbing. BO in patt.
FINISHING
Weave in all ends. Use yarn tail where yarn was joined to thumb to close any holes at base of thumb. Block. (See Blocking Tips on next page)
Acknowledgements
I owe a great debt of gratitude to my Ravelry test knitters, who enthusiastically knit these mitts in record time, and whose comments improved the pattern immensely! Thank you, bgow (Bonnie Gowans), yosemiteknitter (Ruth May), LauraKnitsPA, hsuv, and knovak.
Blocking Tips
Cables pull in, so the finished mitts might look misshapen when they're finished (like the left mitt in photo) Once they're on your hands, they'll look fine, so all you really need to do to "block" them after washing is lay them flat to dry. For gift giving, it's nice to do some structured blocking of the mitts (like the right mitt in the photo), but it's not necessary.
Supplies:
A couple of dpns (I used 2.75 mm/US 2) Blocking pins Something to block them on\*
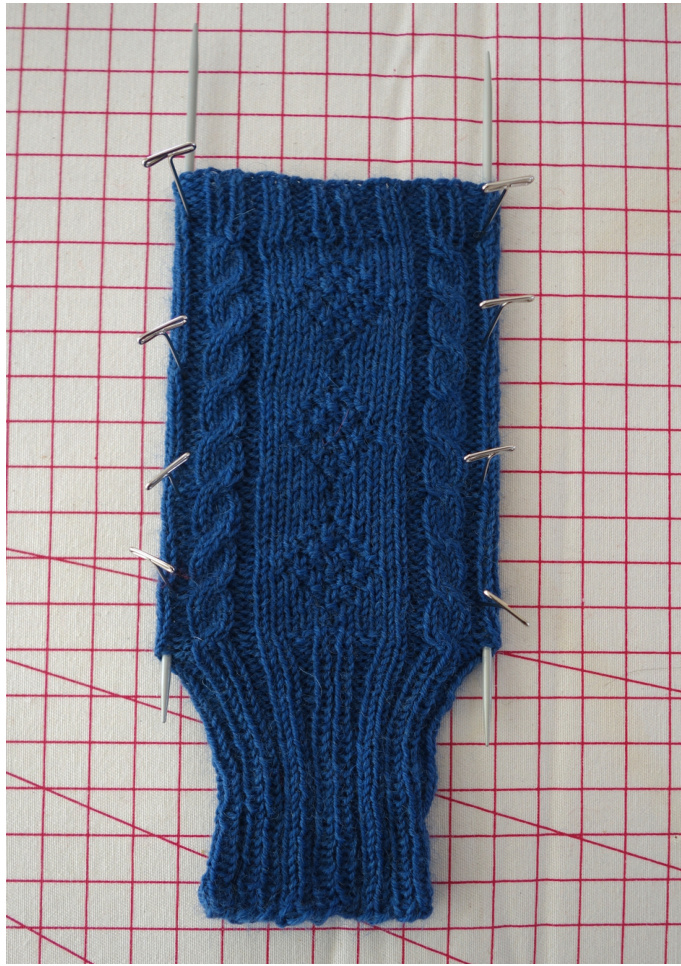
Insert dpns inside mitts, letting points come through base of hand, above the ribbing. Fold the thumb under the fabric. Stretch them to be 3.5" wide, and line up the first knit at each edge. Poke T-pins through the fabric, next to the dpns. \* I use a quilter's pad, because the 1/2" squares help me line things up, but you can block them on anything you can stick a pin in that can tolerate moist wool, and use a ruler to make your measurements.


