Fuzzy 1-tpo
pixelatecmushroom.etsy,com

Hello and welcome
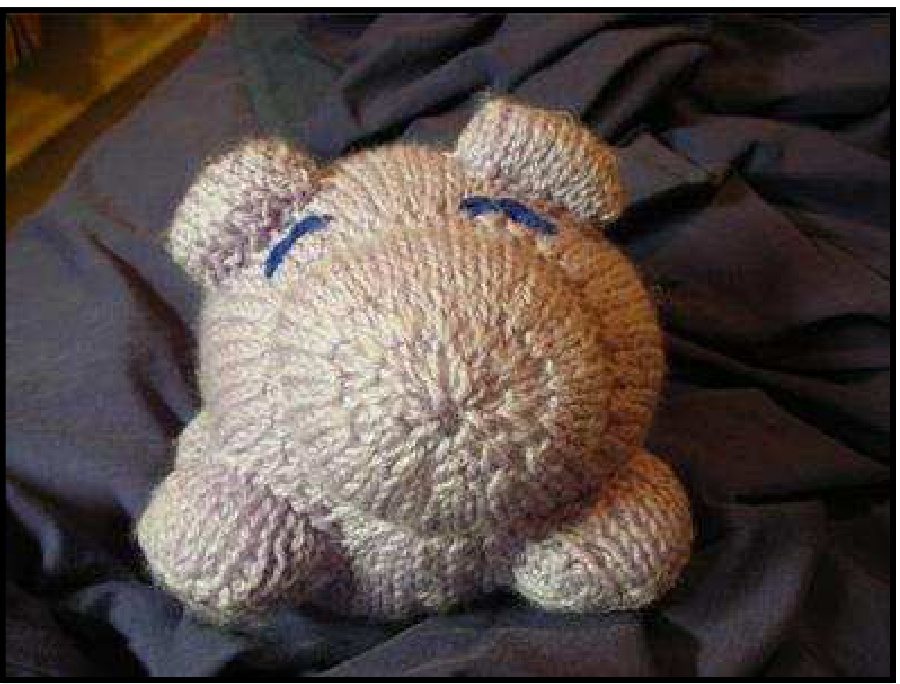
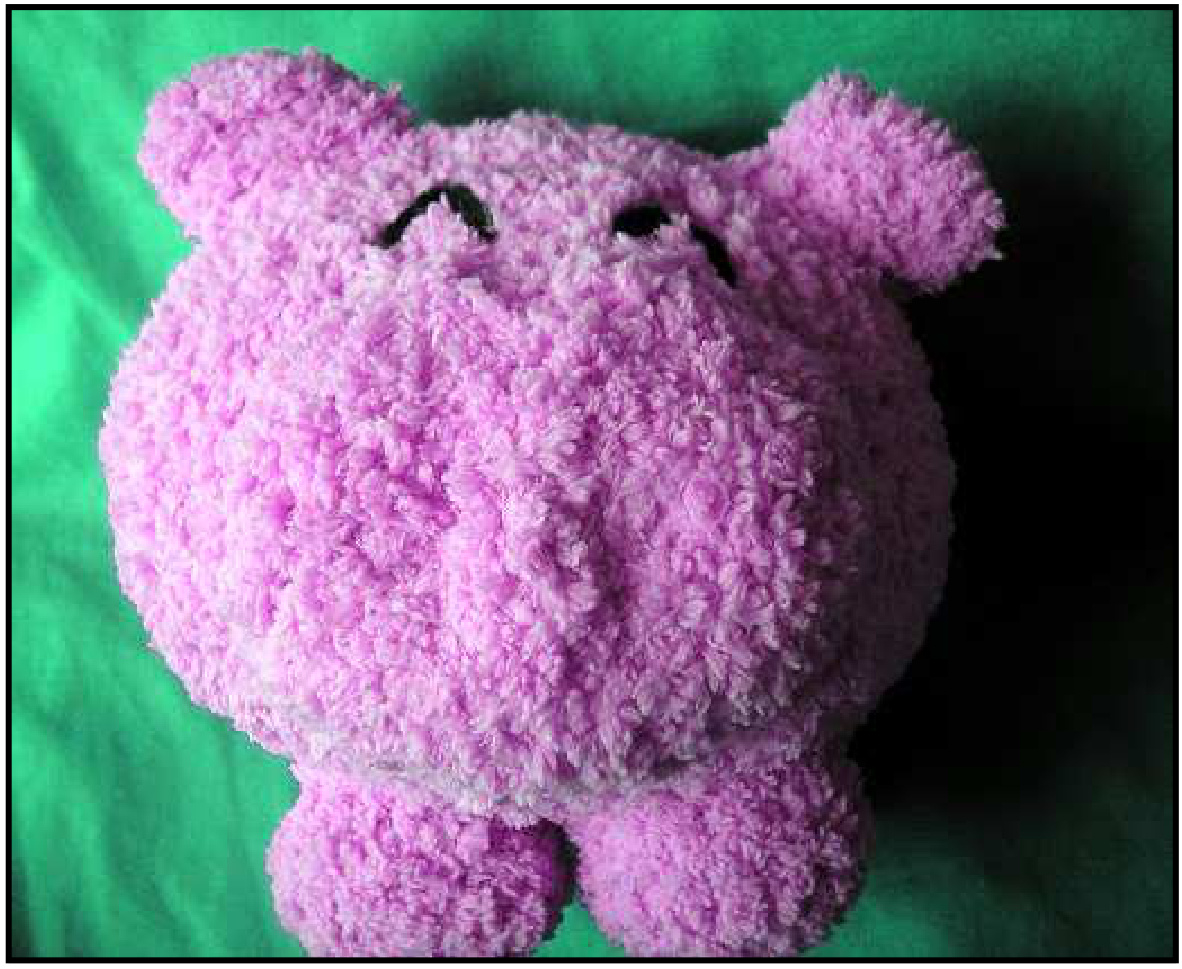
This is a quick and easy pattern for the cute fuzzy Hippo you can see above. He is so lovely to hug, great to throw and catch, and generally fun to make. He is also simple and compact so that no small pieces would come off if this were a gift for a child. This pattern is designed so that you will be able to print page 3 and 4 if you would like to make the pattern portable & take it with you to knit on the go. Page 1 and 2 contain materials and general instructions. It should be noted that because of the fuzzy wool, it is not completely disastrous if you miss an increase or decrease here and there. Your finishing sewing does not need to be neat, and will not look terrible if you make mistakes. Hope you enjoy creating him, and I would love to see any photos of your finished Hippo if you would like to send it to me( pixelatedmushroom@gmail.com ). Feel free to contact me if you have any worries or questions.
Materials
A ball of fuzzy wool Scrap of black or dark coloured wool (for the eyes) Knitting needles (3mm) Sewing needle for making up Stuffing
Skills Needed
Only the basics are needed to make this cute Hippo. If you have never made a soft toy before this is a great place to start, and if you're already well-versed in knitting this will be a fun and quick project. Below are the skills needed to create the Hippo: Cast on Knit Purl Increase Decrease $=$ knit two sts together Cast off
Ears (make 2)
Cast on 14 01 Dec, knit10, dec = 12 02. Purl 1 row 03. Knit 1 row 04. Purl 1 row 05. Knit 1 row 06. Purl 1 row 07. Inc1, Knit10, inc1 $=$ 14 08. Purl 1 row Cast off leaving a long tail
Using your sewing needle, sew up the side seems to make a small pocket. Add a little stuffing to the inside of the ears.
Body
The body and snout are made all in one piece. Starting at the tail end and progressing towards the snout. The seam will run underneath the Hippo as shown in the picture to the right Cast on 4 01. Increase in every stitch $=8$ 02. Purl 1 row 03. Inc in every stitch $=16$ 04. Purl 1 row 05 \*knit1, inc1\* repeat $=24$ 06. Purl 1 row 07. \*knit1, inc1\* rpt $=36$ 08. Purl 1 row 09. Knit 1 row 10. Purl 1 row 11. Inc in every stitch $=$ 72 12. Purl 1 row 13. Knit row 14. Purl 1 row 15. Knit 1 row 16. Purl 1 row 17. Dec, knit10, dec, knit44, dec, k10, dec $=68$ 18. Purl 1 row 19. Knit20, dec, knit24, dec, knit $20=66$ 20. Purl 1 row 21. Knit 1 row 22. Purl 1 row 23. Knit 1 row 24. Purl 1 row 25. \*knit3, dec\* repeat $=53$ 26. Purl 1 row 27. \*knit2, dec\* repeat $=40$ 28. Purl 1 row 29. \*inc1, knit1\* repeat $=60$ (start of nose) 30. Purl 1 row 31. Knit 1 row 32. Purl 1 row 33. \*knit2, dec\* repeat = 45 34. Purl 1 row 35. \*knit2, dec\* repeat = 34 36. Purl 1 row 37. \*knit1, dec\* repeat $=23$ 38. Purl 1 row 39. \*knit1, dec\* repeat $=$ 16 40. \*purl1, dec\* repeat $=$ 11 41. \*knit1, dec\* repeat $=8$ 42. Decrease all $=4$
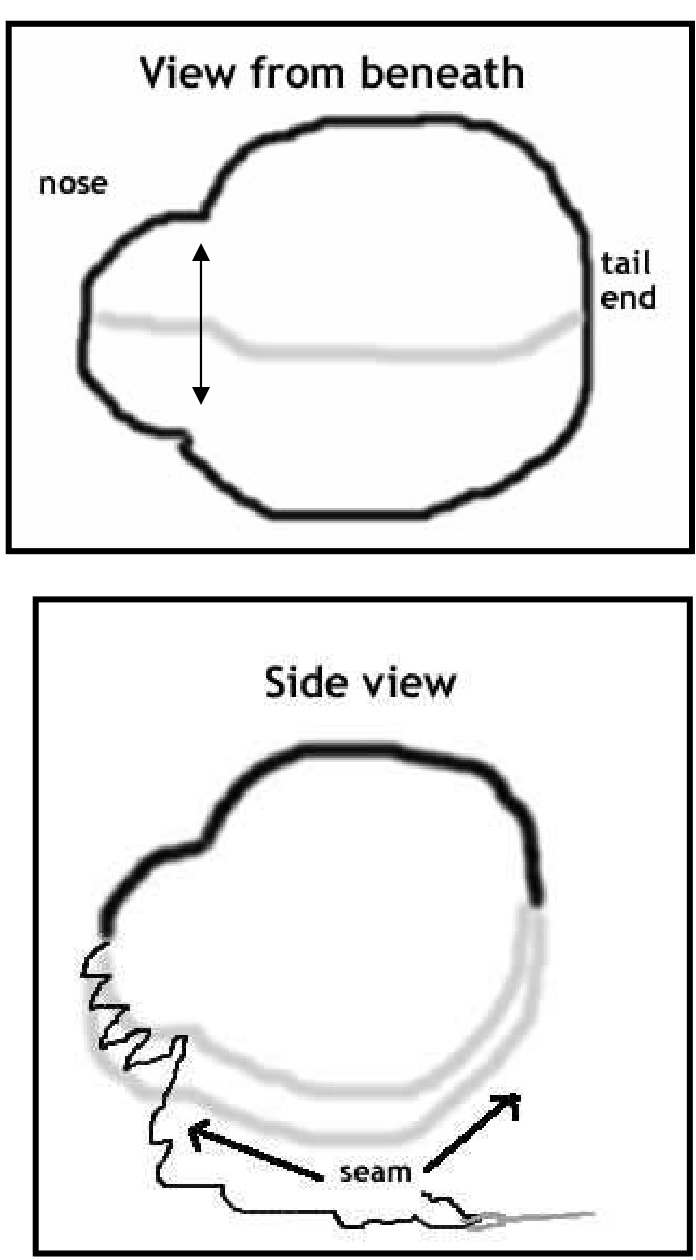
Take a piece of long wool and sew around the stitches that mark the nose area, pulling slightly tight to make the nose more prominent. See arrow in 'view from beneath'
rest of the body seam.
Eyes
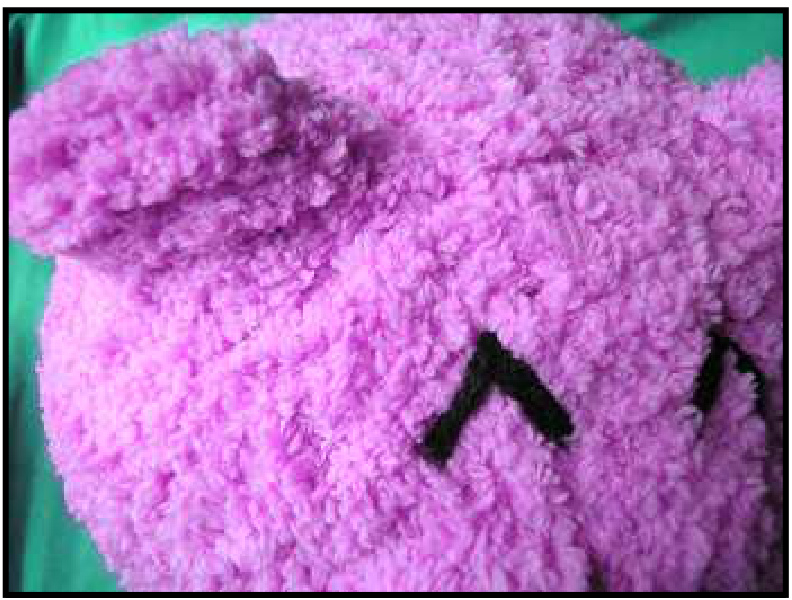
It is easier to sew the Hippo's eyes now that to do so once he is stuffed. Thread some of your black/dark wool onto your sewing needle, and tie a knot or three at the end to secure it in place. Enter through the hole you have left in the seam and create two ^ shapes above the snout. Stuff the body firmly and sew up the Feet (make 4) Cast on 4 01. Increase all stitches $=8$ 02. Purl 1 row 03. Increase all = 16 04. Purl 1 row 05. Knit 1 row 06. Purl 1 row 07. Purl 1 row (for edge of toes) 08. Purl 1 row 09. Knit 1 row Cast off leaving a long tail of thread
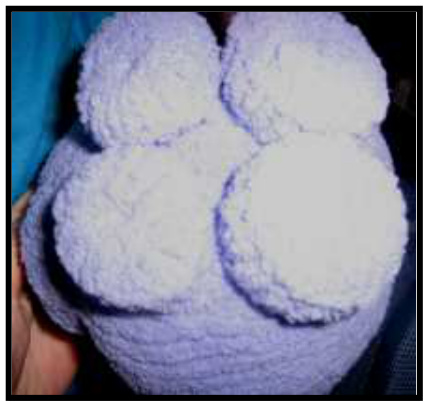
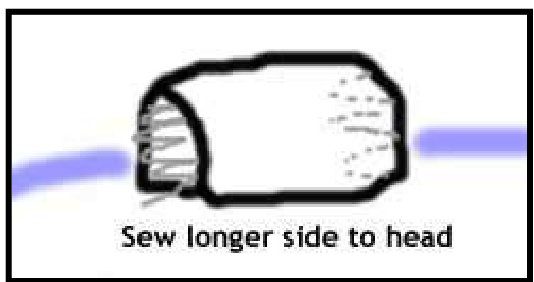
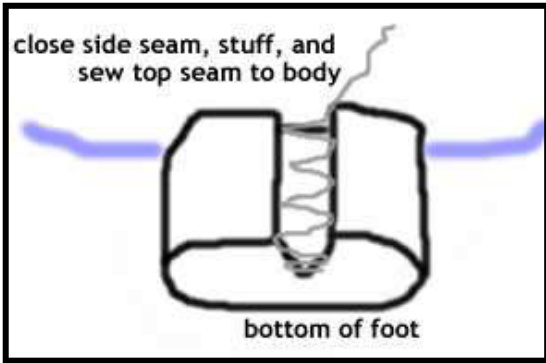
Add a sewing needle to this thread & sew up the base of the foot, then up the side. Add a little bit of stuffing and then carefully sew the foot to one corner of the body. If you have used fluffy wool you do not need to be too neat with your sewing, as long as you leave room for 4 feet to be added. Sew in the ends of thread, and... That's it! You're done! Hope you enjoyed this pattern Happy Knitting!
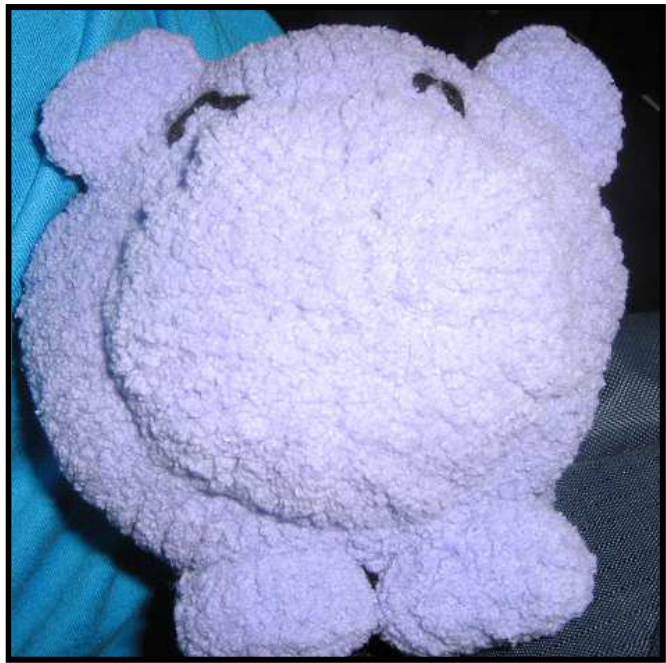
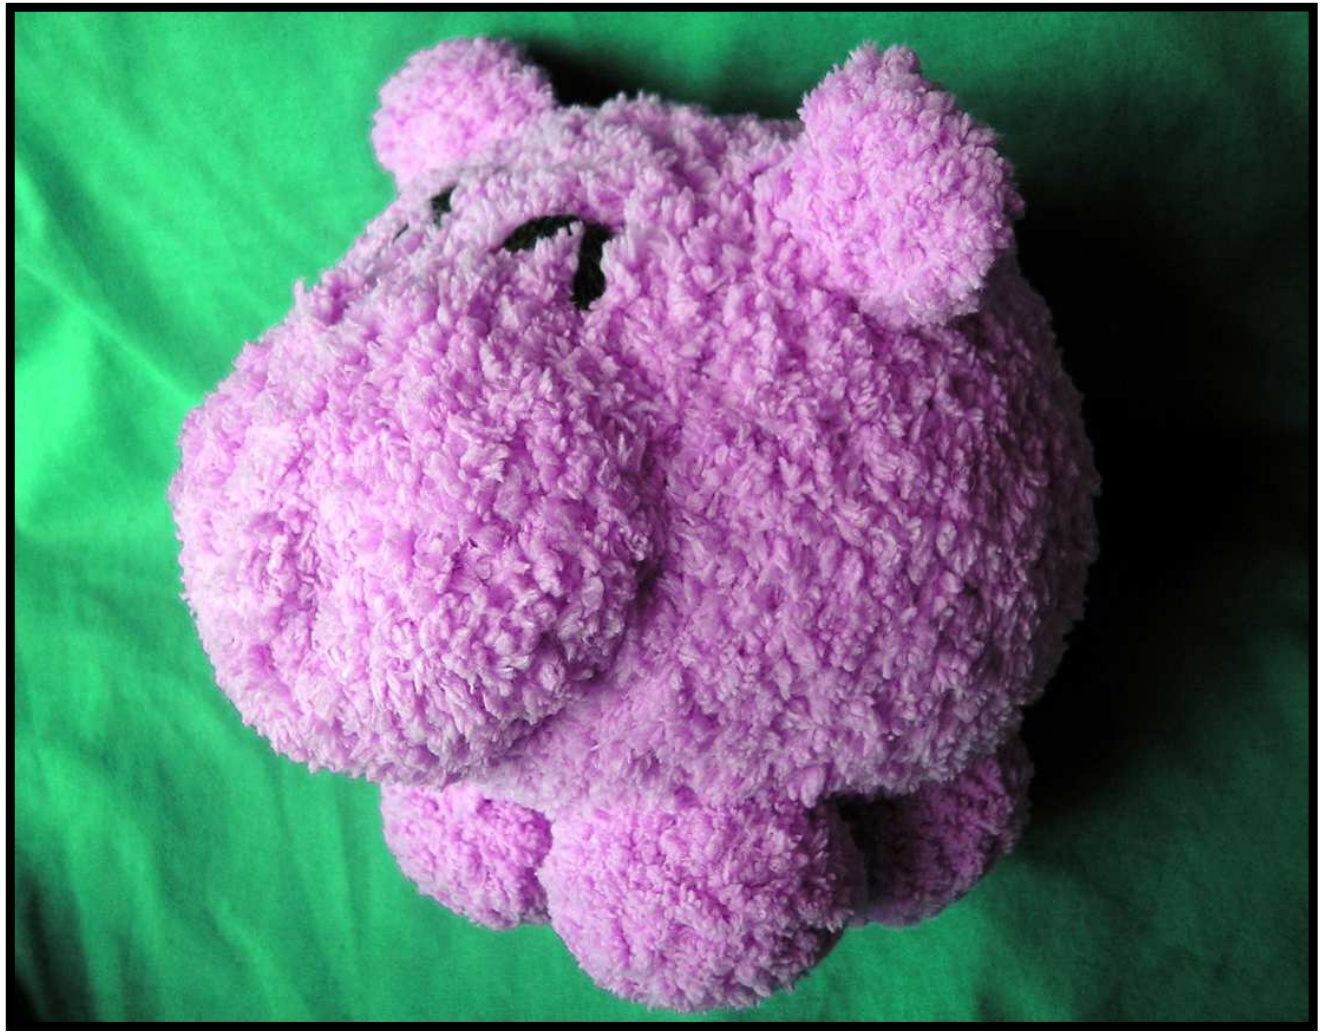
Variations with different kinds of wool: