Little Pumpkin
FREE Crochet Toy Pattern Pattern designed by Masha Pogorielova @ 2014
It is illegal to sell this pattern, distribute it, or reproduce it or use any way without the designer's permission. You are welcome to sell the finished toys made from this pattern wherever you want. If you have any questions please write me to mashutkalu@mail.ru My website "when they live their own lives.." http://mashutkalu.com/en Note: this toy is crocheted in continuous spirals in backloops right side out, Do not join or turn until otherwise is instructed. Mark the first stitch of each round. In parentheses you can see the quantity of sts in each round or the number of rounds that are crocheted without any changes.
Abbreviations: (USA terminology)
ch-chain sl st-slip stitch sC - single crochet (pull up a loop and then yarn over and pull it through again) dec - decrease (2 sc crochet together) inc - increase (crochet 2 sc in the next st)
Materials and supplies:
orange and green yarn (wool, cotton or acrylic); - hook size that matches the yarn; I've used Baby Yarn 100% acrylic 300 m in 100 g, hook size 1.25 mm. The toy size is about 6 cm. - a tapestry needle; - polyester toy stuffing;
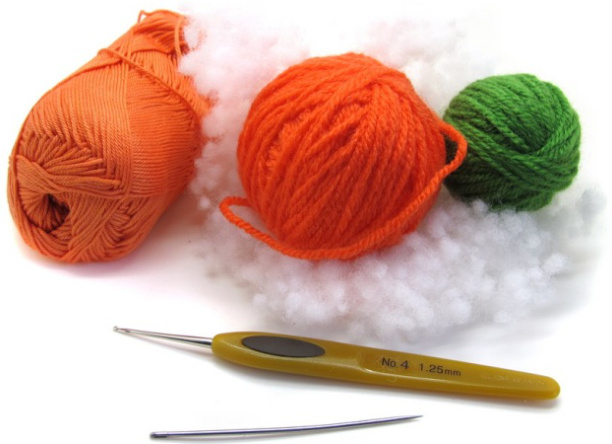
- orange DMC Perle cotton #5 or any other cotton yarn to make the tightenings and long needle.
Pumpkin
Start with orange. Crochet in backloops only: 1 - 2 ch, 6 sc into the 2nd ch from hook(6) 2 - 6 inc (12) 3 - (1 sc, inc) 6 times (18) 4 - (2 sc, inc) 6 times (24) 5 - (3 sc, inc) 6 times (30) 6 - (4 sc, inc) 6 times (36) 7 -(5 sc, inc) 6 times (42) 8 - 17 - 42 sc (10 rounds) 18 - (5 sc, dec) 6 times (36) 19 - (4 sc, dec) 6 times (30) 20 - (3 sc, dec) 6 times (24) Doing the last sc change the yarn to green. You will get:
Continue to crochet with green yarn: 21 - in back loops (2 sc, dec) 6 times (18) Stuff the pumpkin. Make sure you stuffed it very well! Not as tough as a stone because it will be difficult to make the tightenings. But if you stuff not enough it will become too flat after tightening.
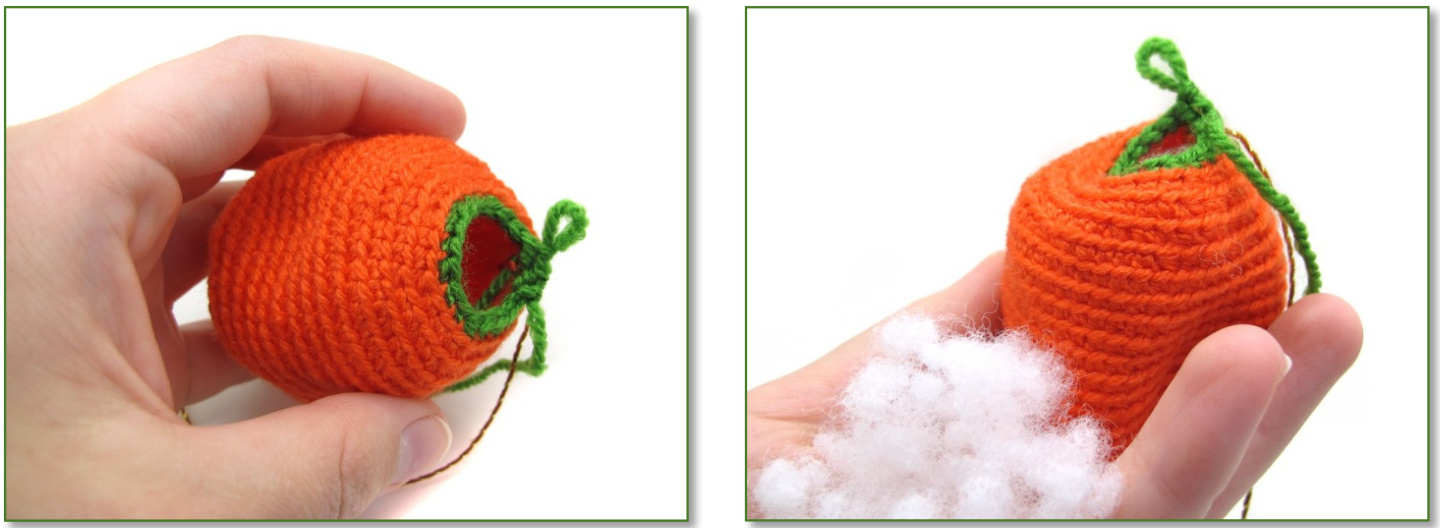
Continue to crochet in both loops: 22 - (1 sc, dec) 6 times (12) 22 - 6 dec (6) add a little more stuffing 23 - dec, 1 sc, 8 ch, 5 sc into the 2"d ch from the hook, continue to crochet 1 sc in each ch, you will do 6 sc in total. Fasten off. Tighten the small opening. Sew the green tail around its edge or just leave as it is now.
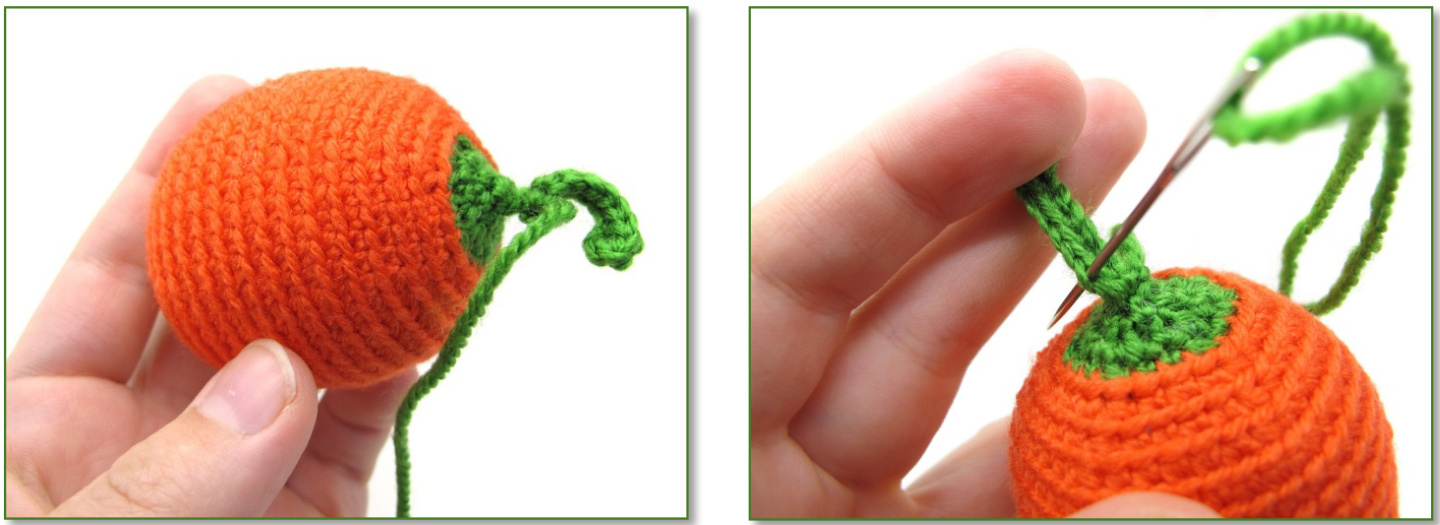
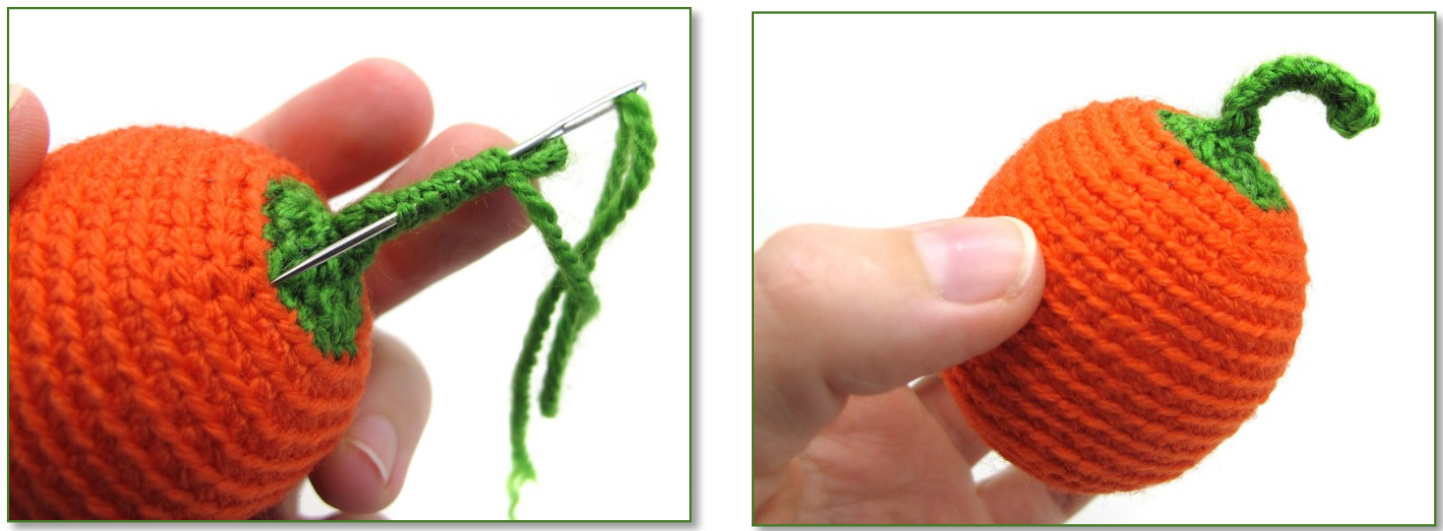
sewed the green tail hide the yarn end inside it as it is shown in the next pag
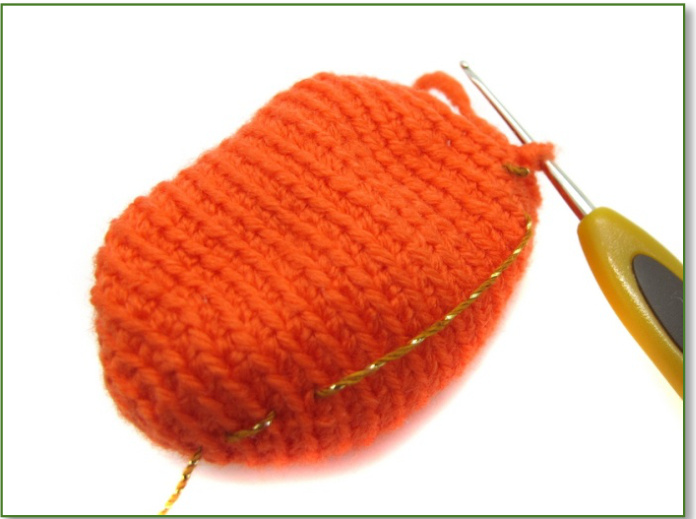
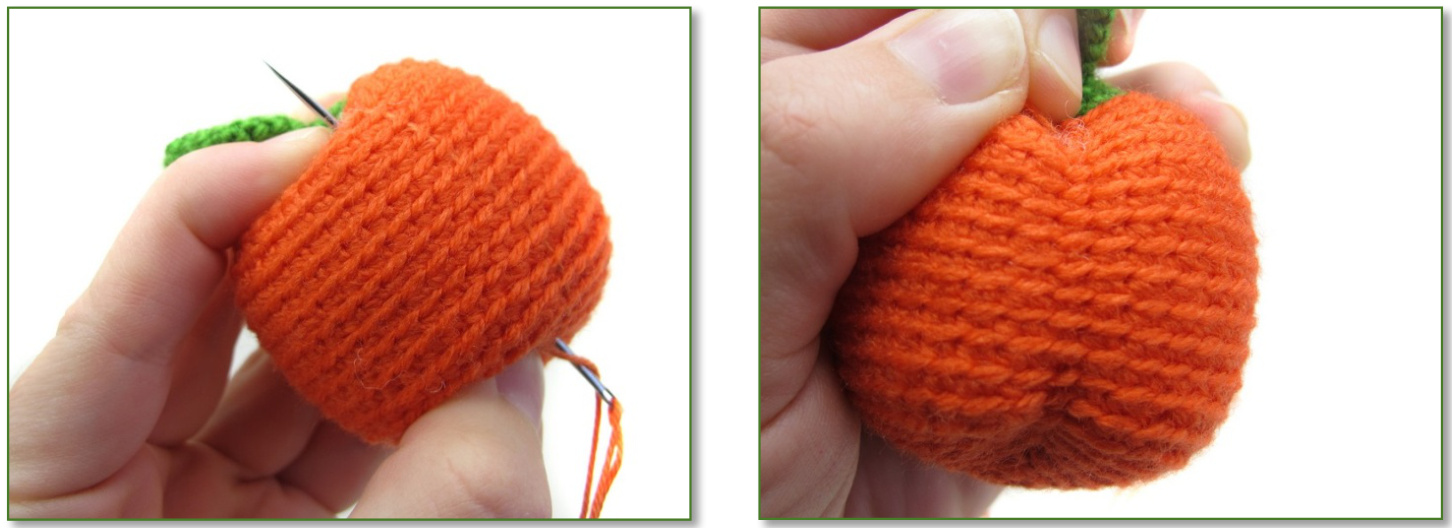
You've got your future pumpkin almost done. Don't be confused by its long shape. If it were round now it would become too flat after the shaping. Our last step is to tighten our pumpkin. Cut a long piece of cotton yarn. Cut it as long as possible but make sure that it is still comfortable to deal with. Thread it into the needle. Fix the yarn at the top of the orange part. Put the yarn down just to look where it will be the right position for it. You can mark it with pins or small piece of yarn. I don't mark at all.
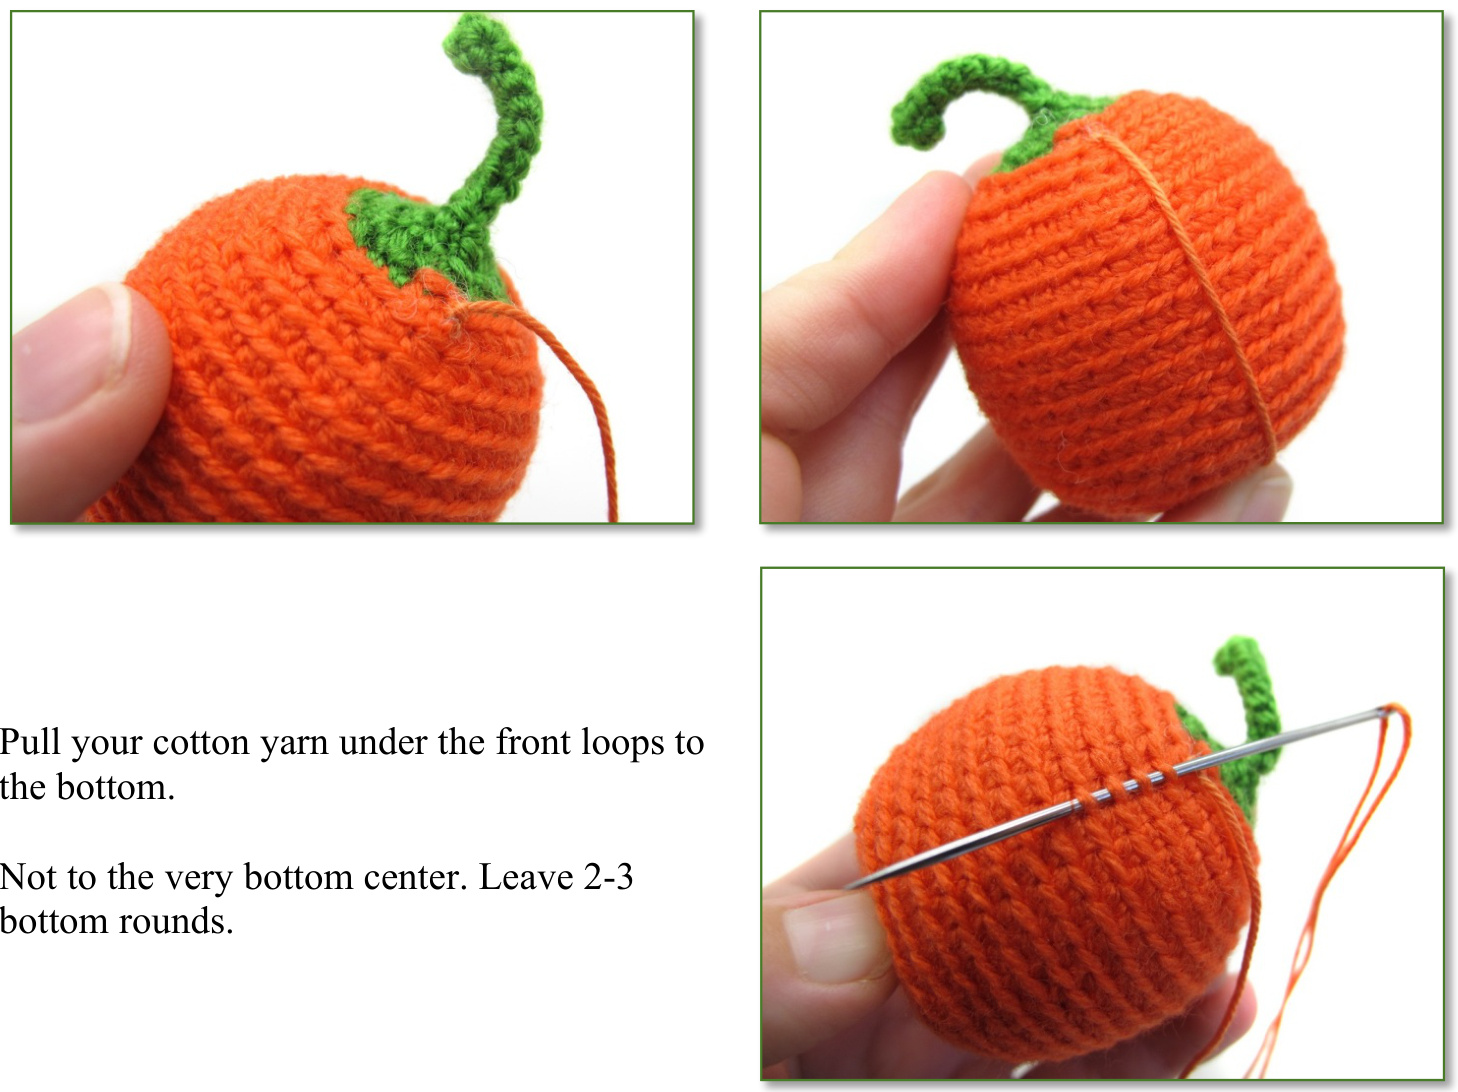
Pierce your pumpkin from the bottom to the top - push the needle to the same position where you started. And pull hard to tighten the pumpkin:
Repeat the tightening one more time right at the same place. Fix it with a little knot.
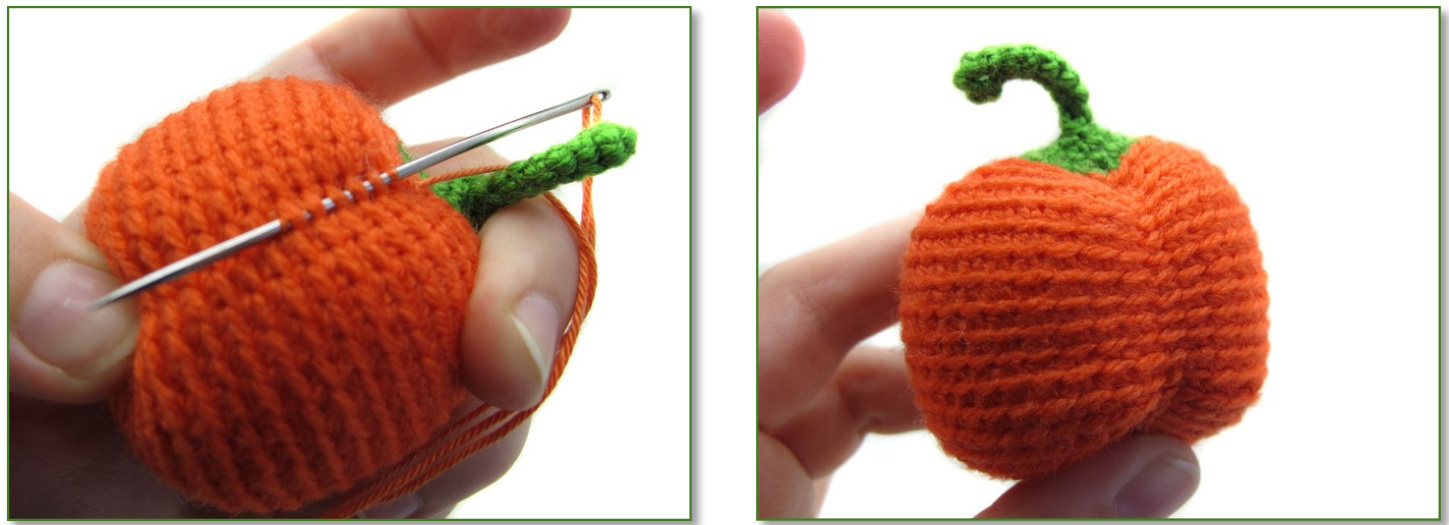
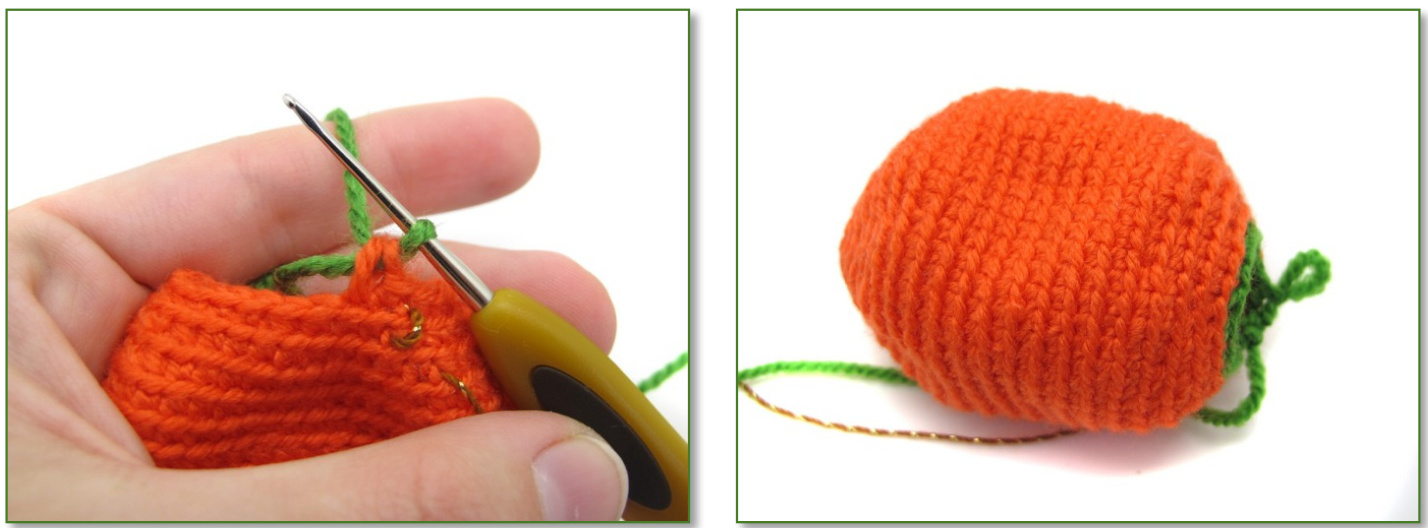
Pierce the pumpkin one more time. But push the needle 3 stitches left or right from the first point. Try the yarn down to find the right place for the second tightening:
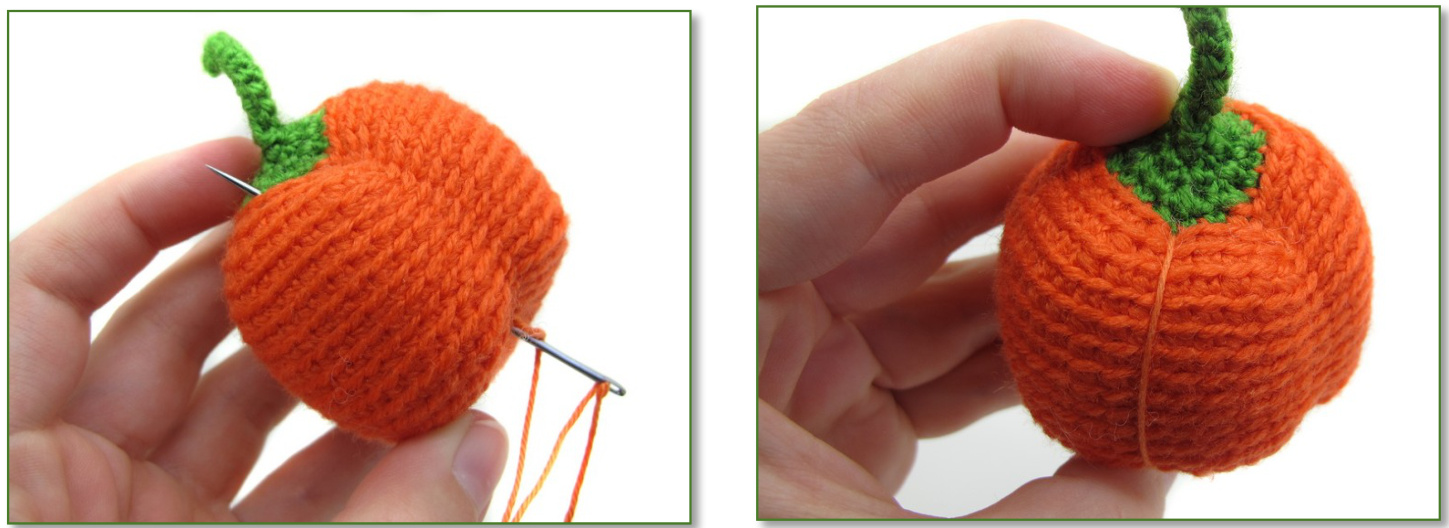
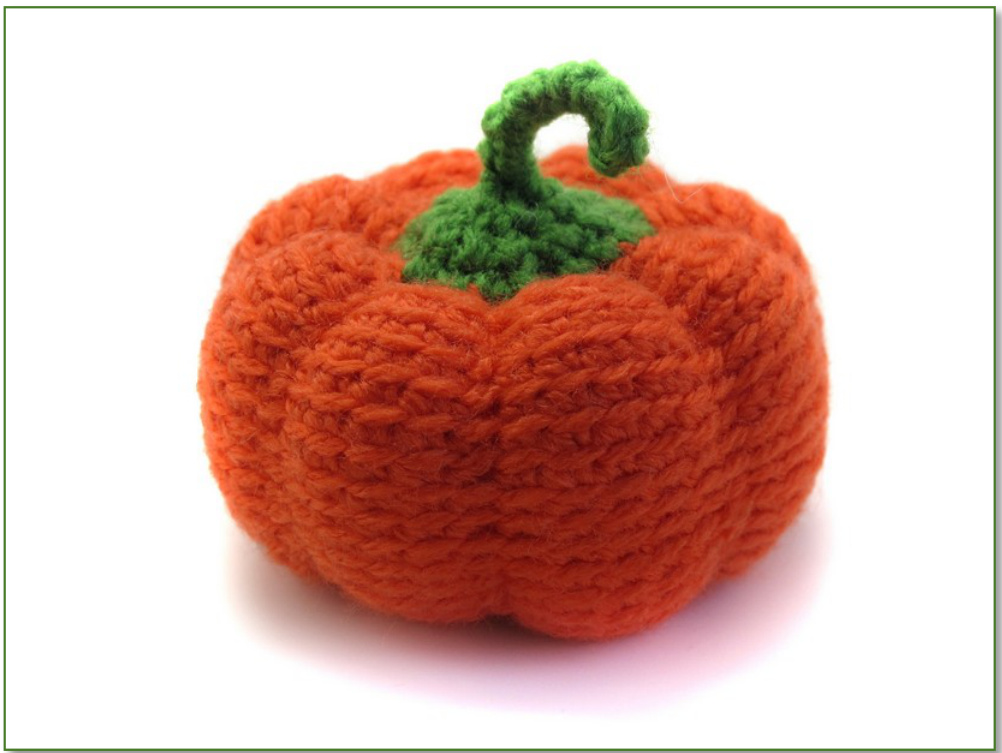
Repeat the double tightenings around the pumpkin with the same interval between them. I usually make 8 of them. If you notice that one of your tightenings is not as deep as the others just make an additional one at the same place. You will get a nice little pumpkin like this one:
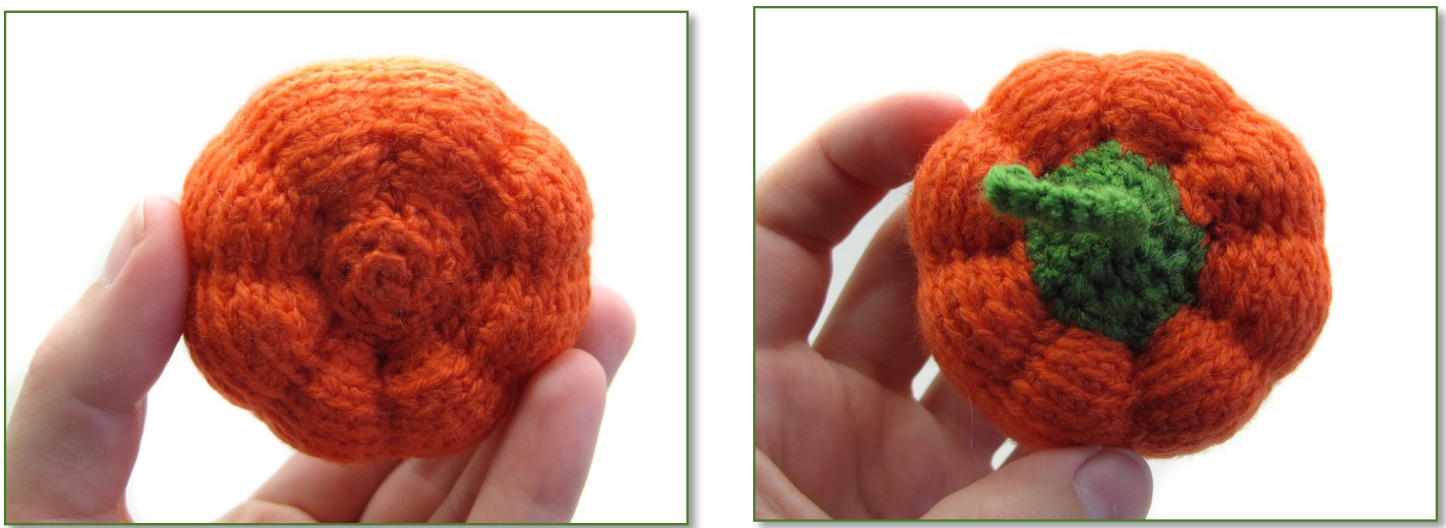
A nice souvenir. kitchen decoration, Hallowing present, key chain, beautiful pincushion or baby toy! Crochet toy patterns by Masha Pogorielova (mashutkalu) When they live their own lives.. http://mashutkalu.com/en


