Camera Sock
By Janelle Fine (bioengiknitter) Yarn: Any leftover yarn. My sock is done with Lorna's Laces Shepherd Sport (Aslan and Natural), and weighs 14g. According to Ravelry, this amounts to 40yds. Needles: Whatever's needed for your yarn.I used US1.5/2.5mm DPNs. Gauge: You'll get your own and calculate how many stitches you'll need, in steps 1- 3. My gauge was 7.25 st/in.
1. Get stitch gauge for stockinette stitch in the round. I had this already measured from the socks I had made with the yarn, but you could knit a swatch if needed. A little bit of fudge in gauge in either direction isn't going to make a whole heap of difference, so if you have a gauge number for another yarn of about the same weight, I'd say that's good enough. But that's me. 2. Measure around your camera in the direction the sock will go around. My PowerShot is about 7.5" around. 3. Multiply your gauge by this length to get the number of stitches you'll need. For the ribbing later it's handy to have a multiple of 4, so subtract stitches from your total number until you get to a multiple of 4. I ended up with 52 stitches needed. 4. Use Judy's Magic Caston to cast on 8 fewer stitches than this total number. I cast on 40 but after getting it done realized that casting on a few more would have avoided the little sticky-outy parts I have on the bottom of the sock when the camera isn't super tight in there. So in retrospect I probably should have cast on 44. 5. Knit one round, arranging the sock on DPNs or circular(s) as you like. Increase “normally" as for a sock toe - increase two stitches at each end of the sock every other round. I did a kfb in the first stitch of one side, knit to the end of that side, and kfb in the last stitch. Repeat for other side, 4 stitches increased each increase round. Knit a plain round. Do the increase round again, for 8 stitches increased, up to your total number needed. 6. Knit in stocking stitch up from there, trying the sock on your camera every so often. Knit until you get to the strap on the camera. 7. (and this is where it's a bit cameraspecific) 1. If your strap not centered on the top (mine is like this), make a hole now only on the strap side. Knit to the center of the strap side, bind off 2, and continue around. On the next row, cast on 2 at the hole and continue. 2. If your strap is in the center, make two holes here, doing the above steps on both sides at the center of the sock. 1. If your strap is not centered, knit the ribbing until you can fold over the top and get the opposite side to reach the strap. Make a hole on the opposite side of the first one at this point in the same way as in step 7. Then knit a few more rounds of ribing. 2. If your strap is centered, knit ribbing for about 1.5" / 4cm.
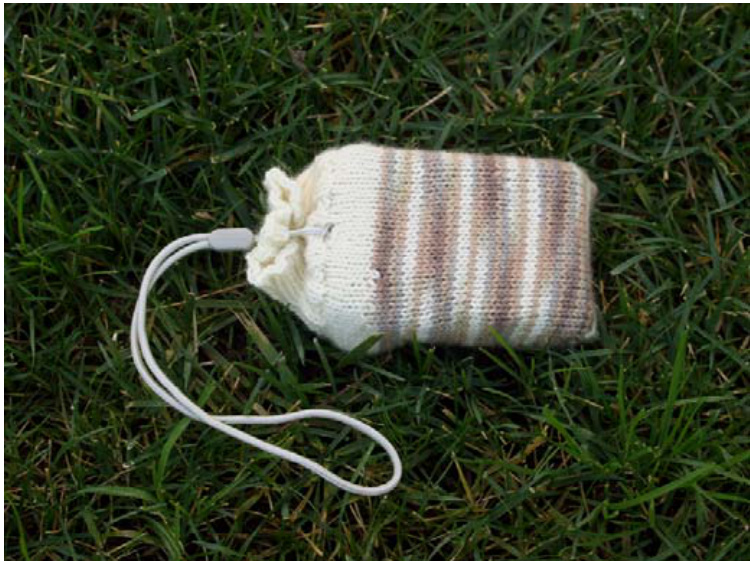
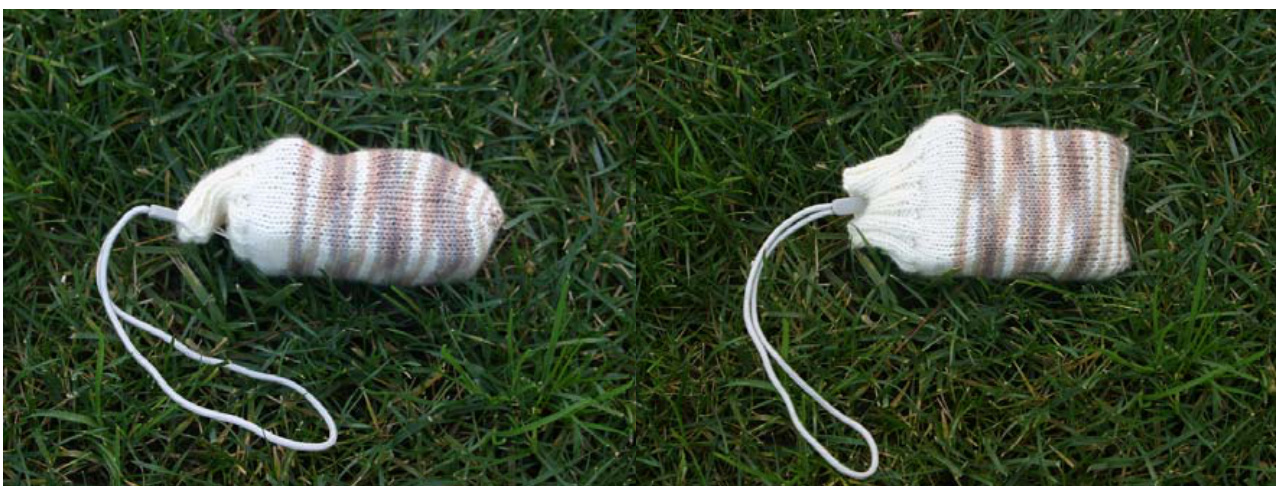
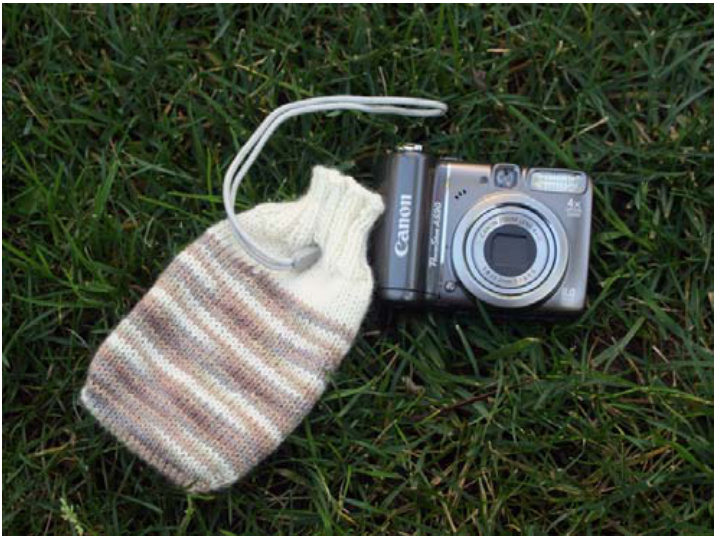
10. Bind off in pattern loosely so that it's not too hard to get the camera in Ta da! Camera sock. To use it put the camera in, being sure to notice which side the hole is on for non-centered straps. Pull the strap through the first strap hole. Then pull the strap through the higher strap hole (see picture below). To use the camera, take the strap out of only the top hole and remove the camera, letting the sock hang down from the top of the strap (see top picture).