Double-knit Snowflake Fingerless Gloves
A pattern by Tracy Leming (TLeming on Ravelry)
Yarn: 2 skeins of fingering weight yarn with some bounce and fuzz in two different solid or gradient colors with some wool content (sample was worked in Crystal Palace Yarns Panda Silk Solid) Needles: Long (32- to 40-inch), flexible circular needle in size 1 (or whatever is required to get gauge) Gauge: 28 stitches and 44 rows over 4 inches or 10 centimeters Finished Size: 7 inches long, 7 inches around the palm of the hand (3.5 inches across, laid flat)
General Information
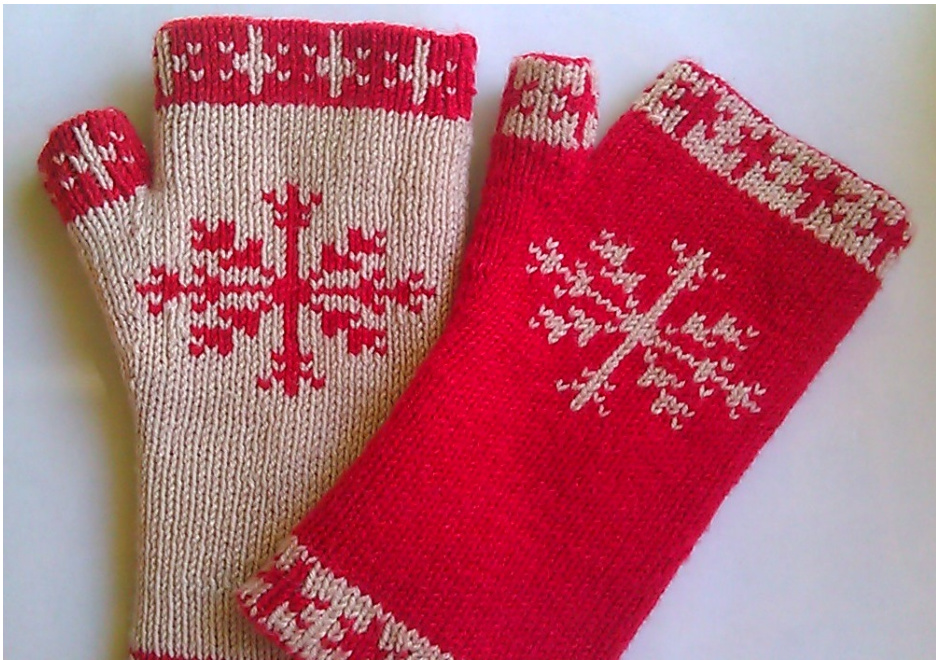
Because these gloves are double-knit, they are completely reversible. The picture shows two gloves from a matching pair, with the one for the left hand turned inside-out. The sample was worked with white as Color A and red as Color B. As it was worked, it looked like the glove on the left, with white as the background. The glove on the right shows what it looks like turned inside-out.
Starting a Glove
Cast on 48 pairs of stitches using Judy's Magic Cast-On or the Provisional Tail Tubular Cast-On (see below for link to detailed instructions). Form the cast-on row of stitches with Color B. (If using the tubular cast-on, use scrap yarn or Color A for the foundation cord.) Do not join the work into a circle right away. Instead, turn the work and knit the first row back across the cast-on row to establish the stitch pattern and stabilize the cast-on. Knit 1 with B and purl 1 with A across the row.
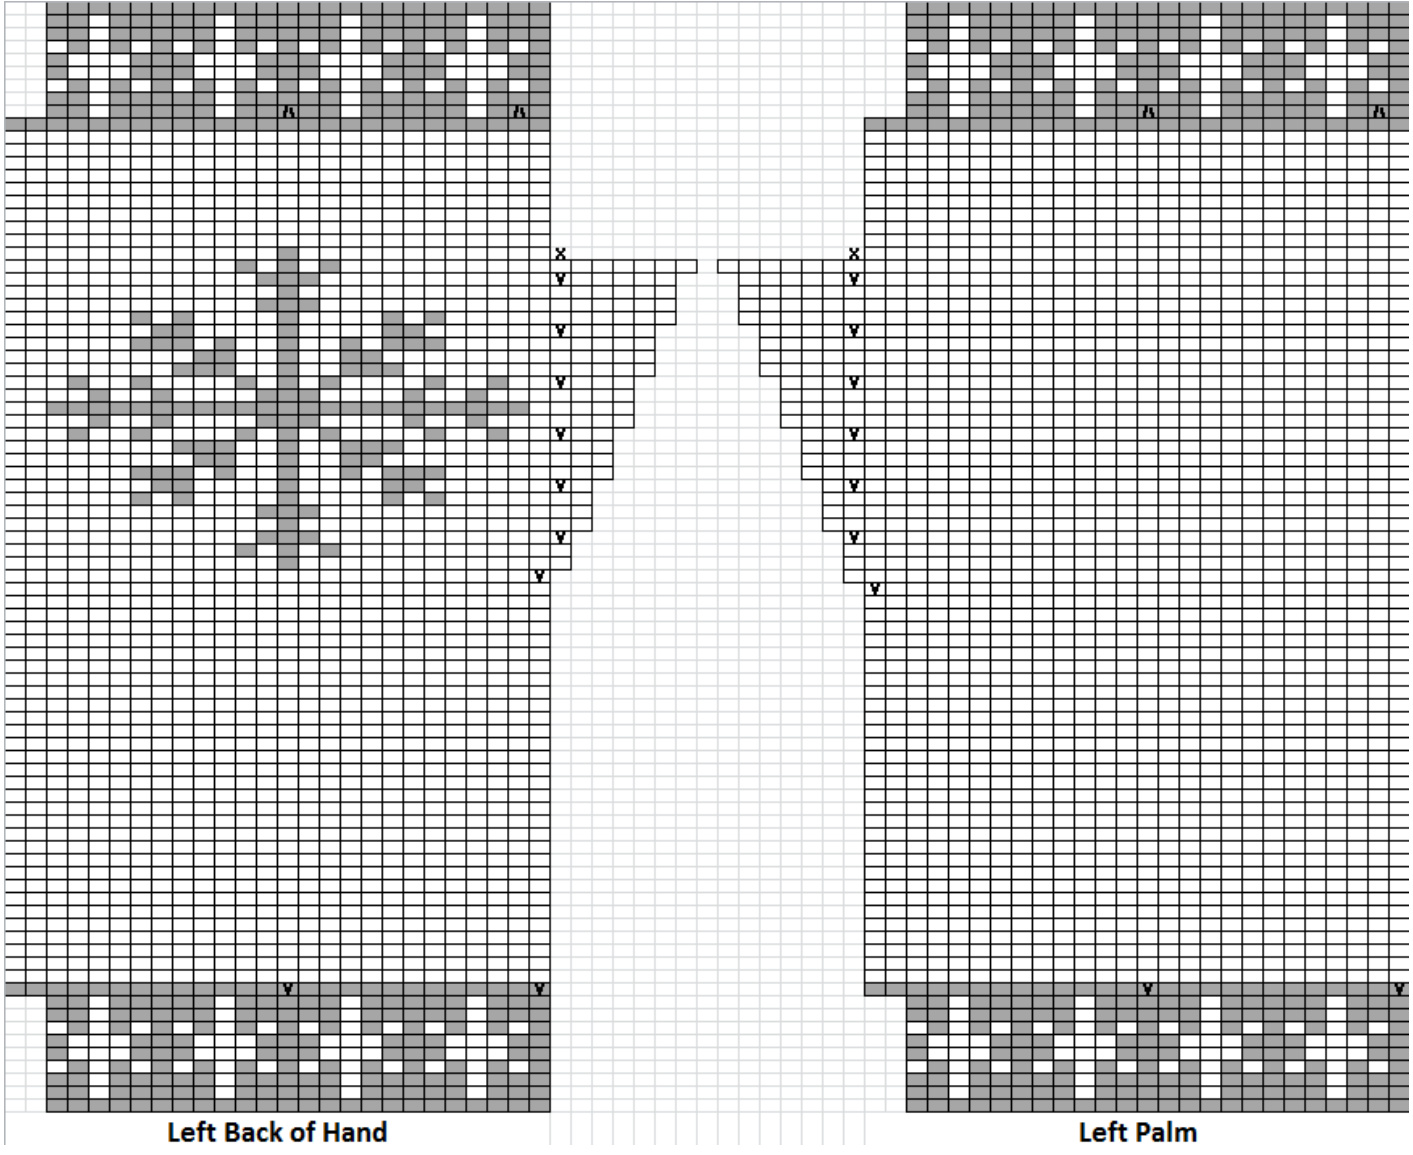
Joining in the Round and Working the Charts
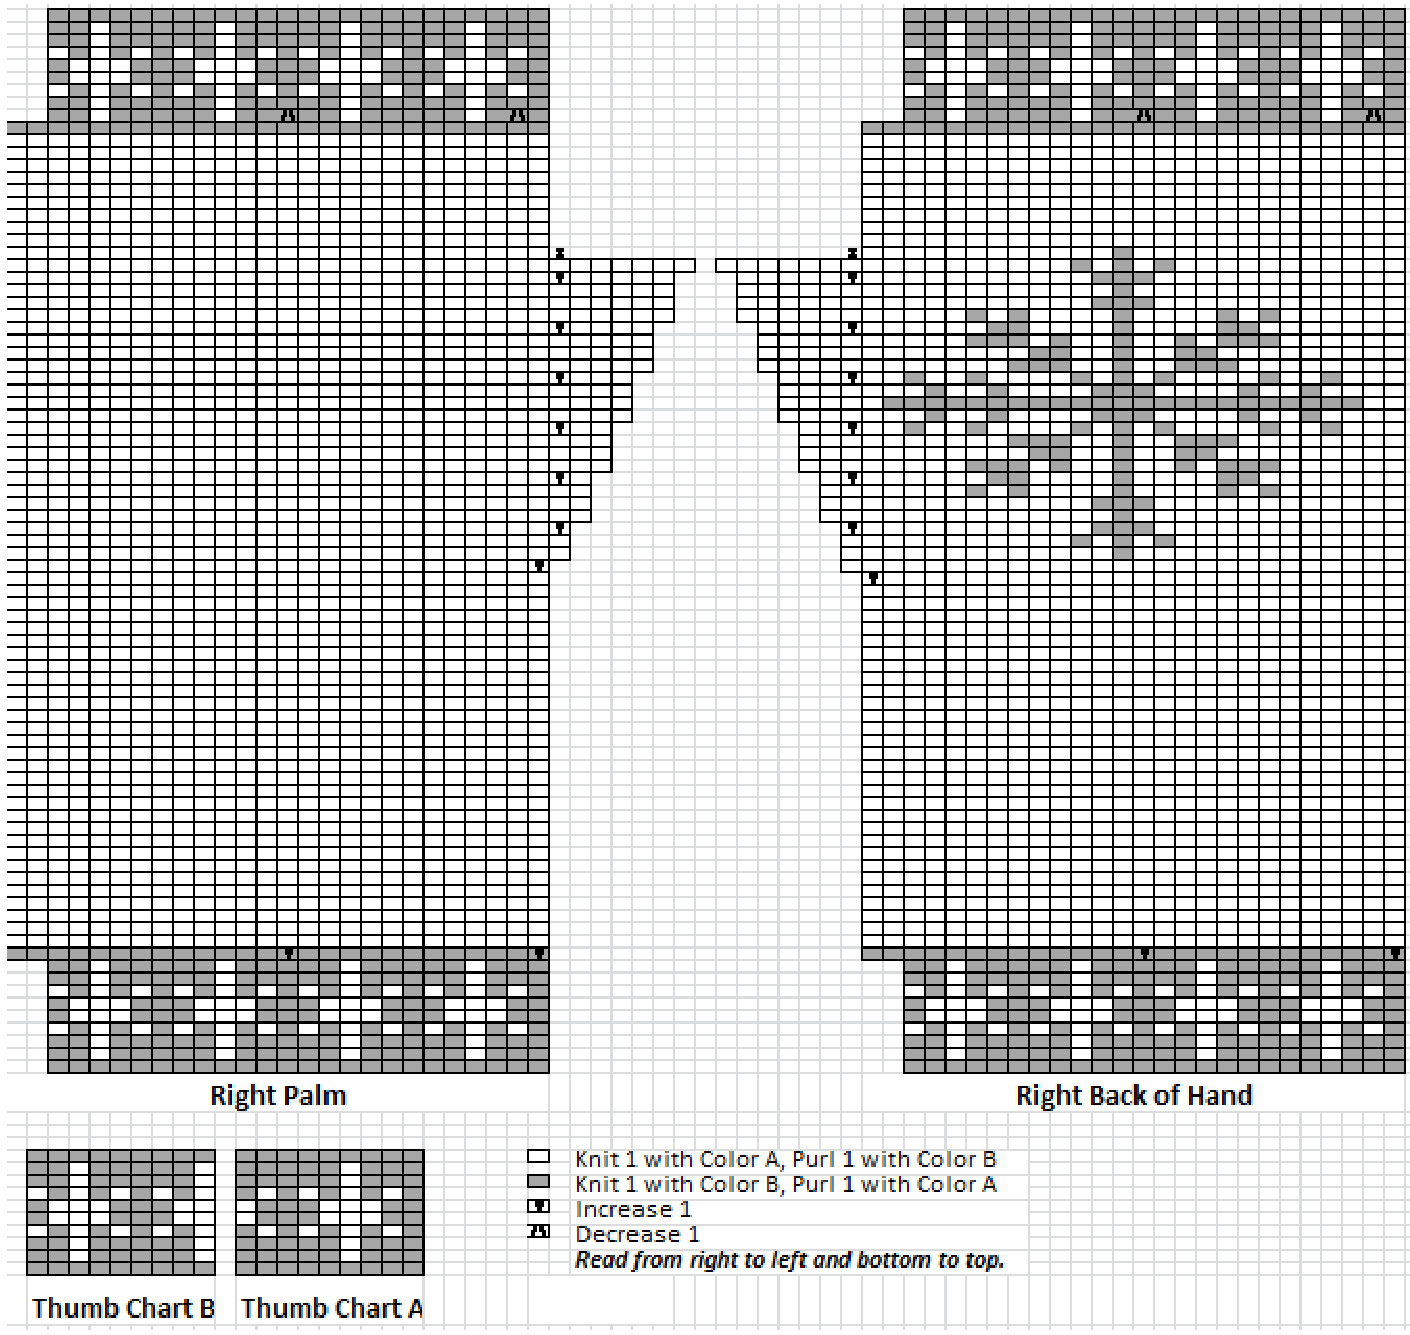
The rest of the glove will be worked in the round using the Magic Loop method (see links below for detailed instructions.) Count off 24 pairs of stitches for one side of the glove, bend the cord of your circular needle, and pull a loop of cord out at that point. There should be 24 pairs of stiches on the other part of the needle, for a total of 48 pairs of stitches. Join the glove into a circle by simply working the first pair of stitches at one end of the cast-on with the strands that are hanging from the other end. There is no need to tie a knot to link the row into a circle, but it is a good idea to give both strands a good tug after working the first pair of stitches on each side. You should now have a circle on your needles that will make up the two sides of the glove, each with 24 pairs of stitches. These correspond to the Back of Hand and Palm parts of the chart. To work the right glove, start at the bottom right side of the page. Work across the bottom row of the Right Back of Hand chart from right to left. Flip your work and work the bottom row of the Right Palm chart. Flip your work and repeat, working your way up the charts. To work the left glove, after casting on, work across the bottom row of the Left Palm chart, flip your work, and work across the bottom row of the Left Back of Hand chart. To set aside stitches for the thumb, on the first row where the chart narrows after the thumb stitches (marked with a !), work across the row to the end of the first chart (the Right Back of Hand or Left Palm chart, depending on which glove you're making). Slip the 14 pairs of thumb stitches onto a piece of scrap yarn using a darning needle. Continue working the other part of the chart, skipping over the stitches on the scrap yarn and being sure to tug both strands of yarn firmly after working the first pair of stitches on the other side. (There will be some loose stitches here; don't worry too much about it.) To cast off, use the Kitchener Stitch on One Needle technique (see link to video instructions below).
Making the Thumb
Put the 14 pairs of stitches from the thumb back onto the needle, placing 7 pairs on each tip. Pick up (but don't knit -- just pick up) two pairs of stitches in the gusset area (marked with a ! on the chart) on each needle in the same pattern as the pairs of stitches, grabbing alternating loops from the layers of Color A and B. Each needle should now have 9 pairs of stitches in alternating colors, with the break between the needles in the center of the gusset area. Starting where the ! is on the big charts, work one row around the thumb in the same colors as the stitches below, twisting the picked-up stitches to close gaps. (Work both sides so you end up back in the center of the gusset.) Work the bottom row of Thumb Chart A. Flip the work and work the bottom row of Thumb Chart B. Continue up the chart until the thumb chart is complete. Cast off using the same method as for the top of the glove. Weave in ends.
Double Knitting Basics
http://www.knittinghelp.com/video/play/double-knitting (starts with both strands in left hand, but also shows combined and both in right hand) Judy's Magic Cast-On for Double Knitting Video: http://www.youtube.com/watch?v=SQOZ8GWM9sE
Provisional Tail Tubular Cast-On
Text and Pictures: http://techknitting.blogspot.com/2008/01/provisional-tail-method-of-1-x-1.html (Just do Phase 1, then start double knitting on the next row.) MagicLoop Video: http://www.knittinghelp.com/video/play/magic-loop Kitchener Stitch on One Needle Video: https://www.youtube.com/watch?v=HqBGeKLlucA