
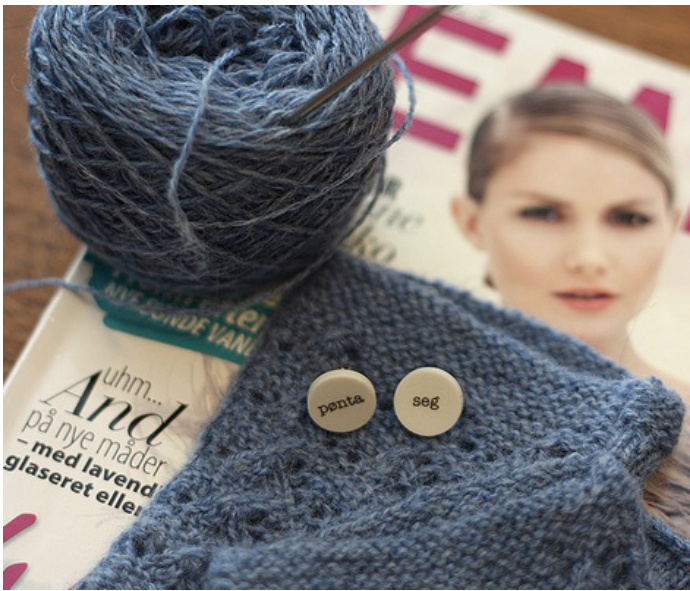
A wee bit knitty monster by: Lena Gjerald http://aweebitknitty.com Mote: You can find the english translation on page
Strikkefasthet: 2.5cm= 8 m/ 2.5cm=l omg
Du trenger:
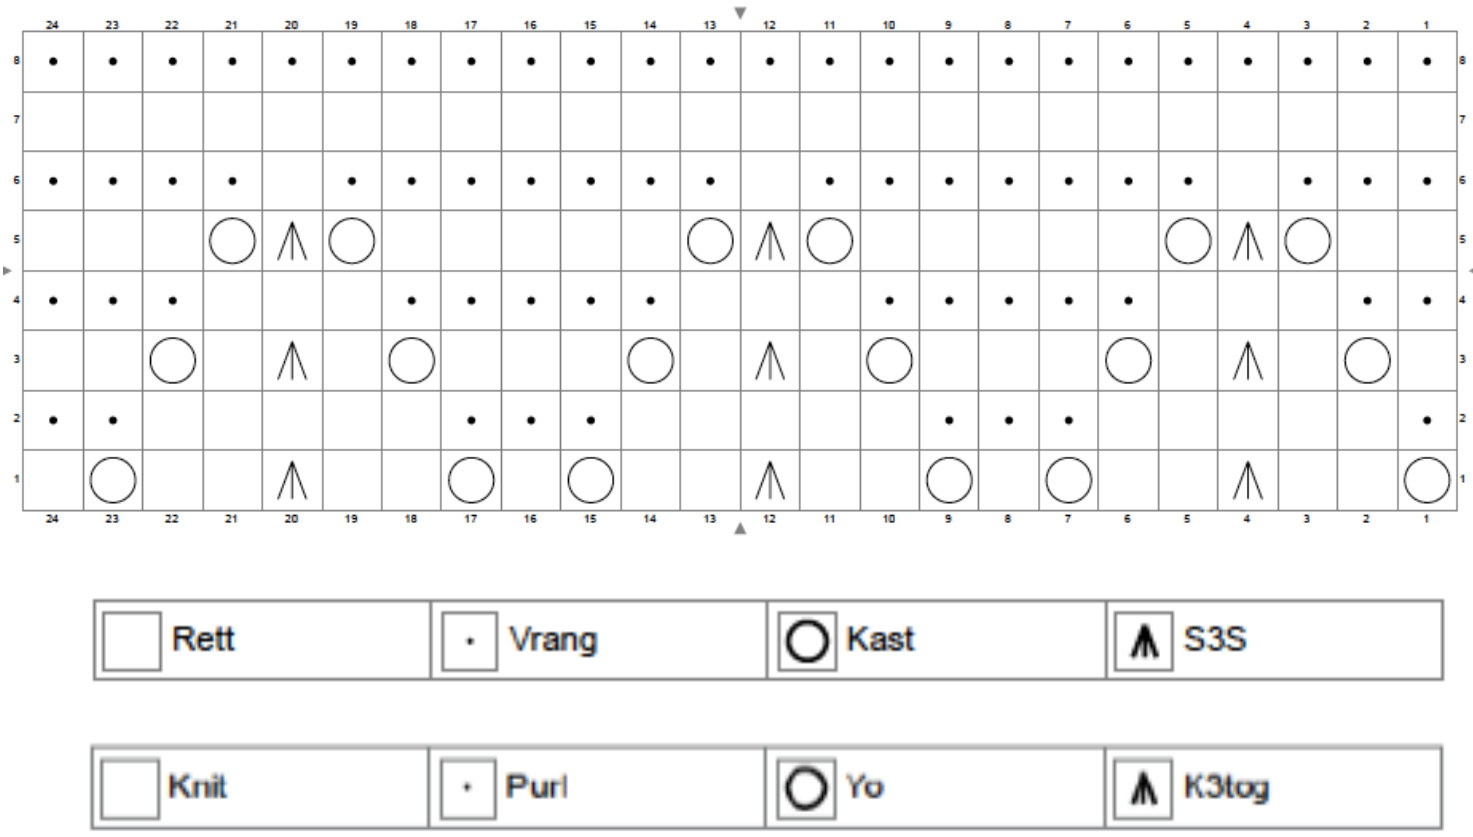
2.5mm strompepinner og ca .160 meter tynt/fingering garn. Garntips: Malsen og Mor Shetland Soft, Holst 10O% uld mansjett Legg opp 48 masker pa 2.5mm pinner. Pulsvantene skal strikkes rundt og rundt. Begynn med a strikke en omgang vrang, sa strikker du en omgang rett, en omgang vrang osv. til du har 8 riller totalt. (Avslutt med en vrang omgang.) pinner. Strikk frem og tilbake. Strikk sa? Her er teskje forklaringa: 1. omg: Strikk alle masker vrangt 3. omg: Strikk alle masker vrangt 4. omg: Strikk alle masker rett gang. Begynn pa diagram.Strikk diagram én 7. omg: Strikk alle masker vrangt 8. omg: Strikk alle masker rett Bolen: Legg opp 150 masker pa 3mm 10. omg: Strikk alle masker rett 11. omg: Strikk alle masker vrangt totalt 7 riller (altsa 14 omganger) 13. omg: Strikk alle masker vrangt 14. omg: Strikk alle masker rett 15. omg: Strikk alle masker vrangt Deretter begynner du pa diagrammet. Gjenta diagrammet rundt hele mansjetten. Gjenta diagrammet 3 ganger totalt for du begynner a strikke pa handa. Forklaringer s3s: Strikk 3 sammen.
Hand
Fortsett & strikke diagrammet, men merk at na er det kun monsterstrikk pa de 23 forste maskene pa omgangen, de resterende maskene i omgangen strikkes rett. (den siste maska pa diagrammet skal du ikke lenger bekymre deg over). Pa omgang 4i diagrammet begynner du a oke ut til tommelkile inne i handa (Altsa over glattstrikken) slik : Strikk monster over 23 masker, (Pa oversiden av vanten skal du kun folge diagrammet hele veien, ikke noe annet!), strikk 5 rett, kast, lr, kast. - strikk rettstrikk ut omgangen. Deretter strikker du neste omgang uten okninger, - husk á strikk kastene vridd, hvis ikke far du hull ved okningene. Med vridd mener jeg at du strikker maska gjennom bakre maskeledd. Strikk enda en omgang uter okinger. Deretter oker du pa neste omgang slik: 3r, kast, 3r, kast, - strikk rett ut omgangen. Gjenta okningen hver tredje omgang. Tommelkilen skal oke med to masker for hver oking. Nar du har 17 masker i tommelkilen strikker du to omganger uten oking og setter deretter de 17 maskene over pa en trad. Legg opp 4 masker over hullet og strikk videre med monster pa oversiden av handa og glattstrikk inni til pulsvanten er ferdig. Na skal du ha 23 masker oppa handa slik du alltid har hatt, og 28 inni. (=51 masker) Pa min versjon har jeg strikket 6 repetisjoner av diagrammet for handa, men du ma gjerne strikke den lenger om du onsker det. Begynn med en rett omgang, og strikk annenhver omgang rett og vrang til du har 4 riller totalt slik: 1. omg: Strikk alle masker rett 2.omg: Strikk alle masker vrangt 3. omg: Strikk alle masker rett 4. omg: Strikk alle masker vrangt 5. omg: Strikk alle masker rett 6. omg: Strikk alle masker vrangt 7. omg: Strikk alle masker rett 8. omg: Strikk alle masker vrangt ell av vrangt. Pass pa sa avfellinqa erken blir for stram eller le elene duger noe sarlig. Strikk en vante til, men husk a lag tommelkilen pa andre siden slik: Strikk diagram over 23 masker, strikk 19 masker rett, kast, 1r, kast, 5r. Deretter strikker du neste omgang uten okninger, - husk a strikk kastene vridd! Strikk enda en omgang uten okinger. Deretter oker du pa neste omgang slik: 19r, kast, 3r, kast, 5r. Gjenta okningen hver tredje omgang. Fortsett til du har like stor tommelkile som pa den andre vanten, og gjor akkurat det samme som du gjorde pa den videre.
Commel
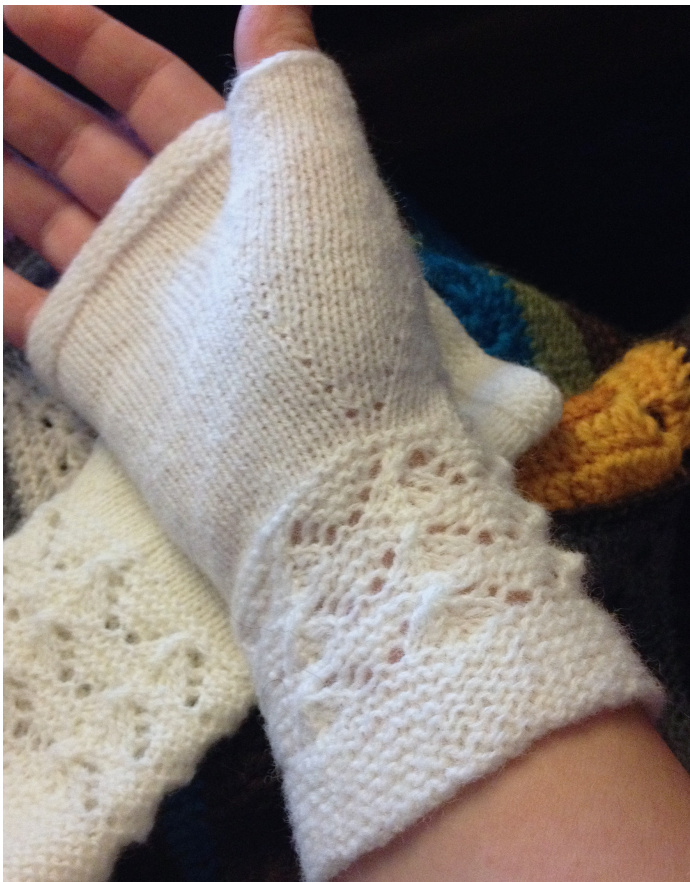
Sett de 17 maskene fra traden over pa pinner og strik dem. Sa legger du opp 6 nye masker rundt hullet. (=23 masker totalt pa tommel) Strikk 12 omganger til. Fell av. Gratulerer! Na kan du "ponte deg" med nye, fjonge pulsvarmere!
English translation
Hand
Gauge: 8 stitches and 1l rows = 1inch You will need: US 1.5/2.5mm dpn, and app. 170 yards of fingering/4 ply yarn. I have used Holst 10O% wool, but you can also use Malsen og Mor Shetland soft and similar yarns.
Qdreriations
K3tog: Knit 3sts together Yo: Yarn over
Cuft
Cast on 48 sts on 1.5US needles. Begin knitting (in the round) like this: 1. row: Purl all sts 2. row: Knit all sts 3. row: Purl all sts 4. row: Knit all sts 5. row: Purl all sts 6. row: Knit all sts 7. row: Purl all sts 8. row: Knit all sts 9. row: Purl all sts 10. row: Knit all sts 11. row: Purl all sts 12. row: Knit all sts 13. row: Purl all sts 14. row: Knit all sts 15. row: Purl all sts Start knitting the chart all the way around the cuff. Repeat the 8 rows of the chart a total of 3 times. Continue knitting the chart, but now you should only knit the chart over the 23 first sts on the round. (The last sts in the chart is not a topic on the hand part of the mitt). The rest of the stitches in the round should be knitted without any pattern in plain stockinette. On the 4th row you start working on the thumb gusset. Inside the hand. You should keep on knitting the chart on the top of the hand as established. Knit the 23 sts on top of the hand according to the chart, k5, yo, kl, yo, k19. Knit two rounds without any increases. Remember to twist the yo sts when you get to them. With twist I mean to knit them in through the back loop. That way you won't get any holes in your gusset. Knit one more row of increases like this: Knit 23 sts on the top of the hand according to the chart, k5, yo, k3, yo, k19. Knit two rounds without any increases, making sure you twist the two yo sts. Repeat the increases every third row. The thumb gusset should get 2 more sts on each of these increase rows. When you've got 17 sts in the thumb gusset, knit two more rounds without any increases and put the 17 sts on a piece of scrap yarn. CO 4 sts over the hole and keep on knitting stockinette sts in the inside of the hand and follow the chart on top of the hand. (You should have 23sts on the top and 28 sts for the inside) Continue to knit the mitt as established until you have repeated the chart a total of 6 times on the hand. All in all you should have knitted the chart a total of 9 times for the whole mitt. Finish the mitt by knitting the edge like this: 1. row: Knit all sts. 2. row: Purl all sts 3. row: Knit all sts. 4. row: Purl all sts 5. row: Knit all sts. 6. row: Purl all sts 7. row: Knit all sts 8. row: Purl all sts. Bind off purlwise. Make one more mitt, but be sure to make the thumb gusset on the other side like this: Knit 23 on the top of the hand according to the chart, k19, yo, k1, yo, k5, and continue to knit the gusset in the same manner as on the left mitt, with increases every third row until you have 17 sts in the thumb gusset. The rest of the left mitt is knitted identical to the right mitt.
Chumle
Transfer the 17 sts from the thumb gusset over on dpn needles and knit them. Pick up 6 new stitches around the thumb hole. (23 sts in total) Knit 12 more rounds and bind off knitwise. Congrats! You're done!


