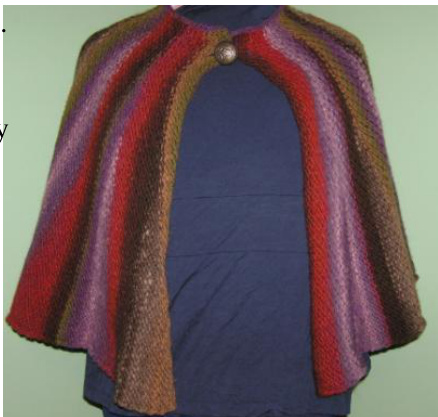
Mid Gauge Poncho
General Notes: I fashioned this garment after seeing a similar one hand knitted. It was knitted with alternating knit and purl rows so that it laid flat. Of course, this would be laborious on a machine, so I developed a tuck stitch that gave the garment texture and kept the piece lying flat. If you have Design-A-Knit, simply load the pattern. If you don't, repeat rows 1 through 4 of the manual directions detailed below until desired length. Hint if the rows on the row counter are
divisible by 4, you need to pull needles out as indicated on row 2 of the manual directions. Another fast way of knowing which needles to pull forward is that the needle next to the OH needle should be pulled
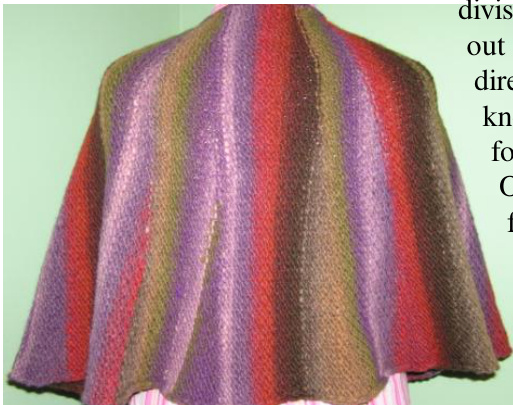
forward. So pull that needle and then every other needle forward. If you are modifying stitches and rows in order to get gauge, you must keep the number of stitches odd. And the row that starts the short rowing needs to be when the tuck is not on the outside needle. Main Bed Tension: 10 Ribber Bed Tension: NA Shape Pattern: none Knitting Machine: SK860 Ribber:SR860 Size: One size fits all. Neck edge 20 ", outside edge 106" Main Yarn: 720 meters of Noro color 157 (brick) Before Washing Gauge: 1 inch = 3.3 stitches & 7.3 rows Texture Pattern: pnchtxtr.pat After Washing Gauge: 1 inch = 3.3 stitches & 8.3 rows
Knitting Instructions:
Texture Manual Method
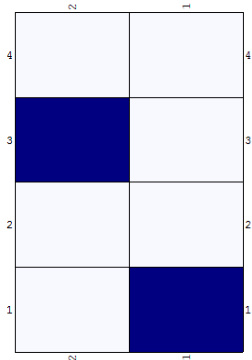
1" Row. COR. Pullevery other needle to B position, starting with the first needle on th right. Knit one row. 2"d Row. Pullall needles to B position. Knit one row. 3rd Row. Pull every other needle to B position starting with the second from the right. Wrap end needle. Knit one row. 4" Row. Pulll needles to B position. Knit one row.
Wedge
Counter 000. COR. Knit 6 rows. Counter 006. Set machine to OH. Pull 3 leftmost needles in Hold position. Knit one row. Wrap needle. Knit one row. Repeat until all needles are OH. Counter 046. COR. Take machine off OH. Knit one row. Counter 047. COL. Pullall needles to B or D position. Knit one row. Counter 048. Start a wedge again or knit rows as the knitting instructions direct.
Body
Counter 000. WY cast on 63 stitches. Knit several rows, ending with the COR. Reset counter to 000. Counter Ooo. COR. With MY, loosely e-wrap cast on because tuck fabric grows once removed from machine. Kni 8rows. Counter 008. Knit 8 wedges. To mark your progress, place marker on neck edge as you complete each wedge. Counter 392. Knit 8 rows. Mark center. Knit 8 rows. Counter 408. Knit 8 wedges. Counter 792. Knit 5 rows. Counter 797. Make button hole. Do not break yarn. Un-knit 5 stitches. Bind off 2 stitches. Hand knit 3 stitches keeping with the texture. Knit 3 rows. Counter 80o. Loosely bind off using the double post method. Bind off needs to be loose enough to allow for the way tuck stitches grow after being removed from the machine. Poncho.doc Property of Susan Fowler 11/07
Mid Gauge Poncho
Assembly
Crochet chain stitches around neck as follows. A crochet stitch per row then a crochet stitch per two rows. Repeat around neck edge. Crochet stitch down the cast on row as a very loose crochet stitch per knitted stitch. Now go out and enjoy the compliments!


