the little green frog:
Sharon Maher - laughing purple goldfish designs
description:
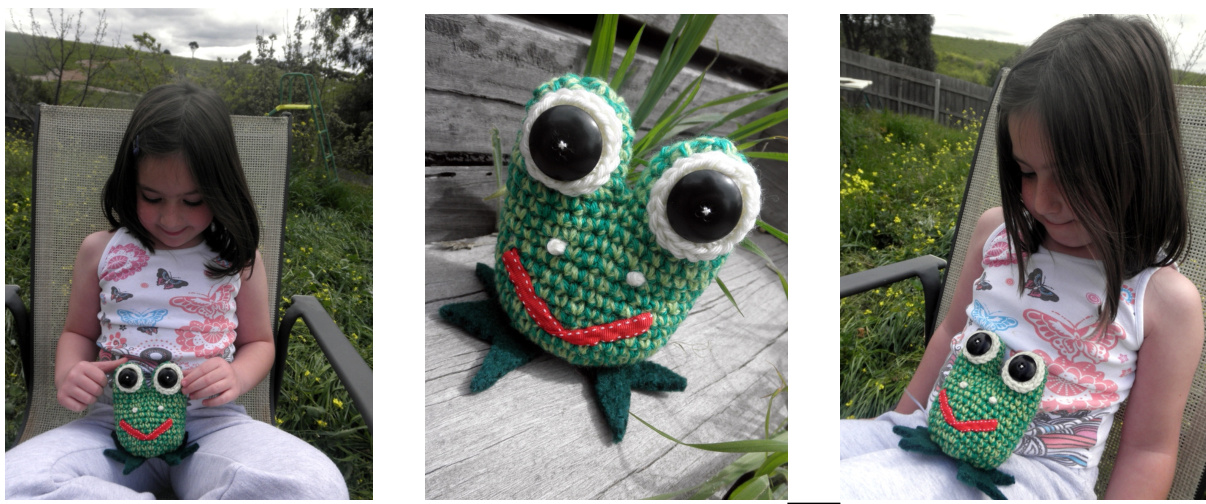
this simple creature stands approximately 12cm tall the body is worked in rounds from the base up, with clear and specific assembly instructions US crochet terminology used throughout
materials:
yarn: feel free to experiment with what you have on hand! the creature photographed uses: 0reclaimed 8ply/DK weight yarn ■main colour (MC) Mid Green - 20g ■colour 1 (C1) Light Green - 20g colour 2 (C2) Cream - 5g $2\times25\mathsf{m m}$ buttons for eyes 10cm length of ribbon for mouth thick felt for feet (eg. piece of a felted jumper) 25g fibrefill stuffing 4.5mm crochet hook scissors wool needle stitch markers sewing needle sewing thread to match colours of felt and ribbon
gauge:
gauge not critical in this project stitches should be tight enough that stuffing does not show though gauge swatch worked in sc use 4.5mm hook, and two strands of yarn worked together 2 inches $=7$ stitches, 2 inches $=7$ rows
special instructions:
adjustable magic ring make a loop of yarn by wrapping in a clockwise direction around two fingers on the left hand ?pinch the point where the yarn meets, between the thumb and forefinger slide fingers out so that the ring can be used place crochet hook into the centre of the ring, and pull a loop of the working yarn through - this is the starting point for the round work as the pattern instructs for the remainder of the round - all stitches are worked around both the ring and the tail when completed, the beginning tail can be pulled tight thus closing the ring
increase
work 2sc into the same stitch
invisible decrease method
· put hook through the FRONT LOOP ONLY of the next stitch then bring the hook back to the front of your work again, this time put it through the FRONT LOOP ONLY of the following stitch (try to ignore the fact that it feels a little awkward) you should now have three stitches on your hook YO, pull through 2 loops; YO again, pull through remaining two loops
INSTRUCTIONS
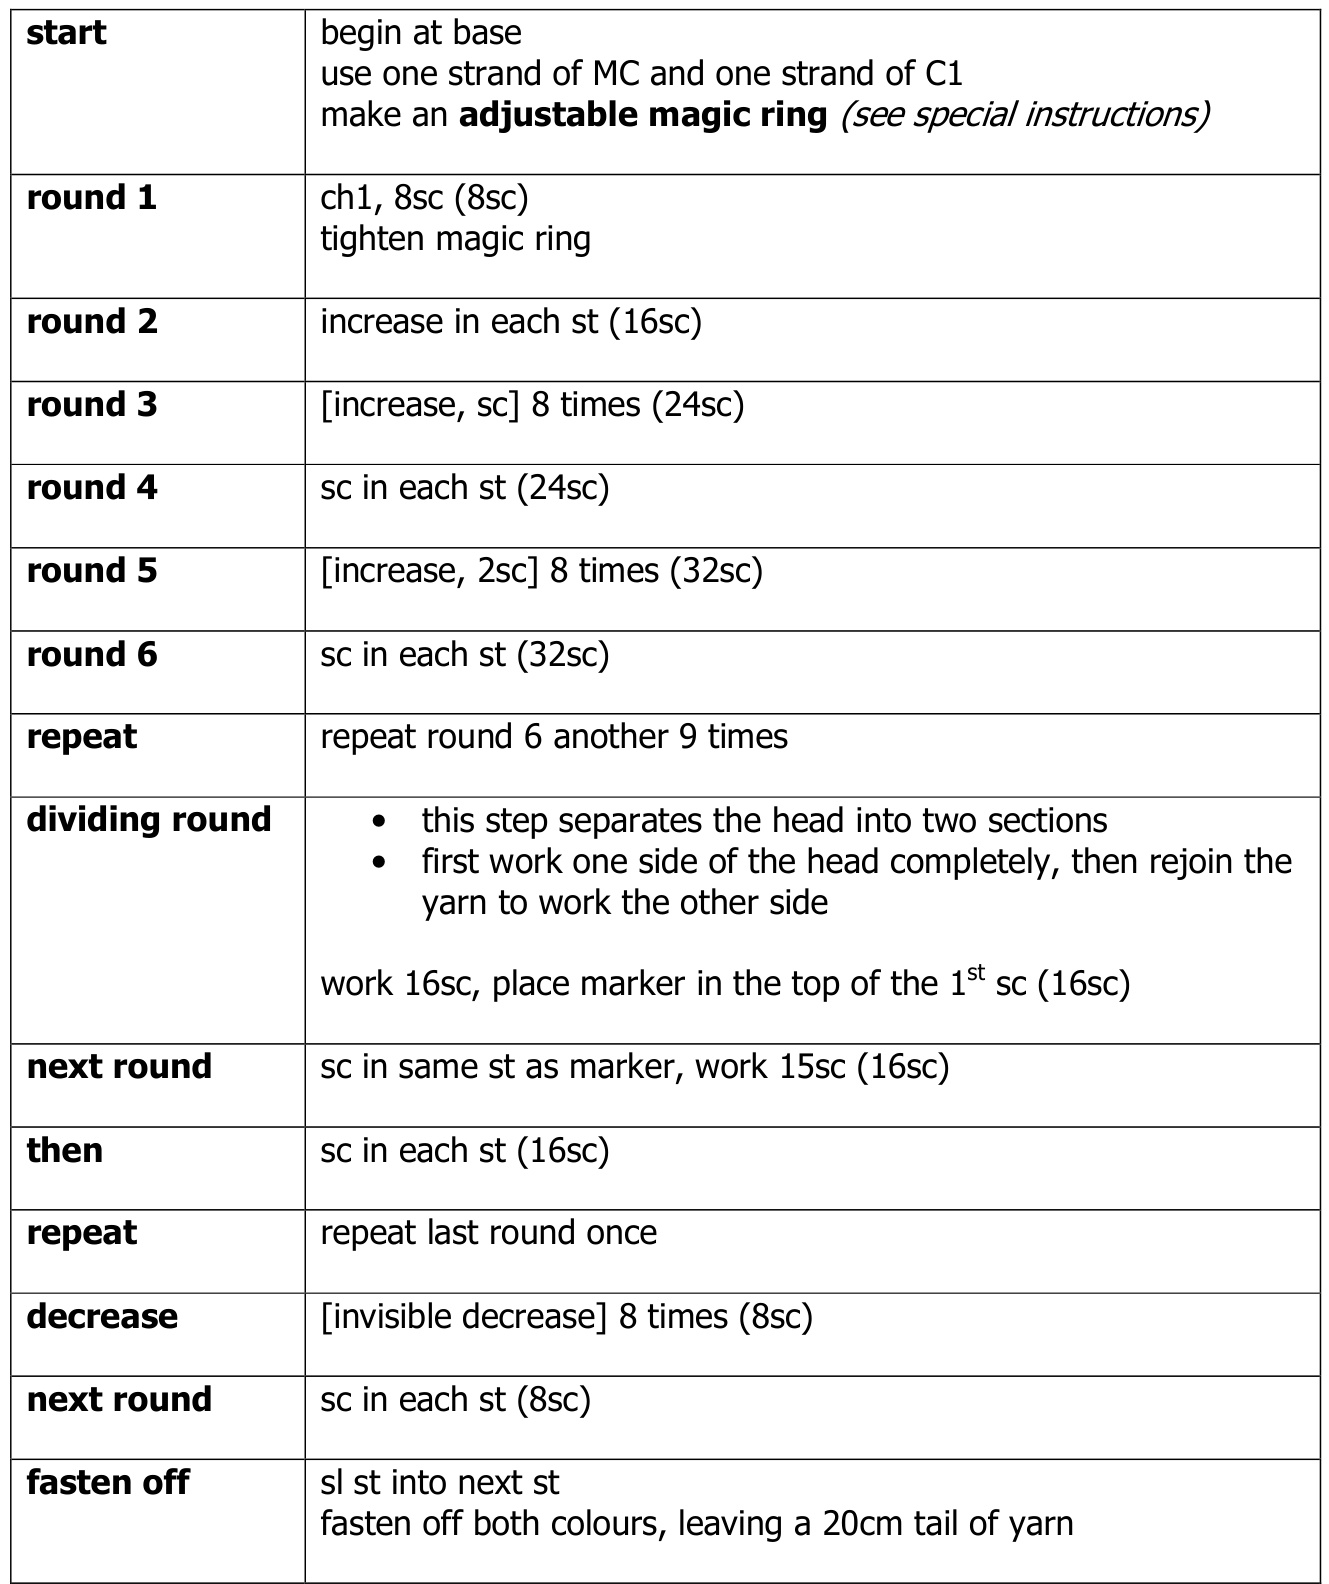
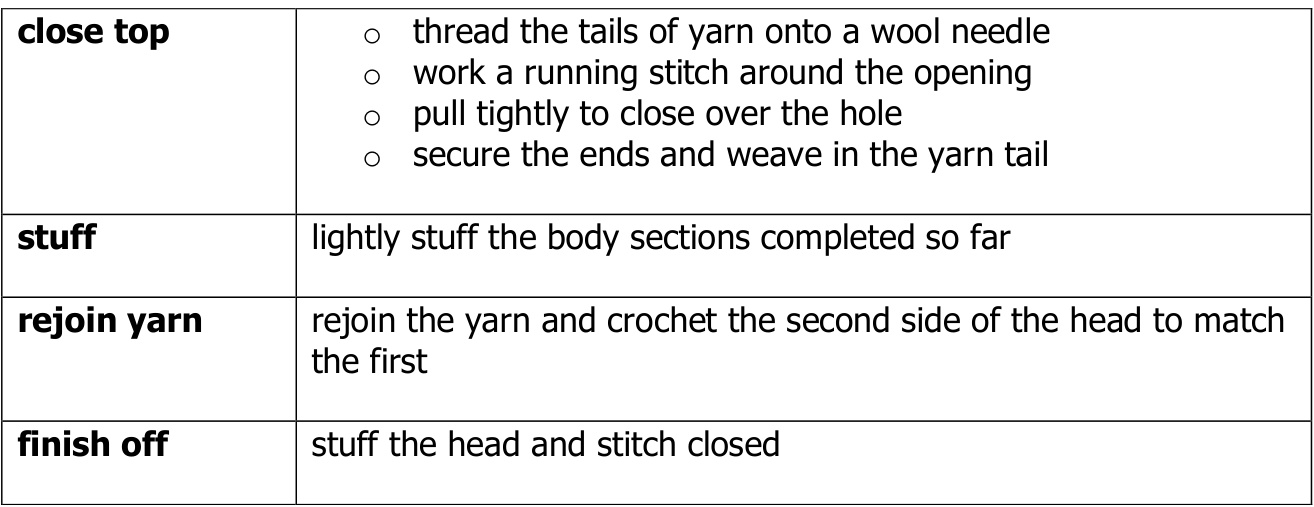
body:
please note that the body is worked in spirals do NoT join the rounds use a stitch marker to keep track of the beginning of each round
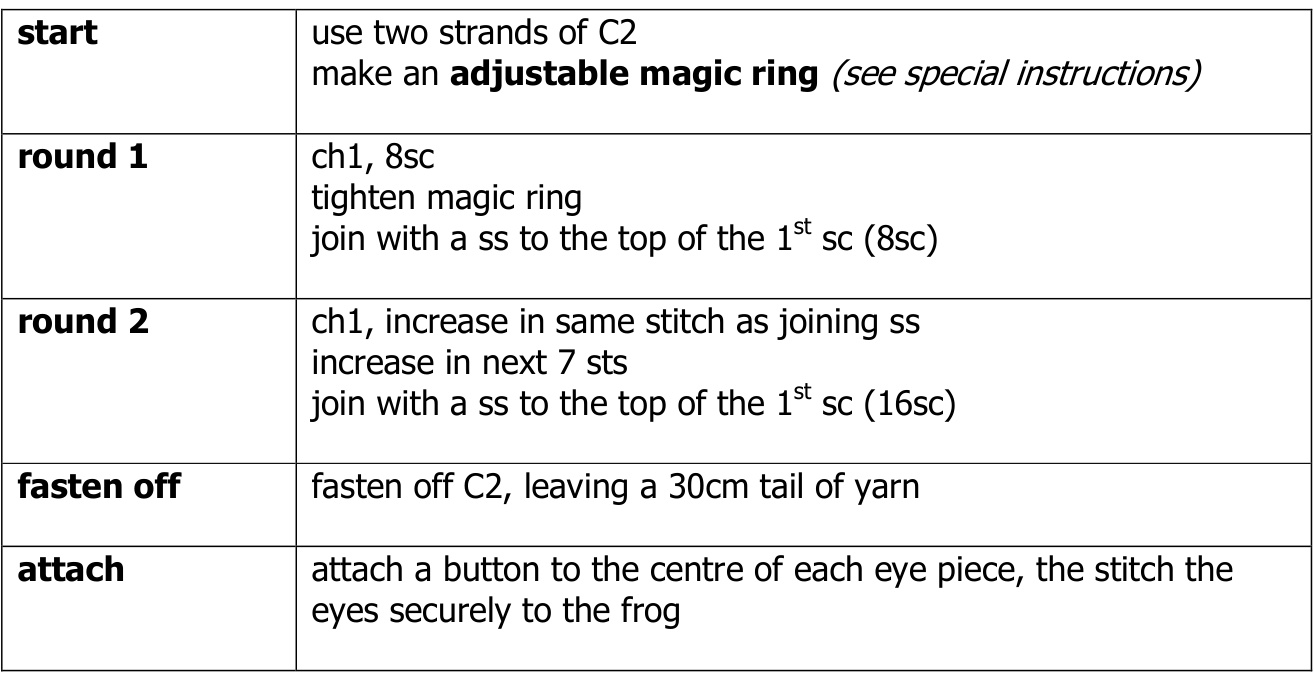
eyes: (make 2)
please note that the eyes are worked in rounds each round is joined with a slip stitch
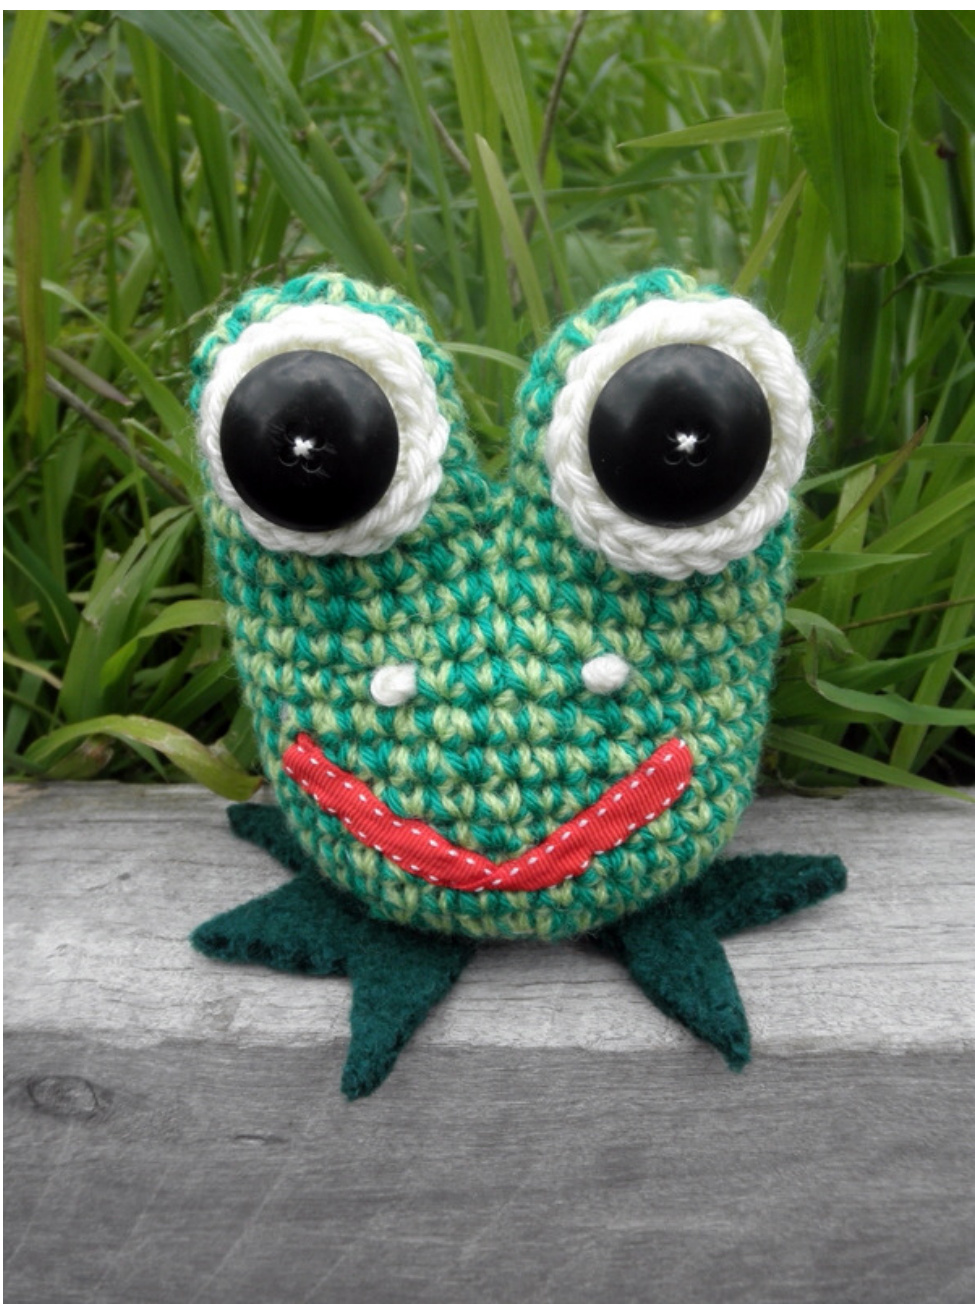
nostrils:
·first mark the positions of the nostrils they should sit 3 rows below each eye, with 4 full stitches between them use a double strand of yarn to work a french knot for each nostril
mouth:
· fold the red ribbon at the centre so that it curves into a mouth shape stitch in place with the matching sewing thread, tuck the raw edges at each end under (to prevent fraying)
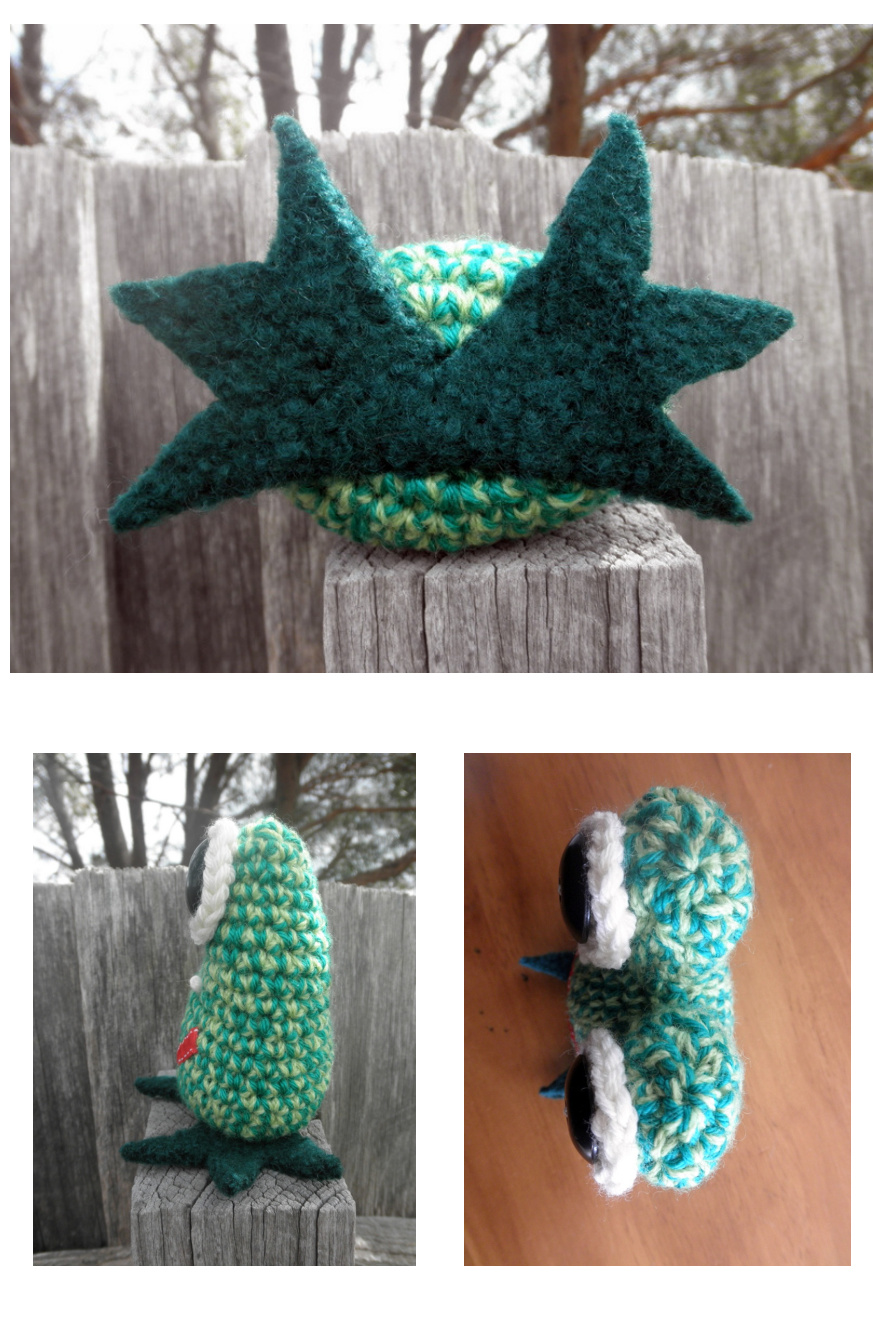
feet:
?cut a semi circle shape from the thick felt then snip v-shapes into it to form the feet attach the feet securely under the body using the sewing needle with matching sewing thread, sew through the thickness of the felt