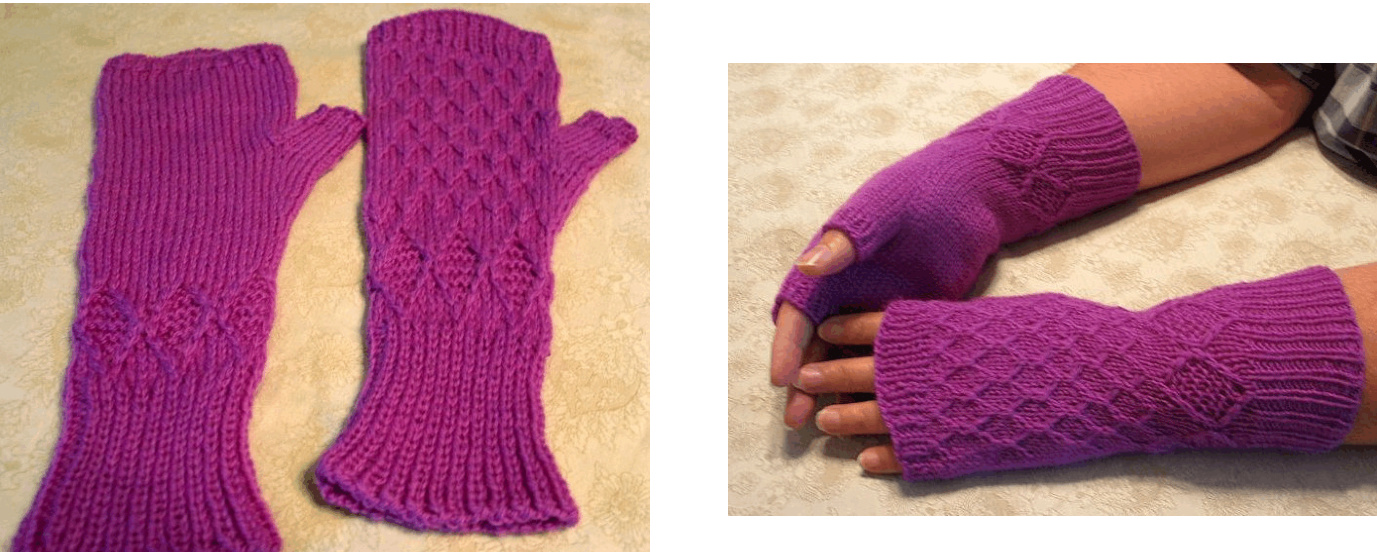
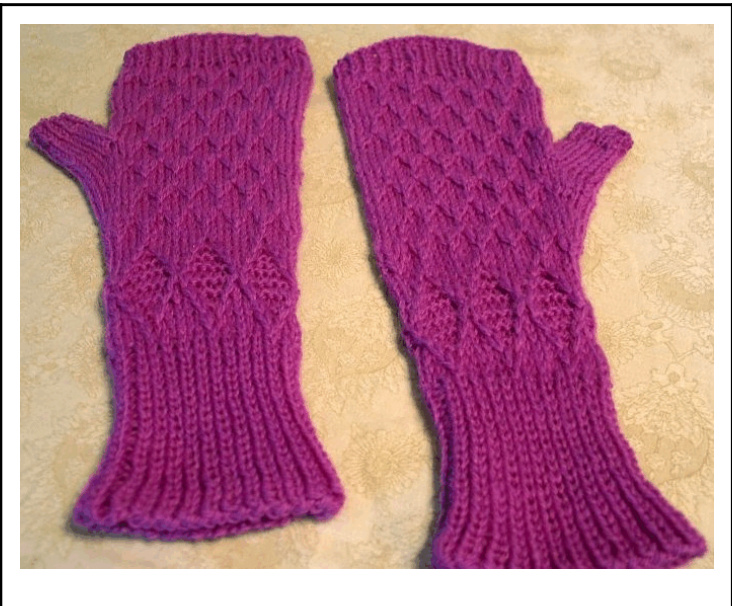
Materials:
Fingering weight wool - 50 gm Circular or DPN needles in sizes 2, 3, and 4 us 2-4 markers I used the magic loop method for knitting these mitts. This accommodates the stitch pattern well. Another alternative is to use 2 circular needles, one for each side. There are several internet tutorials on knitting these ways.
Cuff:
Using #4 needles Cast on 48 sts using fingering weight wool Change to #3 needles and work a K1, P1 ribbing for $\textsf{I}\sqrt[\textsf{1}]{}$ inches or however long you prefer your cuff.
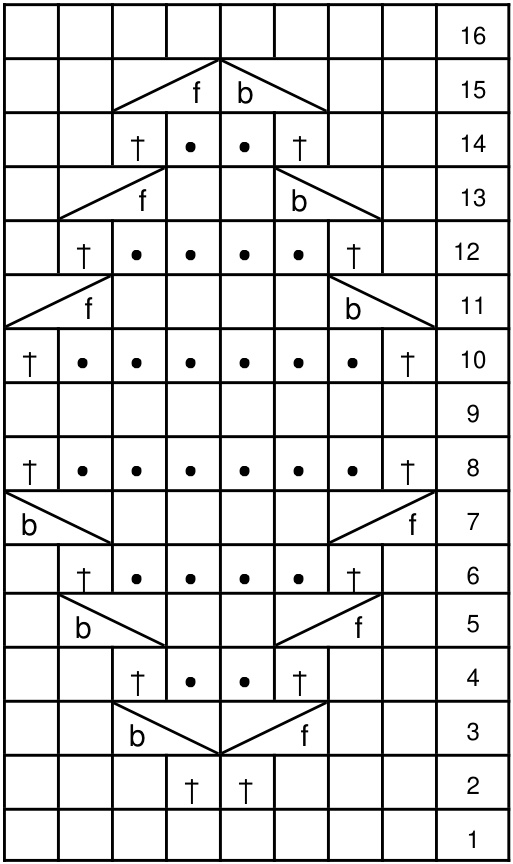
Body: Change back to #4 needles and knit 1 complete repeat of Garter Stitch Diamond Pattern, placing markers and rearranging stitches on row 16. $\sqsupset=$ knit $\bullet\,=\,{\mathsf{p u r l}}$ $\dagger\,=$ slip stitch purl wise with yarn in back $/\mathsf{f}=\mathsf{c r o s s}$ front (cross one stitch so it leans to the right by knitting in the front of the $2^{\mathsf{n d}}$ stitch and then into the $1^{\mathrm{{st}}}$ stitch as usual) $\flat\setminus\widecheck{\mathbf{b}}\setminus\widecheck{\mathbf{\Gamma}}=$ cross back (cross one stitch so it leans to the left by knitting in the back of the $2^{\mathsf{n}\mathsf{\bar{d}}}$ stitch and then into the front of the $1^{\mathrm{{st}}}$ stitch as usual)
Place stitch markers on rnd 16 of the Garter Stitch Diamond Pattern. I rearranged the stitches to be worked in plain stockinette - palm (21 st), - thumb (2 st), on one length of my cable, and the rest to be worked in the Mock Honeycomb stitch -back (25 st) on the other side of my cable. (When knitting the other mitt, reverse the markers so the thumb will be on the opposite side, and the pattern will be on the back of the hand.) Begin working Mock Honeycomb stitch pattern. Mock Honeycomb Stitch (Chart is below for those who prefer using charts.) (Read directions below for seting up gussets before you start the pattern) Row 1: Knit all odd rows Row 2: K1, \*sl 3 wyif (holding yarn loosely), k1, rep from \* Row 4: K1, \*sl 3 wyif (holding yarn loosely), kl, rep from \* Row 6 K2, \* insert needle under the long loose strands of 2 previous rows and knit the next st, k3; rep from \*, end k2 instead of k3 Rows 8: K3, \*sl3 wyif, kl; rep from \*, end k2 Row 10: K3, \*sl3 wyif, k1; rep from \*, end k2 Row 12: K4, \*insert needle under the loose strands of 2 previous rows and knit the next st, k3; rep from \*, end k1 Repeat Rows 1-12 for complete pattern.
Gusset:
Start increasing for the gusset on the $5^{\mathrm{th}}$ row of pattern. Increase in each of the two sts between the markers. You will be increasing in the first and last stitches between the markers on pattern rows 5, 9 and 1 until there are 12 sts in the gusset (This works out to be 2 increases every 4 rounds). Place these 12 sts on waste yarn.
Body Continued:
CO 4 sts and continue in pattern until you have knitted one full pattern repeat plus 7 more rows of the pattern after placing thumb stitches on waste yarn. Change to size 2 needle and knit in K1, P1 ribbing for 3/4 inch or however long you want your mitt to be.
Variation:
If you like the back of the hand longer than the palm side (I do, personally.) You can add some shaping after you start the ribbing. Knit 1 rnd of ribbing. On the next round when you are on the back part of the mitt, Shape as follows: Always maintaining the K1,P1 rib pattern, work 16 stitches. Wrap and turn. Work 8 stitches. Wrap and turn. Work 12 stitches, picking up wrap with the stitch as you go past it. Wrap and turn. Work 16 stitches, picking up wrap with the stitch as you go past it. Wrap and turn. Work at least one more row of K1, Pl rib (there will be one more wrap to pick up). You may work more ribbing if it needs to be longer. Bind off loosely in pattern on the next round. Thumb: With #4 needle, pick up thumb sts, 4 sts on top and one extra stitch on each side to help close holes, and knit 3/4 inch. Change to # 2 needles and K1, P1 rib for 4 rounds. Bind off in pattern. Weave in any loose ends.
Chart for Mock Honeycomb pattern:
Only the even rows are charted. All the odd rows are plain knit.
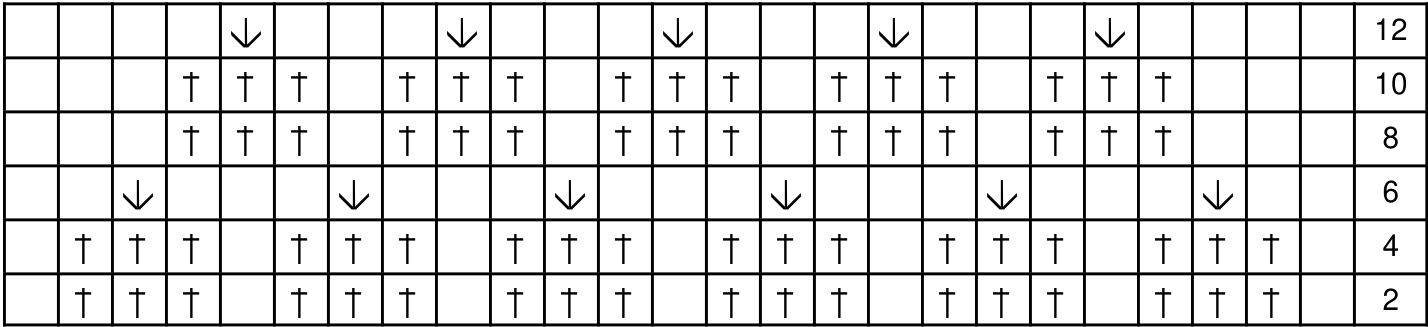
$\square\ =\ {\mathsf{k n i t}}$ ${\boldsymbol{\mathsf{T}}}\ =$ slip with yarn in front of needles $\downarrow\ =$ Insert needle under the long loose strands of 2 previous rows and knit the next st $\circledcirc$ Jhonne Jones You may sell or donate items you knit from this pattern. You may share the pattern freely. Youmay $^{\star\star}\mathsf{N O T}^{\star\star}$ CHARGE for the pattern/download ALONE. Please notify me at jhonnejones@gmail.com if you find any errors in this pattern. I hope you enjoy your knitting