Short Rows Practice Square
Mariya Davydova
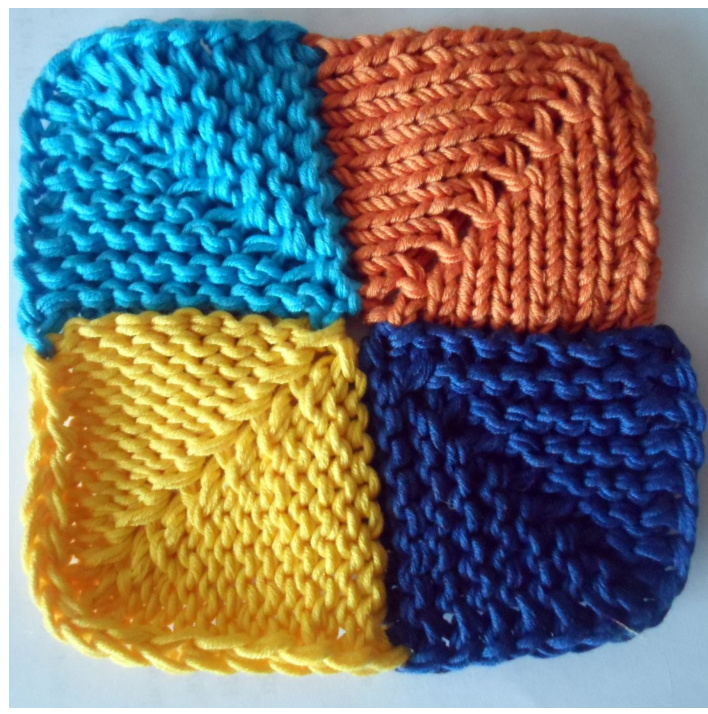
This simple square is designed especially for practicing short rows. It contains 4 sections - 1 of st st, 1 of reversed st st and 2 of garter stitch. The best way to practice desired short rows techniques is to knit all short rows in one square in one techniques. You can make several squares, one per technique, and use them as samples when choosing technique for concrete pattern. A set of squares sewn together can become a dishcloth, a blanket etc, depending on size and amount of squares. Note: Pattern uses standard US abbreviations.
| Craft | Knitting |
| Instrument | Any |
| Yarn | Any; 4 colors |
| Gauge | Any |
| Yardage | Small amount |
| Size | Depends on yarn and needles |
| Extra materials | Tapestry needle |
Instructions
I've used 1 special abbreviation here: T - turn; this means that the short row ends at the point and you should end it and turn according to the technique you are practicing in this square. CO 10 stitches. I prefer using provisional CO, so that I can easily sew CO and BO using kitchener stitch, but if you don't know how to do it or don't like it you can use any other CO method. For this pattern it is not crucial. I suggest use different colors for every section (or at least for every consecutive couple of sections).
Section 1: St st (orange in sample)
As I want the instructions for the sections look similar I refer to CO as to Ro (WS) of first section. R1 (RS): sl1, k8, T (9) R2 (WS): p till the end of row (9) R3 (RS): sl1, k7, T (8) R4 (WS): p till the end of row (8) R5 - R16 are the same except that you knit 1 st less every odd row. So, your rows 15 and 16 are the following: R15 (RS): sl1, k1, T (2) R16 (WS): p till the end of row (2) From the next row you begin to make your rows longer, knitting the more and more stitches that were left in previous rows. R17 (RS): sll, k2, T (3) R18 (WS): p till the end of row (3) R19 (RS): sl1, k3, T (4) R20 (WS): p till the end of row (4) R21 - R30 are the same except that you knit 1 st more every odd row. So, your rows 29 and 30 are the following: R29 (RS): sl1, k8, T (9) R30 (WS): p till the end of row (9) R31 (RS): sk1, k9 (10)
Section 2: Garter stitch (light blue in sample)
This pattern is designed in that way that if you start with provisional CO and finish with kitchener stitch, all the tails will be in the middle of square. So I suggest you leave 2-3 inch tails and tie them in the very end (not when going to next section) to make the middle tight enough. So, cut off the yarn of the first color and continue knitting with the yarn of the second color, leaving a 2-3 inch tail. RO (WS): p till the end of the row (10) All the odd rows (from R1 to R31) are the same as in section 1. All the even rows (from R2 to R30) are knit. Copyright 2013 by Mariya Davydova, All Rights Reserved. This pattern is for personal use. Please do not resell this pattern or post it on the Internet. If you have any questions please do not hesitate to contact me. I'm on Ravelry - http://www.ravelry.com/people/MariyaDavydova My e-mail - mariyafomkina@gmail.com
Section 3: Reversed st st (yellow in sample)
Switch to next color. R0 (WS): p till the end of the row All the odd rows (from R1 to R31) are the same as in section 1 except that you purl stitches instead of knitting them. All the even rows (from R2 to R30) are knit.
Section 4: Garter stitch (dark blue in sample)
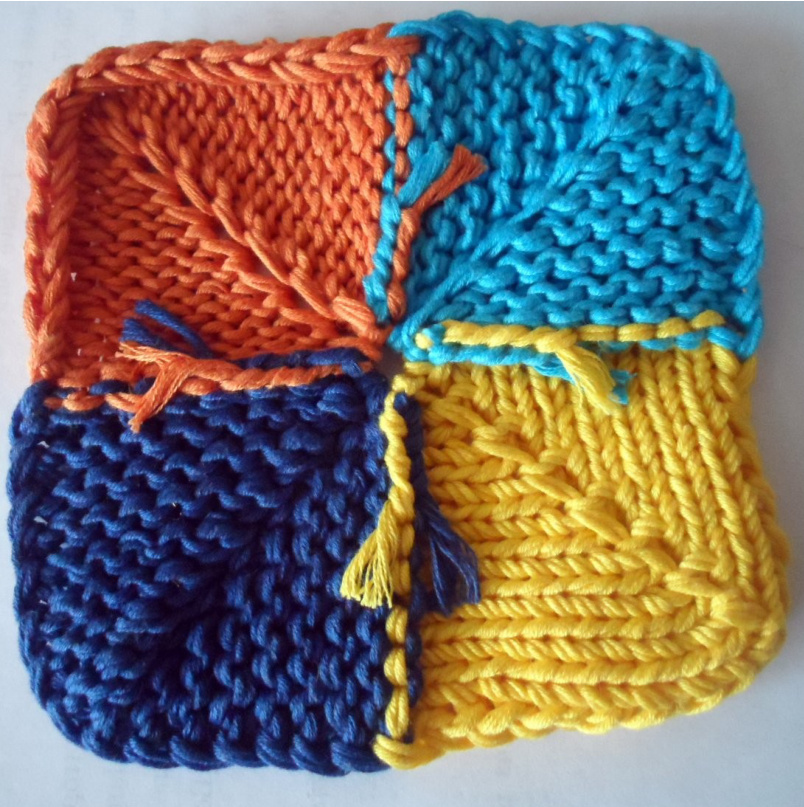
All the odd rows (from R1 to R29) are the same as in section 1. All the even rows (from R2 to R30) are knit. Note that you do not knit R31 in this section. Instead you have two options: 1) If you started with provisional CO, you should sew CO and last row together with the yarn of the color you used for the last section with the kitchener stitch. 2) If you started with other CO, you should BO (any method you like) and sew CO and BO edges together. If all your tails are in the middle, tie them up by pairs and sew into purl rows between sections (i.e. rows O and kitcheners stitch). You should get something like this on your WS:
Referencies
Here is the list of the short rows techniques I suggest you to try with the descriptions and/or links to tutorials. 1a. “Do nothing" method. This is the easiest way - you just turn your work at the end of short row and work with it as usual. The result should contain big holes. 1b. “Do nothing” method with slipped stitches. The idea is the same as in first method except that after turning work you slip the first stitch instead of k or p it. The result should contain a bit smaller holes than the previous one. 2a. "Wrap and Turn" method. First part - http://www.youtube.com/watch?v=G4GxFvi4KD0 Second part - http://www.youtube.com/watch?v=-xaz41JTkLc Another tutorial - http://www.youtube.com/watch?v=UfGpKiNfQmk# 2b. “Wrap and Turn" method with picking up only the top most wrap. Usually you do not think about how many wraps to pick up, because you have only one. If you knit this pattern, you'll have stitches with two wraps (starting with row 19). When picking them up you can pick both wraps (assume you do it in 2a method) or only the top most one. The first way is more difficult, but the second one leaves visible wraps. The sample here is knitted in the second way. 3a. Japanese short rows. Tutorial - http://www.youtube.com/watch?v=v9PmhtN8PyM 3b. Wrapless short rows. They are quite the same as Japanese, except that you k or p stitch after turn instead of slipping it. I'm not sure but this method is likely to be also called “k1 below method'. Tutorial - http://www.youtube.com/watch?v=xchFAYH0c_8 4. German short rows. Part I of the tutorial - http://www.youtube.com/watch?v=P6n561SMZXQ Part II of the tutorial - http://www.youtube.com/watch?v=KooKdm0YBbw 5. Fleegle short rows. Tutorial - http://fleeglesblog.blogspot.ru/2009/09/fleegle-short-row-no-wraps-no-holes-no.html 6. Cat Bordhi method. Tutorial - http://www.youtube.com/watch?v=IRc3309JUyc Provisional CO Tutorial - http://www.youtube.com/watch?v=3OGG0AiJ3XE Kitchener stitch Tutorial - http://www.youtube.com/watch?v=Q-jEGCUed0s


