Braided Pixie Hood
By Brynn Riordan (ItsBrynn on Ravelry) This fun hood is roomy but warm. It is very easy to make and uses basic techniques. It can be easily be customized for a variety of looks.
Supplies:
100 grams Worsted Weight Main Color (MC) for body of hood 15 grams Worsted Weight Coordinating Color 1 (CC1) for braid and tassels 15 grams Worsted Weight Coordinating Color 2 (CC2) for braid and tassels US 10 (6mm) Circular Needles (at least 24") US 10 (6mm) Double Pointed Needles (DPNs) Measuringtape Row counter (optional)
Gauge:
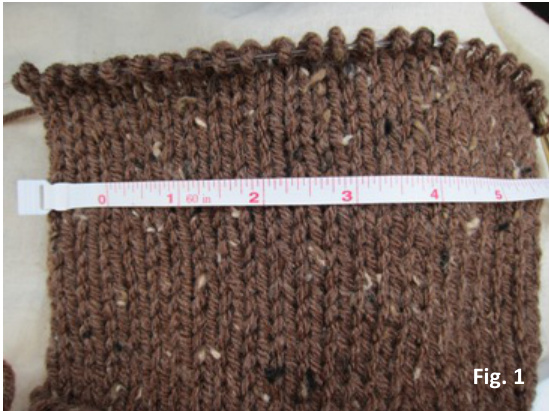
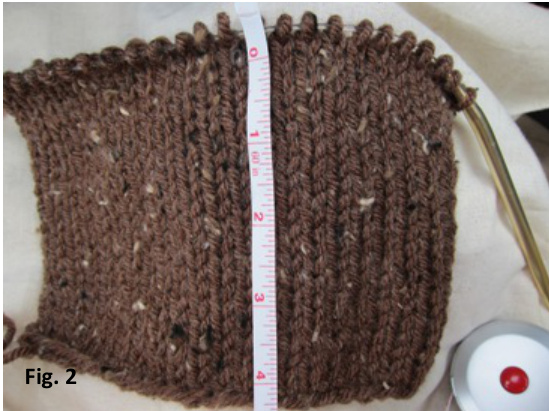
13w x 19h over 4x4 square using Worsted Weight yarn. (Fig. 1 & 2) Sample shown below is knit using Tivoli Tweed Aran.
Body:
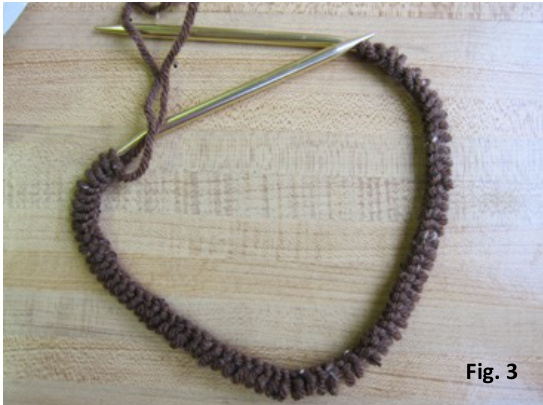
Using MC, cast on 74 stitches using the long-tail method. (Fig. 3)
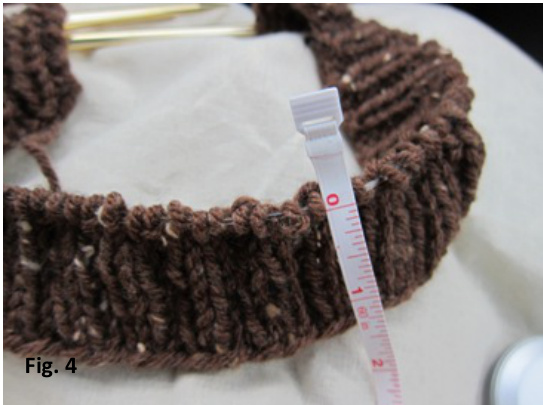
Row 1: (Wrong Side) \*P2 K1\* Repeat \* until the last 2 stitches, P2 Row 2: (Right Side) \*K2 P1\* Repeat \* until the last 2 stitches, K2 Repeat Rows 1 and 2 three more times for a total of 8 rows (appx. 1 %") (Fig. 4)
Row 9: (WS) Purl all stitches Row 10: (RS) Knit all stitches
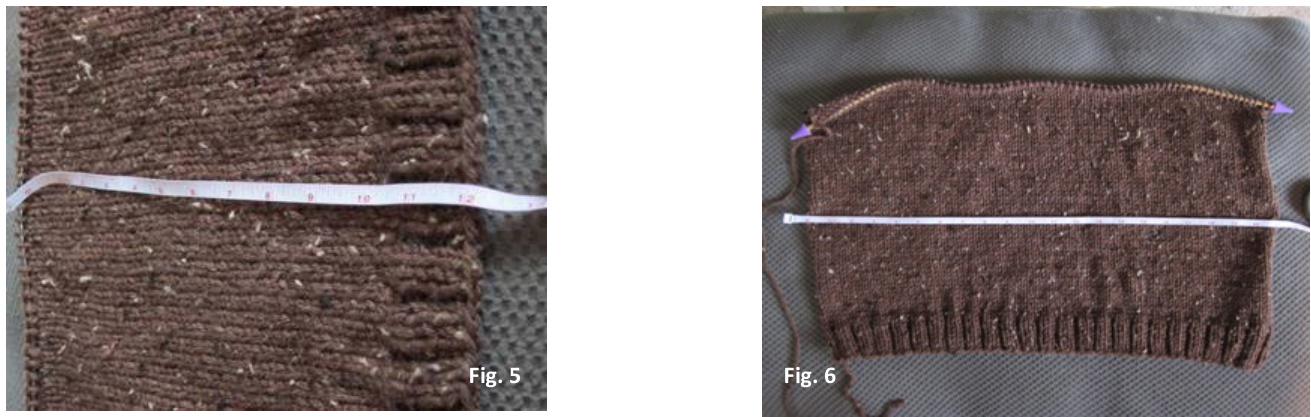
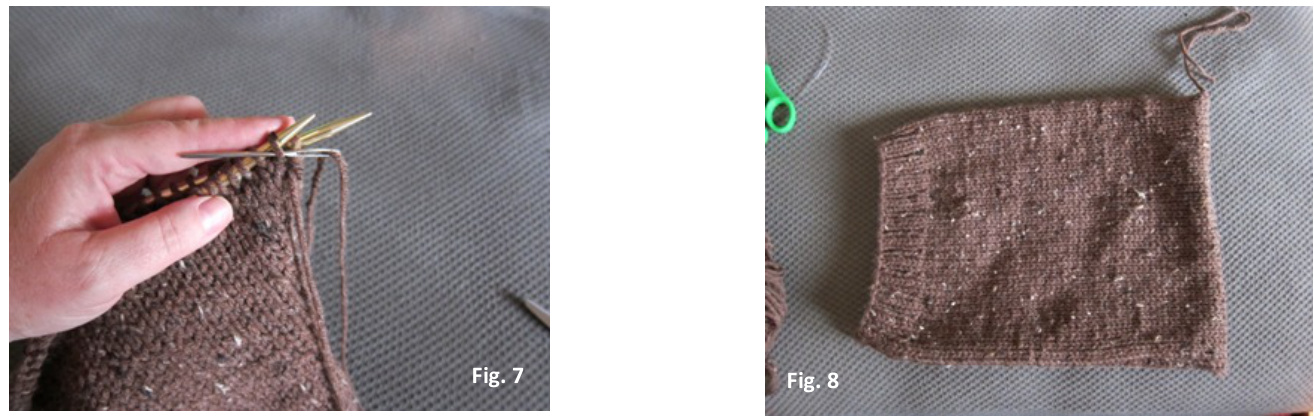
Repeat Rows 9 and 10 22 more times for a total of 46 rows of stockinette + 8 rows of ribbing = 54 total rows (12"h x 21"w). Do not bind off. Leave a 60" tail. Cut yarn. (Fig. 5 & 6)
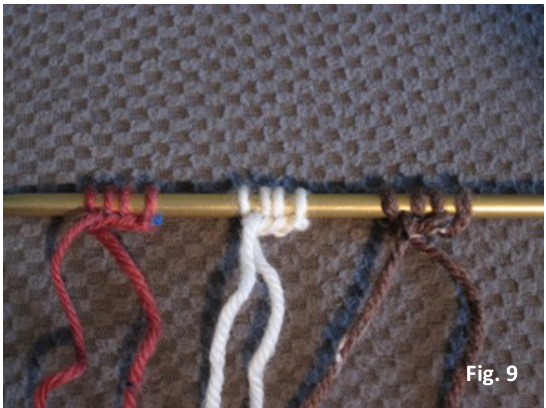
With ribbing across the bottom, fold piece in half with wrong sides together. Using the yarn tail, join sides using the Kitchener stitch. (Fig. 7) Do NOT cut tail or weave in ends. Set aside. (Fig. 8)
Make Braid:
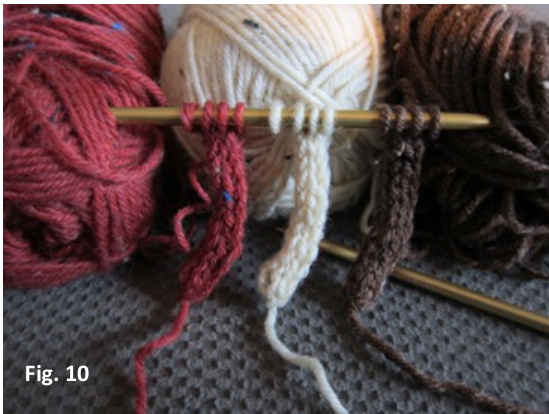
Cast on 4 stitches each of MC, CC1, and CC2 onto a double pointed needle, leaving a 10" tail for each color. (Fig. 9) Knit I-Cord of each color for 36". (Fig. 10) Draw tail through last stitches to close each cord. Cut yarn, again leaving a 10" tail.
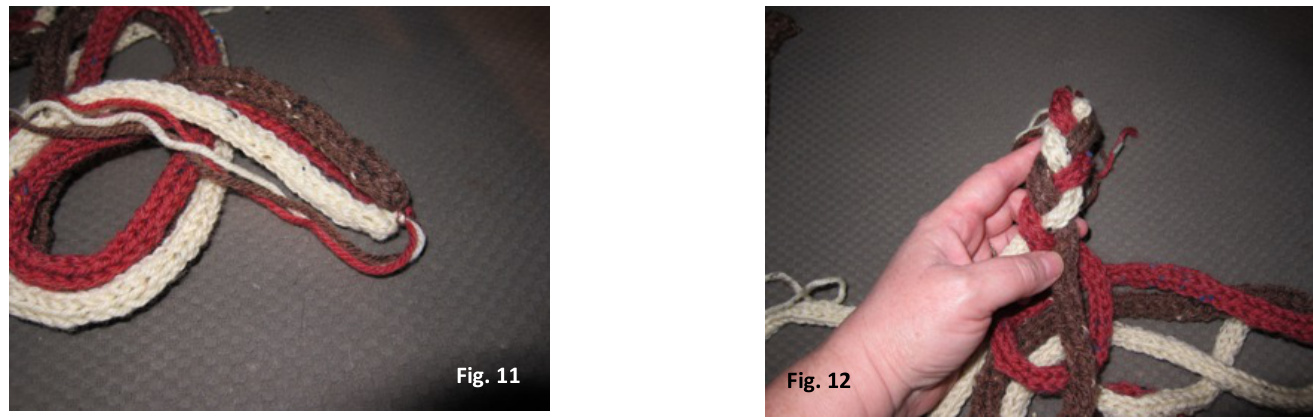
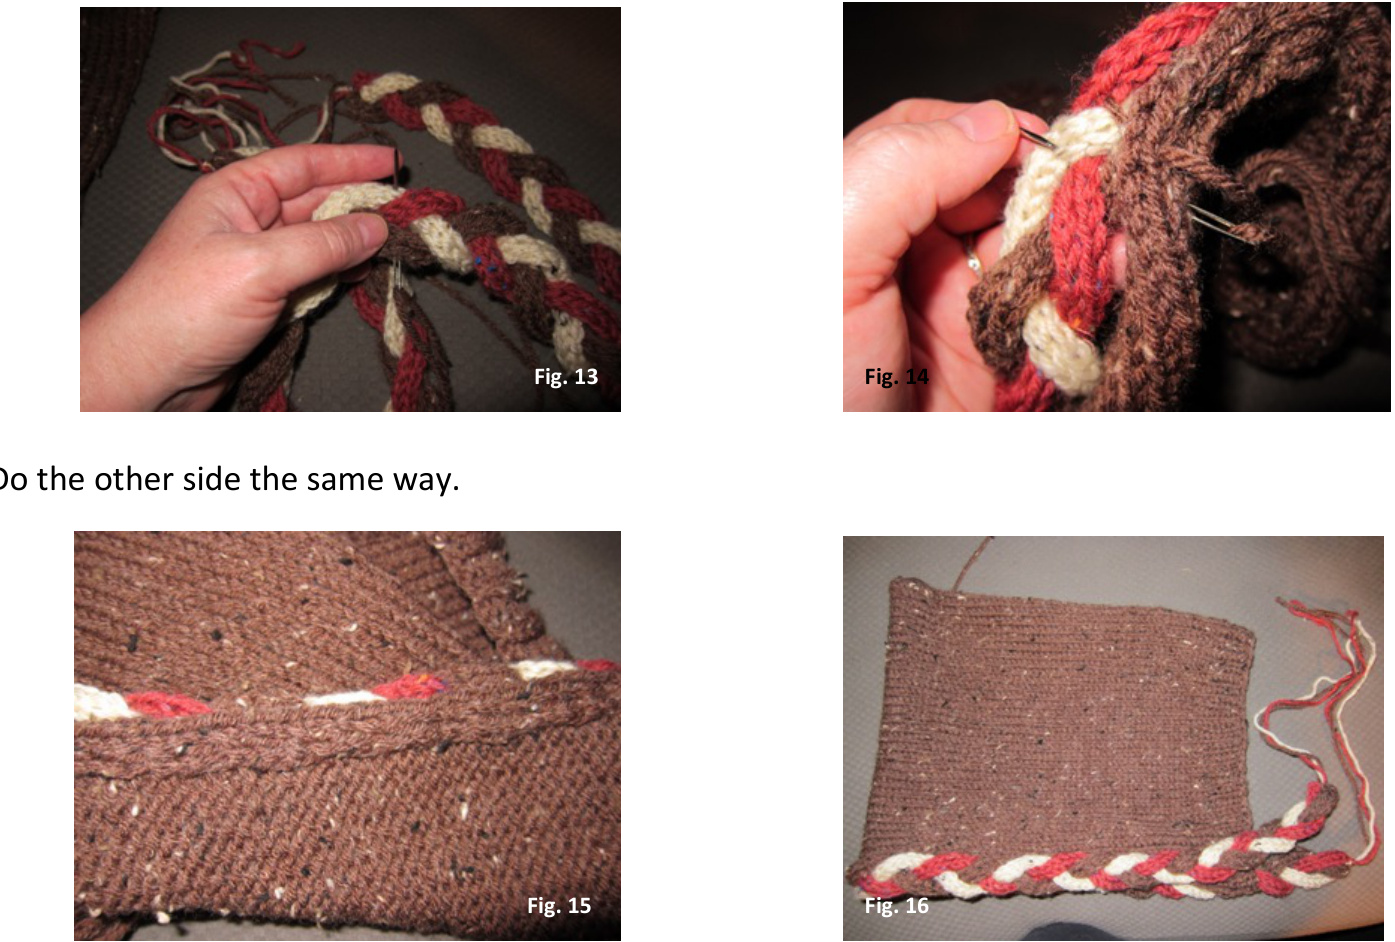
Tie one end of I-Cord tails together (Fig. 11) and braid the three cords (Fig. 12). Tie the other end of the braid tails together to keep it from unraveling. Do NOT cut tails. Remember, the tighter you braid, the shorter your I-Cords will get, so check the braid against the hood to make sure it is going to fit. Braid should be approximately 3" longer than hood on each side.
Attach Braid:
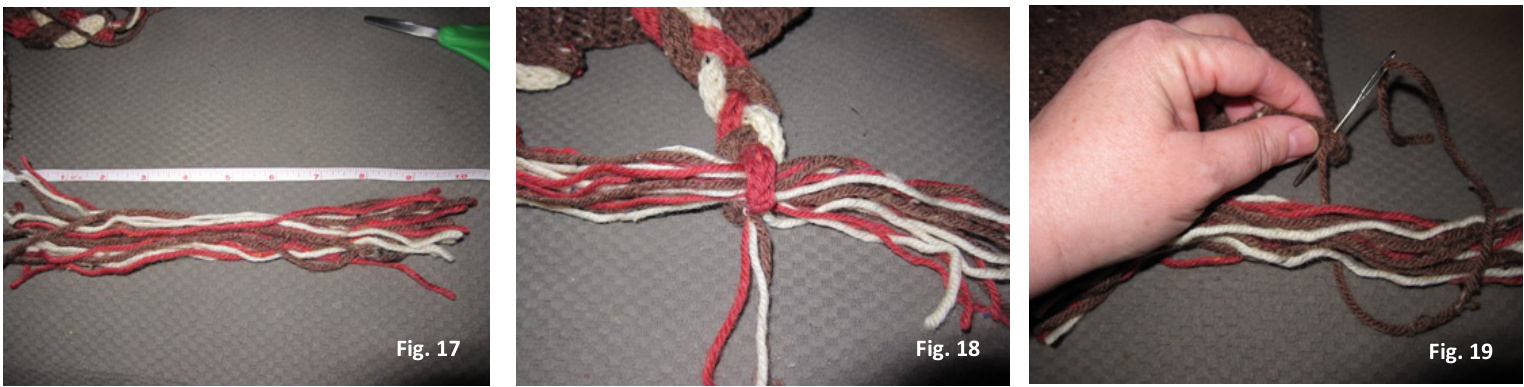
Cut a 60" piece of MC yarn. Find the center of the I-Cord and sew through the back of all three strands, making sure that your sewing tails are the same length (Fig. 13). Tie a small square knot to anchor your sewing yarn. Fold under about %" of the front of the hood to give it firmness and structure, and sew through both layers and the backs of all three strands of the braid on each stitch. (Fig. 14) Starting with only one sewing yarn tail, work from the center of the braid and the top center of the hood down one edge of the hood, attaching one side of the braid to the body of the hood at a time. (Fig. 15 & 16)
Tassels:
Make 3 tassels. For EACH one, cut SIX 10" lengths of EACH color yarn (Fig. 17). For the braid, pass the tassel between the I-Cords (Fig. 18), fold in half, and secure using the leftover I-Cord tails. Repeat for other braid. Trim the tassels and tails to all the same length (about 4" long). For the hood tassel, use the left over yarn from the Kitchener to attach the tassel (Fig. 19). Secure and trim to match braid tassels.
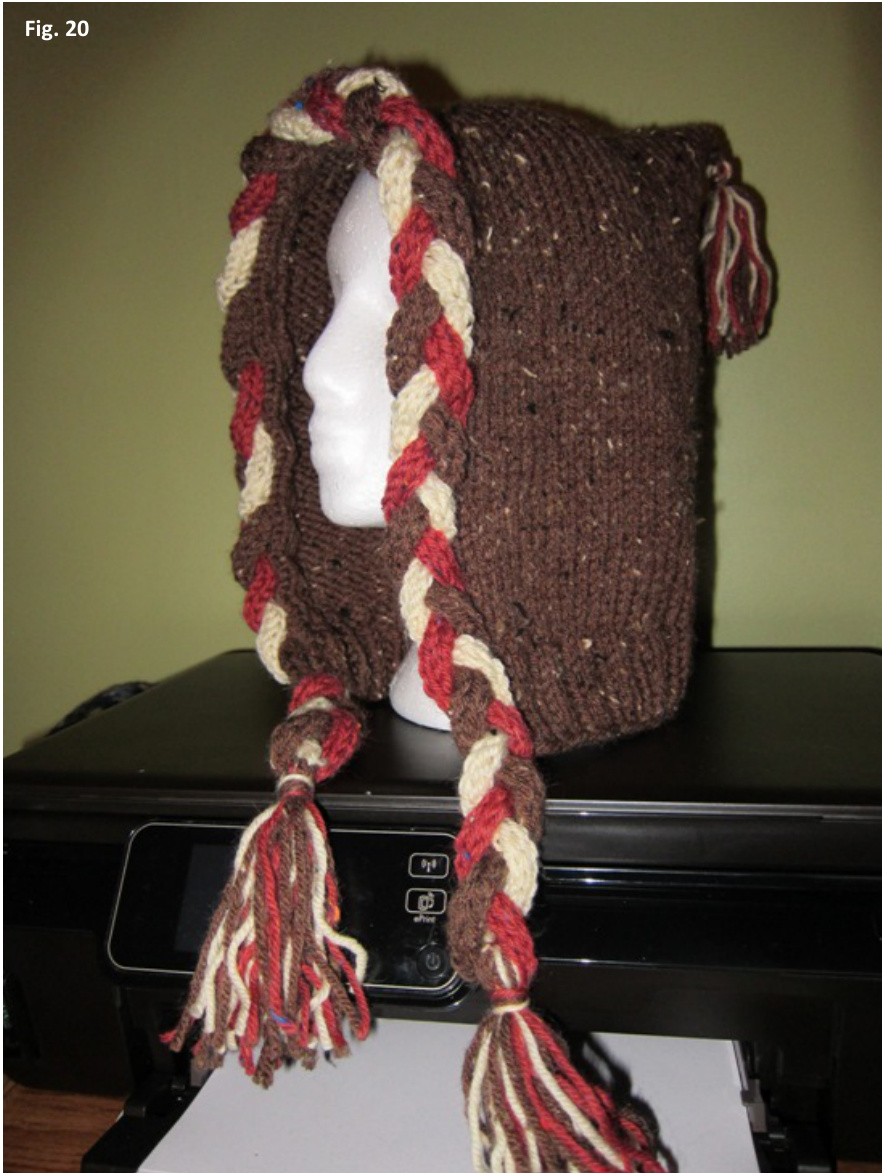
The only tail you should have left is the original cast on tail. Weave this in and you're done! (Fig. 20)
Page 4 of 4


