You ek Mo Happe!
A delicious frappe amigurumi pattern By Brittany Jackson

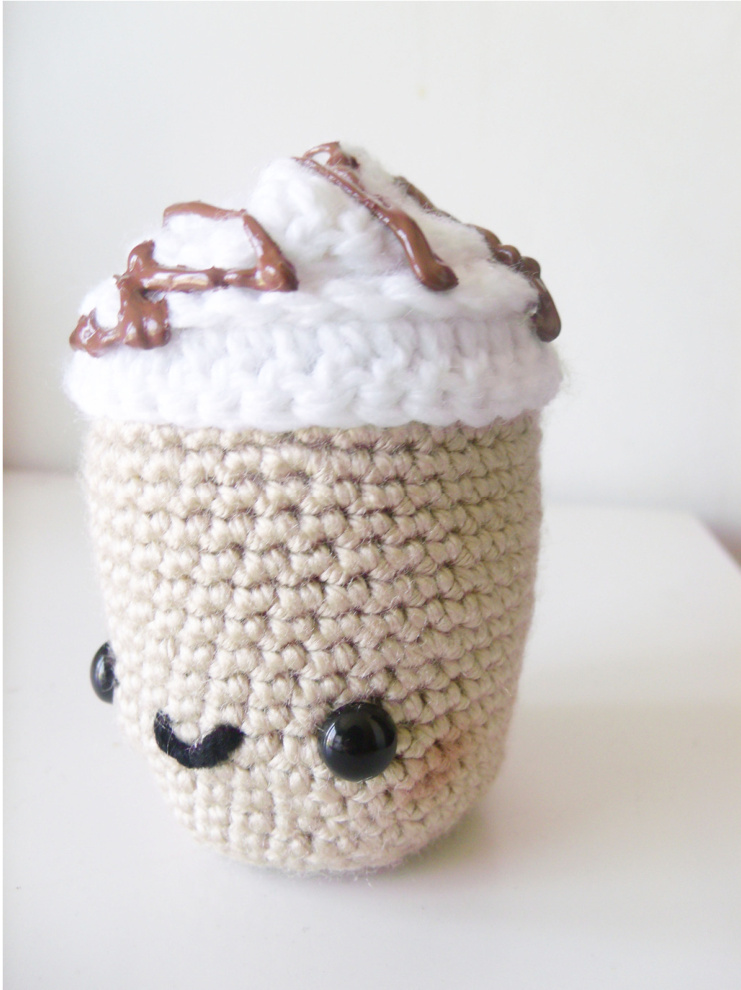
Materials and Tools: Worsted weight yarn in light brown/tan and white, small amount of black yarn or embroidery floss, 9.0 mm safety eyes, brown puffy fabric paint, fiber-fil stuffing or similar, pink chalk/pastel/blush for cheeks, scrap amount of cardboard, 3.0 mm crochet hook, tapestry needle A note on gauge: A definite gauge is not important for amigurumi. It doesn't matter exactly what size your creation turns out, or how many stitches per inch you achieve. What does matter is that your stitches are pulled tightly, leaving no space or holes between stitches. This gives your amigurumi good structure, shaping and allows no stuffing to show through.
Glossary
MR - magic ring/magic loop CH - chain SC - single crochet DC - double crochet INC - increase (2 stitches in 1) DEC - decrease (stitch 2 together) DEC over 3 - decrease by stitching 3 together REP -repeat RD(S) - round(s) ST(S) - stitch(es) EVEN - crochet in each stitch, no increases or decreases BL/BLO - back loop/back loop only. To decaffeinate your frappe and make him child friendly, please omit the safety eyes and replace with embroidery or paint. For your frappe cup/body, you need your light brown yarn and 3.0 mm crochet hook. Have your safety eyes, black scrap yarn, cardboard and stuffing on hand. 1.) MR, sc 6 in ring (6) 2.) Inc in each st (12) 3.) \*sc 1,inc. Rep 6x (18) 4.) \*sc 2, inc. Rep 6x (24) 5.) \*sc 3, inc. Rep 6x (30) 6.) Sc around in BLO (30) 21 & 22.) Sc even (45) Place a stitch marker or scrap yarn through your "“live" stitch. Set the base of your frappe on a small section of cardboard and trace around the bottom (smallest part). Cut out the cardboard circle and place it inside your frappe. This keeps the bottom supported and level so your little guy won't tip over. Insert safety eyes between rounds 11 and 12, about 5 stitches apart. Embroider a smile between both eyes. 23.) Stitching in BLO, \*sc 3, dec. Rep 9x (36)
24.) \*sc 2, dec. Rep 9x (27)
Time to stuff! It's important to stuff very firmly so your amigurumi has structure and stays looking nice for a long time. Grab a big chunk of stuffing (much more than you would think) and get started. It's better to use a big chunk rather than several smaller pieces. Using the smaller pieces can make your piece lumpy and bumpy, and nobody wants that! Stuff your frappe until you can't stuff anymore. 25.) \*sc 1, dec. Rep 9x (18) 26.) dec around (9)
27.) \*dec over 3. Rep 3.x (3)
Cut your yarn and pull it through the last loop on your hook. Thread your tail onto a tapestry needle and hide it inside your frappe. Everything is better with whipped cream It's time for the whipped topping! Grab your 3.0 mm hook and white yarn. \*ch 3 counts as first dc 1.) Ch 95 loosely, dc in 4th ch from hook and each ch thereafter. (93) 2.) Ch 3, turn. Dc 2, inc, dc 8, inc, dc 17, inc, dc 26, inc, dc 35, inc (98) Cut a very long tail, about 24 inches long to be safe. Pull the tail through the last loop on your hook. Weave in your beginning tail (not the long one). Now thread the long tail onto a tapestry needle and start sewing! Starting on the outer, top of your frappe, sew the whipped topping in a spiral. You will probably have a space left in the center when you've sewn all around. That's okay! Seam opposite sides of the whipped topping together to close the gap and create a cute little pointed top. If you'd rather not sew, feel free to use quick drying glue instead. You'll probably still have to seam up the gap on top, though.
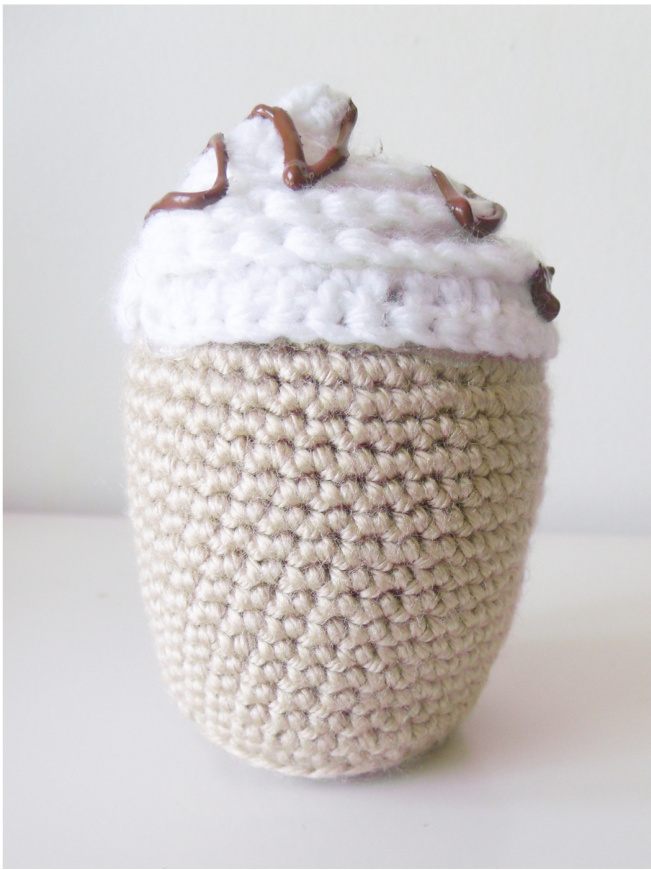
Don't forget my chocolate drizzle!
The finishing touches are what make a frappe delicious to the eyes, as well. Grab your puffy paint and test it on a scrap piece of paper before trying it on your frappe. When the flow of paint is acceptable to you, give your little guy a quick drizzle. Let him dry for several hours in a safe spot where he won't tip over. When he's finished drying, use your chalk, pastels or makeup to give him rosy cheeks. It isn't necessary, but adds quite a bit to the cuteness factor. Enjoy your frappe!